2003 BMW 760LI SEDAN key battery
[x] Cancel search: key batteryPage 36 of 229
Opening and closing
34
Opening and closing
Key/remote control
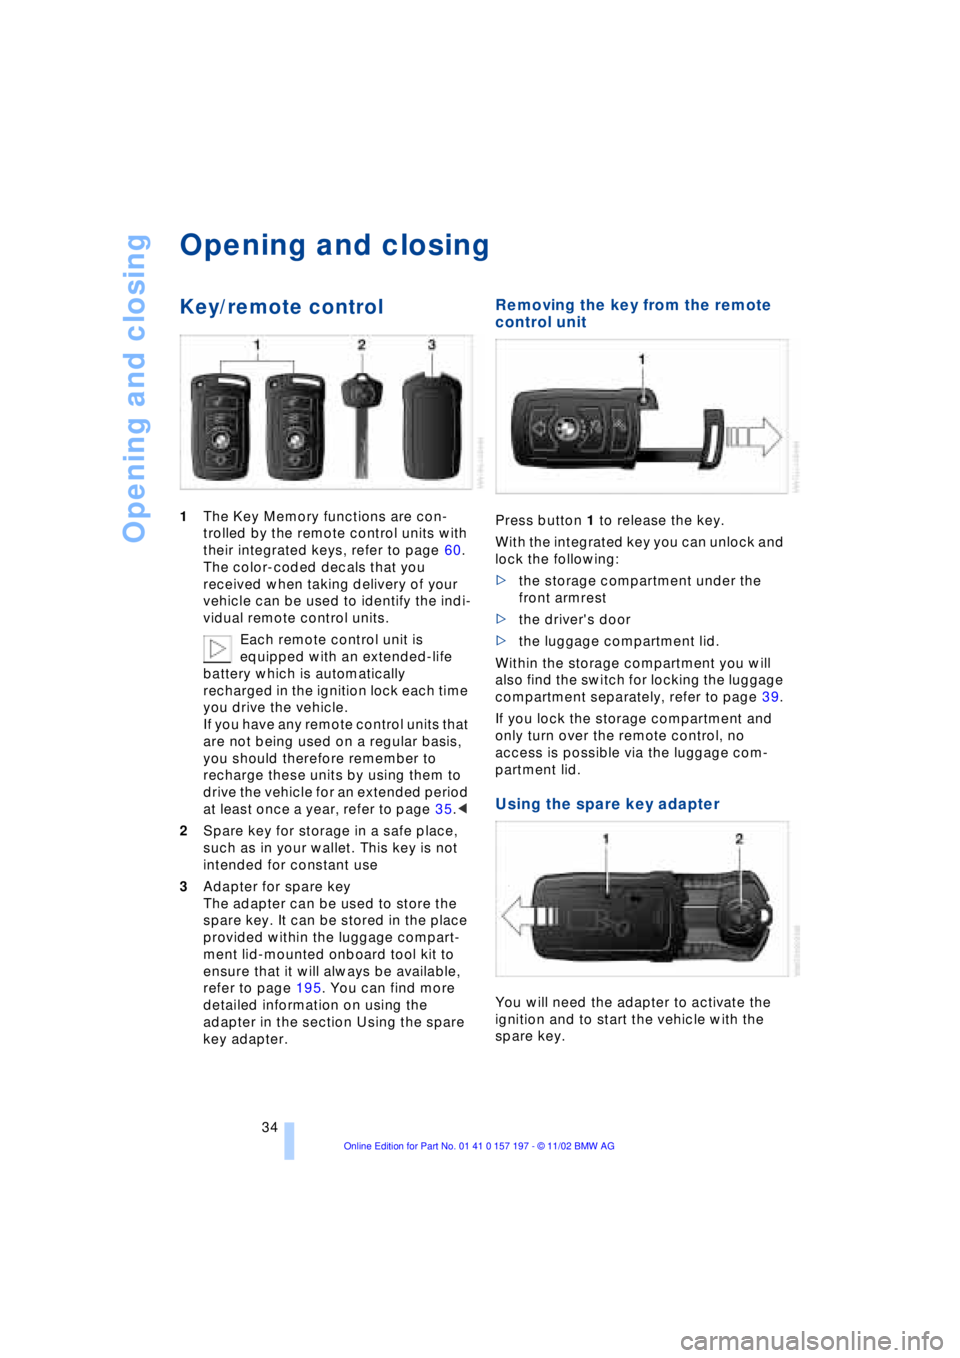
1The Key Memory functions are con-
trolled by the remote control units with
their integrated keys, refer to page 60.
The color-coded decals that you
received when taking delivery of your
vehicle can be used to identify the indi-
vidual remote control units.
Each remote control unit is
equipped with an extended-life
battery which is automatically
recharged in the ignition lock each time
you drive the vehicle.
If you have any remote control units that
are not being used on a regular basis,
you should therefore remember to
recharge these units by using them to
drive the vehicle for an extended period
at least once a year, refer to page 35.<
2Spare key for storage in a safe place,
such as in your wallet. This key is not
intended for constant use
3Adapter for spare key
The adapter can be used to store the
spare key. It can be stored in the place
provided within the luggage compart-
ment lid-mounted onboard tool kit to
ensure that it will always be available,
refer to page 195. You can find more
detailed information on using the
adapter in the section Using the spare
key adapter.
Removing the key from the remote
control unit
Press button 1 to release the key.
With the integrated key you can unlock and
lock the following:
>the storage compartment under the
front armrest
>the driver's door
>the luggage compartment lid.
Within the storage compartment you will
also find the switch for locking the luggage
compartment separately, refer to page 39.
If you lock the storage compartment and
only turn over the remote control, no
access is possible via the luggage com-
partment lid.
Using the spare key adapter
You will need the adapter to activate the
ignition and to start the vehicle with the
spare key.
Page 37 of 229

At a glance
Controls
Driving tips
Communications
Navigation
Entertainment
Mobility
Reference
35
Press lock button 1, slide up the cover and
insert the spare key 2 in the adapter. Close
the cover and insert the adapter in the igni-
tion lock.
Central locking system
The concept
The central locking system is ready for
operation whenever the driver's door is
closed. This simultaneously engages and
releases the locks on the following:
>Doors
>Luggage compartment lid
>Fuel filler door.
The central locking system can be oper-
ated from the outside
>via the remote control
>via the driver's door lock
and from inside via the button for the
central locking system.
When the system is locked from inside, the
fuel filler door remains unlocked. Refer to
page 37.
The anti-theft system is automatically acti-
vated whenever you activate the central
locking system from outside the vehicle.
The alarm system is armed/disarmed at the
same time.
In the event of an accident, the central
locking system unlocks automatically Ð only
those doors which were not locked sepa-
rately with the safety lock buttons, refer to
page 38. In addition, the hazard warning
flashers and interior lamps come on.
Opening and closing Ð from
outside
Using the remote control
When you engage/release the vehicle's
locks, you simultaneously activate/deacti-
vate the anti-theft system, arm/disarm the
alarm system
and switch the interior lamps
on/off. In addition, the remote control offers you
another function:
>Panic mode
In case of danger, you can trigger an
alarm.
You can have various confirmation
signals programmed into the system
to verify that the vehicle has been locked
securely.<
Remote control
1To unlock, convenience opening mode
and alarm system
2To lock and secure, switch off tilt alarm
sensor and interior motion sensor,
switch on interior lamps and door-
mounted proximity lamps
3To open the luggage compartment lid
4To switch on interior lamps, activate
panic mode
Because any persons or animals left
unattended in a parked vehicle could
lock the doors from the inside, you should
always keep the remote control unit with
you; this precaution ensures that you will
remain able to unlock the vehicle from the
outside at all times.<
When it is no longer possible to lock
the vehicle via the remote control, the
battery is discharged. Use this remote con-
trol unit during an extended drive; this will
recharge the battery, refer to page 34.
In the event of a system malfunction,
please contact your BMW center, which is
also your source for replacement keys.<
Page 72 of 229
Driving
70 To obtain maximum acceleration, for
passing maneuvers, etc., during
operation in the manual mode, use the
kickdown or downshift manually.<
Malfunctions
A status report will appear in the Check
Control to alert you to any malfunctions in
the transmission-control system. Please
note any supplementary information that
appears in the Control Display. The direc-
tional arrows also start to flash in the Info
Display.
While it will remain still possible to move
the selector lever to any desired position,
the transmission will revert to operation in
its default mode with only a limited number
of forward gears.
Some types of malfunction will make it
impossible to engage all gears.
The engine may respond with reduced
output when accelerating from a standing
start.
If this happens, avoid extreme engine loads
and consult the nearest BMW center.
If no status messages appear in the
Info Display you should accelerate
carefully to confirm that you are driving in
the desired direction.
Never work in the engine compartment
with any of the forward or reverse gears
engaged, as the vehicle could start to
move. Engage the parking brake, refer to
page 62.<
Releasing transmission lockout
manually
You can respond to any interruptions in the
supply of electrical power, for instance, if
the battery is discharged or disconnected,
by releasing the transmission lockout man-
ually.
To prevent the drive wheels from
locking up and sliding, the transmis-
sion lockout must always be released man-
ually before the vehicle is towed.< Press the brake pedal before
releasing the transmission lockout
manually. If the brakes are not applied, the
vehicle could start to roll if parked on a
steep slope.
The transmission lockout should only be
released for towing. Remember to engage
the transmission lockout when you repark
the vehicle after moving it.
Should it also be necessary to release the
parking brake manually, owing to a dis-
charged battery, etc., always adhere to the
following sequence:
1.Start by manually releasing the parking
brake, refer to page 65
2.Then proceed to manually release the
transmission lockout.<
Jump-starting and towing, refer to
pages 202 and 203.
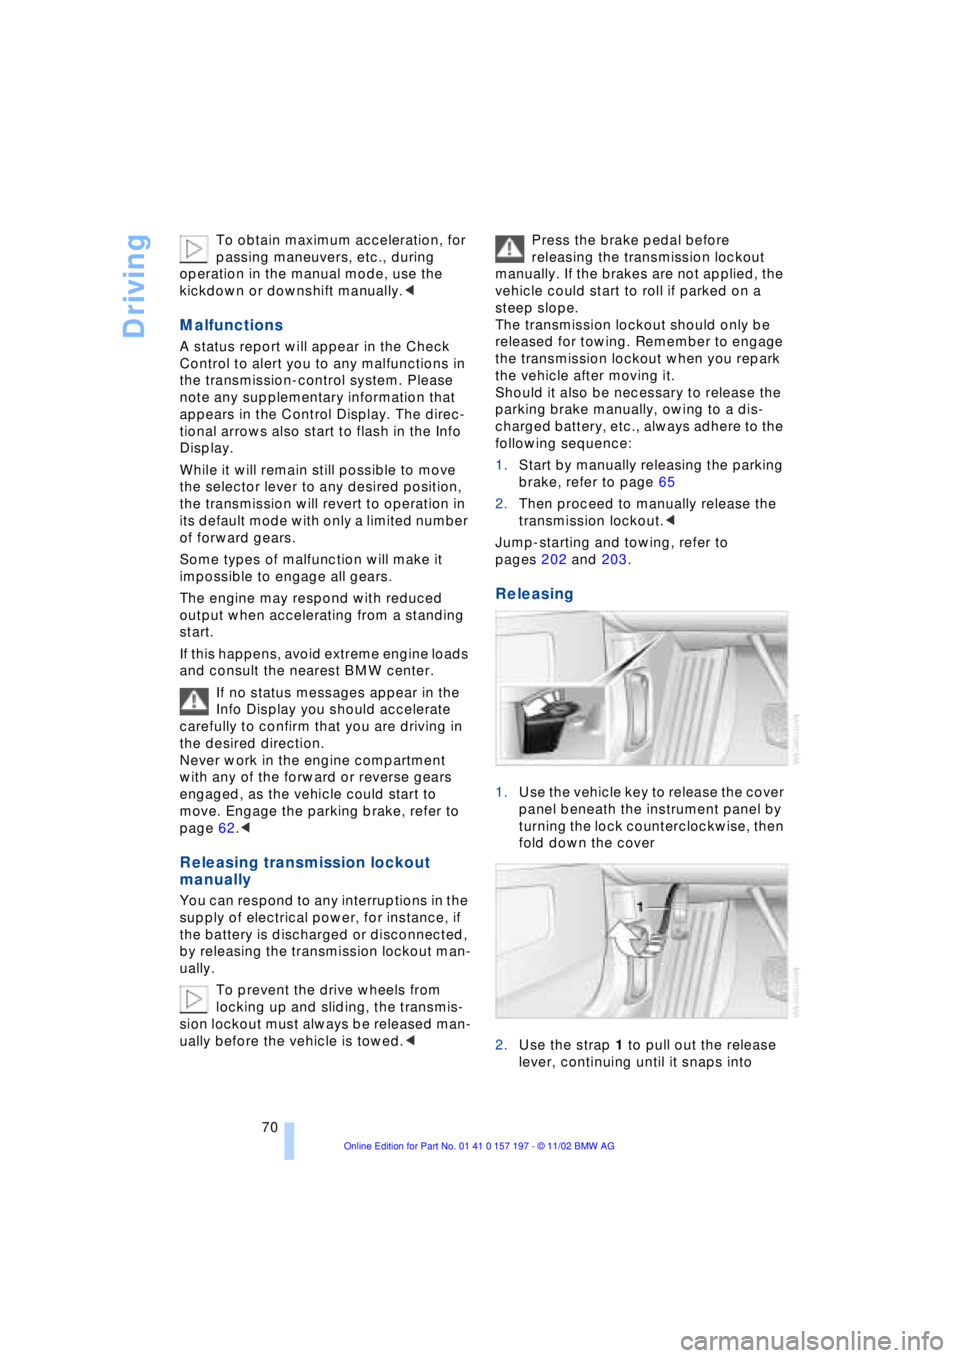
Releasing
1.Use the vehicle key to release the cover
panel beneath the instrument panel by
turning the lock counterclockwise, then
fold down the cover
2.Use the strap 1 to pull out the release
lever, continuing until it snaps into
Page 86 of 229
Everything under control
84 Confirm to exit the display.
The Service Interval Display does not
continue counting down to the next
service during periods when the vehicle is
stored with the battery disconnected or the
battery switch OFF.
Please remember that brake fluid should
be changed every two years at the latest,
even if the display does not yet indicate
that service is required, refer to page 192.
This same precaution applies to all of the
other service and maintenance operations
scheduled according to periodic intervals,
as opposed to mileage.<
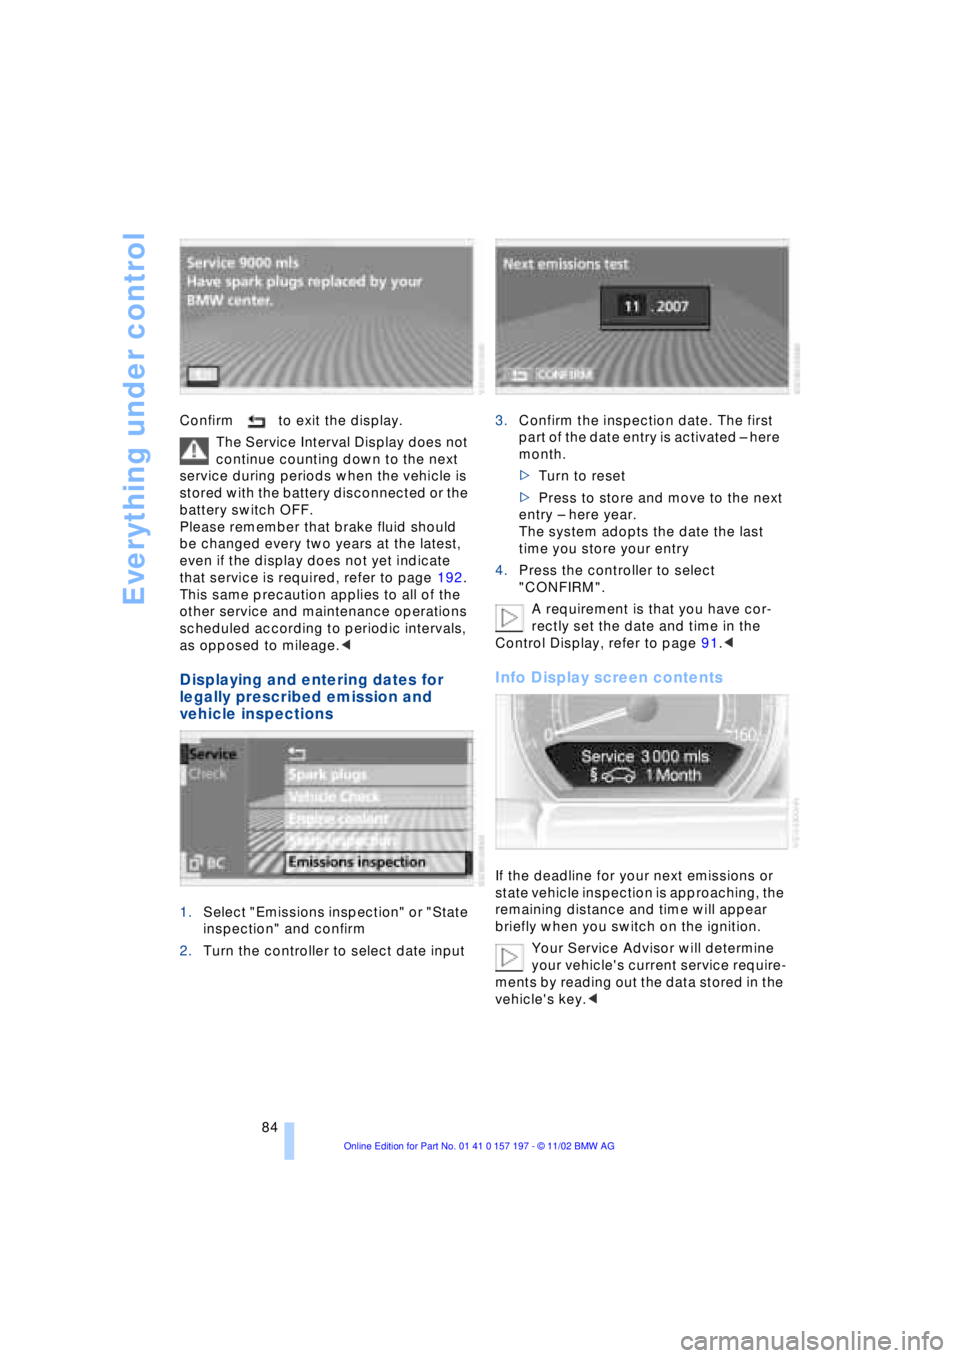
Displaying and entering dates for
legally prescribed emission and
vehicle inspections
1.Select "Emissions inspection" or "State
inspection" and confirm
2.Turn the controller to select date input3.Confirm the inspection date. The first
part of the date entry is activated Ð here
month.
>Turn to reset
>Press to store and move to the next
entry Ð here year.
The system adopts the date the last
time you store your entry
4.Press the controller to select
"CONFIRM".
A requirement is that you have cor-
rectly set the date and time in the
Control Display, refer to page 91.<
Info Display screen contents
If the deadline for your next emissions or
state vehicle inspection is approaching, the
remaining distance and time will appear
briefly when you switch on the ignition.
Your Service Advisor will determine
your vehicle's current service require-
ments by reading out the data stored in the
vehicle's key.<
Page 173 of 229
At a glance
Controls
Driving tips Communications
Navigation
Entertainment
Mobility
Reference
171
Batteries
Never attempt to open your BMW
portable phone or its battery. Use
only approved battery types Ð the wrong
battery can destroy your portable phone.
To avoid possible short circuits, after
removing a battery you should never allow
it to come into contact with metallic sur-
faces of any kind.<
Disposing of used batteries
Return used batteries to a recycling
collection point or to your BMW
center.<
Care instructions
You can find useful information on caring
for your portable phone in the separate
Portable phone manual and in the separate
Care manual.
Controls
You have the option of making phone calls
with the car phone or the BMW portable
phone.
If there is no BMW portable phone in the
cradle, Personal calling can be made with
the car phone.
Your car phone must be activated to
support his feature. Please see your
BMW center for further instructions to acti-
vate your car phone with the wireless car-
rier.<
The upper status line will indicate which
phone is currently active and connected to
the network.
For information on operating your
portable phone, please consult the
separate manual.<
The portable phone can be operated by
means of
>controls on the steering wheel, refer to
page 18
>Control Display
>the folding telephone keypad >and the voice command system, not for
incoming calls.
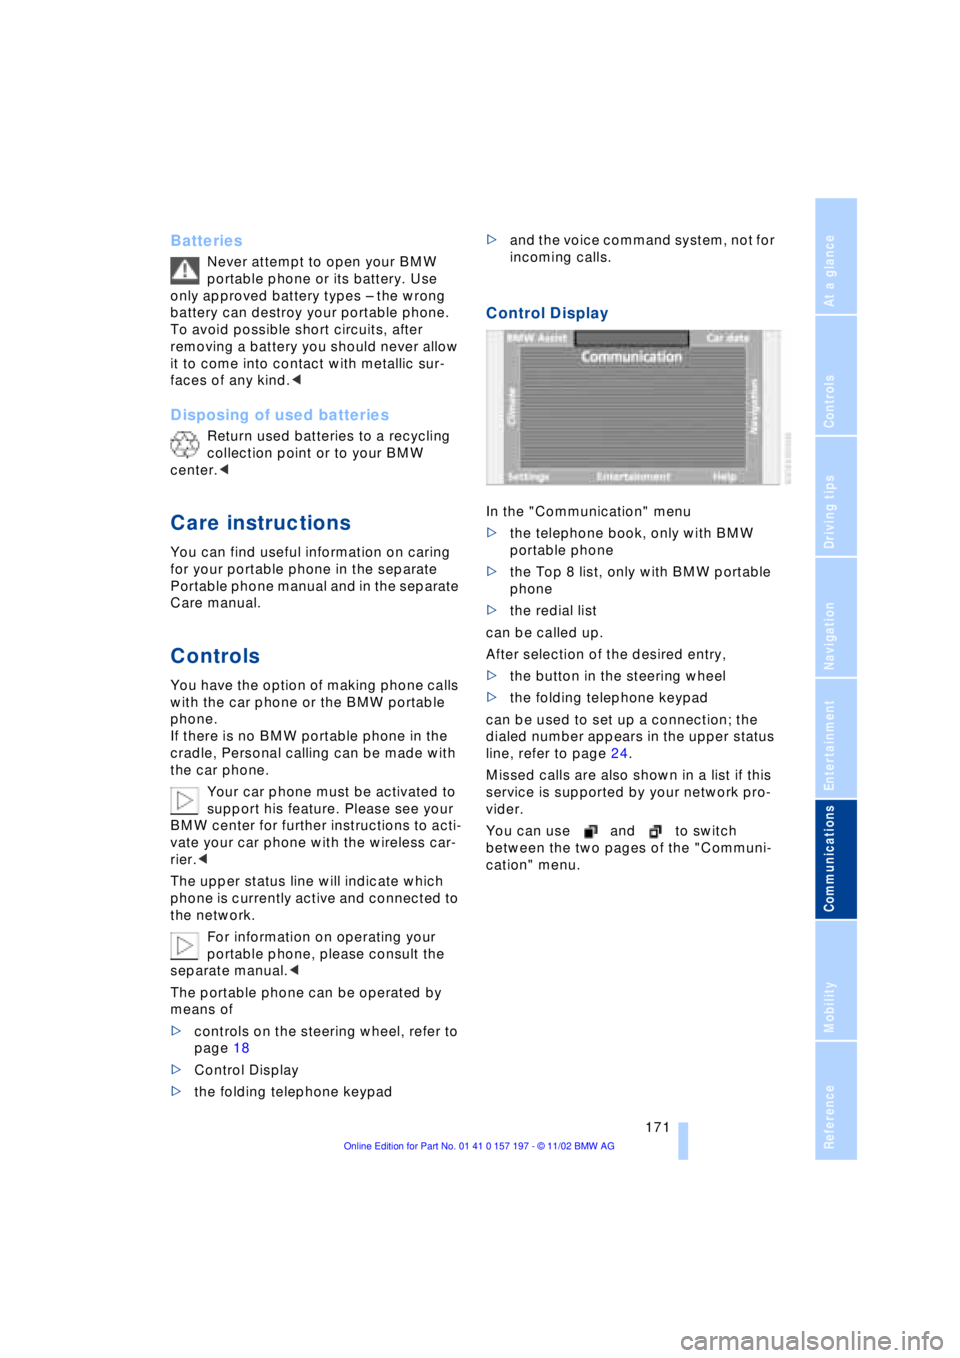
Control Display
In the "Communication" menu
>the telephone book, only with BMW
portable phone
>the Top 8 list, only with BMW portable
phone
>the redial list
can be called up.
After selection of the desired entry,
>the button in the steering wheel
>the folding telephone keypad
can be used to set up a connection; the
dialed number appears in the upper status
line, refer to page 24.
Missed calls are also shown in a list if this
service is supported by your network pro-
vider.
You can use and to switch
between the two pages of the "Communi-
cation" menu.
Page 197 of 229
Overview
Controls
Driving tips
Communications
Navigation
Entertainment
Mobility
Reference
195
Replacing components
Onboard tool kit
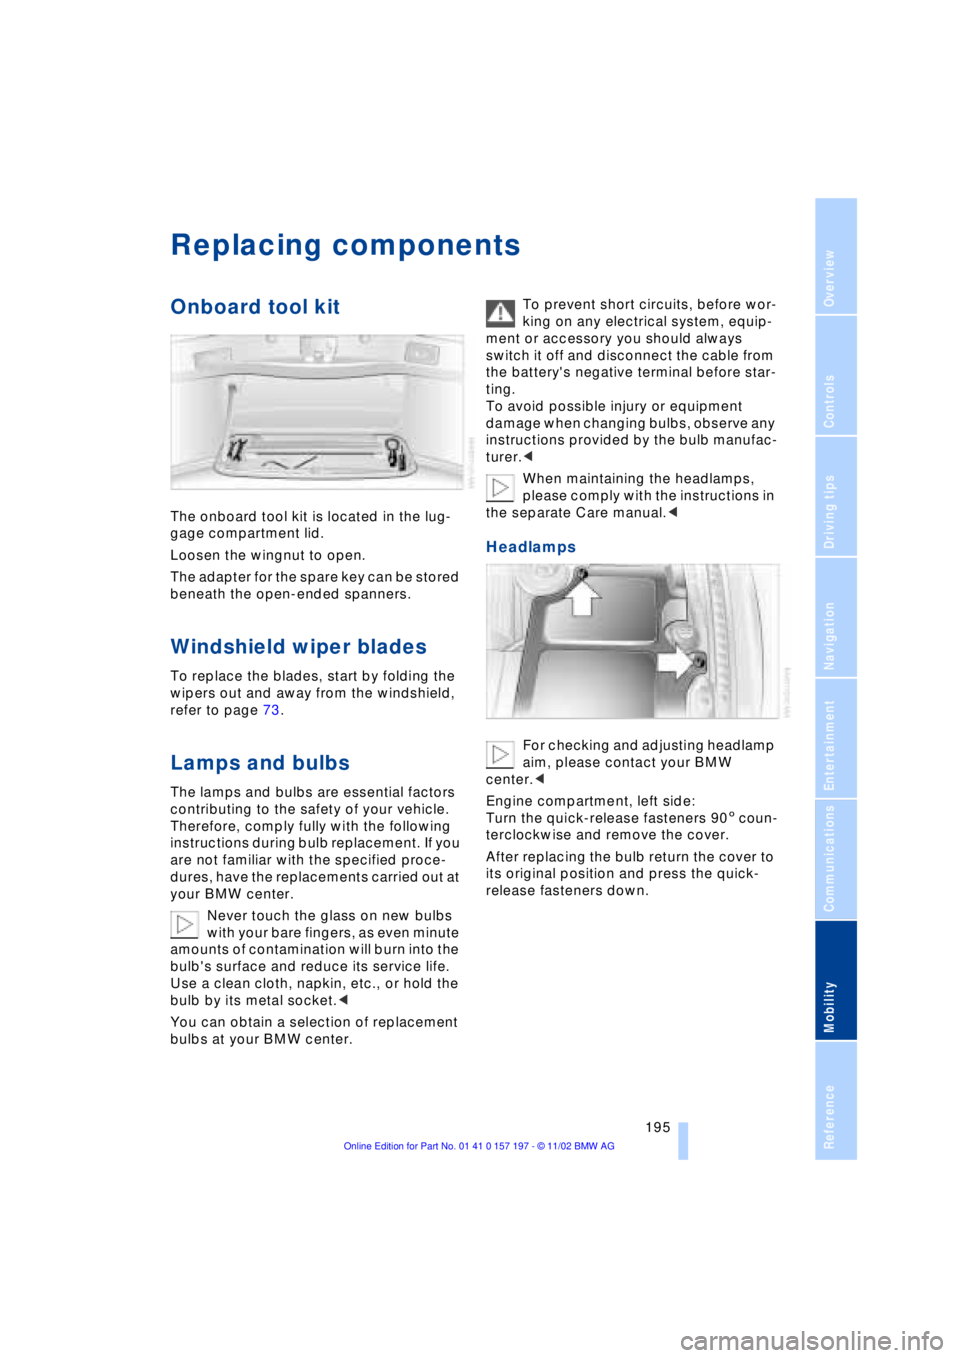
The onboard tool kit is located in the lug-
gage compartment lid.
Loosen the wingnut to open.
The adapter for the spare key can be stored
beneath the open-ended spanners.
Windshield wiper blades
To replace the blades, start by folding the
wipers out and away from the windshield,
refer to page 73.
Lamps and bulbs
The lamps and bulbs are essential factors
contributing to the safety of your vehicle.
Therefore, comply fully with the following
instructions during bulb replacement. If you
are not familiar with the specified proce-
dures, have the replacements carried out at
your BMW center.
Never touch the glass on new bulbs
with your bare fingers, as even minute
amounts of contamination will burn into the
bulb's surface and reduce its service life.
Use a clean cloth, napkin, etc., or hold the
bulb by its metal socket.<
You can obtain a selection of replacement
bulbs at your BMW center. To prevent short circuits, before wor-
king on any electrical system, equip-
ment or accessory you should always
switch it off and disconnect the cable from
the battery's negative terminal before star-
ting.
To avoid possible injury or equipment
damage when changing bulbs, observe any
instructions provided by the bulb manufac-
turer.<
When maintaining the headlamps,
please comply with the instructions in
the separate Care manual.<
Headlamps
For checking and adjusting headlamp
aim, please contact your BMW
center.<
Engine compartment, left side:
Turn the quick-release fasteners 905 coun-
terclockwise and remove the cover.
After replacing the bulb return the cover to
its original position and press the quick-
release fasteners down.
Page 222 of 229
Everything from A to Z
220 Phone number, refer to
Portable phone 174
"Pict. format" 166
"Picture" 146
Ð DVD changer 166
Ð TV 161
Please fasten safety belts
warning lamp 50
Pollen 111
Portable phone
Ð adjusting volume 173
Ð calling 174
Ð call termination 175
Ð controlling with the
buttons on the steering
wheel 18
Ð emergency calls 173
Ð hands-free system 173
Ð missed calls 176
Ð operating using the
Control Display 171
Ð redialing 176
Ð refer to separate Portable
phone manual 170
Ð selecting phone
numbers 174
Ð switching on and off 174
Ð Top 8 list 176
Portable phone battery 171
Portable phone codes 174
Power electric seat 47
Power rating 208
Power socket 119
Pressure, tires 184
Pressure monitor, tires 98
Programmable cruise
control 73
Programming settings,
refer to Vehicle Memory,
Key Memory 60
Publishers 2
Puncture
Ð Flat Tire Monitor 98
R
Radio
Ð adjusting the tone 147
Ð autostore 150
Ð controls 146
Ð frequency band
selection 149
Ð memory locations 150
Ð operating
temperatures 149
Ð sample 150
Ð scan 150
Ð station search 150
Ð station selection 151
Ð store station 150
Ð switching on 149
Ð volume 147
Ð Weather Band 151
Radio mode 61
Radio waveband
selection 149
Rain sensor 72
Reading lamps 104
"Rear" 25
Rear air conditioner 111
Ð air supply 111
Ð cooling adjustment 111
Ð "Extra" 112
Ð maximum cooling 111
Ð "Rear air cond." 112
Ð switching off 111
Ð switching on/off in the
Control Display 112
Rear armrest, refer to
Center armrest 120
Rear cooler 116
Ð "Extra" 116
Ð "Rear refr. box" 116
Rear monitor, refer to
Control Center in rear 24
Rear screen 24
Rear seat heaters 51Rear seats
Ð adjusting passenger seat
from the rear 47
Ð comfort seat
adjustments 47
Ð head restraint
adjustment 48
Rearview mirror 52
Rear window blind, refer to
Sun blinds 115
Rear window defroster 16
Rear window safety
switch 12, 43
"Recirc. air" 54
Reclining seat 45
Redialing list 176
Redialing with portable
phone 176
Refueling 182
Releasing the hood 189
Remaining distance 88
Remote control 34, 35
Remote control unit 34
Removing condensation
from windows 107
Replacement fuses 201
Replacement keys 35
Replacing tires 186
Reserve warning 87
Reservoir, washer
system 73
Reset 147
"RESET" for
audio operation 148
Residual heat mode 108
"Right"
Ð for automatic climate
control 109
Ð for heated seats 51
"RND"
Ð CD changer 157
Ð CD player 154
"Roadside Assistance" 178
Roadside assistance calls
Ð manual activation 173
Roof-mounted luggage
rack 127
"Route" 139
Page 224 of 229
Everything from A to Z
222 "Sport"
Ð "EDC" 97
Stability control,
refer to Driving stability
control 94
Standard during TV
operation 161
Standing lamps 103
Start/stop button 61
Starting 62
Starting and stopping
Ð cassette deck 158
Ð CD changer 156
Ð CD player 153
Ð DVD changer 164
Ð radio 149
Ð TV 160
Starting
problems 62, 203, 204
Starting the engine 62
"State inspection" 84
Station, refer to Radio 150
Status lines in Control
Center 24
Steering wheel 18
Ð adjustment 53
Ð individual button
assignment options 53
Steering wheel adjustment,
automatic 53
Steering wheel heater 53
Steering wheel memory 54
Steptronic 69
Stopwatch 90
Ð "INTERM. TIME" 90
Storage, refer to Care
manual
Storage compartments 117
Storing desired speeds,
refer to Programmable
cruise control 75
Storing destination per
voice 141
Storing seating position,
refer to Seat, mirror and
steering wheel
memory 54
Straps, refer to Cargo
loading 126
"Street" for navigation 134"SUBTITLE" in DVD
mode 167
Summer tires 187
Sun blinds 115
Switch for battery 201
Switching audio sources
on/off 147
Switching off the engine 62
Switching on and off
portable phone 174
"Switch. time1" 113
"Switch. time 2" 113
Symbols 6
Ð Control Center 20
System failure reports, refer
to Check Control 85
T
Tachometer 82
Tail lamps 197
Ð bulb replacement 197
"Tape" 146, 158, 159
Target cursor for
navigation 134, 135
Technical data 208
Technical modifications 8
Telephone 170
Ð operation with the
telephone keypad,
folding 172
Telephone directory 175
Ð creating voice command
telephone directory 175
Ð deleting all entries 176
Ð dialing numbers 175
Ð dialing numbers
using voice command
system 175
Ð entering numbers in voice
command directory 175
Ð entry deletion 176
Ð updating voice command
telephone directory 175
Ð viewing entries 176
Telephone keypad,
folding 172
Television, refer to TV 160
"Temp. distribution" 51
Temperature
adjustment 107Temperature display,
outside temperature 82
Tilt function, passenger-
side mirror 55
Time of arrival,
estimated 88
Timing 90
"Tint" during
TV operation 161
Tire change 197
Tire inflation pressures 184
Ð checking 184
Tire-pressure
monitoring 98, 99
Tire Pressure Monitor
TPM 99
Tire Quality Grading 187
Tires
Ð flat tire 197
Ð tire changes 197
Ð tire damage 186
Ð tire inflation
pressures 184
Ð tire pressure control 99
Ð tire replacement 186
Ð tire size, refer to Wheel
and tire
combinations 187
Ð tire tread 186
Ð treadwear indicators 186
"TITLE" 165
Title search
Ð cassette deck 159
"Tone" for audio
operation 146
Tone for audio operation
Ð adjusting 147
"Tone" in sound system
operation 148
Tools 195
"TOP 8" 176
"TOP" in DVD mode 167
Torque 208
Tow fittings 203
Towing 203, 204
Tow-starting 204
"TPM" 99
Ð "INITIALIZE" 99
TPM Tire Pressure
Monitor 99
Ð "INITIALIZE" 99