2003 BMW 760LI SEDAN radio
[x] Cancel search: radioPage 149 of 229
At a glance
Controls
Driving tips
Communications
Navigation
Entertainment
Mobility
Reference
147
Switching on/off
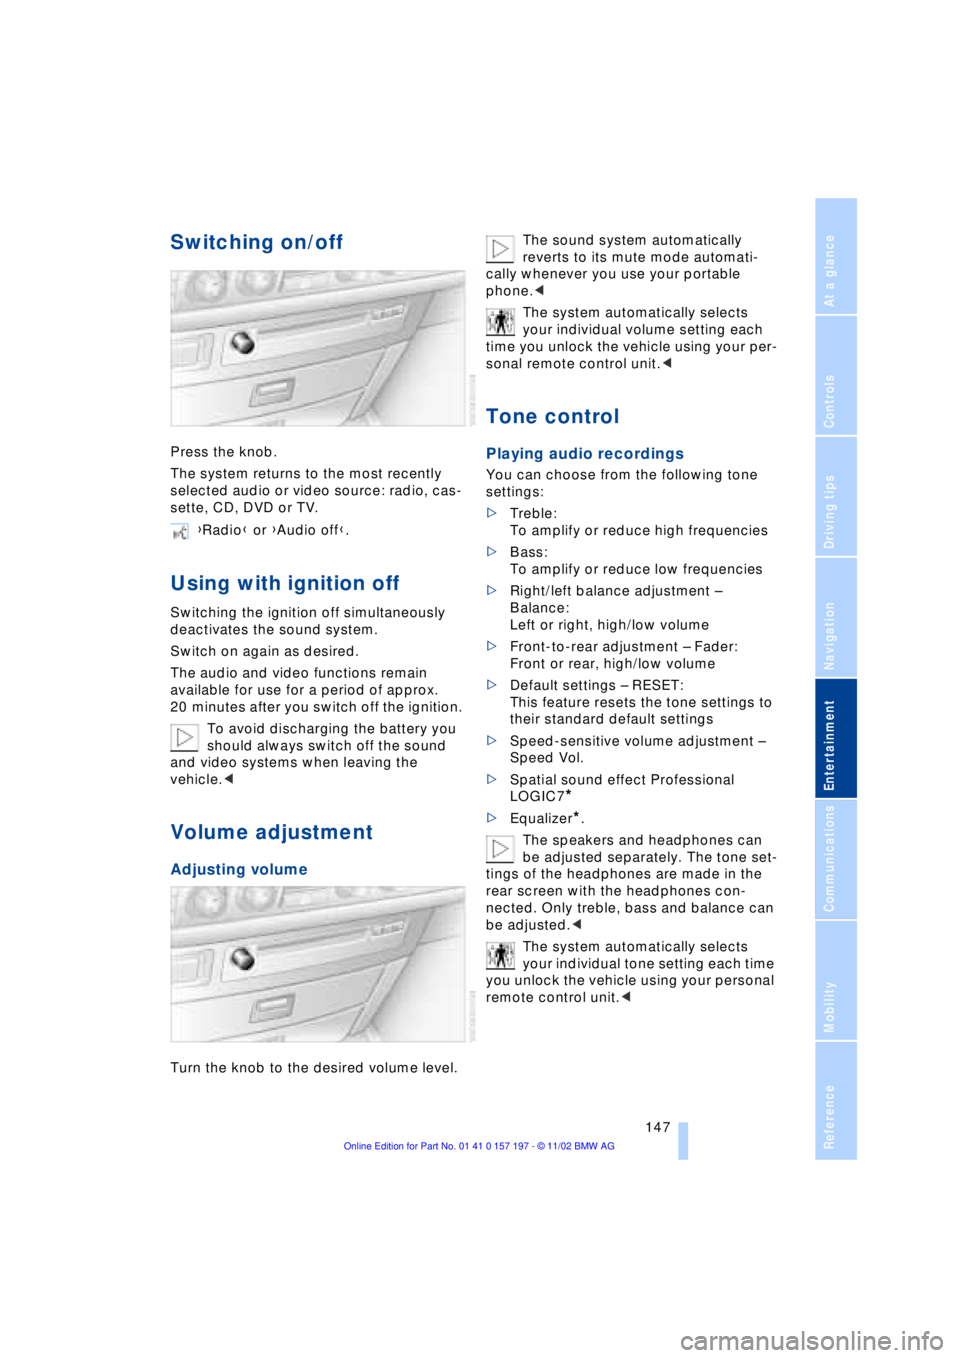
Press the knob.
The system returns to the most recently
selected audio or video source: radio, cas-
sette, CD, DVD or TV.
Using with ignition off
Switching the ignition off simultaneously
deactivates the sound system.
Switch on again as desired.
The audio and video functions remain
available for use for a period of approx.
20 minutes after you switch off the ignition.
To avoid discharging the battery you
should always switch off the sound
and video systems when leaving the
vehicle.<
Volume adjustment
Adjusting volume
Turn the knob to the desired volume level.The sound system automatically
reverts to its mute mode automati-
cally whenever you use your portable
phone.<
The system automatically selects
your individual volume setting each
time you unlock the vehicle using your per-
sonal remote control unit.<
Tone control
Playing audio recordings
You can choose from the following tone
settings:
>Treble:
To amplify or reduce high frequencies
>Bass:
To amplify or reduce low frequencies
>Right/left balance adjustment Ð
Balance:
Left or right, high/low volume
>Front-to-rear adjustment Ð Fader:
Front or rear, high/low volume
>Default settings Ð RESET:
This feature resets the tone settings to
their standard default settings
>Speed-sensitive volume adjustment Ð
Speed Vol.
>Spatial sound effect Professional
LOGIC7
*
>Equalizer*.
The speakers and headphones can
be adjusted separately. The tone set-
tings of the headphones are made in the
rear screen with the headphones con-
nected. Only treble, bass and balance can
be adjusted.<
The system automatically selects
your individual tone setting each time
you unlock the vehicle using your personal
remote control unit.< {Radio} or {Audio off}.
Page 150 of 229
Entertainment
148
Tone adjustment
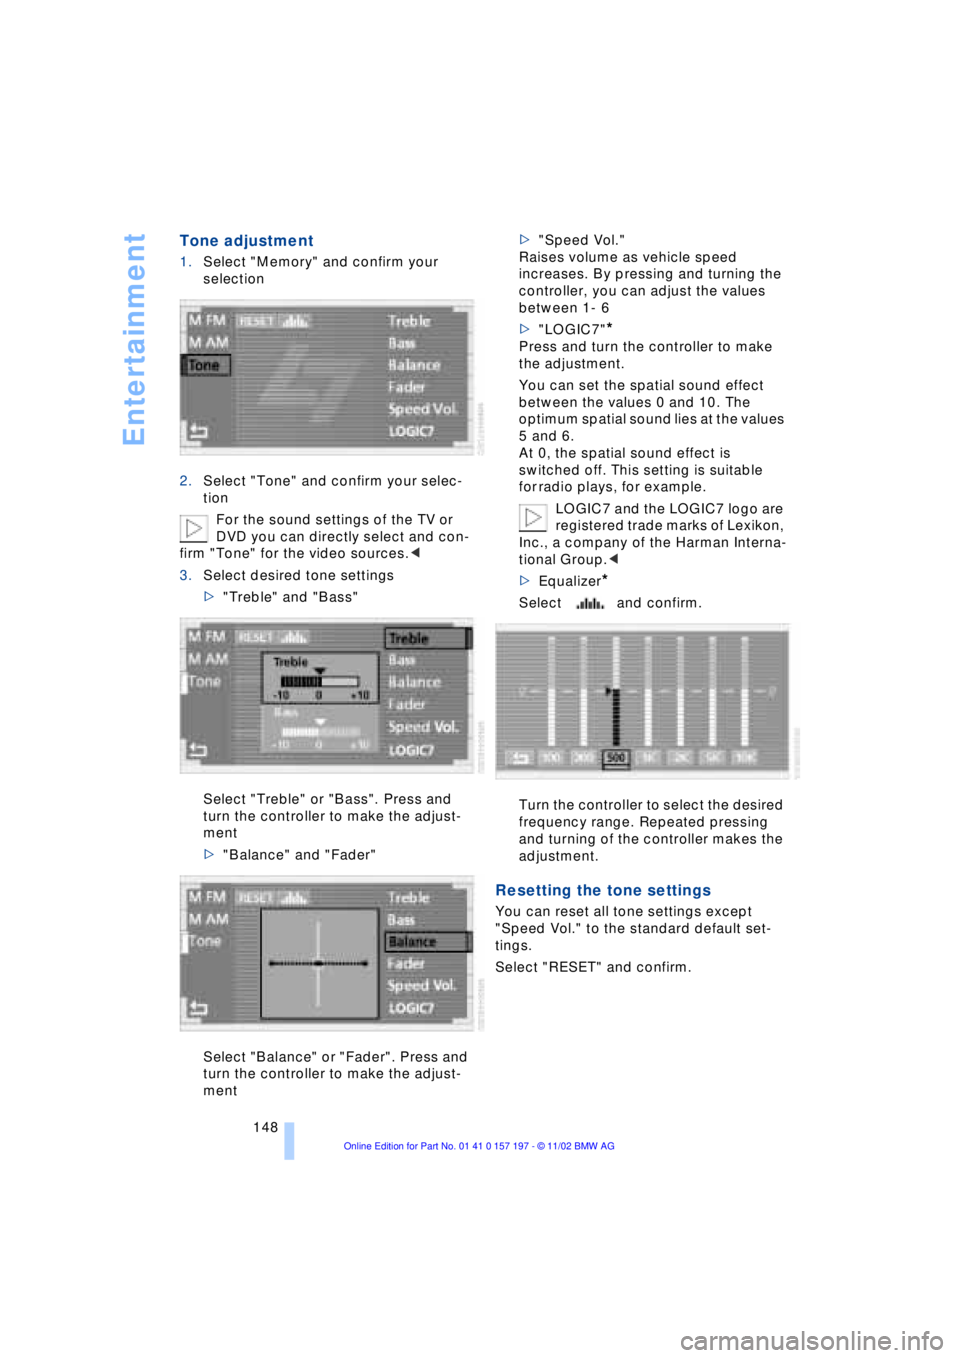
1.Select "Memory" and confirm your
selection
2.Select "Tone" and confirm your selec-
tion
For the sound settings of the TV or
DVD you can directly select and con-
firm "Tone" for the video sources.<
3.Select desired tone settings
>"Treble" and "Bass"
Select "Treble" or "Bass". Press and
turn the controller to make the adjust-
ment
>"Balance" and "Fader"
Select "Balance" or "Fader". Press and
turn the controller to make the adjust-
ment>"Speed Vol."
Raises volume as vehicle speed
increases. By pressing and turning the
controller, you can adjust the values
between 1- 6
>"LOGIC7"
*
Press and turn the controller to make
the adjustment.
You can set the spatial sound effect
between the values 0 and 10. The
optimum spatial sound lies at the values
5 and 6.
At 0, the spatial sound effect is
switched off. This setting is suitable
for radio plays, for example.
LOGIC7 and the LOGIC7 logo are
registered trade marks of Lexikon,
Inc., a company of the Harman Interna-
tional Group.<
>Equalizer
*
Select and confirm.
Turn the controller to select the desired
frequency range. Repeated pressing
and turning of the controller makes the
adjustment.
Resetting the tone settings
You can reset all tone settings except
"Speed Vol." to the standard default set-
tings.
Select "RESET" and confirm.
Page 151 of 229
At a glance
Controls
Driving tips
Communications
Navigation
Entertainment
Mobility
Reference
149
Radio
Operating temperatures
Only operate the radio at tempera-
tures of 57 (Ð156) to 1407
(+606) otherwise, malfunctions can
occur.
Even when switched off, the device should
only be exposed to temperatures between
Ð137 (Ð256) and 1857 (+856).<
Starting
1.Switch on audio or video sources, refer
to page 147
If a video source is switched on,
select "Audio" and confirm.<
2.If another audio source is switched on,
select "FM..." or "AM..." and confirm.
Volume adjustment, refer to page 147.
Tone control, refer to page 147.
Stopping
Switch off audio or video sources, refer to
page 147
or switch over to
>CD player, refer to page 153
>CD changer, refer to page 155
>Cassette deck, refer to page 158
>TV, refer to page 160
>DVD, refer to page 162.
Selecting frequency band
Your radio provides reception of the FM
and AM wavebands.
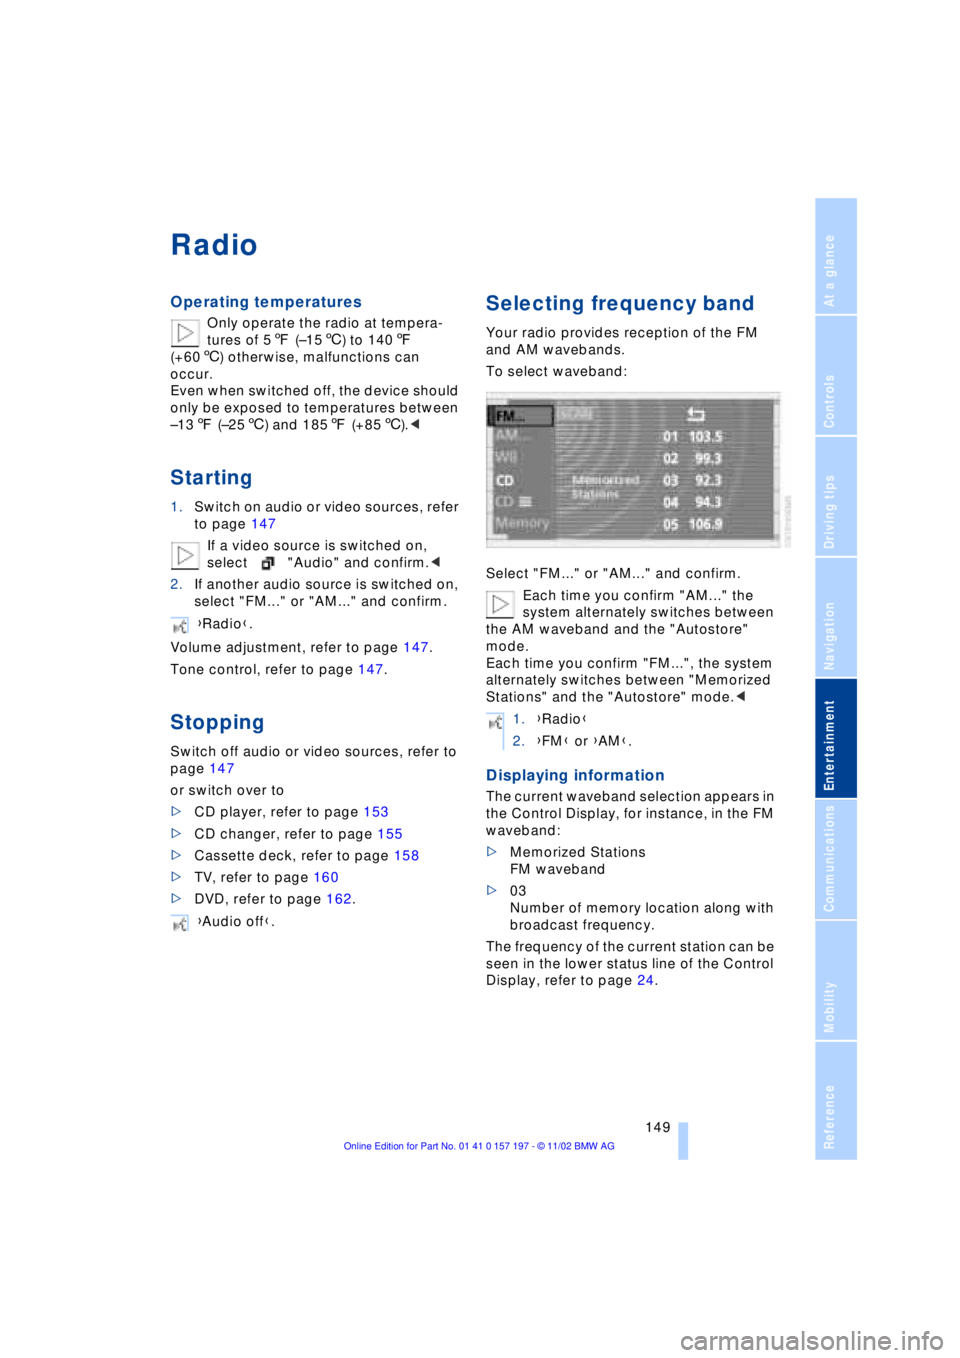
To select waveband:
Select "FM..." or "AM..." and confirm.
Each time you confirm "AM..." the
system alternately switches between
the AM waveband and the "Autostore"
mode.
Each time you confirm "FM...", the system
alternately switches between "Memorized
Stations" and the "Autostore" mode.<
Displaying information
The current waveband selection appears in
the Control Display, for instance, in the FM
waveband:
>Memorized Stations
FM waveband
>03
Number of memory location along with
broadcast frequency.
The frequency of the current station can be
seen in the lower status line of the Control
Display, refer to page 24. {Radio}.
{Audio off}.
1.{Radio}
2.{FM} or {AM}.
Page 152 of 229
Radio
150
Selecting a station
Selecting station manually
To search for a particular station by
selecting its frequency
Scanning
To start scanning:
Extended pressure.
The scan mode begins with the currently
selected frequency.
The scan mode is stopped as soon as a
station is found.
The frequency of the station appears in the
bottom status line, refer to page 24.
Next station
Press to select the desired direction.
The next station that appears in the Control
Display is displayed.
Sampling and selecting Ð Scan
The automatic scan search feature auto-
matically plays a brief sample from each
station in the selected waveband.
1.Select "SCAN" in the Control Display
and confirm your selection.
Station search starts
2.To select a station:
Confirm "SCAN" a second time.
This cancels the scan function, and the
radio remains on the current station.
Storing and retrieving a
station
Memory locations
Your radio can store 36 stations:
>You can store as many as 18 stations in
the FM waveband
>You can store up to 18 stations in the
AM waveband.
Each time you confirm "AM..." the
system alternately switches between
the AM waveband and the "Autostore"
mode.
Each time you confirm "FM...", the system
alternately switches between "Memorized
Stations" and the "Autostore" mode.<
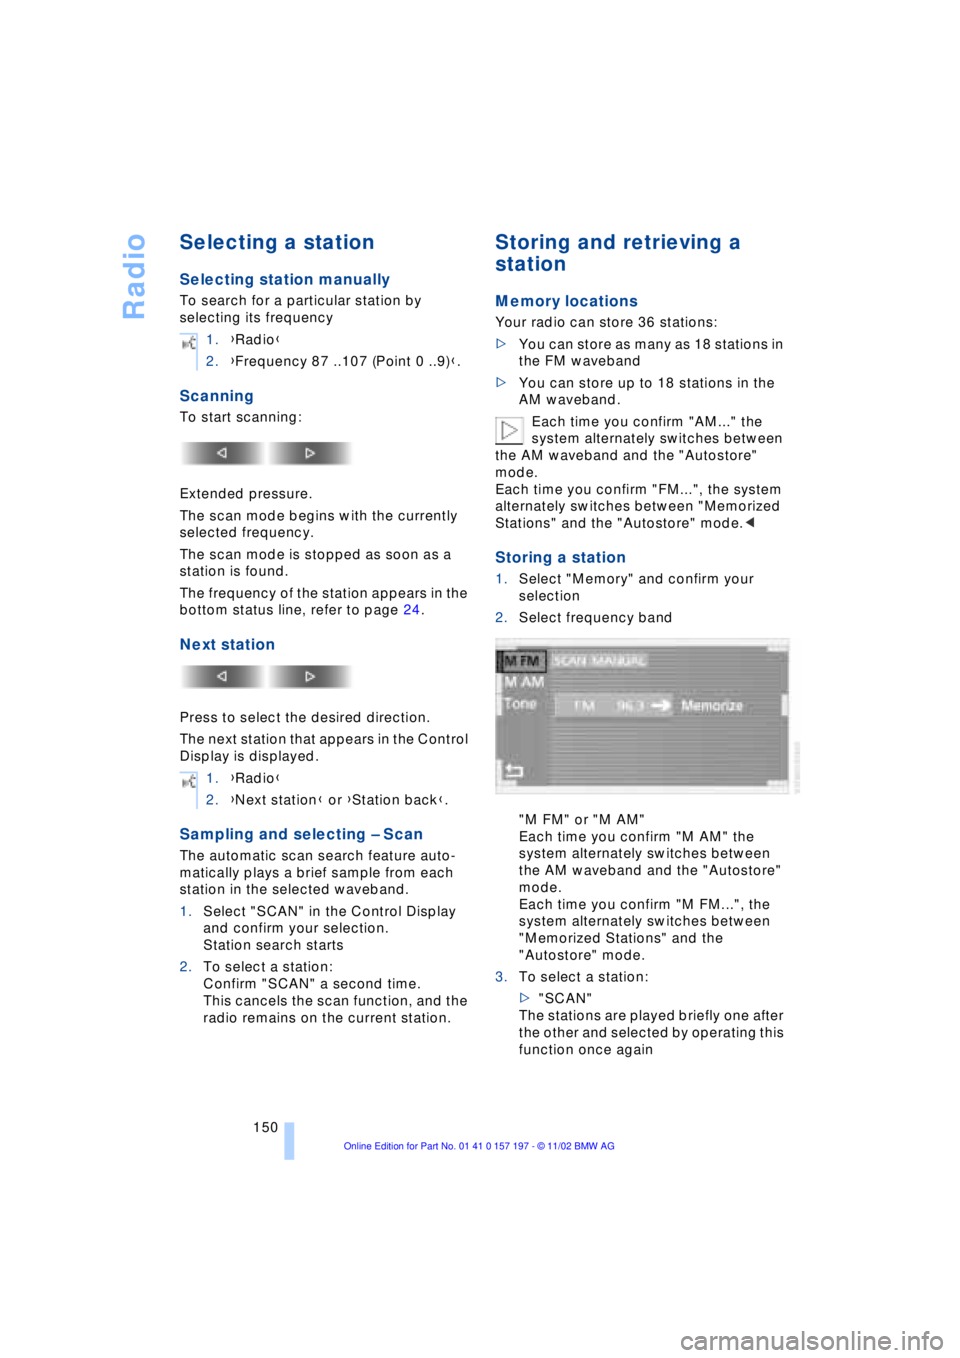
Storing a station
1.Select "Memory" and confirm your
selection
2.Select frequency band
"M FM" or "M AM"
Each time you confirm "M AM" the
system alternately switches between
the AM waveband and the "Autostore"
mode.
Each time you confirm "M FM...", the
system alternately switches between
"Memorized Stations" and the
"Autostore" mode.
3.To select a station:
>"SCAN"
The stations are played briefly one after
the other and selected by operating this
function once again 1.{Radio}
2.{Frequency 87 ..107 (Point 0 ..9)}.
1.{Radio}
2.{Next station} or {Station back}.
Page 153 of 229
At a glance
Controls
Driving tips
Communications
Navigation
Entertainment
Mobility
Reference
151
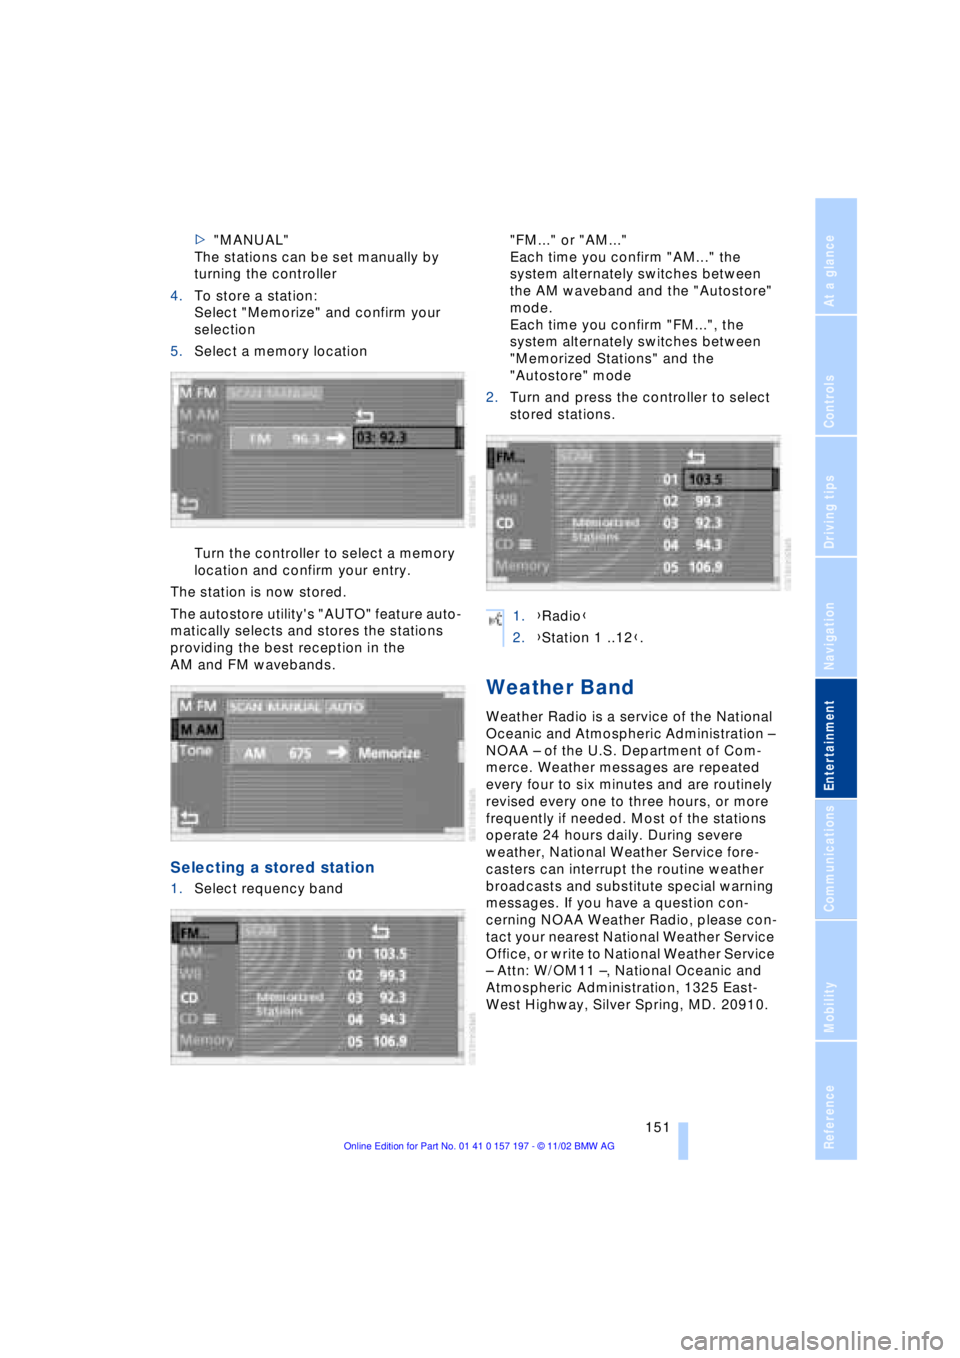
>"MANUAL"
The stations can be set manually by
turning the controller
4.To store a station:
Select "Memorize" and confirm your
selection
5.Select a memory location
Turn the controller to select a memory
location and confirm your entry.
The station is now stored.
The autostore utility's "AUTO" feature auto-
matically selects and stores the stations
providing the best reception in the
AM and FM wavebands.
Selecting a stored station
1.Select requency band "FM..." or "AM..."
Each time you confirm "AM..." the
system alternately switches between
the AM waveband and the "Autostore"
mode.
Each time you confirm "FM...", the
system alternately switches between
"Memorized Stations" and the
"Autostore" mode
2.Turn and press the controller to select
stored stations.
Weather Band
Weather Radio is a service of the National
Oceanic and Atmospheric Administration Ð
NOAA Ð of the U.S. Department of Com-
merce. Weather messages are repeated
every four to six minutes and are routinely
revised every one to three hours, or more
frequently if needed. Most of the stations
operate 24 hours daily. During severe
weather, National Weather Service fore-
casters can interrupt the routine weather
broadcasts and substitute special warning
messages. If you have a question con-
cerning NOAA Weather Radio, please con-
tact your nearest National Weather Service
Office, or write to National Weather Service
Ð Attn: W/OM11 Ð, National Oceanic and
Atmospheric Administration, 1325 East-
West Highway, Silver Spring, MD. 20910.
1.{Radio}
2.{Station 1 ..12}.
Page 154 of 229
Radio
152
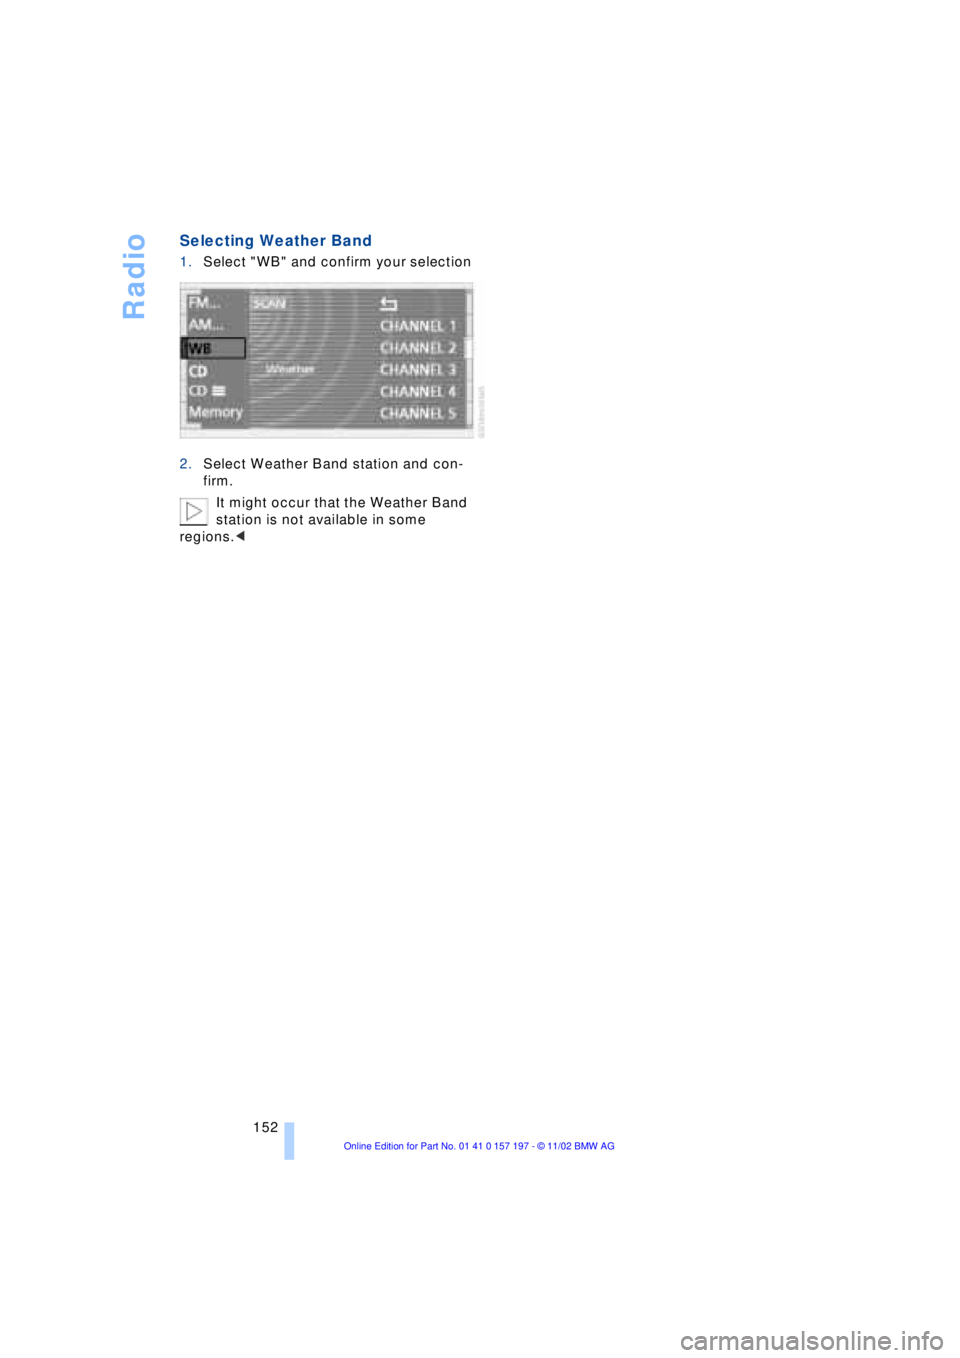
Selecting Weather Band
1.Select "WB" and confirm your selection
2.Select Weather Band station and con-
firm.
It might occur that the Weather Band
station is not available in some
regions.<
Page 155 of 229
At a glance
Controls
Driving tips
Communications
Navigation
Entertainment
Mobility
Reference
153
CD Compact Disc
To prevent CDs from being copied
illegally, they are often provided with
copy protection by the manufacturer.
Please observe the information on your CD.
These CDs differ from the CD Audio Stan-
dard Red Book, on the basis of which all
CD players and changers are designed.
Under certain circumstances this can pre-
vent or restrict the playing of CDs on your
CD player. In this case please contact the
CD dealer or manufacturer.<
If you play self-recorded audio CDs,
faults, e.g. drop-outs, can occur, or
the CD is not played at all.<
With self-recorded CDs, labels
applied later can become detached
during playback due to the development of
heat, causing irreparable damage to the
device.<
Operating temperatures
Only operate the CD-player at tem-
peratures of 57 (Ð156) to 1407
(+606) otherwise, malfunctions can
occur.
Even when switched off, the device should
only be exposed to temperatures between
Ð137 (Ð256) and 1857 (+856).<
Atmospheric humidity
High levels of humidity inside the player
can condense on the laser's scan lens and
prevent it from reading the CD.
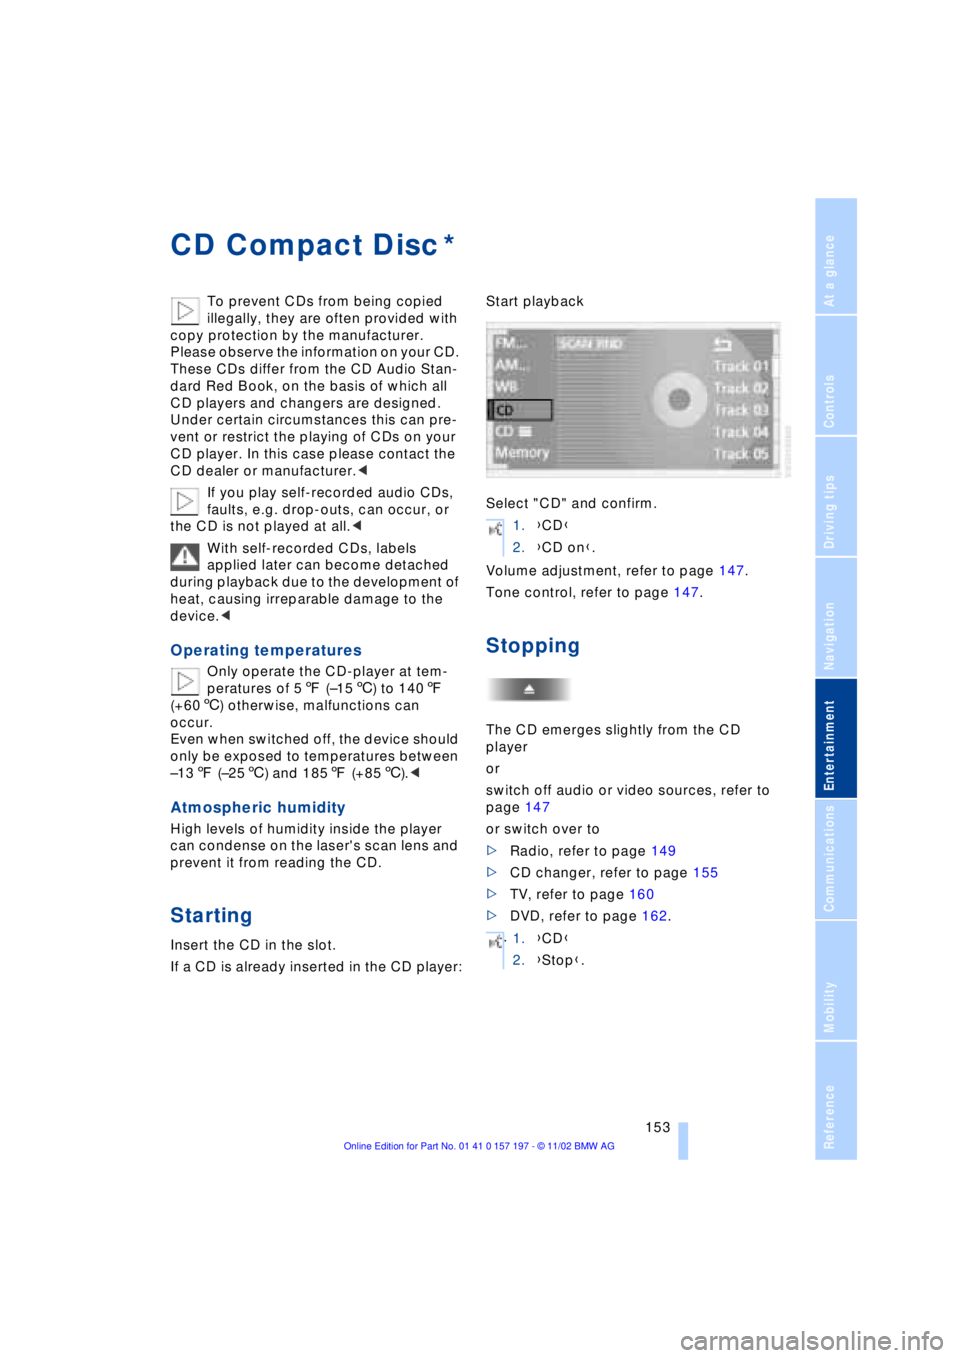
Starting
Insert the CD in the slot.
If a CD is already inserted in the CD player:Start playback
Select "CD" and confirm.
Volume adjustment, refer to page 147.
Tone control, refer to page 147.
Stopping
The CD emerges slightly from the CD
player
or
switch off audio or video sources, refer to
page 147
or switch over to
>Radio, refer to page 149
>CD changer, refer to page 155
>TV, refer to page 160
>DVD, refer to page 162.
*
1.{CD}
2.{CD on}.
.
1.{CD}
2.{Stop}.
Page 158 of 229
CD changer
156
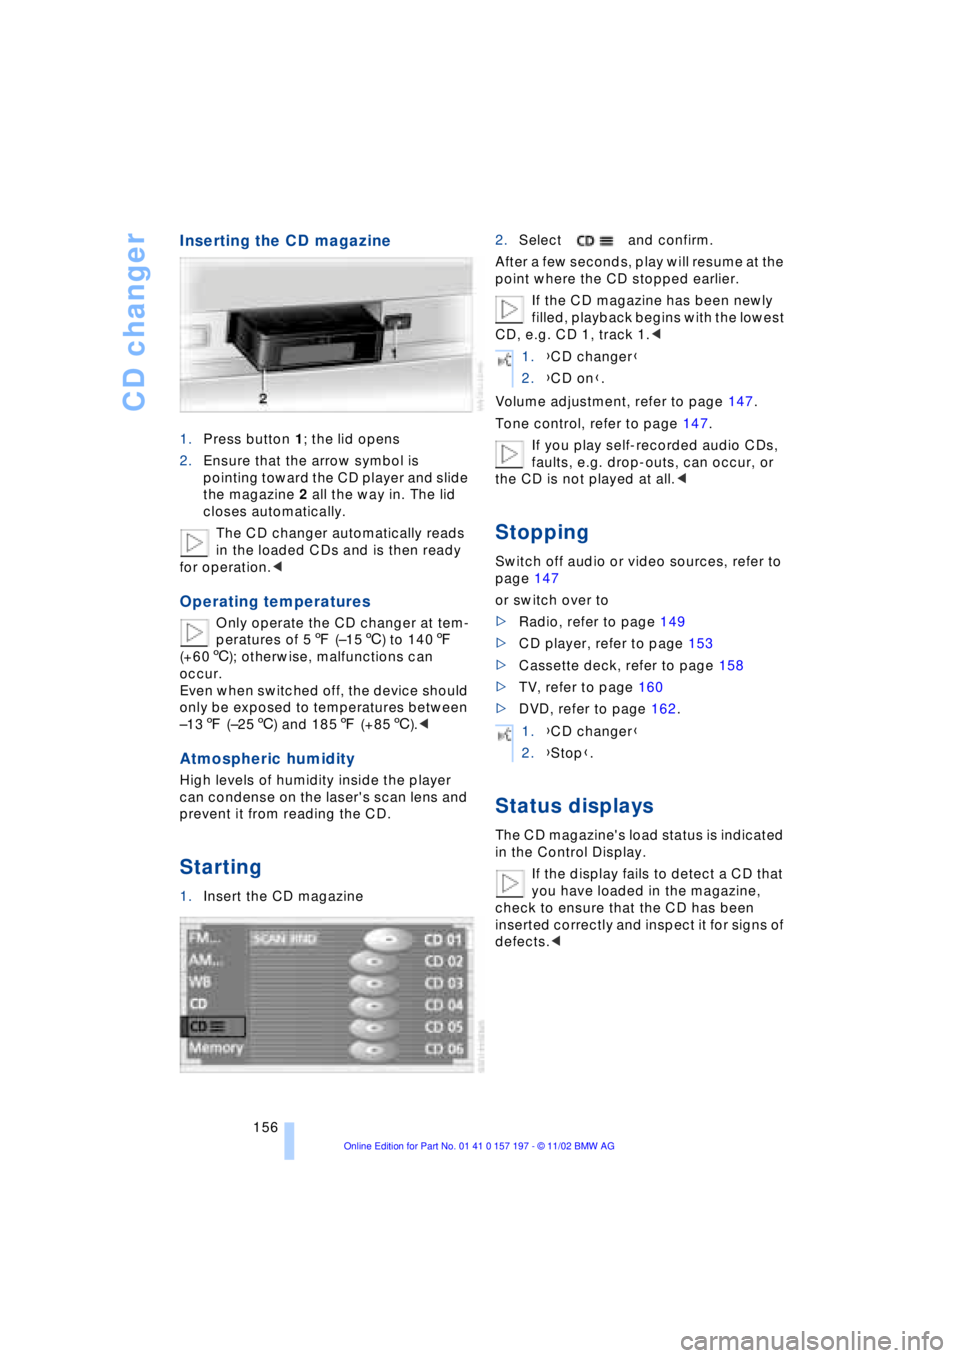
Inserting the CD magazine
1.Press button 1; the lid opens
2.Ensure that the arrow symbol is
pointing toward the CD player and slide
the magazine 2 all the way in. The lid
closes automatically.
The CD changer automatically reads
in the loaded CDs and is then ready
for operation.<
Operating temperatures
Only operate the CD changer at tem-
peratures of 57 (Ð156) to 1407
(+606); otherwise, malfunctions can
occur.
Even when switched off, the device should
only be exposed to temperatures between
Ð137 (Ð256) and 1857 (+856).<
Atmospheric humidity
High levels of humidity inside the player
can condense on the laser's scan lens and
prevent it from reading the CD.
Starting
1.Insert the CD magazine2.Select and confirm.
After a few seconds, play will resume at the
point where the CD stopped earlier.
If the CD magazine has been newly
filled, playback begins with the lowest
CD, e.g. CD 1, track 1.<
Volume adjustment, refer to page 147.
Tone control, refer to page 147.
If you play self-recorded audio CDs,
faults, e.g. drop-outs, can occur, or
the CD is not played at all.<
Stopping
Switch off audio or video sources, refer to
page 147
or switch over to
>Radio, refer to page 149
>CD player, refer to page 153
>Cassette deck, refer to page 158
>TV, refer to page 160
>DVD, refer to page 162.
Status displays
The CD magazine's load status is indicated
in the Control Display.
If the display fails to detect a CD that
you have loaded in the magazine,
check to ensure that the CD has been
inserted correctly and inspect it for signs of
defects.<
1.{CD changer}
2.{CD on}.
1.{CD changer}
2.{Stop}.