2003 BMW 760LI SEDAN radio
[x] Cancel search: radioPage 44 of 229
Opening and closing
42 Lock, i.e. arm by pressing twice; press
button 2of the remote control
twice in succession, refer to page 36, or
lock twice with the key, refer to page 37.
The indicator lamp lights up briefly and
then flashes continuously. The tilt alarm
sensor and the interior motion sensor are
switched off as long as the system is
armed.
If you desire, the
>tilt alarm sensor
>interior motion sensor
can be switched off permanently. Please
contact your BMW center for assistance.<
Interior motion sensor
In order for the interior motion sensor to
function properly, the windows and sliding/
tilt sunroof must be completely closed.
Be sure to deactivate the interior motion
sensor, refer to section on Avoiding unin-
tentional alarms, when you wish to leave
the windows or sliding/tilt sunroof open.
Electric power windows
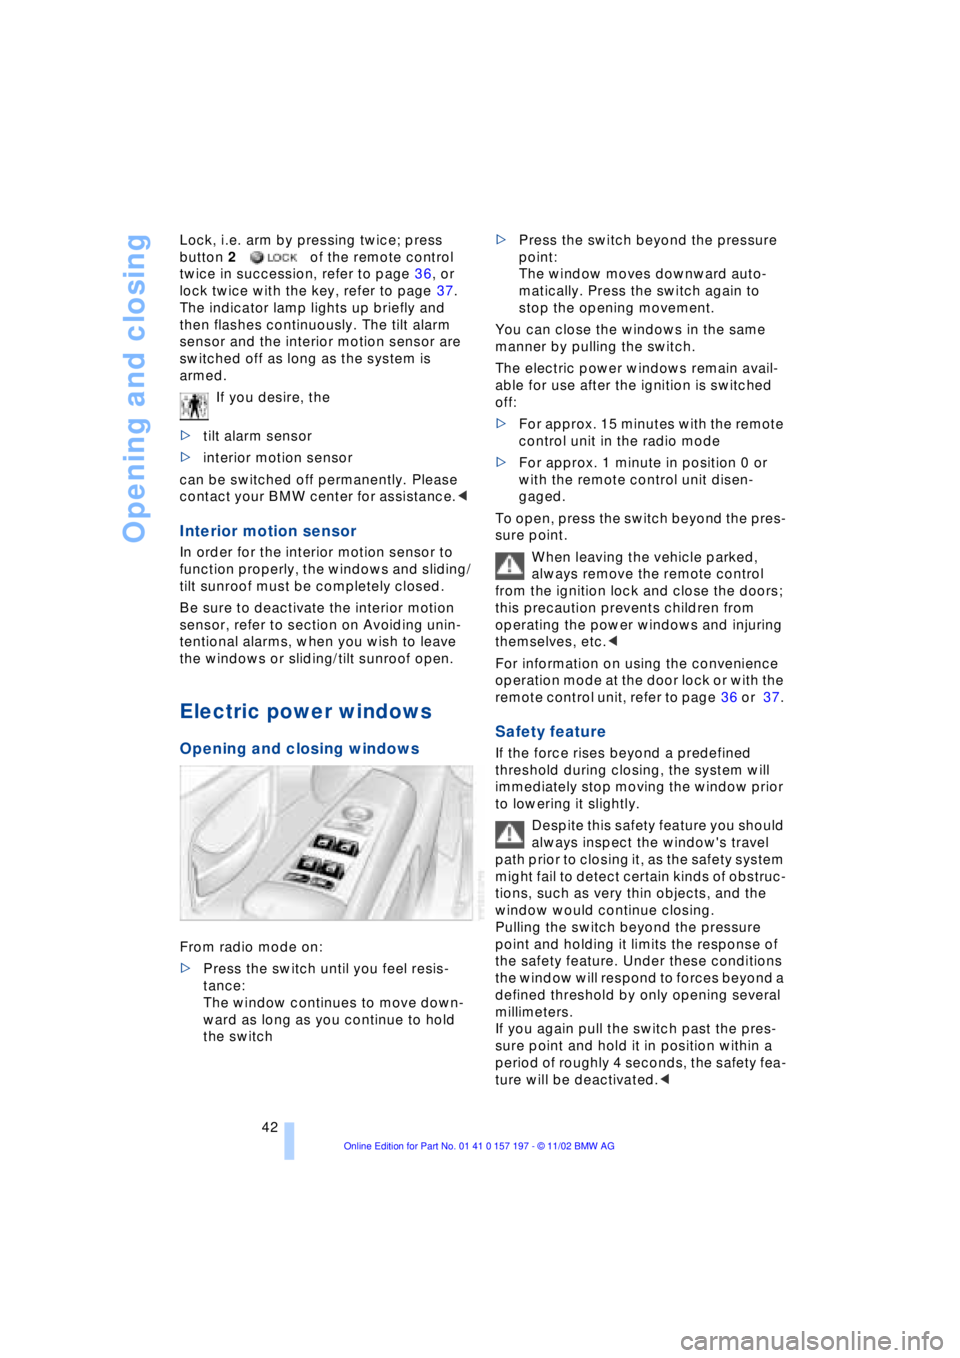
Opening and closing windows
From radio mode on:
>Press the switch until you feel resis-
tance:
The window continues to move down-
ward as long as you continue to hold
the switch >Press the switch beyond the pressure
point:
The window moves downward auto-
matically. Press the switch again to
stop the opening movement.
You can close the windows in the same
manner by pulling the switch.
The electric power windows remain avail-
able for use after the ignition is switched
off:
>For approx. 15 minutes with the remote
control unit in the radio mode
>For approx. 1 minute in position 0 or
with the remote control unit disen-
gaged.
To open, press the switch beyond the pres-
sure point.
When leaving the vehicle parked,
always remove the remote control
from the ignition lock and close the doors;
this precaution prevents children from
operating the power windows and injuring
themselves, etc.<
For information on using the convenience
operation mode at the door lock or with the
remote control unit, refer to page 36 or 37.
Safety feature
If the force rises beyond a predefined
threshold during closing, the system will
immediately stop moving the window prior
to lowering it slightly.
Despite this safety feature you should
always inspect the window's travel
path prior to closing it, as the safety system
might fail to detect certain kinds of obstruc-
tions, such as very thin objects, and the
window would continue closing.
Pulling the switch beyond the pressure
point and holding it limits the response of
the safety feature. Under these conditions
the window will respond to forces beyond a
defined threshold by only opening several
millimeters.
If you again pull the switch past the pres-
sure point and hold it in position within a
period of roughly 4 seconds, the safety fea-
ture will be deactivated.<
Page 45 of 229
At a glance
Controls
Driving tips
Communications
Navigation
Entertainment
Mobility
Reference
43
When you close the windows they will
slow down as they approach the end
of their travel; this is to allow the safety fea-
ture to respond more precisely to any
obstructions encountered in this critical
range.<
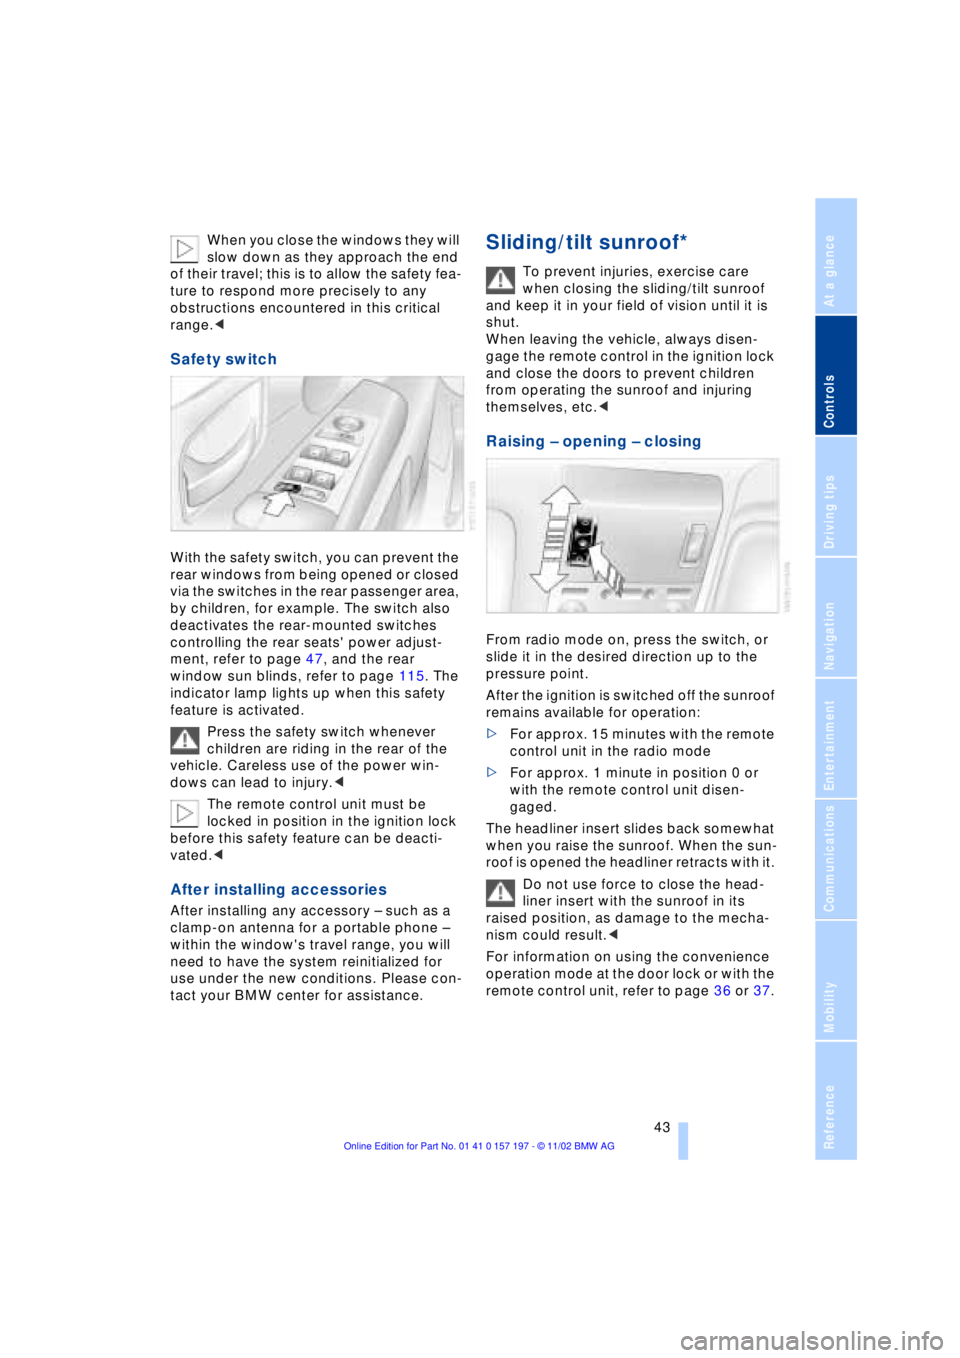
Safety switch
With the safety switch, you can prevent the
rear windows from being opened or closed
via the switches in the rear passenger area,
by children, for example. The switch also
deactivates the rear-mounted switches
controlling the rear seats' power adjust-
ment, refer to page 47, and the rear
window sun blinds, refer to page 115. The
indicator lamp lights up when this safety
feature is activated.
Press the safety switch whenever
children are riding in the rear of the
vehicle. Careless use of the power win-
dows can lead to injury.<
The remote control unit must be
locked in position in the ignition lock
before this safety feature can be deacti-
vated.<
After installing accessories
After installing any accessory Ð such as a
clamp-on antenna for a portable phone Ð
within the window's travel range, you will
need to have the system reinitialized for
use under the new conditions. Please con-
tact your BMW center for assistance.
Sliding/tilt sunroof*
To prevent injuries, exercise care
when closing the sliding/tilt sunroof
and keep it in your field of vision until it is
shut.
When leaving the vehicle, always disen-
gage the remote control in the ignition lock
and close the doors to prevent children
from operating the sunroof and injuring
themselves, etc.<
Raising Ð opening Ð closing
From radio mode on, press the switch, or
slide it in the desired direction up to the
pressure point.
After the ignition is switched off the sunroof
remains available for operation:
>For approx. 15 minutes with the remote
control unit in the radio mode
>For approx. 1 minute in position 0 or
with the remote control unit disen-
gaged.
The headliner insert slides back somewhat
when you raise the sunroof. When the sun-
roof is opened the headliner retracts with it.
Do not use force to close the head-
liner insert with the sunroof in its
raised position, as damage to the mecha-
nism could result.<
For information on using the convenience
operation mode at the door lock or with the
remote control unit, refer to page 36 or 37.
Page 56 of 229
Adjustments
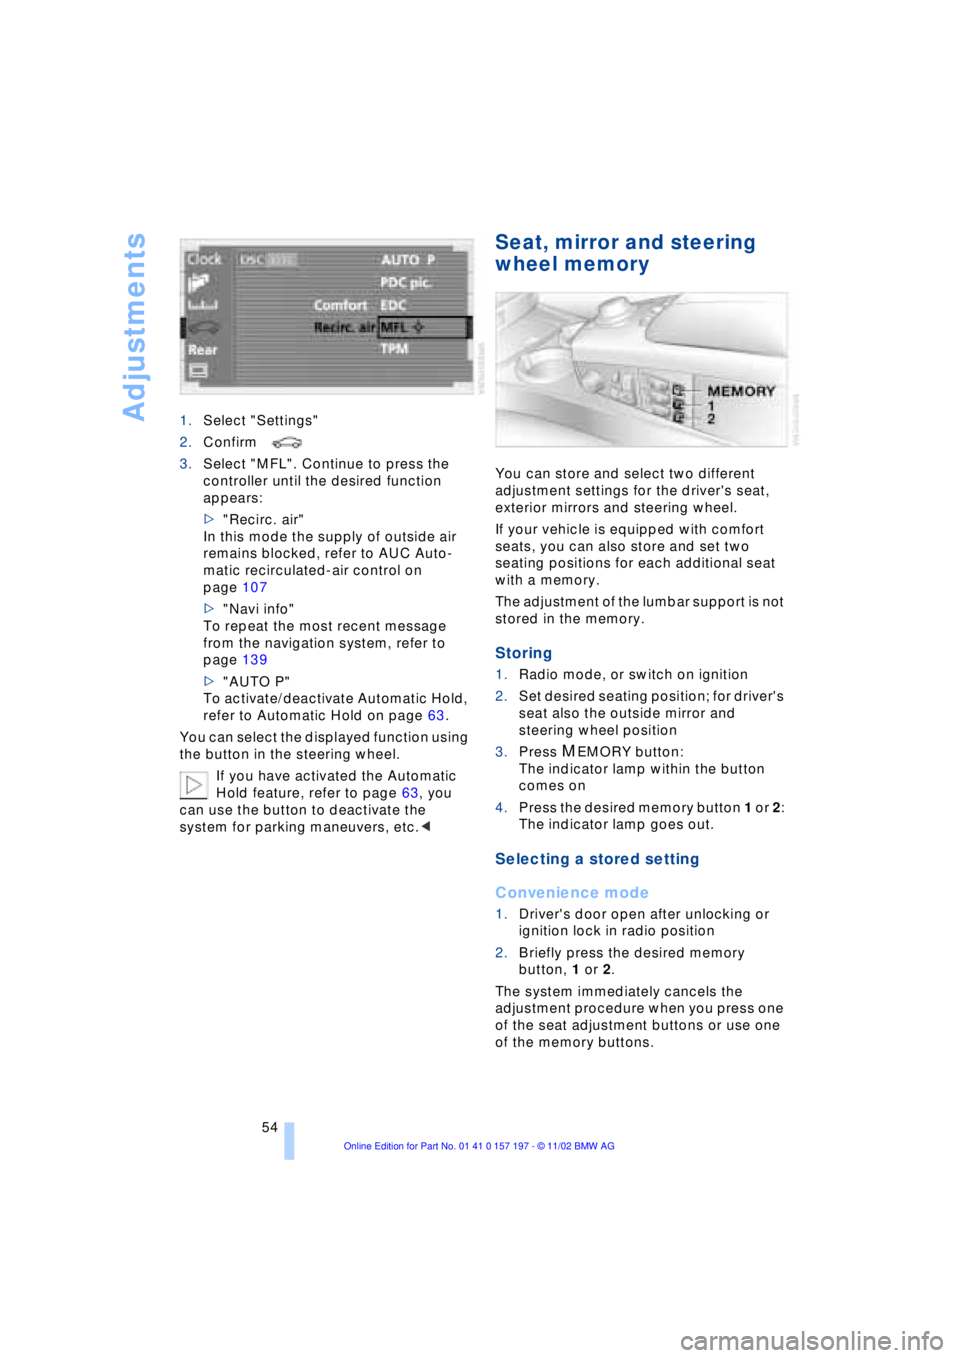
54 1.Select "Settings"
2.Confirm
3.Select "MFL". Continue to press the
controller until the desired function
appears:
>"Recirc. air"
In this mode the supply of outside air
remains blocked, refer to AUC Auto-
matic recirculated-air control on
page 107
>"Navi info"
To repeat the most recent message
from the navigation system, refer to
page 139
>"AUTO P"
To activate/deactivate Automatic Hold,
refer to Automatic Hold on page 63.
You can select the displayed function using
the button in the steering wheel.
If you have activated the Automatic
Hold feature, refer to page 63, you
can use the button to deactivate the
system for parking maneuvers, etc.<
Seat, mirror and steering
wheel memory
You can store and select two different
adjustment settings for the driver's seat,
exterior mirrors and steering wheel.
If your vehicle is equipped with comfort
seats, you can also store and set two
seating positions for each additional seat
with a memory.
The adjustment of the lumbar support is not
stored in the memory.
Storing
1.Radio mode, or switch on ignition
2.Set desired seating position; for driver's
seat also the outside mirror and
steering wheel position
3.Press
MEMORY button:
The indicator lamp within the button
comes on
4.Press the desired memory button 1 or 2:
The indicator lamp goes out.
Selecting a stored setting
Convenience mode
1.Driver's door open after unlocking or
ignition lock in radio position
2.Briefly press the desired memory
button, 1 or 2.
The system immediately cancels the
adjustment procedure when you press one
of the seat adjustment buttons or use one
of the memory buttons.
Page 63 of 229
At a glance
Controls
Driving tips
Communications
Navigation
Entertainment
Mobility
Reference
61
Driving
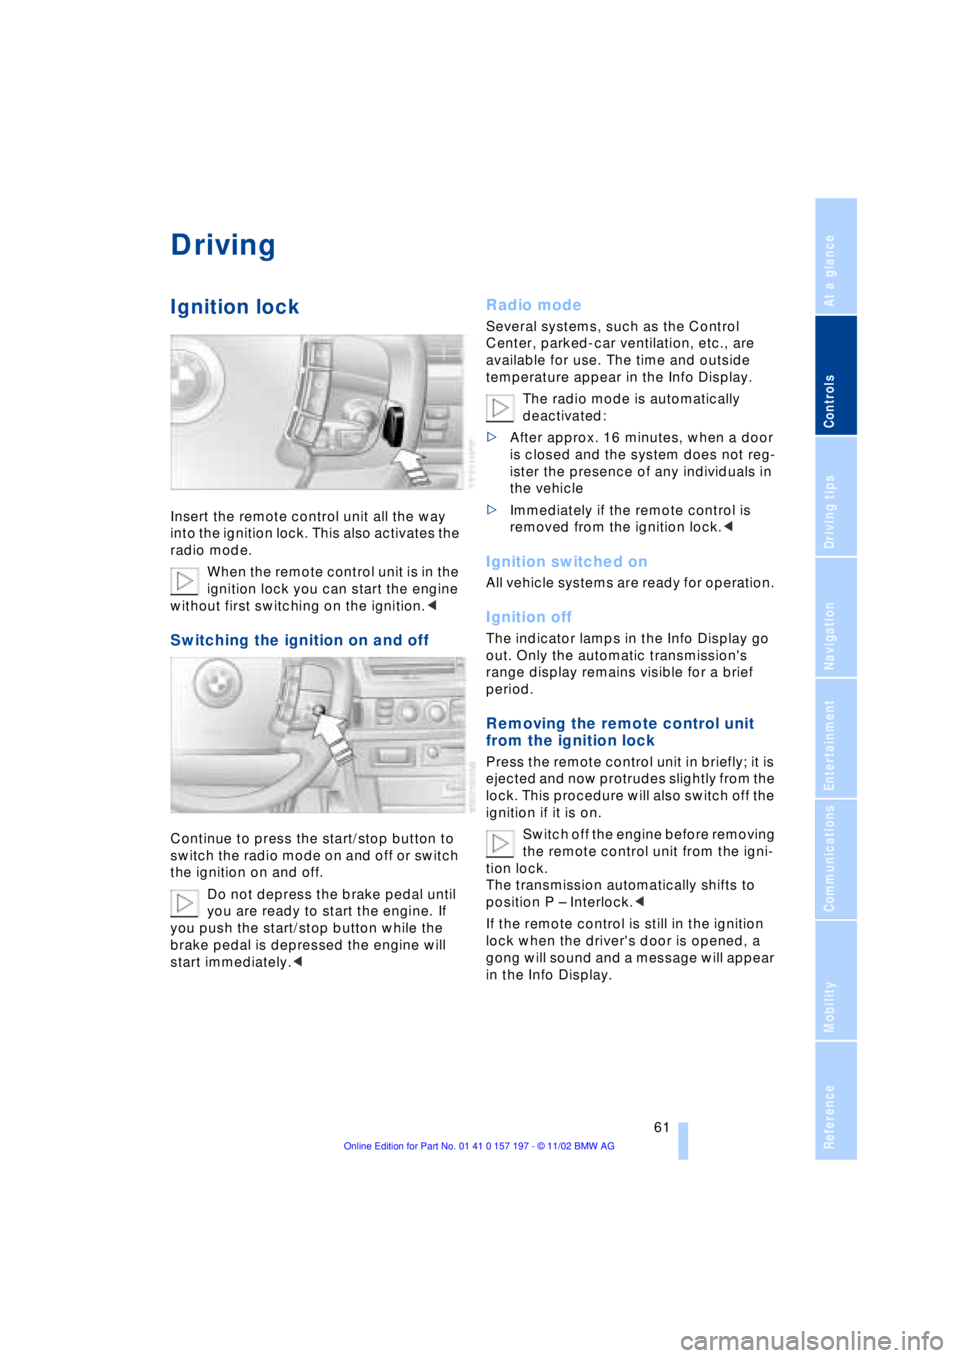
Ignition lock
Insert the remote control unit all the way
into the ignition lock. This also activates the
radio mode.
When the remote control unit is in the
ignition lock you can start the engine
without first switching on the ignition.<
Switching the ignition on and off
Continue to press the start/stop button to
switch the radio mode on and off or switch
the ignition on and off.
Do not depress the brake pedal until
you are ready to start the engine. If
you push the start/stop button while the
brake pedal is depressed the engine will
start immediately.<
Radio mode
Several systems, such as the Control
Center, parked-car ventilation, etc., are
available for use. The time and outside
temperature appear in the Info Display.
The radio mode is automatically
deactivated:
>After approx. 16 minutes, when a door
is closed and the system does not reg-
ister the presence of any individuals in
the vehicle
>Immediately if the remote control is
removed from the ignition lock.<
Ignition switched on
All vehicle systems are ready for operation.
Ignition off
The indicator lamps in the Info Display go
out. Only the automatic transmission's
range display remains visible for a brief
period.
Removing the remote control unit
from the ignition lock
Press the remote control unit in briefly; it is
ejected and now protrudes slightly from the
lock. This procedure will also switch off the
ignition if it is on.
Switch off the engine before removing
the remote control unit from the igni-
tion lock.
The transmission automatically shifts to
position P Ð Interlock.<
If the remote control is still in the ignition
lock when the driver's door is opened, a
gong will sound and a message will appear
in the Info Display.
Page 64 of 229
Driving
62
Starting the engine
Do not run the engine in closed
rooms, as otherwise the inhaling of
toxic exhaust gases can cause uncon-
sciousness and death. The exhaust gases
contain carbon monoxide, an odorless and
colorless, but highly toxic gas.
Never leave an unattended vehicle with the
engine running, as such a vehicle repre-
sents a potential safety hazard.<
1.Insert the remote control unit all the way
into the ignition lock
2.Depress the brake pedal
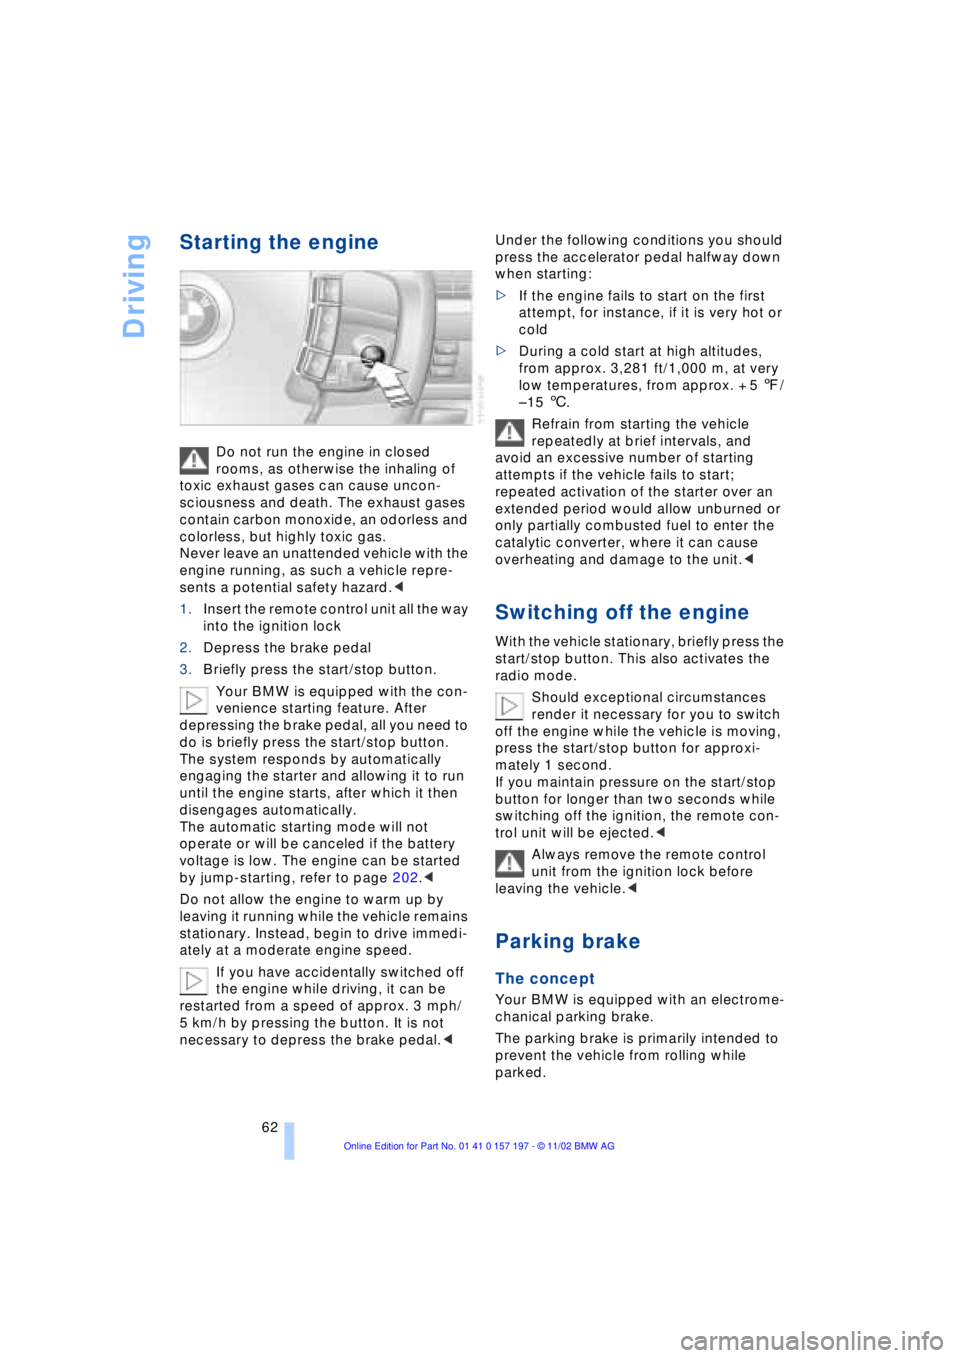
3.Briefly press the start/stop button.
Your BMW is equipped with the con-
venience starting feature. After
depressing the brake pedal, all you need to
do is briefly press the start/stop button.
The system responds by automatically
engaging the starter and allowing it to run
until the engine starts, after which it then
disengages automatically.
The automatic starting mode will not
operate or will be canceled if the battery
voltage is low. The engine can be started
by jump-starting, refer to page 202.<
Do not allow the engine to warm up by
leaving it running while the vehicle remains
stationary. Instead, begin to drive immedi-
ately at a moderate engine speed.
If you have accidentally switched off
the engine while driving, it can be
restarted from a speed of approx. 3 mph/
5 km/h by pressing the button. It is not
necessary to depress the brake pedal.< Under the following conditions you should
press the accelerator pedal halfway down
when starting:
>If the engine fails to start on the first
attempt, for instance, if it is very hot or
cold
>During a cold start at high altitudes,
from approx. 3,281 ft/1,000 m, at very
low temperatures, from approx. + 5 7/
Ð 15 6.
Refrain from starting the vehicle
repeatedly at brief intervals, and
avoid an excessive number of starting
attempts if the vehicle fails to start;
repeated activation of the starter over an
extended period would allow unburned or
only partially combusted fuel to enter the
catalytic converter, where it can cause
overheating and damage to the unit.<
Switching off the engine
With the vehicle stationary, briefly press the
start/stop button. This also activates the
radio mode.
Should exceptional circumstances
render it necessary for you to switch
off the engine while the vehicle is moving,
press the start/stop button for approxi-
mately 1 second.
If you maintain pressure on the start/stop
button for longer than two seconds while
switching off the ignition, the remote con-
trol unit will be ejected.<
Always remove the remote control
unit from the ignition lock before
leaving the vehicle.<
Parking brake
The concept
Your BMW is equipped with an electrome-
chanical parking brake.
The parking brake is primarily intended to
prevent the vehicle from rolling while
parked.
Page 74 of 229
Driving
72
Wiper system
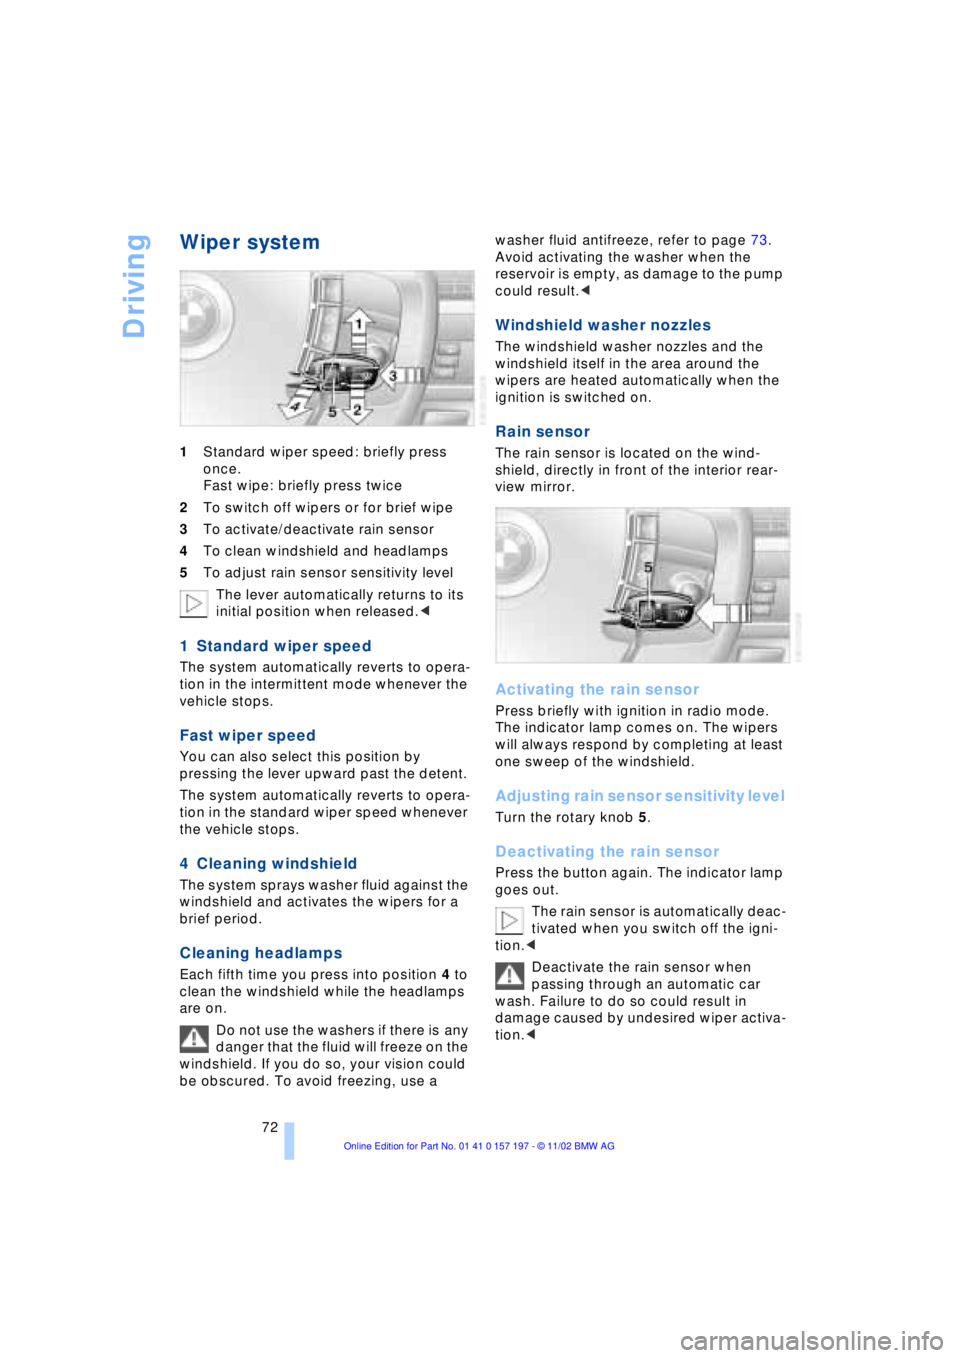
1Standard wiper speed: briefly press
once.
Fast wipe: briefly press twice
2To switch off wipers or for brief wipe
3To activate/deactivate rain sensor
4To clean windshield and headlamps
5To adjust rain sensor sensitivity level
The lever automatically returns to its
initial position when released.<
1 Standard wiper speed
The system automatically reverts to opera-
tion in the intermittent mode whenever the
vehicle stops.
Fast wiper speed
You can also select this position by
pressing the lever upward past the detent.
The system automatically reverts to opera-
tion in the standard wiper speed whenever
the vehicle stops.
4 Cleaning windshield
The system sprays washer fluid against the
windshield and activates the wipers for a
brief period.
Cleaning headlamps
Each fifth time you press into position 4 to
clean the windshield while the headlamps
are on.
Do not use the washers if there is any
danger that the fluid will freeze on the
windshield. If you do so, your vision could
be obscured. To avoid freezing, use a washer fluid antifreeze, refer to page 73.
Avoid activating the washer when the
reservoir is empty, as damage to the pump
could result.<
Windshield washer nozzles
The windshield washer nozzles and the
windshield itself in the area around the
wipers are heated automatically when the
ignition is switched on.
Rain sensor
The rain sensor is located on the wind-
shield, directly in front of the interior rear-
view mirror.
Activating the rain sensor
Press briefly with ignition in radio mode.
The indicator lamp comes on. The wipers
will always respond by completing at least
one sweep of the windshield.
Adjusting rain sensor sensitivity level
Turn the rotary knob 5.
Deactivating the rain sensor
Press the button again. The indicator lamp
goes out.
The rain sensor is automatically deac-
tivated when you switch off the igni-
tion.<
Deactivate the rain sensor when
passing through an automatic car
wash. Failure to do so could result in
damage caused by undesired wiper activa-
tion.<
Page 75 of 229
At a glance
Controls
Driving tips
Communications
Navigation
Entertainment
Mobility
Reference
73
Selecting wiper fold-out position
Important for changing wiper blades, when
folding away from windshield to prevent
blades from sticking when ice forms, etc.
1.Switch off the engine and remove the
remote control unit from the ignition
lock
2.Press the wiper lever up and maintain
pressure for about 3 seconds until the
wipers are roughly vertical Ð this is the
fold-out position.
After folding the wipers back against the
windshield you will need to reactivate the
wiper system:
1.Insert the remote control unit to activate
the radio mode in the ignition lock
2.Apply brief upward pressure to the
wiper lever. The wipers return to their
retracted position and are ready for
normal operation.
To prevent damage to the wipers,
always fold them back against the
windshield before switching on either the
radio mode or the ignition.<
Washer fluid
Windshield and headlamp washer
system
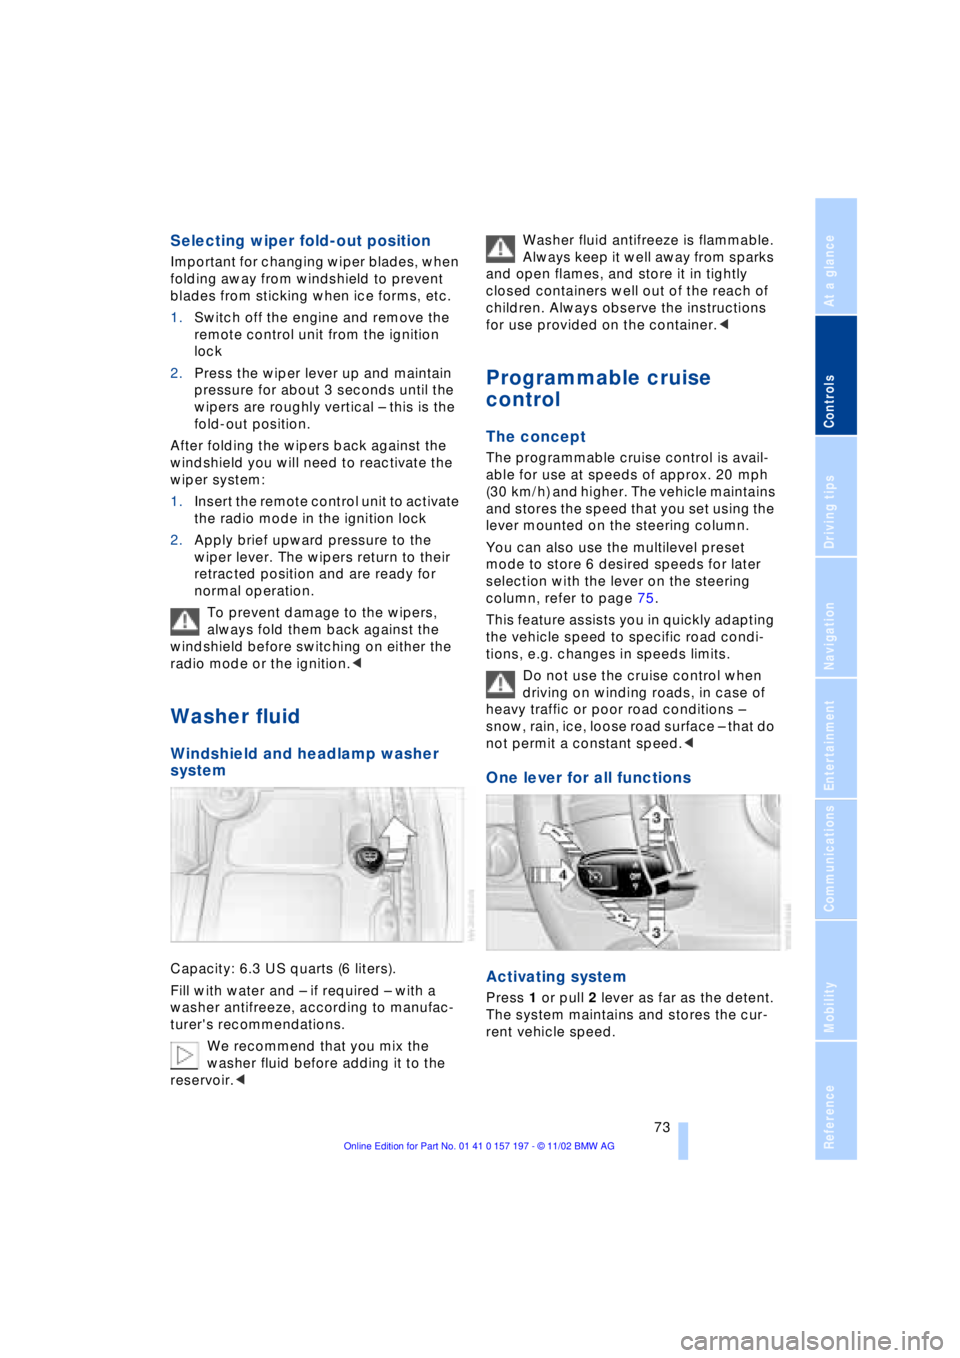
Capacity: 6.3 US quarts (6 liters).
Fill with water and Ð if required Ð with a
washer antifreeze, according to manufac-
turer's recommendations.
We recommend that you mix the
washer fluid before adding it to the
reservoir.< Washer fluid antifreeze is flammable.
Always keep it well away from sparks
and open flames, and store it in tightly
closed containers well out of the reach of
children. Always observe the instructions
for use provided on the container.<
Programmable cruise
control
The concept
The programmable cruise control is avail-
able for use at speeds of approx. 20 mph
(30 km/h) and higher. The vehicle maintains
and stores the speed that you set using the
lever mounted on the steering column.
You can also use the multilevel preset
mode to store 6 desired speeds for later
selection with the lever on the steering
column, refer to page 75.
This feature assists you in quickly adapting
the vehicle speed to specific road condi-
tions, e.g. changes in speeds limits.
Do not use the cruise control when
driving on winding roads, in case of
heavy traffic or poor road conditions Ð
snow, rain, ice, loose road surface Ð that do
not permit a constant speed.<
One lever for all functions
Activating system
Press 1 or pull 2 lever as far as the detent.
The system maintains and stores the cur-
rent vehicle speed.
Page 84 of 229
Everything under control
82
Everything under control
Odometer, outside temperature display, clock
When the ignition is off you can briefly acti-
vate the time, outside temperature and
odometer displays by pressing the knob at
the upper left of the Info Display.
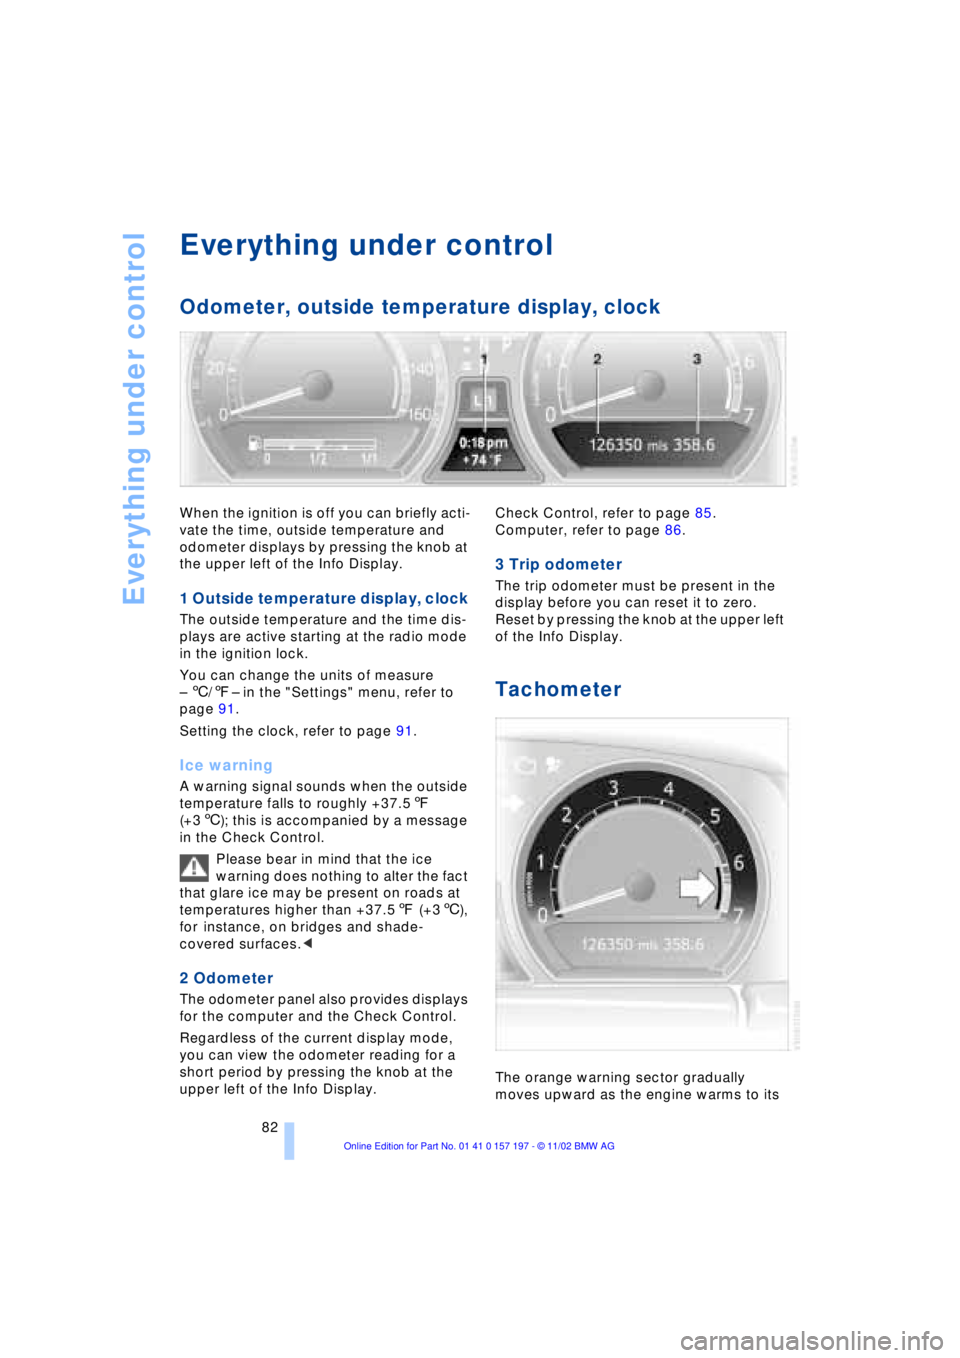
1 Outside temperature display, clock
The outside temperature and the time dis-
plays are active starting at the radio mode
in the ignition lock.
You can change the units of measure
Ð 6/7Ð in the "Settings" menu, refer to
page 91.
Setting the clock, refer to page 91.
Ice warning
A warning signal sounds when the outside
temperature falls to roughly +37.57
(+36); this is accompanied by a message
in the Check Control.
Please bear in mind that the ice
warning does nothing to alter the fact
that glare ice may be present on roads at
temperatures higher than +37.57 (+36),
for instance, on bridges and shade-
covered surfaces.<
2 Odometer
The odometer panel also provides displays
for the computer and the Check Control.
Regardless of the current display mode,
you can view the odometer reading for a
short period by pressing the knob at the
upper left of the Info Display. Check Control, refer to page 85.
Computer, refer to page 86.
3 Trip odometer
The trip odometer must be present in the
display before you can reset it to zero.
Reset by pressing the knob at the upper left
of the Info Display.
Tachometer
The orange warning sector gradually
moves upward as the engine warms to its