Page 65 of 111

NOTE: To avoid excessive wear and the necessity of rebalancing, mark and reinstall wheels in the same location and
position as before removal. To lessen the chance of imbalance, each wheel hub is equipped with a guide stud to ensure
that a removed wheel can be reinstalled in its original position (as when changing over to winter tires/wheels).
pg. 93 Changing wheels
Installing the wheel
· Clean the contact surfaces on the wheel and hub.
· Lift the wheel and place it on the hub. Make sure that you align the wheel with the guide stud on the wheel hub prior
to installation.
· Install the wheel bolts and tighten handtight. use the lug wrench, tighten crosswise(see illustration above) until all
bolts are snug.
· Lower the vehicle to the ground and alternately tighten the bolts crosswise to 100 ft. lbs. (136 Nm).
· Install the wheel cap (where applicable).WARNING!
· The jack must correctly engage the bar in the jack attachment (A). The car's weight must not rest on the jack
attachment (B). See illustration on page 92
.
· Be sure the jack is on a firm, level, non-slippery surface.
· Never allow any part of your body to be extended under a car supported by a jack.
· Use the jack intended for the car when replacing a wheel. For any other job, use stands to support the side of the
car being worked on.
· Apply the parking brake and put the gear selector in the (P)ark position.
· Block the wheels standing on the ground, use rigid wooden blocks or large stones.
· The jack should be kept well-greased.
CAUTION:
· The car must not be driven with wheels of different dimensions or with a spare tire other than the one that came with
the car. The use of different size wheels can seriously damage your car's transmission.
ProCarManuals.com
Page 66 of 111
· Correct tightening torque on wheel bolts must be observed. The wheel bolts should never be greased or lubricated.
The extended, chromed wheel bolts must not be used with steel rims, as they make it impossible to fit the hub caps.
pg. 94
Contents | Top of Page
ProCarManuals.com
Page 67 of 111
2 0 0 2
VOLVO S80
Chapter 8 - Maintenance/Servicing
pg. 95 Maintenance/Servicing
Fuses96
Replacing bulbs100
Paint touch up107
Washing the car108
Cleaning the upholstery109
Maintenance service, Warranty110
Fuel/emissions systems111
Drive belt, Air pump system, Coolant112
Emissions maintenance113
Opening the hood, Engine compartment115
Engine oil116
Power steering/Brake fluid reservoirs118
Battery maintenance119
Replacing wiper blades121
pg. 96 Fuses
ProCarManuals.com
Page 68 of 111

Replacing fuses
If an electrical component fails to function, it is likely that a fuse has blown due to a temporary circuit overload.
The fuse boxes are located in three different places:
A - Relays/fuse box in the engine compartment
B - Fuse box in the passenger compartment
C - Relays/fuse box in the trunk
A label on the inside of each cover indicates the amperage and the electrical components that are connected to each
fuse.
The easiest way to see if a fuse is blown is to remove it. Pull the fuse straight out. If a fuse is difficult to remove, you
will find a special fuse removal tool in the passenger compartment fuse box. From the side, examine the curved metal
wire to see if it is broken. If so, put in a new fuse of the same color and amperage (written on the fuse). Spare fuses
are stored in the fuse box in the passenger compartment. If fuses burn out repeatedly, have the electrical system
inspected by an authorized Volvo retailer.
WARNING!
Never use fuses with higher amperage than those stated on the following pages. Doing so could overload the car's
electrical system.
pg. 97 Fuses in the engine compartment
Relays/fuses in the engine compartment
When replacing fuses, be sure to replace a blown fuse with a new one of the same color and amperage (written on
the fuse).
ProCarManuals.com
Page 69 of 111
A - To open, press the plastic catches on the rear side of the fuse box cover and lift.
Ordinary fuses
LocationAmperage
1 Accessories 25A
2 Auxiliary lamps (option) 15A
3 Vacuum pump 15A
4 Oxygen sensors 20A
5 Crankcase ventilation heater, Solenoid valves 15A
6 Mass airflow sensor, Engine control module, Injectors 15A
7 Throttle module 10A
8 AC compressor, Accelerator pedal position sensor 10A
9 Horn 15A
10 -
11 AC compressor, Ignition coils 20A
12 Brake light switch 5A
13 Windshield wipers 25A
15 -
16 A/ Windshield and headlight washers 15A
17 Low beam, right 10A
18 Low beam, left 10A
19 ABS 30A
20 High beam, left 15A
21 High beam, right 15A
22 Starter motor 25A
23 Engine control module 5A
pg. 98 Fuses in the passenger compartment
ProCarManuals.com
Page 70 of 111

Fuse box in the passenger compartment
This fuse box is located at the far left side of the instrument panel. Extra fuses and the fuse removal tool are also stored
here. When replacing a blown fuse, be sure to replace it with a new one of the same color and amperage (written on
the fuse).
Location Amperage
1 Left low beam 10A
2 Right low beam 10A
3 Front beam headlights 15A
4 High beam headlights 20A
5 Power driver's seat 30A
6 Power passenger's seat 30A
7 Heated front seats - left 15A
8 Heated front seats - right 15A
9 ABS 5A
10 -
11 -
12 Headlight wipers 15A
13 Electric socket 12 V 20A
14 Power passenger's seat, seat belt buckle switches, SRS 5A
15 Audio system 5A
16 Audio system 20A
17 Radio amplifier 30A
18 Front fog lights 15A
19 VNS display (option) 15A
20 Transport switch 10A
20 Transmission module 5A
22 Direction indicators 20A
23 Headlight switch module, module for electrical connections,
climate control system, onboard diagnostic connector , steering wheel lever modules 5A
24 Relay for extended X-feed: climate control system,
power driver's seat, text window, shiftlock geartronic 10A
ProCarManuals.com
Page 71 of 111

25Ignition switch, Relay starter motor 10A
26Control module - climate control blower 30A
27 Central locking system, power windows, defroster, lighting, sideview mirrors,
door warning lights, power sideview mirrors 15A
28 Power sun roof, courtesy lights, vanity mirror lights 10A
29 Telephone (option) 10A
30 Left front/rear parking lights 10A
31 Right front/rear parking lights, license plate lights 10A
32 Central electrical module, vanity mirror lighting, interior courtesy lights,
power steering 10A
33 Fuel pump 15A
34 Power sun roof 15A
35 Central locking system, power windows - left front 25A
36 Defroster, Lighting, Sideview mirrors, central locking system, power windows - right front 25A
37 Power windows - rear doors, child safety locks 30A
38 Siren alarm 5A
pg. 99 Fuses in the trunk
Fuses in the trunk
The fuses in the trunk are located behind the left panel. When replacing a blown fuse, be sure to replace it with a new
one of the same color and amperage (written on the fuse).
Ordinary fuses
Location Amperage
1 Rear electrical module, trunk lights 10A
2 Rear fog light 10A
3 Brake lights 15A
4 Backup lights 10A
5 Rear window heater 5A
ProCarManuals.com
Page 72 of 111
6Trunk release 10A
7Folding rear outboard head restraints 10A
8 Central locking system - rear doors/fuel filler door 15A
9 Trailer (30 supply) 15A
10 CD changer, CD ROM, VNS, antenna 10A
11 Electrical module - accesories 15A
12 -
13 -
14 -
15 Trailer (15 supply) 15A
16 -
17 -
18 -
pg. 100 Replacing bulbs
Replacing high/low beam headlight bulbs
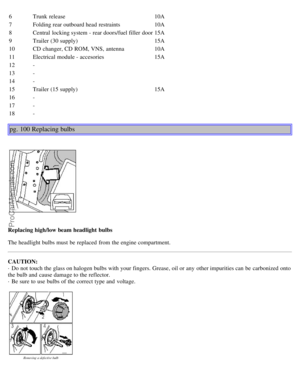
The headlight bulbs must be replaced from the engine compartment.
CAUTION:
· Do not touch the glass on halogen bulbs with your fingers. Grease, oil or any other impurities can be carbonized onto
the bulb and cause damage to the reflector.
· Be sure to use bulbs of the correct type and voltage.
ProCarManuals.com
 1
1 2
2 3
3 4
4 5
5 6
6 7
7 8
8 9
9 10
10 11
11 12
12 13
13 14
14 15
15 16
16 17
17 18
18 19
19 20
20 21
21 22
22 23
23 24
24 25
25 26
26 27
27 28
28 29
29 30
30 31
31 32
32 33
33 34
34 35
35 36
36 37
37 38
38 39
39 40
40 41
41 42
42 43
43 44
44 45
45 46
46 47
47 48
48 49
49 50
50 51
51 52
52 53
53 54
54 55
55 56
56 57
57 58
58 59
59 60
60 61
61 62
62 63
63 64
64 65
65 66
66 67
67 68
68 69
69 70
70 71
71 72
72 73
73 74
74 75
75 76
76 77
77 78
78 79
79 80
80 81
81 82
82 83
83 84
84 85
85 86
86 87
87 88
88 89
89 90
90 91
91 92
92 93
93 94
94 95
95 96
96 97
97 98
98 99
99 100
100 101
101 102
102 103
103 104
104 105
105 106
106 107
107 108
108 109
109 110
110


