Page 1435 of 1767

System Check
WARNING:
Never remove the radiator cap when the engine is hot. Serious
burns could occur from high pressure coolant escaping from
the radiator.
Wrap a thick cloth around the cap. Slowly turn it a quarter turn
to allow built-up pressure to escape. Carefully remove the cap
by turning it all the way.
CHECKING COOLING SYSTEM HOSES
Check hoses for the following:
IImproper attachment
ILeaks
ICracks
IDamage
IChafing
IDeterioration
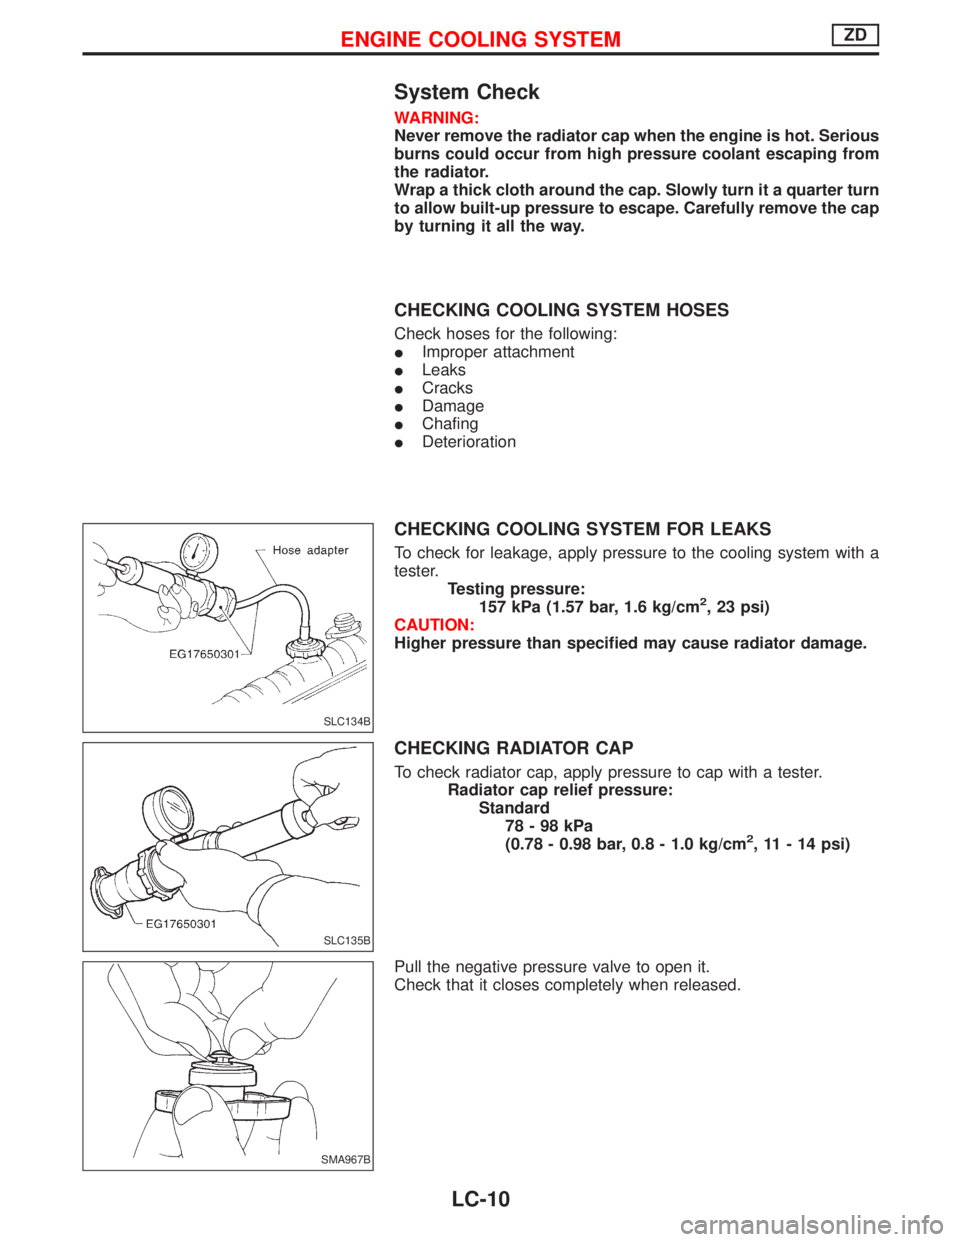
CHECKING COOLING SYSTEM FOR LEAKS
To check for leakage, apply pressure to the cooling system with a
tester.
Testing pressure:
157 kPa (1.57 bar, 1.6 kg/cm
2, 23 psi)
CAUTION:
Higher pressure than specified may cause radiator damage.
CHECKING RADIATOR CAP
To check radiator cap, apply pressure to cap with a tester.
Radiator cap relief pressure:
Standard
78-98kPa
(0.78 - 0.98 bar, 0.8 - 1.0 kg/cm
2, 11 - 14 psi)
Pull the negative pressure valve to open it.
Check that it closes completely when released.
SLC134B
SLC135B
SMA967B
ENGINE COOLING SYSTEMZD
LC-10
Page 1436 of 1767
Water Pump
CAUTION:
IWhen removing water pump assembly, be careful not to
get coolant on drive belt.
IWater pump cannot be disassembled and should be
replaced as a unit.
IAlways replace with new gasket.
IAfter installing water pump, connect hose and clamp
securely, then check for leaks using radiator cap tester.
Refer to MA section.
REMOVAL AND INSTALLATION
1. Drain coolant from radiator and cylinder block.
Refer to MA section (ªChanging Engine Coolantº, ªENGINE
MAINTENANCEº).
2. Remove radiator upper hose.
3. Remove radiator shroud.
4. Remove cooling fan.
5. Remove drive belt. Refer to MA section, ªChecking Drive Beltº.
6. Remove insulator.
7. Remove vacuum pipe.
8. Remove TDC sensor. Refer to EM section, ªTDC sensor
removal and installationº in ªTIMING GEARº.
9. Remove fan coupling with water pump.
10. Install in the reverse order of removal.
JLC373B
ENGINE COOLING SYSTEMZD
LC-11
Page 1438 of 1767
REMOVAL AND INSTALLATION
1. Drain engine coolant. Refer to MA section, ªChanging Engine
Coolantº.
2. Remove left side battery. (If so equipped)
3. Remove radiator upper hose.
4. Remove radiator shroud.
5. Remove intake air duct, inlet pipe.
6. Remove harness and connectors.
7. Install in reverse order of removal.
IAfter installation, run engine for a few minutes and check
for leaks.
IBe careful not to spill coolant in engine compartment. Use
a rag to absorb coolant.
INSPECTION
1. Check valve seating condition at ordinary temperatures. It
should seat tightly.
2. Check valve opening temperature and maximum valve lift.
Valve opening temperature ÉC (ÉF) 82 (180)
Maximum valve lift mm/ÉC (in/ÉF) 10/95 (0.39/203)
3. Then check if valve closes at 5ÉC (9ÉF) below valve opening
temperature.
Water Outlet
INSPECTION
Visual inspection for water leaks. If there is leakage, replace gas-
ket.
JLC384B
SLC695A
YLC033
ENGINE COOLING SYSTEMZD
Thermostat (Cont'd)
LC-13
Page 1440 of 1767

REMOVAL AND INSTALLATION
1. Remove under cover.
2. Drain engine coolant. Refer to MA section, ªChanging Engine
Coolantº.
3. Remove air cleaner case, air duct and resonator.
4. Remove battery (right side).
5. Remove radiator shroud (lower).
6. Remove radiator shroud (front).
7. Disconnect radiator hose (upper and lower).
8. Disconnect reservoir tank hose.
9. Disconnect A/T oil cooler hose (Only A/T models).
10. Remove radiator.
11. After repairing or replacing radiator, install all removed parts in
reverse order of removal.
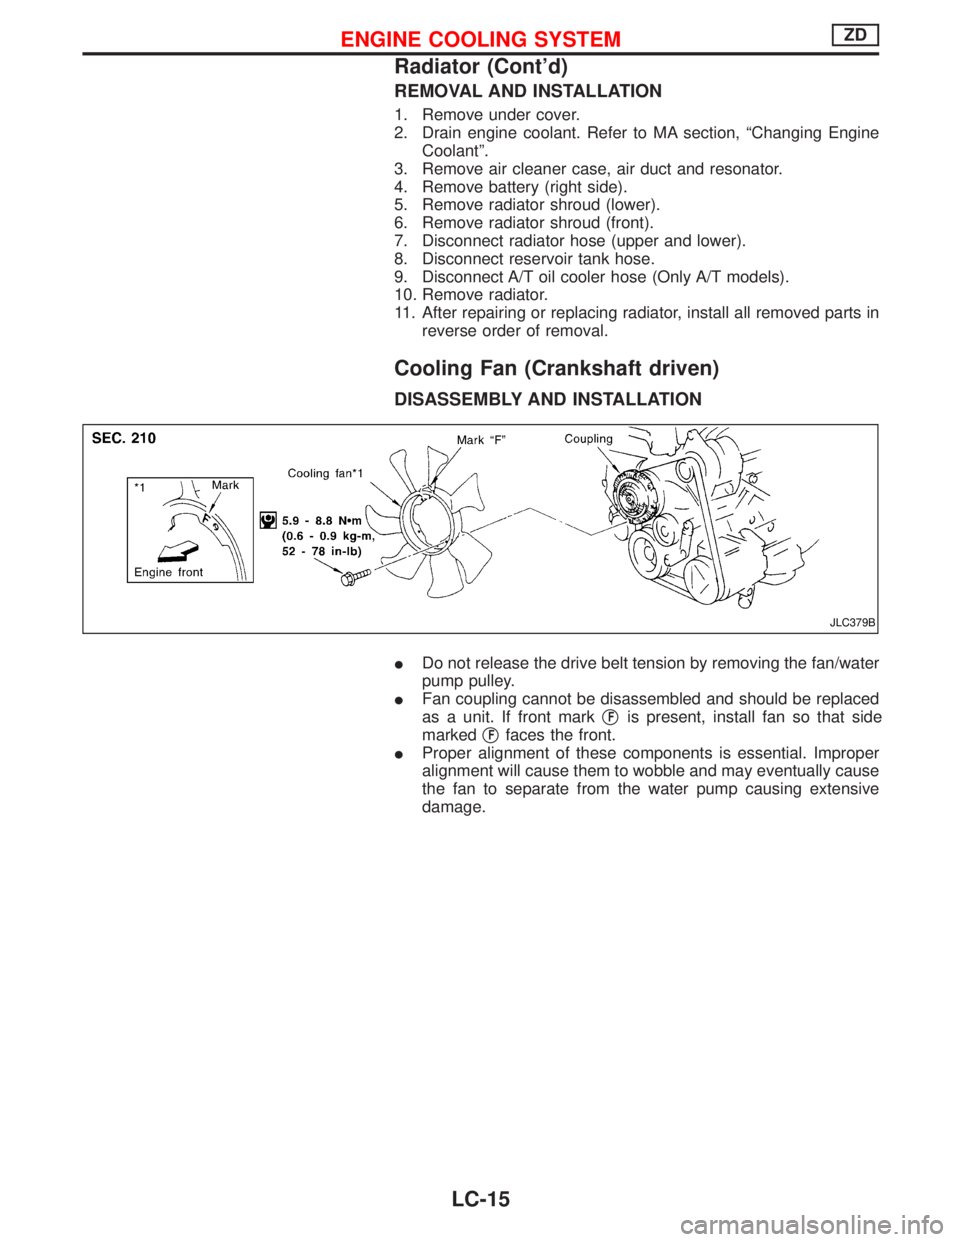
Cooling Fan (Crankshaft driven)
DISASSEMBLY AND INSTALLATION
IDo not release the drive belt tension by removing the fan/water
pump pulley.
IFan coupling cannot be disassembled and should be replaced
as a unit. If front markq
Fis present, install fan so that side
markedq
Ffaces the front.
IProper alignment of these components is essential. Improper
alignment will cause them to wobble and may eventually cause
the fan to separate from the water pump causing extensive
damage.
JLC379B
ENGINE COOLING SYSTEMZD
Radiator (Cont'd)
LC-15
Page 1444 of 1767
LIQUID GASKET APPLICATION PROCEDURE
a. Before applying liquid gasket, use a scraper to remove all
traces of old liquid gasket from mating surface.
b. Apply a continuous bead of liquid gasket to mating sur-
faces.
(Use Genuine Liquid Gasket or equivalent.)
IBe sure liquid gasket is 3.5 to 4.5 mm (0.138 to 0.177
in) wide (for oil pan).
IBe sure liquid gasket is 2.0 to 3.0 mm (0.079 to 0.118
in) wide (in areas except oil pan).
c. Apply liquid gasket to inner sealing surface around hole
perimeter area.
(Assembly should be done within 5 minutes after coating.)
d. Wait at least 30 minutes before refilling engine oil and
engine coolant.
SEM371C
PRECAUTIONTD27Ti
LC-19
Page 1454 of 1767
Water Pump
REMOVAL AND INSTALLATION
Drain coolant from drain plugs on cylinder block and radiator.
Cylinder block drain plug:
(Use proper sealant)
:20-29N×m (2.0 - 3.0 kg-m, 14 - 22 ft-lb)
CAUTION:
IWhen removing water pump assembly, be careful not to
spill coolant on drive belt.
IWater pump cannot be disassembled and should be
replaced as a unit.
IAlways replace with new gasket.
IAfter installing water pump, connect hose and clamp
securely, then check for leaks using radiator cap tester.
NLC012
NLC058
ENGINE COOLING SYSTEMTD27Ti
LC-29
Page 1456 of 1767
Thermostat
q1Water outlet
q
2Thermostat with jiggle valve
q
3Rubber sealq
4Water connector
q
5Thermostat housingq
6Engine coolant temperature sen-
sor
q
7Thermal transmitter
CAUTION:
IAfter installation, run engine for a few minutes, and check
for leaks.
IBe careful not to spill coolant over engine compartment.
Place a rag to absorb coolant.
INSPECTION
1. Check for valve seating condition at ordinary temperatures. It
should seat tightly.
2. Check valve opening temperature and maximum valve lift.
Standard type Optional type
Valve opening temperature ÉC (ÉF) 82 (180) 88 (190)
Max. valve lift
mm/ÉC (in/ÉF)8/95
(0.315/203)8/100
(0.315/212)
3. Then check if valve closes at 5ÉC (9ÉF) below valve opening
temperature.
NLC059
SLC343
ENGINE COOLING SYSTEMTD27Ti
LC-31
Page 1457 of 1767
Radiator
CAUTION:
When filling radiator with coolant, refer to MA section.
NLC082
ENGINE COOLING SYSTEMTD27Ti
LC-32