2002 NISSAN QUEST rear entertainment
[x] Cancel search: rear entertainmentPage 111 of 294
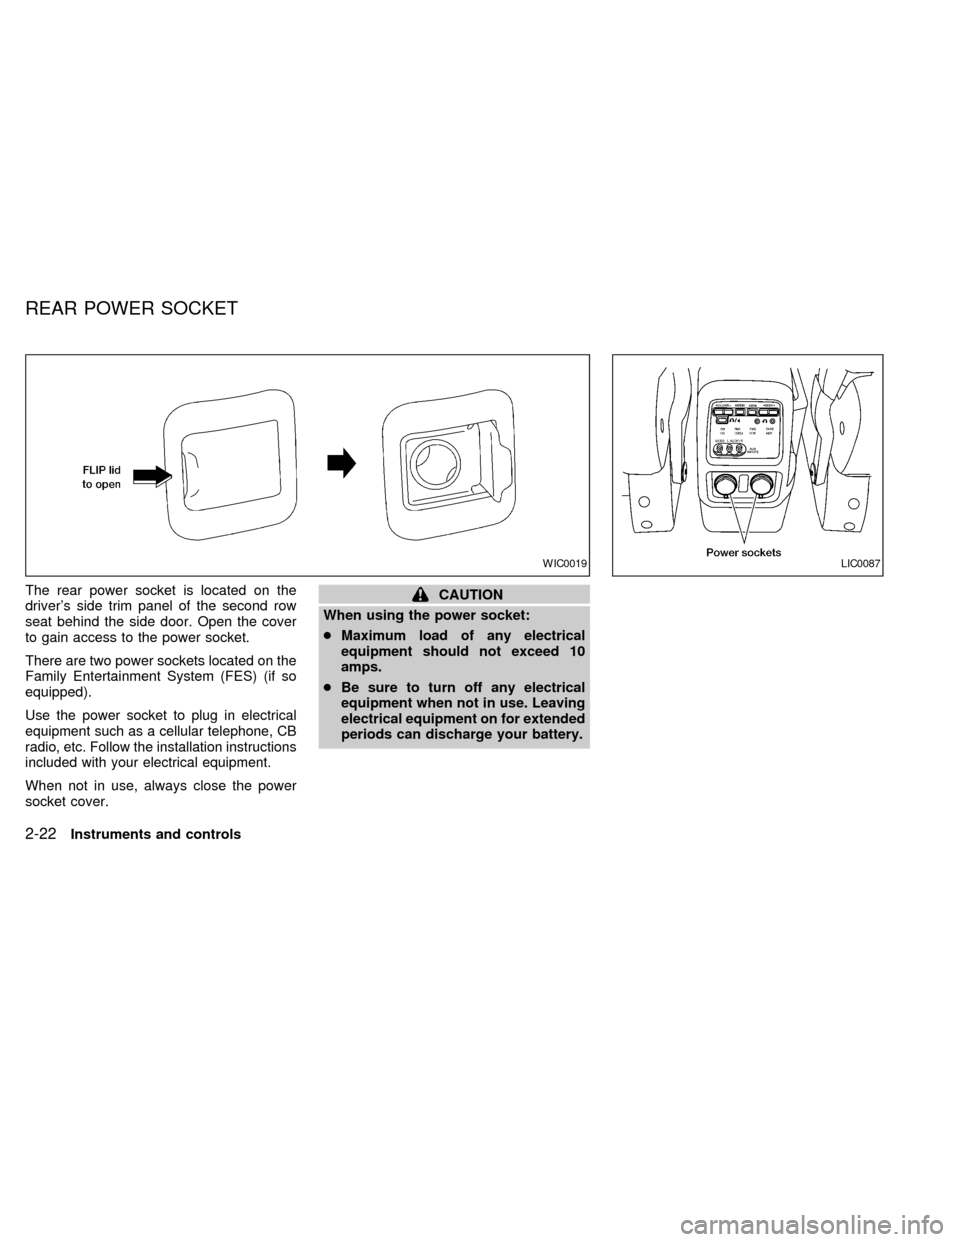
The rear power socket is located on the
driver's side trim panel of the second row
seat behind the side door. Open the cover
to gain access to the power socket.
There are two power sockets located on the
Family Entertainment System (FES) (if so
equipped).
Use the power socket to plug in electrical
equipment such as a cellular telephone, CB
radio, etc. Follow the installation instructions
included with your electrical equipment.
When not in use, always close the power
socket cover.
CAUTION
When using the power socket:
cMaximum load of any electrical
equipment should not exceed 10
amps.
cBe sure to turn off any electrical
equipment when not in use. Leaving
electrical equipment on for extended
periods can discharge your battery.
WIC0019LIC0087
REAR POWER SOCKET
2-22Instruments and controls
ZX
Page 144 of 294

4Heater, air conditioner and audio systems
Ventilators ..............................................................4-2
Center ventilators ..............................................4-2
Side ventilators ..................................................4-2
Heater and air conditioner (manual) ......................4-3
Controls .............................................................4-3
Heater operation ................................................4-4
Air conditioner operation ...................................4-5
Air flow charts ....................................................4-7
Heater and air conditioner (automatic)
(if so equipped) ....................................................4-11
Automatic operation ........................................4-12
Rear seat air conditioner (if so equipped) ...........4-14
Controls ...........................................................4-14
Servicing air conditioning .....................................4-15
Audio system ........................................................4-16
Radio ...............................................................4-16
FM radio reception ..........................................4-16
AM radio reception ..........................................4-16
Audio operation precautions ...........................4-17FM-AM radio with cassette player...................4-20
FM-AM radio with cassette player and
compact disc (CD) player ................................4-26
Compact disc (CD) player (if so
equipped) .........................................................4-32
CD care and cleaning......................................4-33
Steering wheel switch for audio controls
(if so equipped)................................................4-34
Rear audio controls (if so equipped) ...............4-35
Antenna ...........................................................4-37
AutovisionTfamily entertainment system
(FES) (if so equipped) ..........................................4-37
Rear seat entertainment module
(RSEM) (if so equipped)..................................4-41
Care and maintenance ....................................4-43
Troubleshooting ...............................................4-44
Specifications ..................................................4-45
Car phone or CB radio .........................................4-46
ZX
Page 180 of 294
ANTENNA
The manual antenna on your vehicle re-
mains in the up position at all times. The
antenna cannot be shortened, but can be
removed. When you need to remove the
antenna, turn the antenna rod counterclock-
wise.
To install the antenna rod, turn the antenna
clockwise. Tighten the antenna rod to speci-
fication using a suitable tool such as a
open-end wrench. The antenna rod tighten-
ing specification is 3.4 - 3.6 Nzm(30-32
in-lb). Do not use pliers to tighten the an-
tenna as they can leave marks on the an-
tenna surface. The antenna rod cannot be
hand tightened to the proper specification.
CAUTION
Always properly tighten the antenna
rod during installation or the antenna
rod may break during vehicle operation.
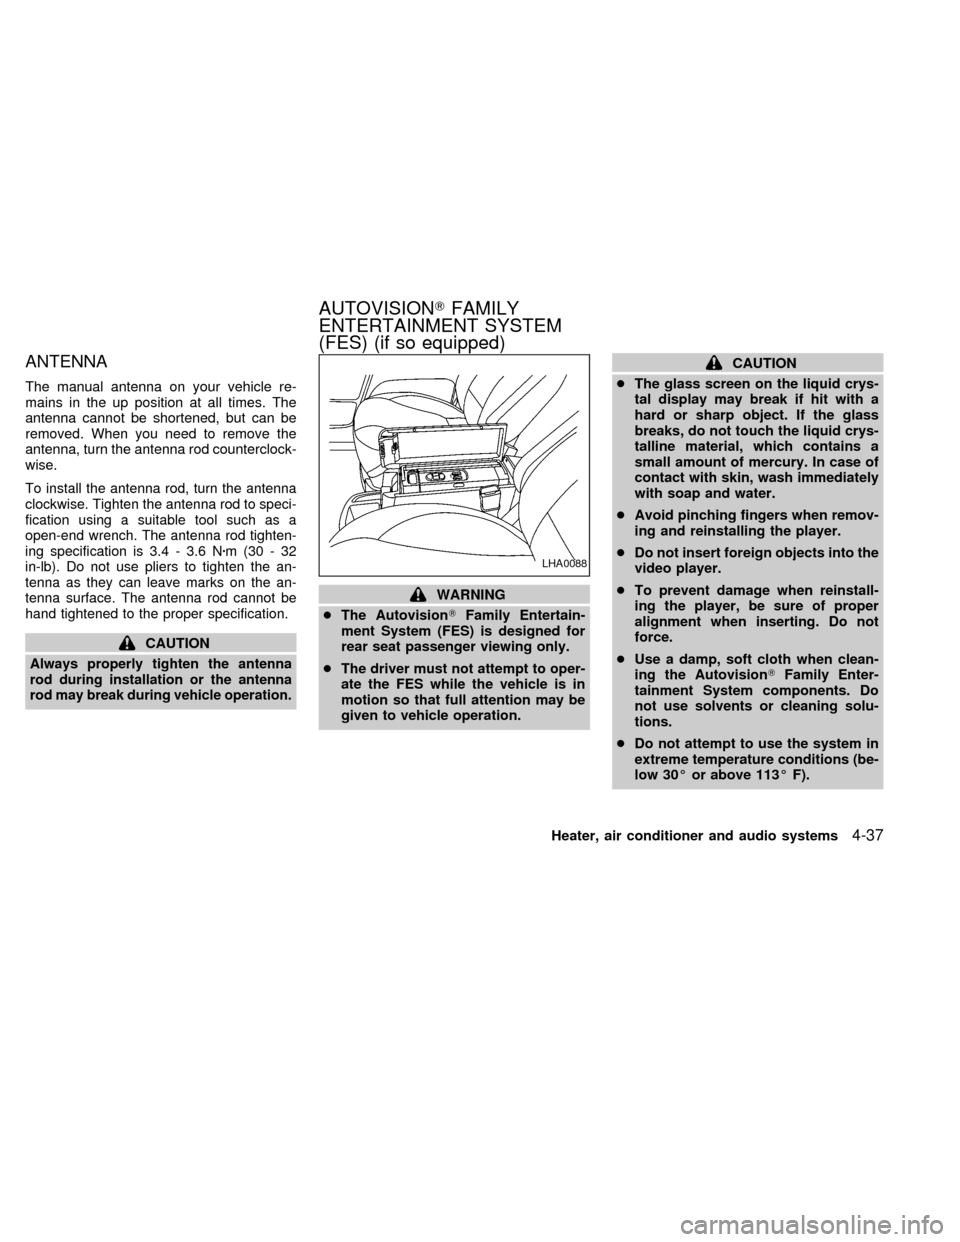
WARNING
cThe AutovisionTFamily Entertain-
ment System (FES) is designed for
rear seat passenger viewing only.
cThe driver must not attempt to oper-
ate the FES while the vehicle is in
motion so that full attention may be
given to vehicle operation.
CAUTION
cThe glass screen on the liquid crys-
tal display may break if hit with a
hard or sharp object. If the glass
breaks, do not touch the liquid crys-
talline material, which contains a
small amount of mercury. In case of
contact with skin, wash immediately
with soap and water.
cAvoid pinching fingers when remov-
ing and reinstalling the player.
cDo not insert foreign objects into the
video player.
cTo prevent damage when reinstall-
ing the player, be sure of proper
alignment when inserting. Do not
force.
cUse a damp, soft cloth when clean-
ing the AutovisionTFamily Enter-
tainment System components. Do
not use solvents or cleaning solu-
tions.
cDo not attempt to use the system in
extreme temperature conditions (be-
low 30É or above 113É F).
LHA0088
AUTOVISIONTFAMILY
ENTERTAINMENT SYSTEM
(FES) (if so equipped)
Heater, air conditioner and audio systems4-37
ZX
Page 184 of 294
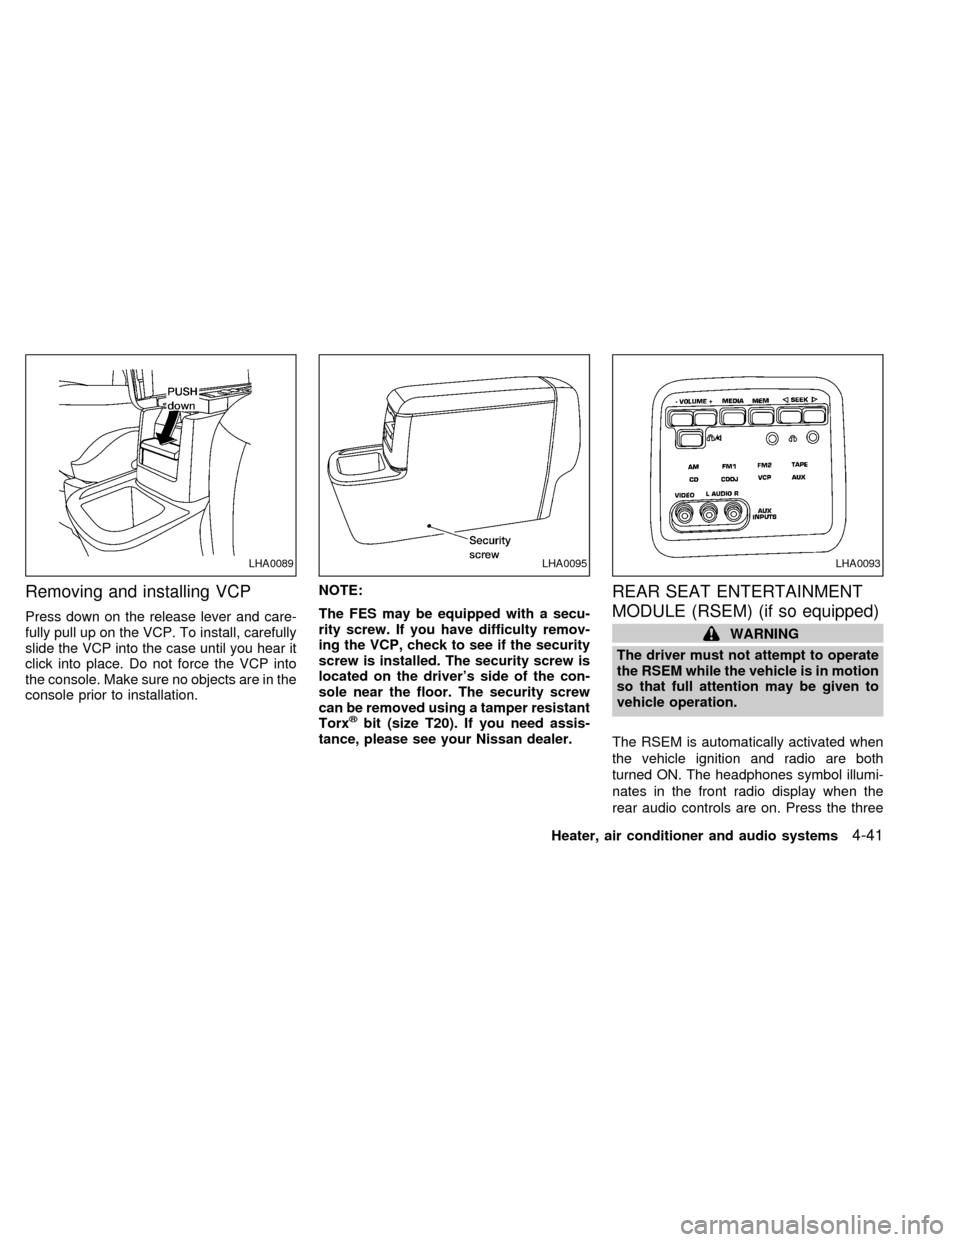
Removing and installing VCP
Press down on the release lever and care-
fully pull up on the VCP. To install, carefully
slide the VCP into the case until you hear it
click into place. Do not force the VCP into
the console. Make sure no objects are in the
console prior to installation.NOTE:
The FES may be equipped with a secu-
rity screw. If you have difficulty remov-
ing the VCP, check to see if the security
screw is installed. The security screw is
located on the driver's side of the con-
sole near the floor. The security screw
can be removed using a tamper resistant
Torx
žbit (size T20). If you need assis-
tance, please see your Nissan dealer.
REAR SEAT ENTERTAINMENT
MODULE (RSEM) (if so equipped)
WARNING
The driver must not attempt to operate
the RSEM while the vehicle is in motion
so that full attention may be given to
vehicle operation.
The RSEM is automatically activated when
the vehicle ignition and radio are both
turned ON. The headphones symbol illumi-
nates in the front radio display when the
rear audio controls are on. Press the three
LHA0089LHA0095LHA0093
Heater, air conditioner and audio systems4-41
ZX
Page 186 of 294
also be connected to the auxiliary jacks.
The auxiliary jacks are color coded for iden-
tification purposes.
cYellow - video input
cWhite - left channel audio input
cRed - right channel audio input
DUAL PLAY mode
Dual Play Mode allows the rear seat pas-
sengers to listen to one media source while
the front seat passengers listen to another.
To activate, press the speaker control but-
ton and plug a headphone into the head-
phone jack. With the headphones ON, the
rear speaker will not operate. Select the
desired media and adjust as necessary.
Press the speaker control button again to
operate the rear speakers and disengage
Dual Play Mode.
IN-HOME use
Your AutovisionTFamily Entertainment
System is UL registered for in-home use.
To use the FES system in your home, you
will need:c12V DC power converter rated for 1.5
amps/minute
cPatch cords with RCA style connectors
CARE AND MAINTENANCE
Use a lightly dampened, lint free cloth to
clean the surfaces of your Family Entertain-
ment System. (VCP face, monitor screen,
remote control, etc.)
CAUTION
cDo not use any solvents or cleaning
solutions when cleaning the video
system.
cDo not use excessive force on the
monitor screen.
cAvoid touching or scratching the
monitor screen as it may become
dirty or damaged.
Your Family Entertainment System is com-
patible with any cassette tape bearing the
VHS mark. We recommend storing your
video cassettes in a moisture free, dust free
container.
CAUTION
cDo not attempt to operate the system
in extreme temperature conditions
(below 30É and above 113É Fahren-
heit).
cDo not attempt to operate the system
in extreme humidity conditions (less
than 10% or more than 75%).
Tape head cleaning
Normally the VCP will not require frequent
head cleaning. However, after long periods
of usage dirt can collect on the video heads,
causing the picture to become blurred or
interrupted. In this case, head cleaning may
be required.
To clean the video heads, obtain a head
cleaning tape from your local video store.
Be sure to completely follow the instructions
included with the cleaning tape. Excessive
cleaning can shorten video head life.
Heater, air conditioner and audio systems
4-43
ZX
Page 289 of 294
Heater and air conditioner controls
(automatic) ............................................ 4-11
Heater and air conditioner controls
(manual).................................................. 4-3
Rear seat air conditioner ...................... 4-14
Coolant
Capacities and recommended fuel/
lubricants ................................................ 9-2
Changing engine coolant........................ 8-9
Checking engine coolant level ............... 8-8
Engine coolant temperature gauge ........ 2-6
Cornering light ........................................... 2-19
Corrosion protection .................................... 7-4
Cruise control............................................. 5-10
Cup holders ............................................... 2-25
D
Daytime running light system (Canada
only) ........................................................... 2-17
Defogger switch
Rear window defogger switch .............. 2-16
Dimensions and weights.............................. 9-9
Door locks .................................................... 3-2
Door open warning light .............................. 2-9
Drive belts .................................................. 8-16
Driving
Cold weather driving............................. 5-16
Driving with automatic transmission ....... 5-6
Precautions when starting and driving ... 5-2E
Economy - fuel........................................... 5-12
Emission control information label............. 9-11
Emission control system warranty ............. 9-20
Engine
Before starting the engine ...................... 5-5
Capacities and recommended fuel/
lubricants ................................................ 9-2
Changing engine coolant........................ 8-9
Changing engine oil.............................. 8-10
Changing engine oil filter...................... 8-11
Checking engine coolant level ............... 8-8
Checking engine oil level ....................... 8-9
Engine compartment check locations .... 8-7
Engine coolant temperature gauge ........ 2-6
Engine cooling system ........................... 8-8
Engine oil ................................................ 8-9
Engine oil and oil filter
recommendation ..................................... 9-4
Engine oil pressure warning light ........... 2-8
Engine oil viscosity ................................. 9-5
Engine serial number ........................... 9-11
Starting the engine ................................. 5-5
Exhaust gas (Carbon monoxide) ................. 5-2
F
Family entertainment system..................... 4-37
Five passenger seating ............................. 1-28
Five passenger seating with cargo room .. 1-29Flashers (See hazard warning flasher
switch) ........................................................ 2-19
Flat tire ......................................................... 6-2
Flexible seating .......................................... 1-12
Floor mat positioning ........................ 1-27, 1-30
Floor mat positioning aid ........................... 1-30
Fluid
Automatic transmission fluid (ATF) ...... 8-12
Brake fluid ..................................... 8-13, 9-2
Capacities and recommended fuel/
lubricants ................................................ 9-2
Engine coolant ........................................ 8-8
Engine oil ................................................ 8-9
Power steering fluid ...................... 8-13, 9-2
Window washer fluid ............................ 8-14
F.M.V.S.S. certification label ..................... 9-11
Fuel
Capacities and recommended fuel/
lubricants ................................................ 9-2
Fuel economy ....................................... 5-12
Fuel filler lid and cap ............................ 3-10
Fuel filler lid lock opener lever ............. 3-10
Fuel gauge.............................................. 2-6
Fuel octane rating................................... 9-3
Fuel recommendation ............................. 9-2
Inertia fuel shut-off switch .................... 6-11
Fuses ......................................................... 8-22
10-2
ZX