2002 NISSAN QUEST fuel cap
[x] Cancel search: fuel capPage 3 of 294

Welcome To The World Of NISSAN
Your new NISSAN is the result of our dedication
to produce the finest in safe, reliable and eco-
nomical transportation. Your vehicle is the prod-
uct of a successful worldwide company that
manufactures cars and trucks in over 17 coun-
tries and distributes them in 170 nations.
NISSAN vehicles are designed and manufactured
by Nissan Motor Co., Ltd. which was founded in
Tokyo, Japan in 1933, and NISSAN affiliates world-
wide, collectively growing to become the fifth largest
automaker in the world. In addition to cars and
trucks, NISSAN also makes forklift trucks, marine
engines, boats and other diversified products.
NISSAN has made a substantial and growing
investment in North America. NISSAN's commit-
ment is nearly $4 billion dollars in capital invest-
ments in facilities across the continent. Some of
the facilities include the Nissan Manufacturing
facility in Smyrna, Tennessee, vehicle stylingdesign at Nissan Design America, Inc. in San
Diego, California, and engineering at Nissan
Technical Center North America in Farmington
Hills, Michigan. Additionally, NISSAN employs
nearly 18,000 people throughout the United
States, Canada, and Mexico. An additional
71,000 people work for the 1,500 NISSAN and
INFINITI dealers across North America.
NISSAN is also a substantial contributor to the
Canadian economy. Nissan Canada Inc., its sup-
pliers and over 140 dealers employ approxi-
mately 4,500 people. These include company
employees and the staffs of NISSAN dealers all
across Canada. In addition, many Canadians
work for companies that supply NISSAN and
NISSAN dealers with materials and services
ranging from the operation of port facilities and
transportation services, to the supply of lubri-
cants, parts and accessories.NISSAN pioneered the use of electronics and
computers in automobiles, and has led the indus-
try in improving both performance and fuel effi-
ciency through new engine designs and the use
of synthetic materials to reduce vehicle weight.
The company has also developed ways to build
quality into its vehicles at each stage of the
production process, both through extensive use
of automation and Ð most importantly Ð
through an awareness thatpeopleare the cen-
tral element in quality control.
From the time the parts arrived from our suppli-
ers until you took delivery of your new NISSAN,
dozens of checks were made to ensure that only
the best job was being done in producing and
delivering your vehicle. NISSAN also takes great
care to ensure that when you take your NISSAN
to your dealer for maintenance, the service techni-
cian will perform his work according to the quality
standards that have been established by the
factory.
Safety has also been built into your NISSAN. As
you know, seat belts are an integral part of the
safety systems that will help protect you and your
passengers in the event of a sudden stop or an
accident. We urge you to use the seat belts every
time you drive the vehicle.
The NISSAN story of growth and achievement
reflects our major goal: to provide you, our
customer, with a vehicle that is built with quality
and craftsmanship Ð a product that we can be
proud to build and you can be proud to own.
WFW0002
ZX
Page 100 of 294

Turn signal/hazard indicator
lights
The appropriate light flashes when the turn
signal lever is activated.
Both lights flash when the hazard switch is
turned on.
High beam indicator light
(Blue)
This light comes on when the headlight high
beam is on and goes out when the low
beam is selected.
Cruise main switch indicator
light
The light comes on when the cruise control
main switch is pushed. The light goes out
when the main switch is pushed again.
While the cruise main switch indicator light
comes on, the cruise control system is
operational.
Cruise set switch indicator
light
The light comes on while the vehicle speed is
controlled by the cruise control system. If the
light blinks while the engine is running, it mayindicate the cruise control system is not
functioning properly. Have the system
checked by your NISSAN dealer.
Malfunction indicator lamp
(MIL)
If this indicator lamp comes on steady or
blinks while the engine is running, it may
indicate a potential emission control mal-
function.
The malfunction indicator lamp may also
come on steady if the fuel filler cap is loose
or missing, or if the vehicle runs out of fuel.
Check to make sure the fuel filler cap is
installed and closed tightly, and that the
vehicle has at least three gallons of fuel in
the fuel tank.
After a few driving trips, the
lamp
should turn off if no other potential emission
control system malfunction exists.
Operation
The malfunction indicator lamp will come on
in one of two ways:
cMalfunction indicator lamp on steady - An
emission control system malfunction has
been detected. Check the fuel filler cap. Ifthe fuel filler cap is loose or missing,
tighten or install the cap and continue to
drive the vehicle. The
lamp should
turn off after a few driving trips. If the
lamp does not turn off after a few
driving trips, have the vehicle inspected
by an authorized NISSAN dealer. You do
not need to have your vehicle towed to
the dealer.
cMalfunction indicator lamp blinking - An
engine misfire has been detected which
may damage the emission control sys-
tem. To reduce or avoid emission control
system damage:
a) do not drive at speeds above 45 MPH
(72 km/h).
b)
avoid hard acceleration or deceleration.c) avoid steep uphill grades.
d) if possible, reduce the amount of
cargo being hauled or towed.
The malfunction indicator lamp may stop
blinking and come on steady. Have the
vehicle inspected by an authorized NISSAN
dealer. You do not need to have your ve-
hicle towed to the dealer.
Instruments and controls
2-11
ZX
Page 130 of 294

3 Pre-driving checks and adjustments
Keys .......................................................................3-2
Doors ......................................................................3-2
Locking with key ................................................3-3
Locking with inside lock knob............................3-3
Locking with power door lock switch.................3-4
Child safety sliding door locks...........................3-5
Remote keyless entry system ................................3-6
How to use remote keyless entry
system ...............................................................3-6
Battery replacement ..........................................3-8
Hood .......................................................................3-9
Rear door .............................................................3-10Fuel filler lid ..........................................................3-10
Opener operation ............................................3-10
Fuel filler cap ...................................................3-10
Steering wheel .....................................................3-11
Tilt operation ....................................................3-11
Sun visors.............................................................3-12
Vanity mirror ....................................................3-12
Mirrors ..................................................................3-12
Memory driver seat and mirrors
(if so equipped)................................................3-12
Inside mirror.....................................................3-13
Outside mirrors ................................................3-14
ZX
Page 139 of 294

Key operation
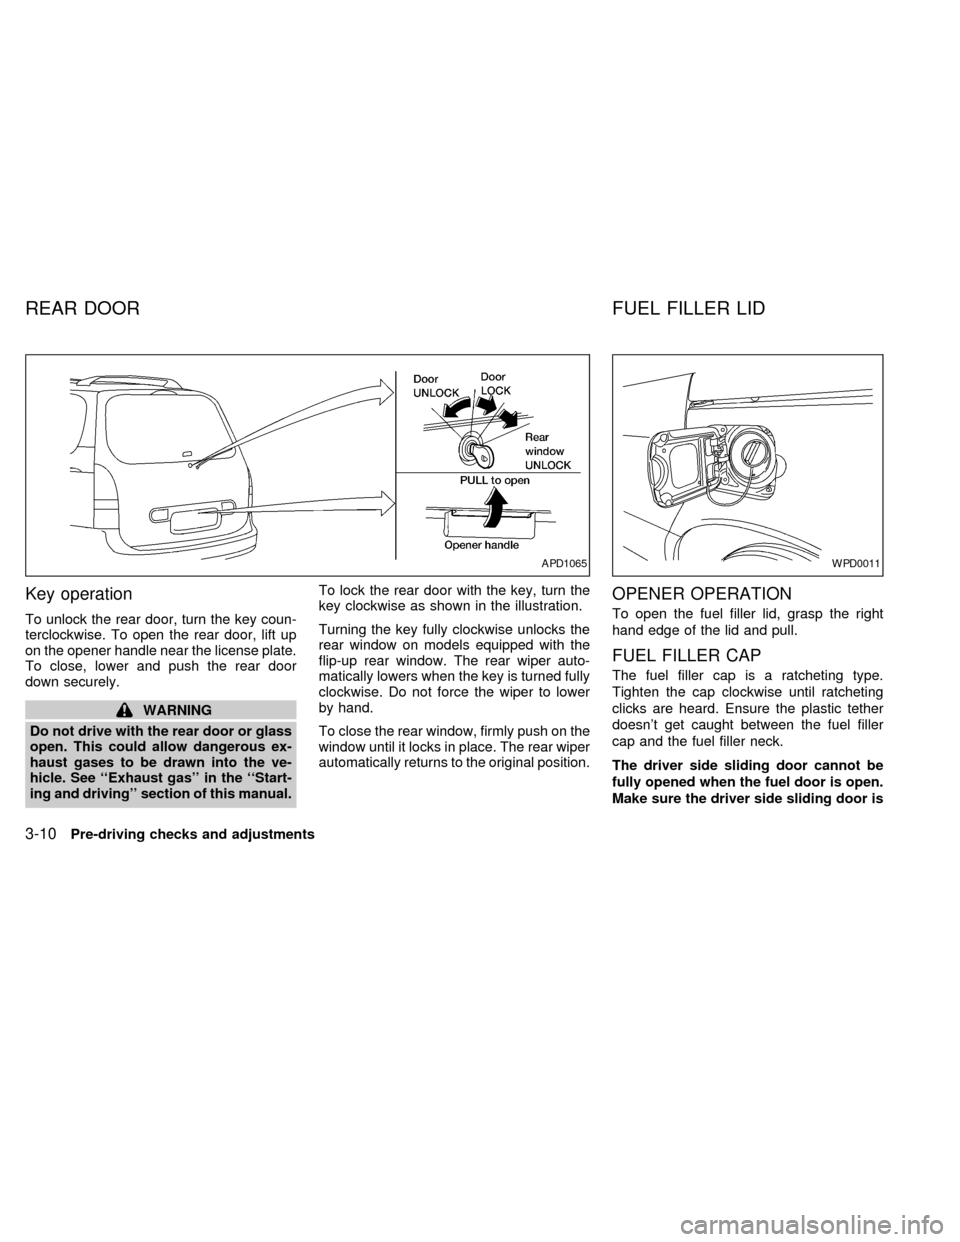
To unlock the rear door, turn the key coun-
terclockwise. To open the rear door, lift up
on the opener handle near the license plate.
To close, lower and push the rear door
down securely.
WARNING
Do not drive with the rear door or glass
open. This could allow dangerous ex-
haust gases to be drawn into the ve-
hicle. See ``Exhaust gas'' in the ``Start-
ing and driving'' section of this manual.To lock the rear door with the key, turn the
key clockwise as shown in the illustration.
Turning the key fully clockwise unlocks the
rear window on models equipped with the
flip-up rear window. The rear wiper auto-
matically lowers when the key is turned fully
clockwise. Do not force the wiper to lower
by hand.
To close the rear window, firmly push on the
window until it locks in place. The rear wiper
automatically returns to the original position.
OPENER OPERATION
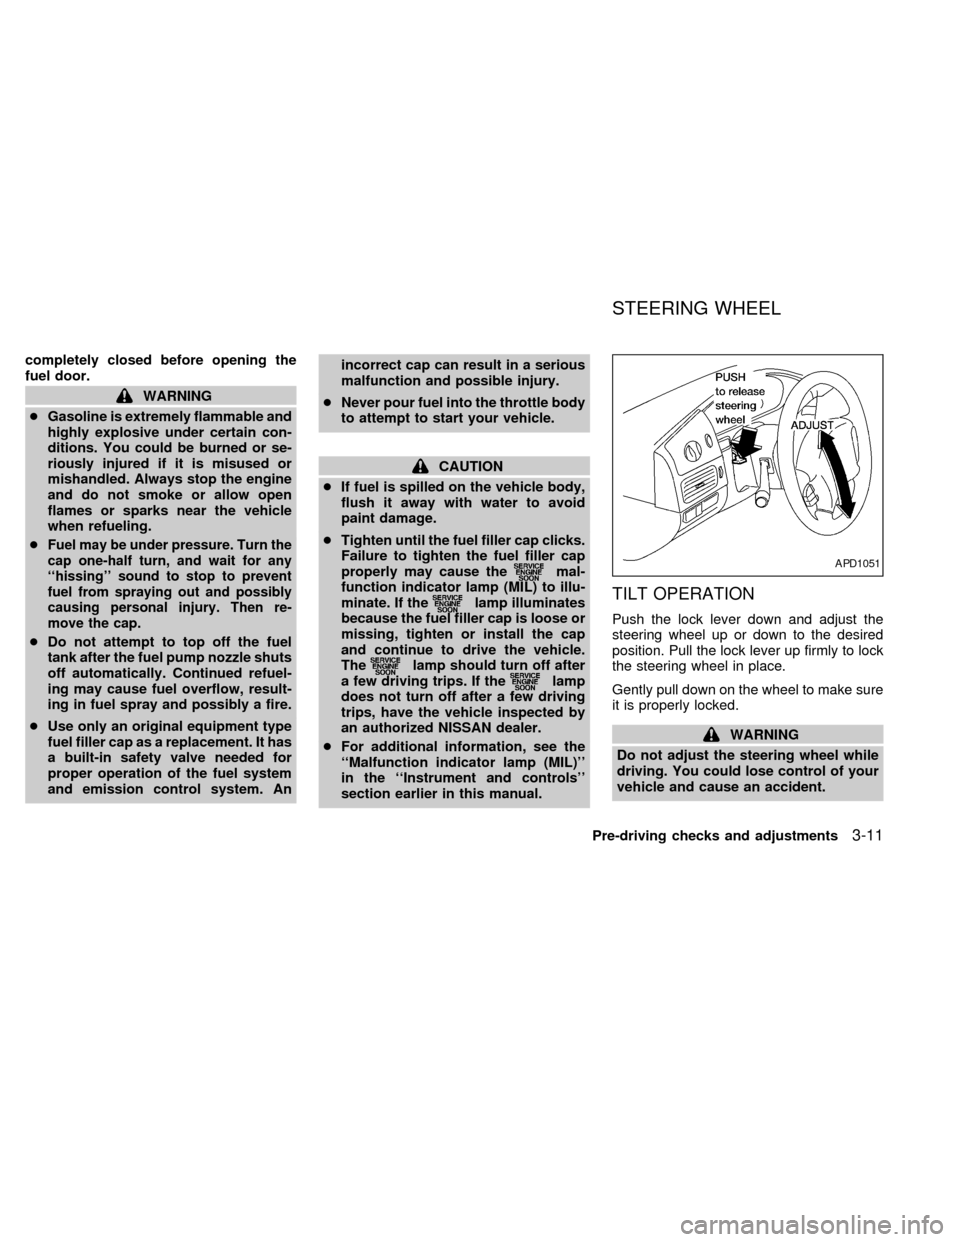
To open the fuel filler lid, grasp the right
hand edge of the lid and pull.
FUEL FILLER CAP
The fuel filler cap is a ratcheting type.
Tighten the cap clockwise until ratcheting
clicks are heard. Ensure the plastic tether
doesn't get caught between the fuel filler
cap and the fuel filler neck.
The driver side sliding door cannot be
fully opened when the fuel door is open.
Make sure the driver side sliding door is
APD1065WPD0011
REAR DOOR FUEL FILLER LID
3-10Pre-driving checks and adjustments
ZX
Page 140 of 294

completely closed before opening the
fuel door.
WARNING
cGasoline is extremely flammable and
highly explosive under certain con-
ditions. You could be burned or se-
riously injured if it is misused or
mishandled. Always stop the engine
and do not smoke or allow open
flames or sparks near the vehicle
when refueling.
c
Fuel may be under pressure. Turn the
cap one-half turn, and wait for any
``hissing'' sound to stop to prevent
fuel from spraying out and possibly
causing personal injury. Then re-
move the cap.
cDo not attempt to top off the fuel
tank after the fuel pump nozzle shuts
off automatically. Continued refuel-
ing may cause fuel overflow, result-
ing in fuel spray and possibly a fire.
cUse only an original equipment type
fuel filler cap as a replacement. It has
a built-in safety valve needed for
proper operation of the fuel system
and emission control system. Anincorrect cap can result in a serious
malfunction and possible injury.
cNever pour fuel into the throttle body
to attempt to start your vehicle.
CAUTION
cIf fuel is spilled on the vehicle body,
flush it away with water to avoid
paint damage.
cTighten until the fuel filler cap clicks.
Failure to tighten the fuel filler cap
properly may cause the
mal-
function indicator lamp (MIL) to illu-
minate. If the
lamp illuminates
because the fuel filler cap is loose or
missing, tighten or install the cap
and continue to drive the vehicle.
The
lamp should turn off after
a few driving trips. If thelamp
does not turn off after a few driving
trips, have the vehicle inspected by
an authorized NISSAN dealer.
cFor additional information, see the
``Malfunction indicator lamp (MIL)''
in the ``Instrument and controls''
section earlier in this manual.
TILT OPERATION
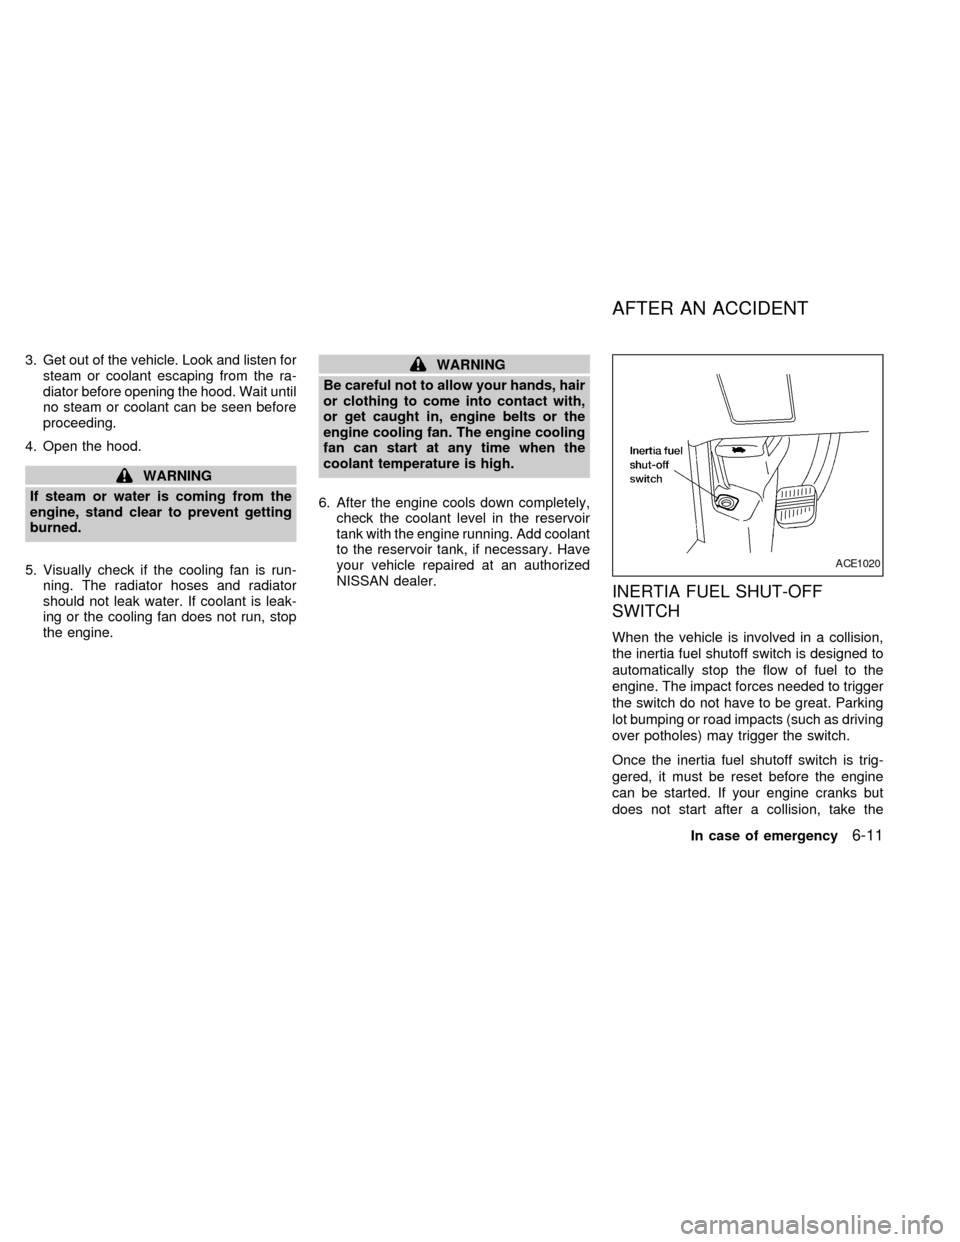
Push the lock lever down and adjust the
steering wheel up or down to the desired
position. Pull the lock lever up firmly to lock
the steering wheel in place.
Gently pull down on the wheel to make sure
it is properly locked.
WARNING
Do not adjust the steering wheel while
driving. You could lose control of your
vehicle and cause an accident.
APD1051
STEERING WHEEL
Pre-driving checks and adjustments3-11
ZX
Page 218 of 294

3. Get out of the vehicle. Look and listen for
steam or coolant escaping from the ra-
diator before opening the hood. Wait until
no steam or coolant can be seen before
proceeding.
4. Open the hood.
WARNING
If steam or water is coming from the
engine, stand clear to prevent getting
burned.
5. Visually check if the cooling fan is run-
ning. The radiator hoses and radiator
should not leak water. If coolant is leak-
ing or the cooling fan does not run, stop
the engine.
WARNING
Be careful not to allow your hands, hair
or clothing to come into contact with,
or get caught in, engine belts or the
engine cooling fan. The engine cooling
fan can start at any time when the
coolant temperature is high.
6. After the engine cools down completely,
check the coolant level in the reservoir
tank with the engine running. Add coolant
to the reservoir tank, if necessary. Have
your vehicle repaired at an authorized
NISSAN dealer.
INERTIA FUEL SHUT-OFF
SWITCH
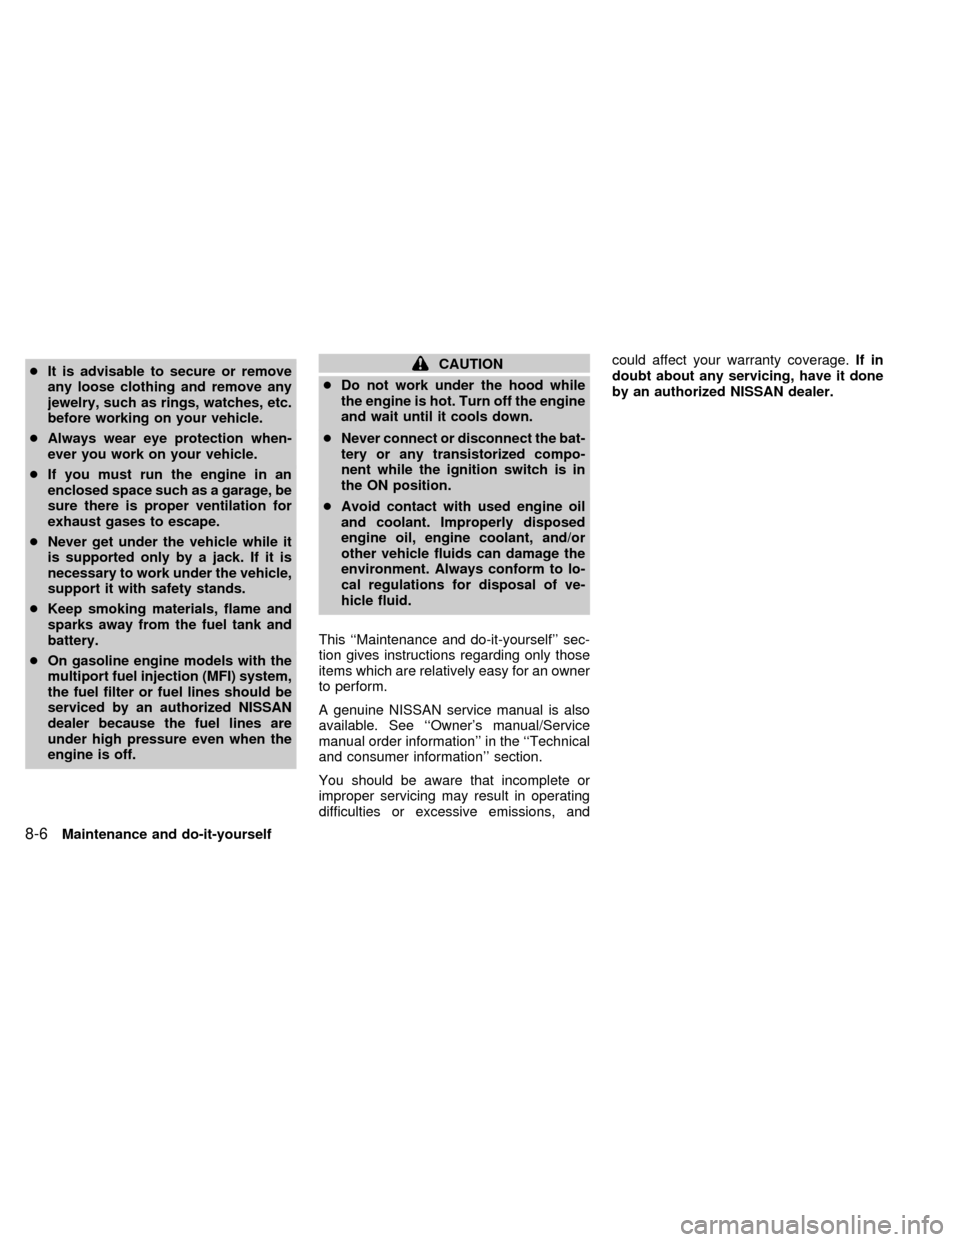
When the vehicle is involved in a collision,
the inertia fuel shutoff switch is designed to
automatically stop the flow of fuel to the
engine. The impact forces needed to trigger
the switch do not have to be great. Parking
lot bumping or road impacts (such as driving
over potholes) may trigger the switch.
Once the inertia fuel shutoff switch is trig-
gered, it must be reset before the engine
can be started. If your engine cranks but
does not start after a collision, take the
ACE1020
AFTER AN ACCIDENT
In case of emergency6-11
ZX
Page 233 of 294

cIt is advisable to secure or remove
any loose clothing and remove any
jewelry, such as rings, watches, etc.
before working on your vehicle.
cAlways wear eye protection when-
ever you work on your vehicle.
cIf you must run the engine in an
enclosed space such as a garage, be
sure there is proper ventilation for
exhaust gases to escape.
cNever get under the vehicle while it
is supported only by a jack. If it is
necessary to work under the vehicle,
support it with safety stands.
cKeep smoking materials, flame and
sparks away from the fuel tank and
battery.
cOn gasoline engine models with the
multiport fuel injection (MFI) system,
the fuel filter or fuel lines should be
serviced by an authorized NISSAN
dealer because the fuel lines are
under high pressure even when the
engine is off.CAUTION
cDo not work under the hood while
the engine is hot. Turn off the engine
and wait until it cools down.
cNever connect or disconnect the bat-
tery or any transistorized compo-
nent while the ignition switch is in
the ON position.
cAvoid contact with used engine oil
and coolant. Improperly disposed
engine oil, engine coolant, and/or
other vehicle fluids can damage the
environment. Always conform to lo-
cal regulations for disposal of ve-
hicle fluid.
This ``Maintenance and do-it-yourself'' sec-
tion gives instructions regarding only those
items which are relatively easy for an owner
to perform.
A genuine NISSAN service manual is also
available. See ``Owner's manual/Service
manual order information'' in the ``Technical
and consumer information'' section.
You should be aware that incomplete or
improper servicing may result in operating
difficulties or excessive emissions, andcould affect your warranty coverage.If in
doubt about any servicing, have it done
by an authorized NISSAN dealer.
8-6Maintenance and do-it-yourself
ZX
Page 264 of 294

9 Technical and consumer information
Capacities and recommended fuel/lubricants ........9-2
Fuel recommendation ........................................9-2
Engine oil and oil filter recommendation ...........9-4
Recommended SAE viscosity number ..............9-6
Air conditioner system refrigerant and
lubricant recommendations ...............................9-6
Specifications .........................................................9-7
Engine ...............................................................9-7
Wheels and tires................................................9-9
Dimensions and weights ...................................9-9
When traveling or registering your vehicle in
another country ....................................................9-10
Vehicle identification ............................................9-10
Vehicle identification number (VIN)
plate .................................................................9-10
Vehicle identification number
(chassis number) .............................................9-10
Engine serial number ......................................9-11
F.M.V.S.S. certification label ...........................9-11
Emission control information label ..................9-11Tire placard......................................................9-12
Air conditioner specification label ....................9-12
Installing front license plate..................................9-12
Vehicle loading information ..................................9-13
Terms...............................................................9-13
Determining vehicle load capacity...................9-13
Loading tips .....................................................9-13
Towing a trailer.....................................................9-14
Maximum load limts.........................................9-14
Towing safety ..................................................9-15
Uniform tire quality grading ..................................9-19
Emission control system warranty .......................9-20
Reporting safety defects (US only) ......................9-20
Readiness for inspection/maintenance (I/M)
test (US only) .......................................................9-21
Owner's manual/service manual order
information ............................................................9-22
In the event of a collision ................................9-23
ZX