2002 NISSAN QUEST reset
[x] Cancel search: resetPage 11 of 294
FRONT POWER SEAT
ADJUSTMENT (if so equipped)
WARNING
cDo not adjust the driver's seat while
driving so full attention may be given
to vehicle operation.
c
Do not leave children unattended in-
side the vehicle. They could unknow-
ingly activate switches or controls.
Unattended children could become
involved in serious accidents.
For memory seat and mirror information
see ``Memory driver seat and mirrors'' in the
``Pre-driving checks and adjustments'' sec-
tion.
Operating tips
cThe motor has an auto-reset overload
protection circuit. If the motor stops dur-
ing operation, wait 30 seconds, then re-
activate the switch.cDo not operate the power support seat
for a long period of time when the engine
is off. This discharges the battery.
1-4Seats, restraints and supplemental air bag systems
ZX
Page 93 of 294

1. Engine coolant temperature gauge
2. Tachometer
3. Speedometer
4. Fuel gauge
5. Reset button for trip odometer
6. Odometer/trip odometer
7. Message center
8. Message center button
WIC0149
METERS AND GAUGES
2-4Instruments and controls
ZX
Page 94 of 294
SPEEDOMETER AND
ODOMETER
Speedometer
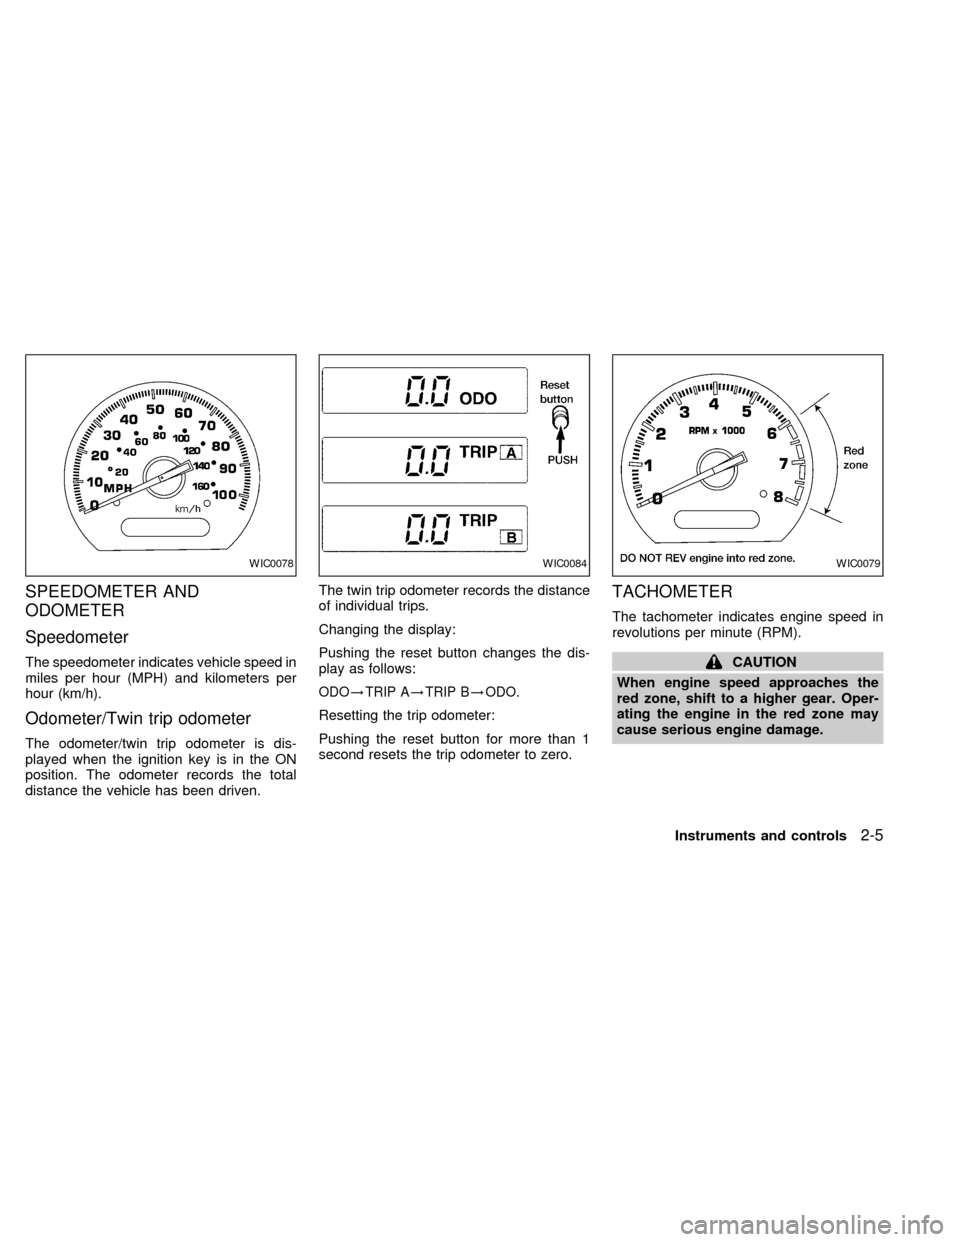
The speedometer indicates vehicle speed in
miles per hour (MPH) and kilometers per
hour (km/h).
Odometer/Twin trip odometer
The odometer/twin trip odometer is dis-
played when the ignition key is in the ON
position. The odometer records the total
distance the vehicle has been driven.The twin trip odometer records the distance
of individual trips.
Changing the display:
Pushing the reset button changes the dis-
play as follows:
ODO!TRIP A!TRIP B!ODO.
Resetting the trip odometer:
Pushing the reset button for more than 1
second resets the trip odometer to zero.
TACHOMETER
The tachometer indicates engine speed in
revolutions per minute (RPM).
CAUTION
When engine speed approaches the
red zone, shift to a higher gear. Oper-
ating the engine in the red zone may
cause serious engine damage.
WIC0078WIC0084WIC0079
Instruments and controls2-5
ZX
Page 96 of 294
Refill the fuel tank before the gauge
registers E (empty).
CAUTION
cIf the vehicle runs out of fuel, the
malfunction indicator lamp
(MIL) may come on. Refuel as soon
as possible. After a few driving trips,
the
lamp should turn off. If the
lamp remains on after a few driving
trips, have the vehicle inspected by
an authorized NISSAN dealer.
cFor additional information, see the
``Malfunction indicator lamp (MIL)''
later in this section.
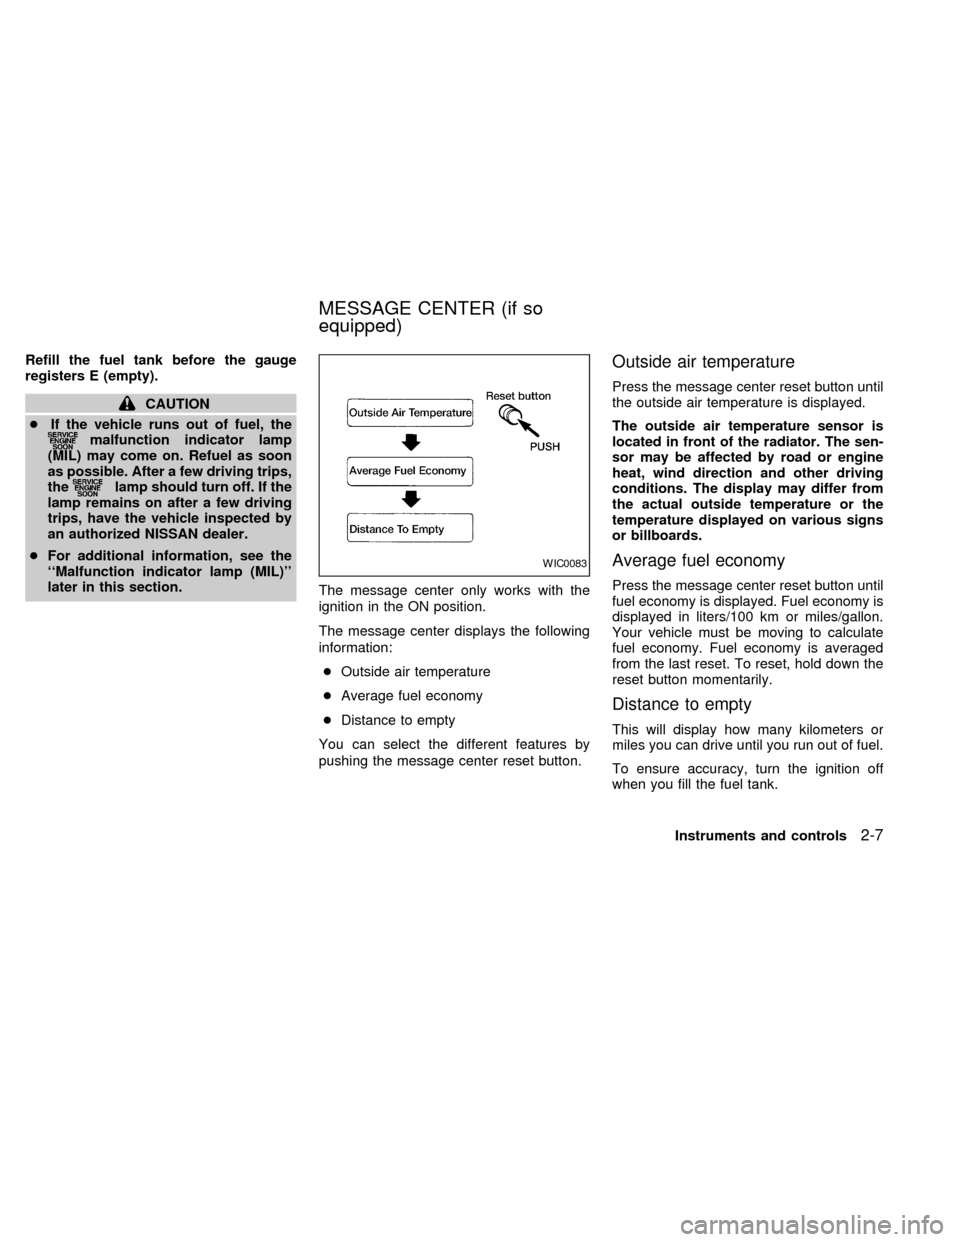
The message center only works with the
ignition in the ON position.
The message center displays the following
information:
cOutside air temperature
cAverage fuel economy
cDistance to empty
You can select the different features by
pushing the message center reset button.
Outside air temperature
Press the message center reset button until
the outside air temperature is displayed.
The outside air temperature sensor is
located in front of the radiator. The sen-
sor may be affected by road or engine
heat, wind direction and other driving
conditions. The display may differ from
the actual outside temperature or the
temperature displayed on various signs
or billboards.
Average fuel economy
Press the message center reset button until
fuel economy is displayed. Fuel economy is
displayed in liters/100 km or miles/gallon.
Your vehicle must be moving to calculate
fuel economy. Fuel economy is averaged
from the last reset. To reset, hold down the
reset button momentarily.
Distance to empty
This will display how many kilometers or
miles you can drive until you run out of fuel.
To ensure accuracy, turn the ignition off
when you fill the fuel tank.
WIC0083
MESSAGE CENTER (if so
equipped)
Instruments and controls2-7
ZX
Page 122 of 294
The sunroof operates when the ignition key
is in the ON position, or for 15 minutes after
the ignition key is turned to the OFF posi-
tion. If the driver's or passenger's door is
opened during this 15 minute period, power
to the sunroof is cancelled.
NOTE:
If the battery is discharged or is discon-
nected, the sunroof may not operate cor-
rectly, and must be reset.
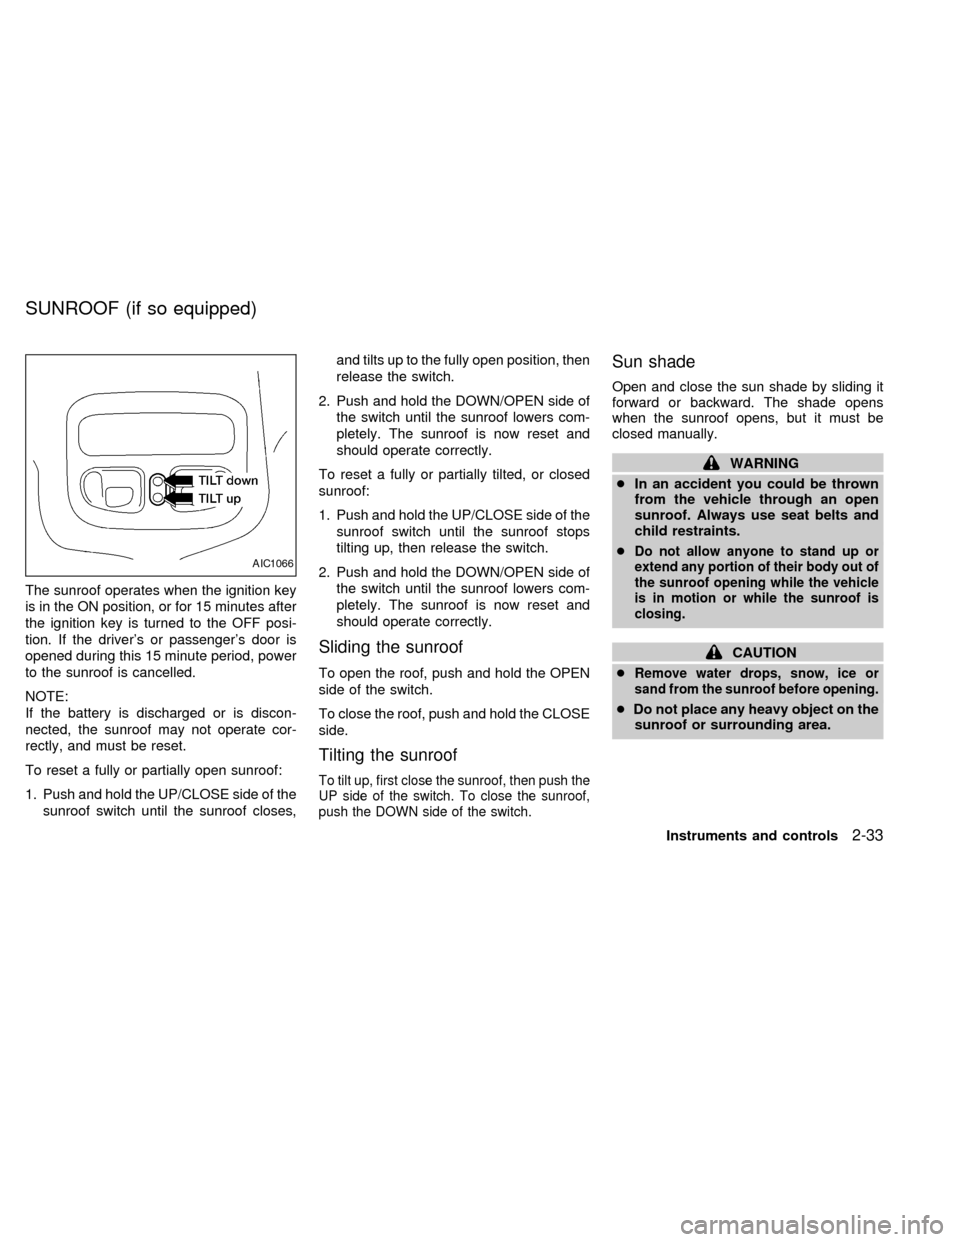
To reset a fully or partially open sunroof:
1. Push and hold the UP/CLOSE side of the
sunroof switch until the sunroof closes,and tilts up to the fully open position, then
release the switch.
2. Push and hold the DOWN/OPEN side of
the switch until the sunroof lowers com-
pletely. The sunroof is now reset and
should operate correctly.
To reset a fully or partially tilted, or closed
sunroof:
1. Push and hold the UP/CLOSE side of the
sunroof switch until the sunroof stops
tilting up, then release the switch.
2. Push and hold the DOWN/OPEN side of
the switch until the sunroof lowers com-
pletely. The sunroof is now reset and
should operate correctly.
Sliding the sunroof
To open the roof, push and hold the OPEN
side of the switch.
To close the roof, push and hold the CLOSE
side.
Tilting the sunroof
To tilt up, first close the sunroof, then push the
UP side of the switch. To close the sunroof,
push the DOWN side of the switch.
Sun shade
Open and close the sun shade by sliding it
forward or backward. The shade opens
when the sunroof opens, but it must be
closed manually.
WARNING
cIn an accident you could be thrown
from the vehicle through an open
sunroof. Always use seat belts and
child restraints.
c
Do not allow anyone to stand up or
extend any portion of their body out of
the sunroof opening while the vehicle
is in motion or while the sunroof is
closing.
CAUTION
c
Remove water drops, snow, ice or
sand from the sunroof before opening.
cDo not place any heavy object on the
sunroof or surrounding area.
AIC1066
SUNROOF (if so equipped)
Instruments and controls2-33
ZX
Page 138 of 294
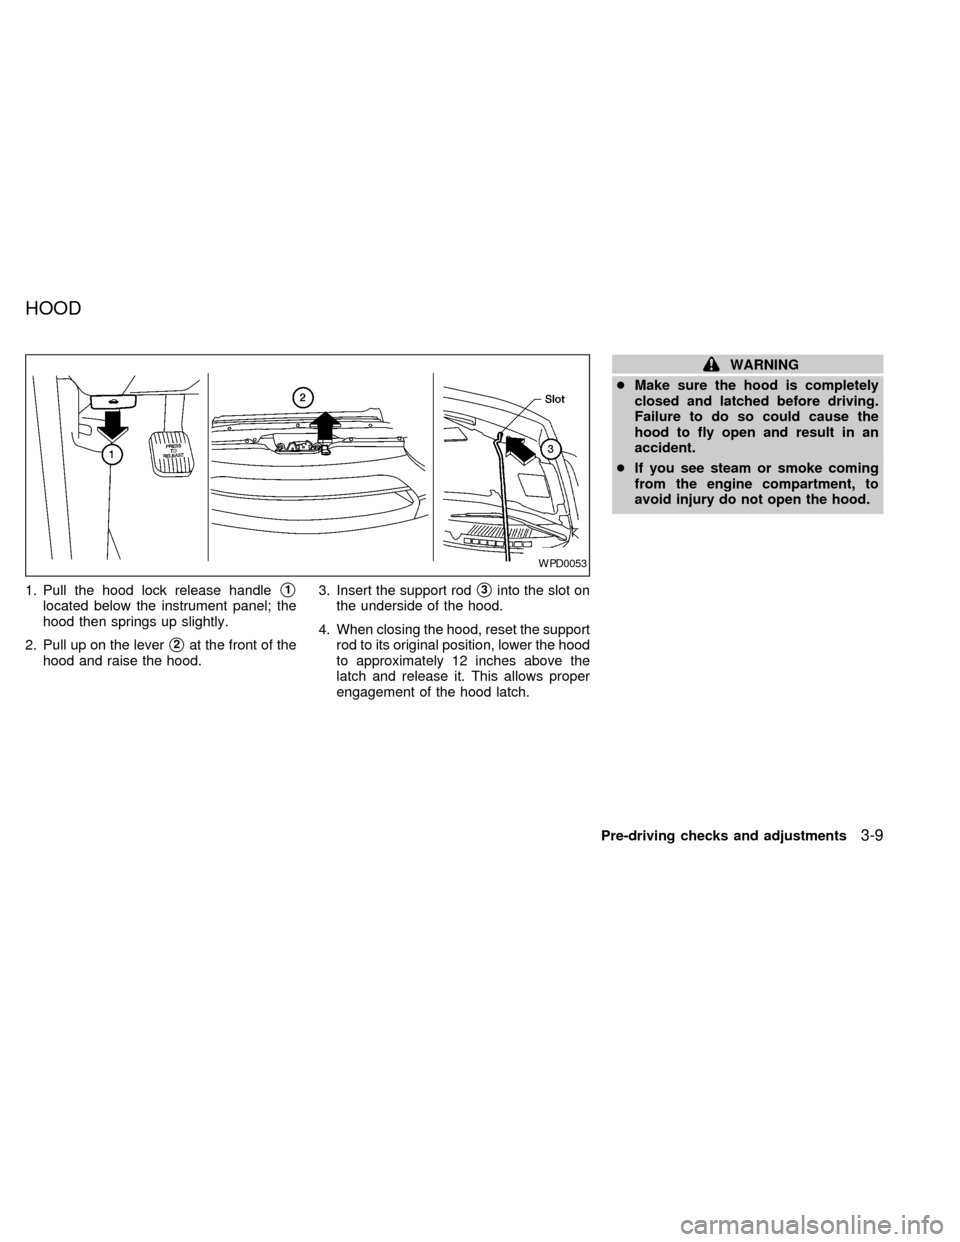
1. Pull the hood lock release handles1
located below the instrument panel; the
hood then springs up slightly.
2. Pull up on the lever
s2at the front of the
hood and raise the hood.3. Insert the support rod
s3into the slot on
the underside of the hood.
4. When closing the hood, reset the support
rod to its original position, lower the hood
to approximately 12 inches above the
latch and release it. This allows proper
engagement of the hood latch.
WARNING
cMake sure the hood is completely
closed and latched before driving.
Failure to do so could cause the
hood to fly open and result in an
accident.
cIf you see steam or smoke coming
from the engine compartment, to
avoid injury do not open the hood.
WPD0053
HOOD
Pre-driving checks and adjustments3-9
ZX
Page 141 of 294

VANITY MIRROR
Access the mirror by pulling the sun visor
down and lifting the cover up. The vanity
mirror will illuminate when the mirror cover
is opened.
MEMORY DRIVER SEAT AND
MIRRORS (if so equipped)
The memory driver seat and mirror function
provides a convenient way to recall a driv-
er's seat and outside mirror positions. Un-
locking the doors using the multi-remote
controller, or by pressing the memory seat
position 1 or position 2 button activates the
memory driver seat and mirrors.
Remote keyless entry system entry
Pressing thebutton on the keyfob un-
locks the driver's door, and recalls the
memory settings for both outside mirrorsand driver's seat for that memory position.
Two keyfobs are delivered with the vehicle.
They can be programmed with the same
memory driver's seat and mirror positions,
or each one can be programmed sepa-
rately. One keyfob can be programmed for
memory driver's seat and mirror position 1,
and the other for memory driver's seat and
mirror position 2.
Memory Driver Seat and Mirror But-
tons
The memory seat and mirror buttons are
located on the driver door. Pressing the
memory driver seat and mirror position 1 or
position 2 button will recall the memory set-
tings for both outside mirrors and driver seat
for that memory seat position, provided the
vehicle is in P (Park) or N (Neutral). For easy
vehicle exit, press memory driver seat and
mirror position 1 and position 2 buttons to-
gether to move the driver seat fully rearward
and fully downward. This function is preset
and cannot be changed.
Programming Memory Positions
1. Move the driver seat and outside mirrors
to the desired position using the manual
controls.
WPD0012APD1062
SUN VISORS MIRRORS
3-12Pre-driving checks and adjustments
ZX
Page 166 of 294

FM1, or FM2. The selected band illumi-
nates in the display.
2. Tune to the desired station.
3. Push the desired station select button for
more than 1.5 seconds. The radio mutes
when the select button is pushed.
4. When the sound resumes, memorizing is
complete.
5. Other station select buttons can be set in
the same manner.
If the battery is disconnected, or if the radio
fuse opens, the radio memory is canceled.
In that case, reset the desired stations.
RDS (Radio Data System)
RDS stands for Radio Data System, and is
a data information service transmitted by
some radio stations on the FM band (not
AM band) encoded within a regular radio
broadcast. Most RDS stations are currently
in large cities, but many stations are now
considering broadcasting RDS data.
RDS can display:
cStation name or call-sign, such as
``WHFR 98.3''.cMusic or programming type such as
``Classical'', ``Country'', or ``Rock''.
cTraffic reports about delays or construc-
tion.
Using RDS
To turn RDS on push the RDS/CLK button
until RDS OFF is displayed, then press the
SEL button until RDS ON is displayed.
To change display type turn RDS ON then
use the SEL button to choose between:
cSHOW TYPE - Music or program type.
cSHOW NAME - Station name or call-
sign.
cSHOW NONE - No text display.
To choose traffic reports press the
RDS/CLK button until TRAFFIC OFF is dis-
played, the use then SEL button to choose
TRAFFIC ON, then use the seek or scan
control to look for a station that may transmit
traffic reports, the radio will display a
``TRAF'' icon to show it is in traffic mode and
tuned to a station that may transmit traffic
reports. If the radio searches through the
whole band and then returns to the previous
station it was originally playing there are nostations in the area that are transmitting
traffic reports.
If a cassette or compact disc is being played
while the traffic option is on and the station
previously tuned into displays a traffic bul-
letin the radio will pause the cassette or
compact disc and broadcast the bulletin,
then resume playing the cassette or com-
pact disc.
Using RDS to search for programming type
Certain areas have a limited number of
stations that transmit RDS. Many stations
transmit call letters and frequencies only.
Searching or scanning by program type
may yield a limited number of selections.
Press the RDS/CLK button until FIND
CLASSIC is displayed, then use the SEL
button to choose between CLASSIC,
COUNTRY, INFO, JAZZ, OLDIES, R&B,
RELIGUS (Religious), ROCK, SOFT and
TOP40. When you have chosen a program
type, use the SEEK, SCAN, or AUTOSET
controls to look for a station transmitting that
kind of program. If the radio searches
through the whole band and then returns to
the previous station it was originally playing
there are no stations in the area that are
Heater, air conditioner and audio systems
4-23
ZX