2002 NISSAN FRONTIER instrument panel
[x] Cancel search: instrument panelPage 45 of 273
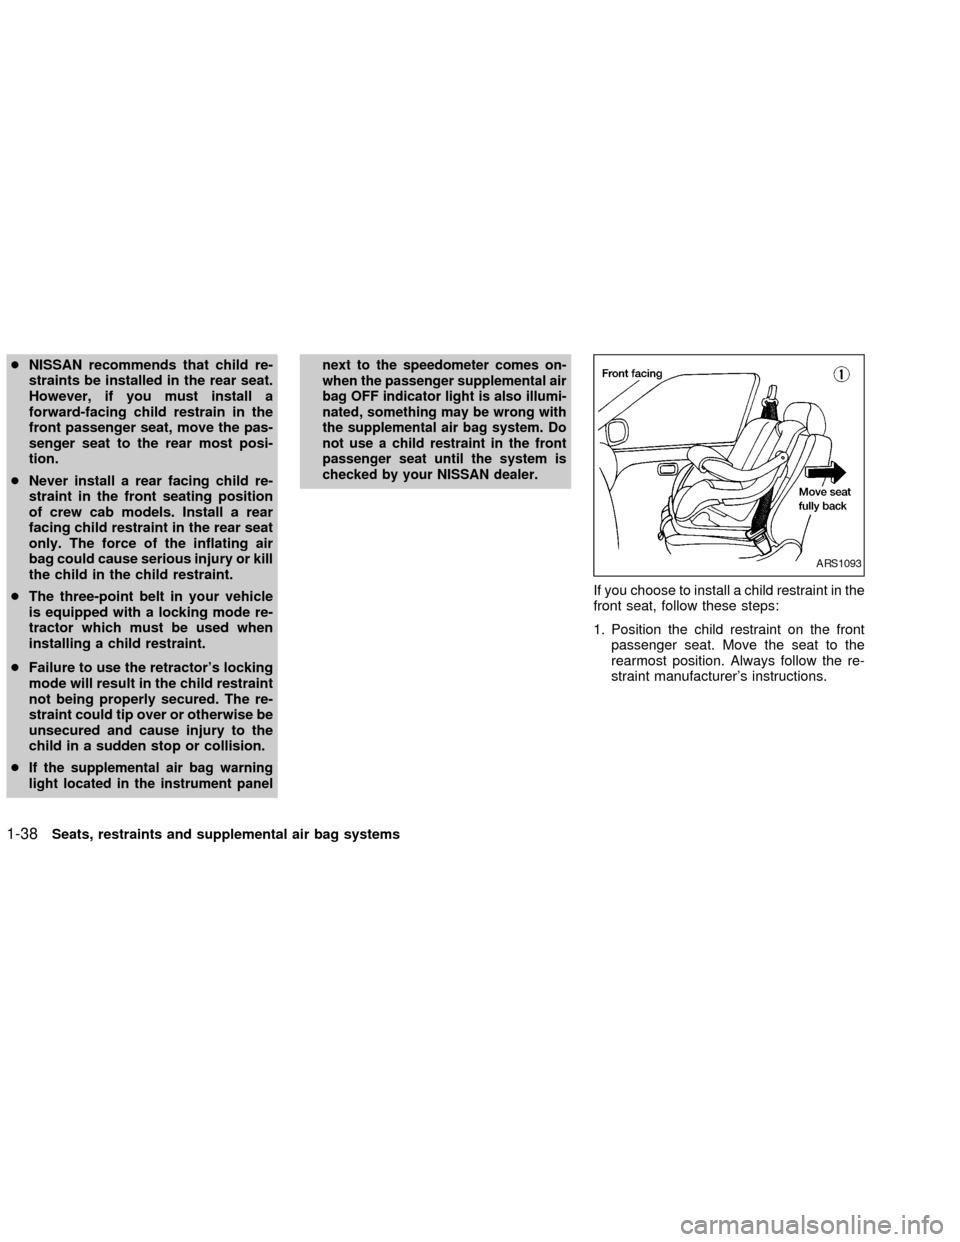
cNISSAN recommends that child re-
straints be installed in the rear seat.
However, if you must install a
forward-facing child restrain in the
front passenger seat, move the pas-
senger seat to the rear most posi-
tion.
cNever install a rear facing child re-
straint in the front seating position
of crew cab models. Install a rear
facing child restraint in the rear seat
only. The force of the inflating air
bag could cause serious injury or kill
the child in the child restraint.
cThe three-point belt in your vehicle
is equipped with a locking mode re-
tractor which must be used when
installing a child restraint.
cFailure to use the retractor's locking
mode will result in the child restraint
not being properly secured. The re-
straint could tip over or otherwise be
unsecured and cause injury to the
child in a sudden stop or collision.
c
If the supplemental air bag warning
light located in the instrument panelnext to the speedometer comes on-
when the passenger supplemental air
bag OFF indicator light is also illumi-
nated, something may be wrong with
the supplemental air bag system. Do
not use a child restraint in the front
passenger seat until the system is
checked by your NISSAN dealer.
If you choose to install a child restraint in the
front seat, follow these steps:
1. Position the child restraint on the front
passenger seat. Move the seat to the
rearmost position. Always follow the re-
straint manufacturer's instructions.
ARS1093
1-38Seats, restraints and supplemental air bag systems
ZX
Page 47 of 273
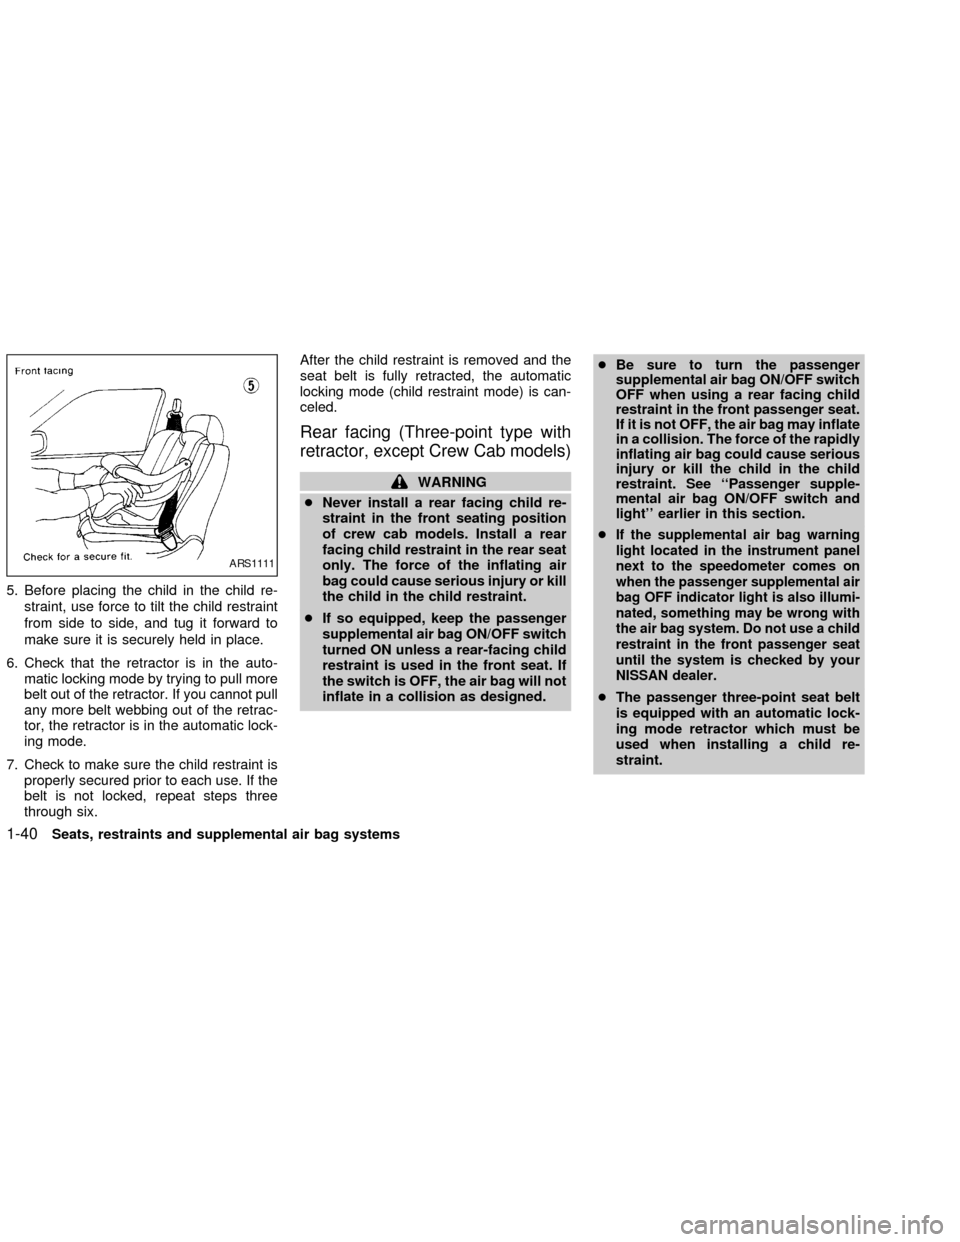
5. Before placing the child in the child re-
straint, use force to tilt the child restraint
from side to side, and tug it forward to
make sure it is securely held in place.
6. Check that the retractor is in the auto-
matic locking mode by trying to pull more
belt out of the retractor. If you cannot pull
any more belt webbing out of the retrac-
tor, the retractor is in the automatic lock-
ing mode.
7. Check to make sure the child restraint is
properly secured prior to each use. If the
belt is not locked, repeat steps three
through six.After the child restraint is removed and the
seat belt is fully retracted, the automatic
locking mode (child restraint mode) is can-
celed.
Rear facing (Three-point type with
retractor, except Crew Cab models)
WARNING
cNever install a rear facing child re-
straint in the front seating position
of crew cab models. Install a rear
facing child restraint in the rear seat
only. The force of the inflating air
bag could cause serious injury or kill
the child in the child restraint.
cIf so equipped, keep the passenger
supplemental air bag ON/OFF switch
turned ON unless a rear-facing child
restraint is used in the front seat. If
the switch is OFF, the air bag will not
inflate in a collision as designed.cBe sure to turn the passenger
supplemental air bag ON/OFF switch
OFF when using a rear facing child
restraint in the front passenger seat.
If it is not OFF, the air bag may inflate
in a collision. The force of the rapidly
inflating air bag could cause serious
injury or kill the child in the child
restraint. See ``Passenger supple-
mental air bag ON/OFF switch and
light'' earlier in this section.
c
If the supplemental air bag warning
light located in the instrument panel
next to the speedometer comes on
when the passenger supplemental air
bag OFF indicator light is also illumi-
nated, something may be wrong with
the air bag system. Do not use a child
restraint in the front passenger seat
until the system is checked by your
NISSAN dealer.
cThe passenger three-point seat belt
is equipped with an automatic lock-
ing mode retractor which must be
used when installing a child re-
straint.
ARS1111
1-40Seats, restraints and supplemental air bag systems
ZX
Page 51 of 273

2 Instruments and controls
Instrument panel ....................................................2-2
Meters and gauges ................................................2-3
Speedometer and odometer .............................2-3
Tachometer........................................................2-5
Engine coolant temperature gauge ...................2-5
Fuel gauge ........................................................2-6
Compass and outside temperature display
(if so equipped) ......................................................2-6
Outside temperature display .............................2-7
Compass display ...............................................2-7
Warning/indicator lights and audible
reminders..............................................................2-10
Checking bulbs ................................................2-10
Warning lights ..................................................2-11
Indicator lights .................................................2-14
Audible reminders............................................2-15
Security system ..................................................2-15
Vehicle security system (if so equipped) ........2-15
Windshield wiper and washer switch ...................2-18
Switch operation ..............................................2-19
Rear window defogger switch (Crew Cab
models only) .........................................................2-19Headlight and turn signal switch ..........................2-20
Headlight switch ..............................................2-20
Turn signal switch............................................2-21
Front fog light switch (if so equipped)..................2-21
Hazard warning flasher switch .............................2-22
Horn ......................................................................2-22
Power point (if so equipped) ................................2-23
Cigarette lighter and ash tray (accessories) ........2-24
Storage .................................................................2-24
Storage compartment ......................................2-24
Cup holders (if so equipped) ...........................2-25
Glove box ........................................................2-26
Console box ....................................................2-26
Grocery hooks (King Cab only) .......................2-27
Windows ...............................................................2-27
Power windows (if so equipped) .....................2-27
Manual windows ..............................................2-29
Rear sliding window (if so equipped) ..............2-29
Sunroof (if so equipped).......................................2-30
Tilting the sunroof ............................................2-30
Removing/installing..........................................2-31
Interior lights .........................................................2-33
ZX
Page 53 of 273

1. Headlight/turn signal switch
2. Meters and gauges
3. Windshield wiper/washer switch
4. Power point
5. Heater and air conditioner
6. Passenger air bag ON/OFF switch*
7. Passenger air bag ON/OFF switch light*
8. Front passenger supplemental air bag
9. Glove box
10. Audio system
11. Hazard warning flasher switch
12. Automatic/manual selector lever
13. Transfer case shift lever
14. Parking brake release lever
15. Cruise control main/set switch
16. Driver supplemental air bag
17. Steering wheel switch for audio controls
*if so equipped
LIC0088
INSTRUMENT PANEL
2-2Instruments and controls
ZX
Page 64 of 273
necessary. See ``Window washer fluid'' in
the ``Maintenance and do-it-yourself'' sec-
tion of this manual.
Seat belt warning light and
chime
The light and chime remind you to fasten
your seat belts. The light illuminates when-
ever the ignition key is turned to ON or
START, and remains illuminated until the
driver's seat belt is fastened. At the same
time, the chime sounds for about seven
seconds unless the driver seat belt is se-
curely fastened.
Refer to ªSeat beltsº in the ªSeats, restraints
and supplemental air bag systemsº section
for precautions on seat belt usage.
Supplemental air bag
warning light
When the ignition key is in the ON or START
position, the supplemental air bag warning
light illuminates for about 7 seconds and
then turns off. This means the system is
operational.
If any of the following conditions occur, the
supplemental air bag and pre-tensionerseat belt systems need servicing and your
vehicle must be taken to an authorized
authorized NISSAN dealer:
cThe supplemental air bag warning light
remains on after approximately 7 sec-
onds.
cThe supplemental air bag warning light
flashes intermittently.
cThe supplemental air bag warning light
does not come on at all.
Unless checked and repaired, the supplemen-
tal air bag system and/or the pre-tensioner
seat belts may not function properly. For
additional details, see the ``Seats, restraints
and supplemental air bag systems'' section of
this manual.
WARNING
If the supplemental air bag warning
light is on, it could mean that the
supplemental air bag or pre-tensioner
seat belt system will not operate in an
accident.
Passenger supplemental air
bag OFF indicator light (ex-
cept Crew Cab models)
The passenger supplemental air bag is
equipped with an ON/OFF switch. The
switch is located in the center of the instru-
ment panel. When the switch is turned to
the ON position, the passenger supplemen-
tal air bag is enabled and could inflate in a
frontal collision. When the switch is turned
to the OFF position, the passenger supple-
mental air bag is disabled and will not inflate
in a frontal collision. The passenger supple-
mental air bag OFF indicator light on the
instrument panel illuminates when the pas-
senger supplemental air bag ON/OFF
switch is turned to the OFF position. The
driver's side supplemental air bag always
remains enabled and is not affected by the
passenger supplemental air bag ON/OFF
switch. The key for the passenger supple-
mental air bag ON/OFF switch should not
be left in the switch. Remove the key after
turning the switch in the desired position. Do
not leave a key in the switch. See ªPassen-
ger supplemental air bag ON/OFF switch
and lightº in the9Seats, restraints and
Instruments and controls
2-13
ZX
Page 71 of 273

HEADLIGHT SWITCH
Lighting
Turn the switch to theposition:
The front combination, rear combination,
license plate and instrument panel lights
come on.Turn the switch to the
position:
The headlights come on and all the other
lights remain on.
To select the high beam function, push the
lever forward. The high beam lights come
on and the
light illuminates. Pull it back
to select the low beam.
Instrument brightness control
The instrument brightness control operates
when the light switch is in the
or
position.
Turn the control to adjust the brightness of
the instrument panel lights.
Passing signal
Pulling and releasing the lever flashes the
headlight high beams on and off.
WIC0118
AIC1023
HEADLIGHT AND TURN
SIGNAL SWITCH
2-20Instruments and controls
ZX
Page 75 of 273
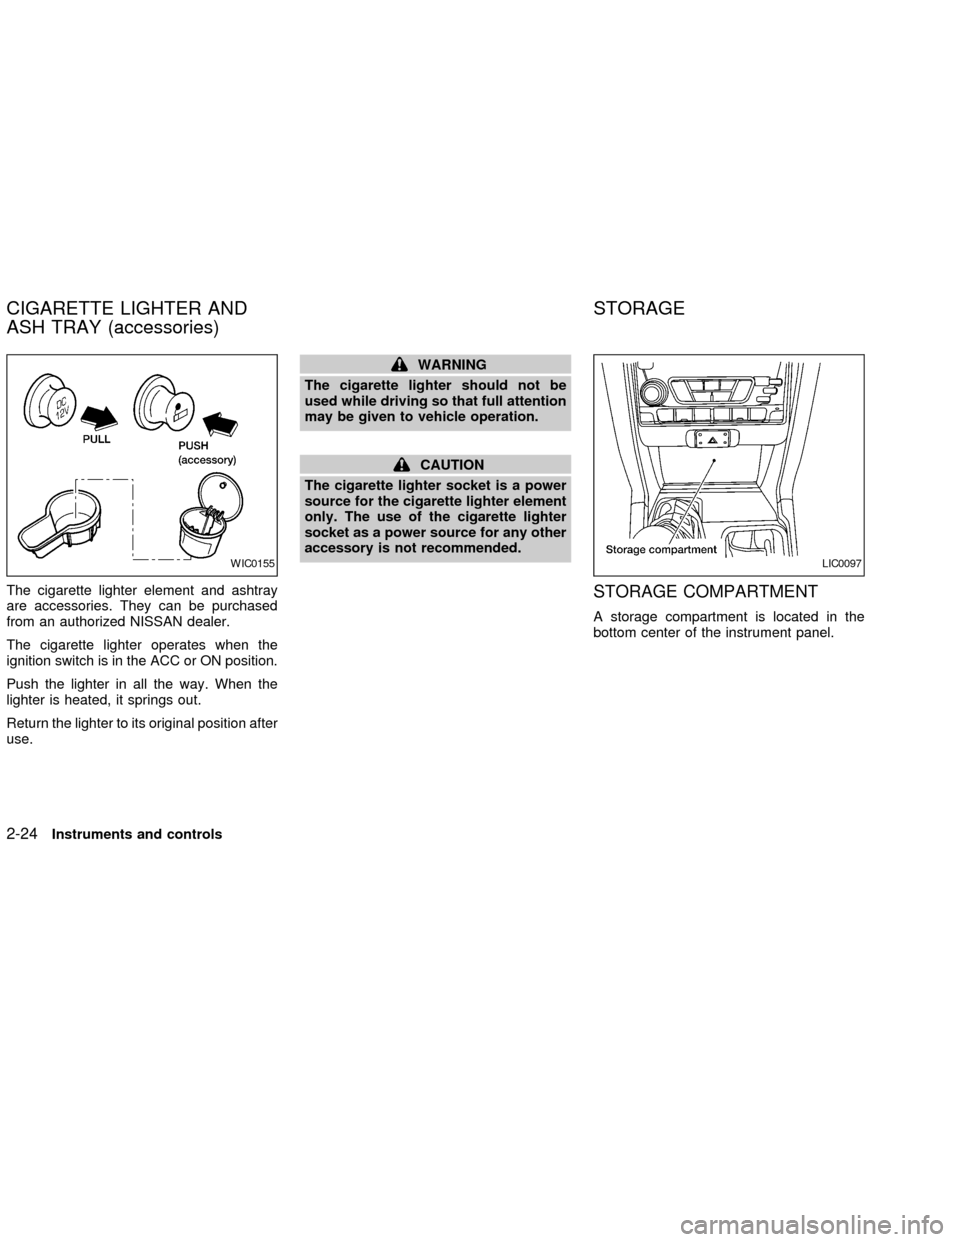
The cigarette lighter element and ashtray
are accessories. They can be purchased
from an authorized NISSAN dealer.
The cigarette lighter operates when the
ignition switch is in the ACC or ON position.
Push the lighter in all the way. When the
lighter is heated, it springs out.
Return the lighter to its original position after
use.
WARNING
The cigarette lighter should not be
used while driving so that full attention
may be given to vehicle operation.
CAUTION
The cigarette lighter socket is a power
source for the cigarette lighter element
only. The use of the cigarette lighter
socket as a power source for any other
accessory is not recommended.
STORAGE COMPARTMENT
A storage compartment is located in the
bottom center of the instrument panel.
WIC0155LIC0097
CIGARETTE LIGHTER AND
ASH TRAY (accessories)STORAGE
2-24Instruments and controls
ZX
Page 79 of 273
cDo not leave children unattended in-
side the vehicle. They could un-
knowingly activate switches or con-
trols and become trapped in a
window. Unattended children could
become involved in serious acci-
dents.
The power windows operate when the igni-
tion key is in the ON position, or for 45
seconds after the ignition key is turned to
the OFF position. If the driver's or passen-
ger's door is opened during this 45 second
period, power to the windows is cancelled.
To open the driver window, press the driver
switch and hold it down. To close the win-
dow, lift the switch up. The driver side
control panel (driver's switch) also opens or
closes the passenger windows.
Locking passenger's window
When the lock button is pushed in, only the
driver side window can be opened or
closed. Push it in again to cancel the win-
dow lock function.
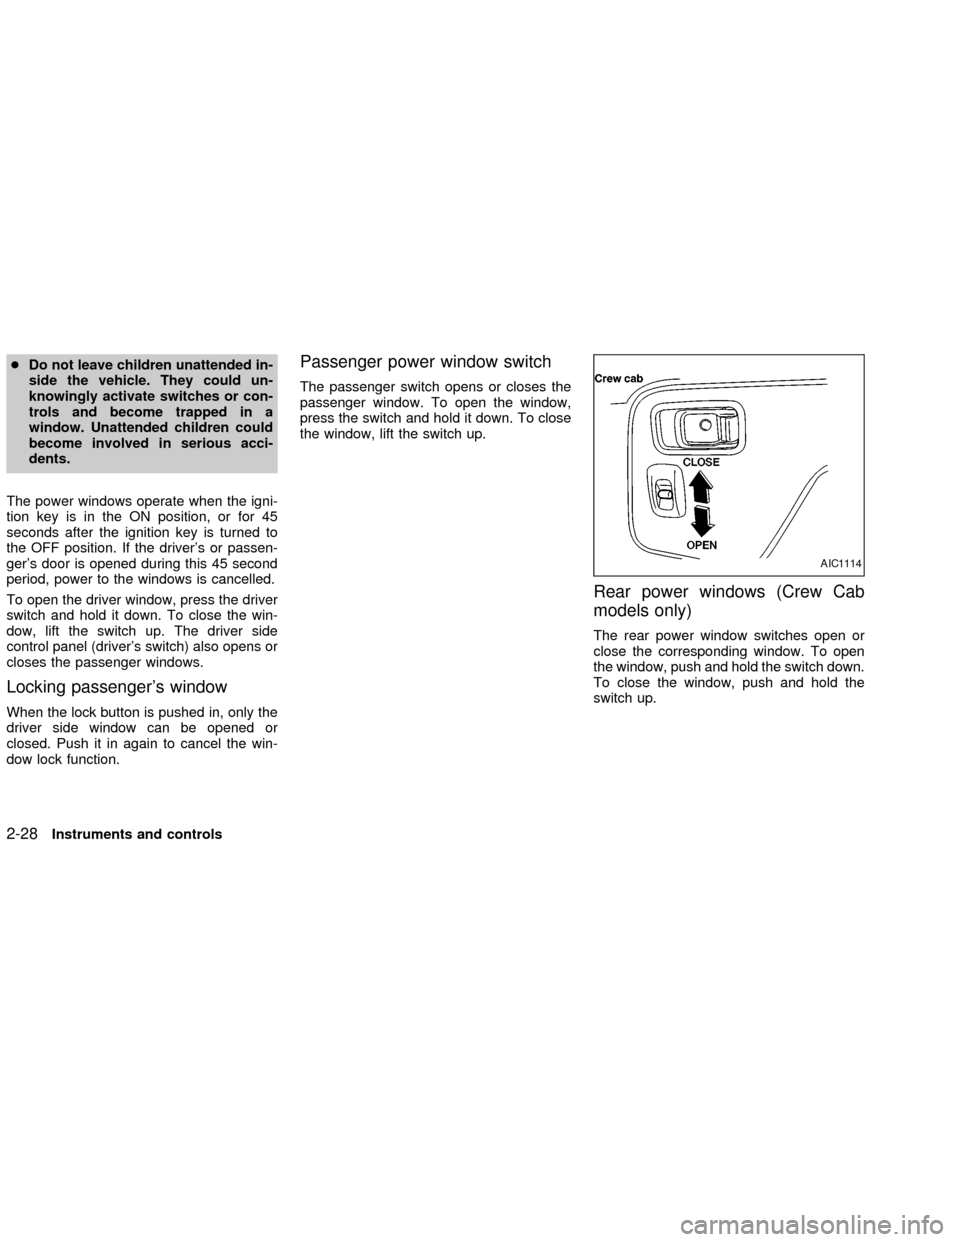
Passenger power window switch
The passenger switch opens or closes the
passenger window. To open the window,
press the switch and hold it down. To close
the window, lift the switch up.
Rear power windows (Crew Cab
models only)
The rear power window switches open or
close the corresponding window. To open
the window, push and hold the switch down.
To close the window, push and hold the
switch up.
AIC1114
2-28Instruments and controls
ZX