2002 NISSAN ALTIMA ECO mode
[x] Cancel search: ECO modePage 2 of 249
IMPORTANT INFORMATION ABOUT
THIS MANUAL
You will see various symbols in this manual.
They are used in the following ways:
WARNING
This is used to indicate the presence of
a hazard that could cause death or
serious personal injury. To avoid or
reduce the risk, the procedures must
be followed precisely.
CAUTION
This is used to indicate the presence of
a hazard that could cause minor or
moderate personal injury or damage to
your vehicle. To avoid or reduce the
risk, the procedures must be followed
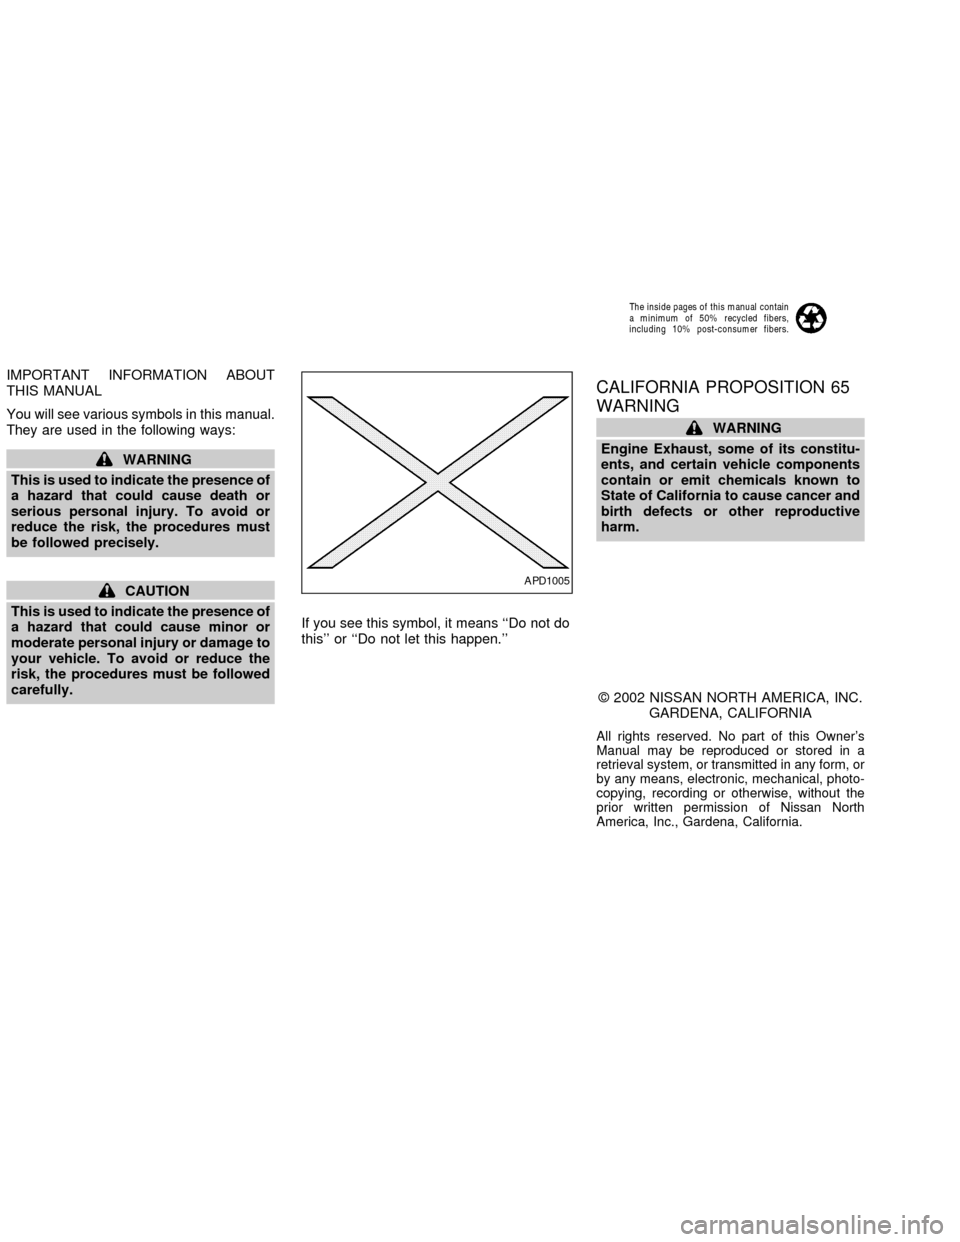
carefully.If you see this symbol, it means ``Do not do
this'' or ``Do not let this happen.''
CALIFORNIA PROPOSITION 65
WARNING
WARNING
Engine Exhaust, some of its constitu-
ents, and certain vehicle components
contain or emit chemicals known to
State of California to cause cancer and
birth defects or other reproductive
harm.
2002 NISSAN NORTH AMERICA, INC.
GARDENA, CALIFORNIA
All rights reserved. No part of this Owner's
Manual may be reproduced or stored in a
retrieval system, or transmitted in any form, or
by any means, electronic, mechanical, photo-
copying, recording or otherwise, without the
prior written permission of Nissan North
America, Inc., Gardena, California.
APD1005
The inside pages of this manual contain
a minimum of 50% recycled fibers,
including 10% post-consumer fibers.
ZX
Page 37 of 249
forward and check to see if the belt
holds the restraint in place. If the
restraint is not secure, tighten the
belt as necessary, or put the re-
straint in another seat and test it
again.
c
For a front-facing child restraint, if
the seat position where it is installed
has a three-point type lap/shoulder
belt, check to make sure the shoulder
belt does not go in front of the child's
face or neck. If it does, put the shoul-
der belt behind the child restraint. If
you must install a front-facing child
restraint in the front seat, see ``Instal-
lation on front passenger seat'' later
in this section for details.
cWhen your child restraint is not in
use, keep it secured with a seat belt
to prevent it from being thrown
around in case of a sudden stop or
accident.
CAUTION
Remember that a child restraint left in a
closed vehicle can become very hot.
Check the seating surface and buckles
before placing your child in the child
restraint.INSTALLATION ON REAR SEAT
CENTER OR OUTBOARD POSI-
TIONS
WARNING
cThe three-point belt in your vehicle
is equipped with a locking mode re-
tractor which must be used when
installing a child restraint.
cFailure to use the retractor's locking
mode will result in the child restraint
not being properly secured. The re-
straint could tip over or otherwise be
unsecured and cause injury to the
child in a sudden stop or collision.
1-30Seats, restraints and supplemental air bag systems
ZX
Page 45 of 249
INSTALLATION ON FRONT PAS-
SENGER SEAT
WARNING
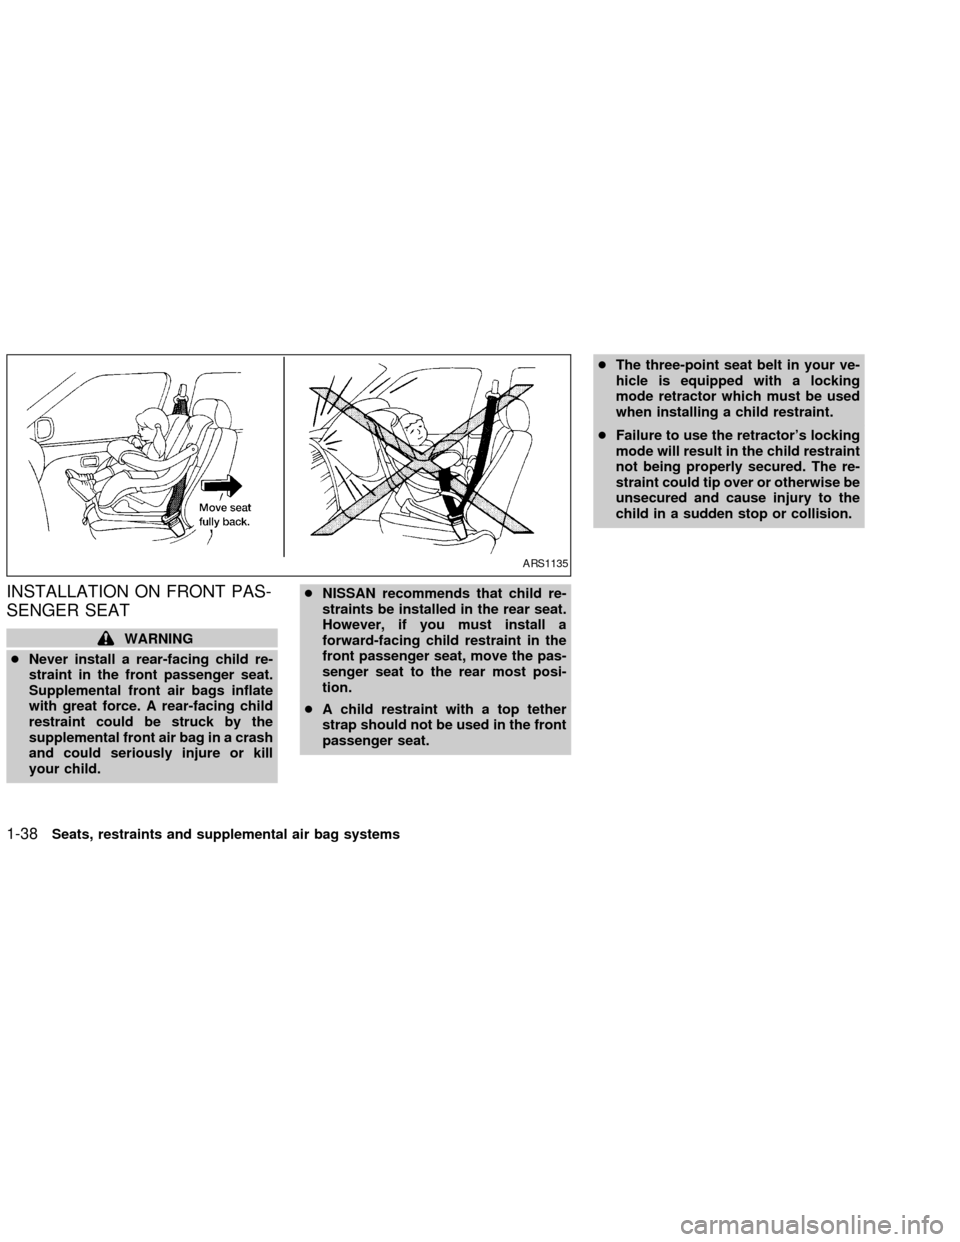
cNever install a rear-facing child re-
straint in the front passenger seat.
Supplemental front air bags inflate
with great force. A rear-facing child
restraint could be struck by the
supplemental front air bag in a crash
and could seriously injure or kill
your child.cNISSAN recommends that child re-
straints be installed in the rear seat.
However, if you must install a
forward-facing child restraint in the
front passenger seat, move the pas-
senger seat to the rear most posi-
tion.
cA child restraint with a top tether
strap should not be used in the front
passenger seat.cThe three-point seat belt in your ve-
hicle is equipped with a locking
mode retractor which must be used
when installing a child restraint.
cFailure to use the retractor's locking
mode will result in the child restraint
not being properly secured. The re-
straint could tip over or otherwise be
unsecured and cause injury to the
child in a sudden stop or collision.
ARS1135
1-38Seats, restraints and supplemental air bag systems
ZX
Page 53 of 249

in the speedometer display. When the igni-
tion is turned to ON, the display scrolls all
the modes of the trip computer and then
shows the mode chosen before the ignition
switch is turned OFF.
If the battery terminal is disconnected,
push the trip computer mode switch
more than 1 second to activate the com-
puter.
When the ignition switch is turned to ON,
modes of the trip computer can be selected
by pushing the trip mode switch on the
steering wheel switch for audio controls or
by the trip computer change button. The
following modes can be selected:
Outside air temperature (ICY±ÉF or
ÉC)
The outside air temperature is displayed in
ÉF or ÉC.
The outside air temperature mode includes
a low temperature warning feature: below
37ÉF (3ÉC), the outside air temperaturemode is automatically selected and ICY will
illuminate in order to draw the driver's atten-
tion. Press the mode switch if you wish to
return to the mode that was selected before
the warning occurred. The ICY indicator will
continue blinking as long as the tempera-
ture remains below 39ÉF (4ÉC).
The ambient temperature sensor is located
in front of the radiator. The sensor may be
affected by road or engine heat, wind direc-
tions and other driving conditions. The dis-
play may differ from the actual ambient
temperature or the temperature displayed
on various signs or billboards.
Distance to empty (dte±mile or km)
The distance to empty (dte) mode provides
you with an estimation of the distance that
can be driven before refueling. The dte is
constantly being calculated, based on the
amount of fuel in the fuel tank and the actual
fuel consumption.
The display is updated every 30 seconds.
The dte mode inlcudes a low range warning
feature: when the fuel level is low, the dte
mode is automatically selected and the dig-
its blink in order to draw the driver's atten-
tion. Press the mode switch if you wish to
WIC0159
2-4Instruments and controls
ZX
Page 54 of 249

return to the mode that was selected before
the warning occurred. The dte mark (dte)
will remain blinking until the vehicle is refu-
elled.
When the fuel level drops even lower, the
dte display will change to (----).
NOTE:
cIf the amount of fuel added while the
ignition switch is OFF is small, the
display just before the ignition switch
is turned OFF may continue to be
displayed.
cWhen driving uphill or rounding
curves, the fuel in the tank shifts,
which may momentairly change the
display.
Average fuel consumption
(Mpg or l/100km)
The Average fuel consumption mode shows
the average fuel consumption since the last
reset. Resetting is done by pressing the
mode switch for more than approximately 1
second. The display is updated every 30
seconds. At about the first 1/3 miles (500 m)
after a reset, the display shows (----).
Average speed (MPH or km/h)
The average speed mode shows the aver-
age vehicle speed since last reset. Reset-
ting is done by pressing the mode switch for
more than approximately 1 minute. The
display is updated every 30 seconds. The
first 30 seconds after a reset, the display
shows (----).
Journey time
The journey time mode shows the time
since the last reset. The displayed time can
be reset by pressing the mode switch for
more than approximately 1 second.
NOTE:
If a low temperature warning and low
range warning occur simultaneously,
other display modes switch automati-
cally to the outside temperature display.
When the mode switch is pushed, the
display switches to the mode chosen
before the warning display, and the out-
side air temperature indicator marked
ICY will blink.
WIC0187
Instruments and controls2-5
ZX
Page 85 of 249
WARNING
cDo not use the HomeLinkTUniversal
Transceiver with any garage door
opener that lacks safety stop and
reverse features as required by fed-
eral safety standards. (These stan-
dards became effective for opener
models manufactured after April 1,
1982). A garage door opener which
cannot detect an object in the path of
a closing garage door and then au-
tomatically stop and reverse, does
not meet current federal safety stan-
dards. Using a garage door opener
without these features increases the
risk of serious injury or death.
cDuring programming, your garage
door or gate may open or close.
Make sure that people and objects
are clear of the garage door or gate
that you are programming.
cYour vehicle's engine should be
turned off while programming the
HomeLinkTUniversal Transceiver.
PROGRAMMING HomeLinkT
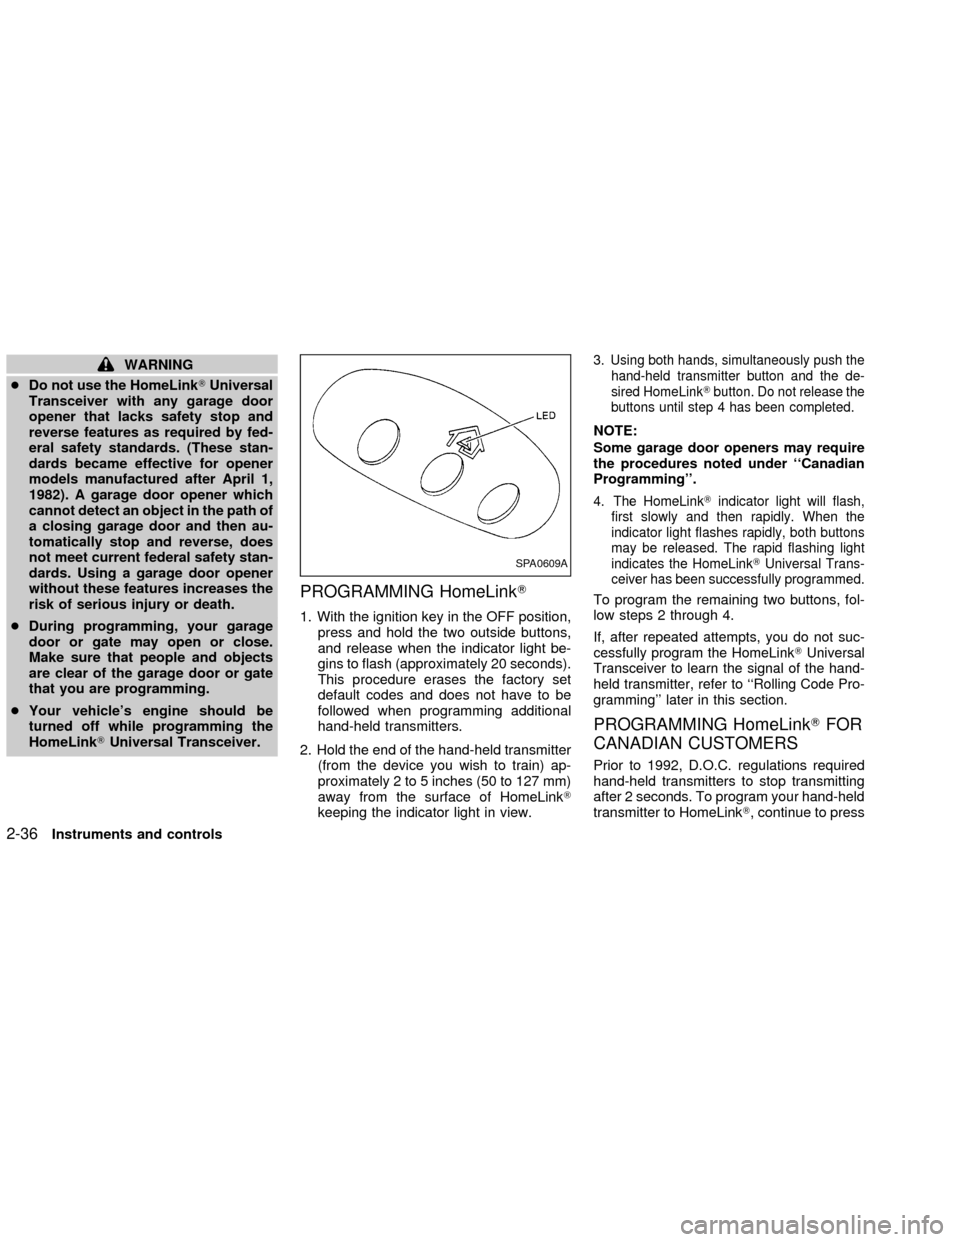
1. With the ignition key in the OFF position,
press and hold the two outside buttons,
and release when the indicator light be-
gins to flash (approximately 20 seconds).
This procedure erases the factory set
default codes and does not have to be
followed when programming additional
hand-held transmitters.
2. Hold the end of the hand-held transmitter
(from the device you wish to train) ap-
proximately 2 to 5 inches (50 to 127 mm)
away from the surface of HomeLinkT
keeping the indicator light in view.
3. Using both hands, simultaneously push the
hand-held transmitter button and the de-
sired HomeLinkTbutton. Do not release the
buttons until step 4 has been completed.
NOTE:
Some garage door openers may require
the procedures noted under ``Canadian
Programming''.
4. The HomeLinkTindicator light will flash,
first slowly and then rapidly. When the
indicator light flashes rapidly, both buttons
may be released. The rapid flashing light
indicates the HomeLinkTUniversal Trans-
ceiver has been successfully programmed.
To program the remaining two buttons, fol-
low steps 2 through 4.
If, after repeated attempts, you do not suc-
cessfully program the HomeLinkTUniversal
Transceiver to learn the signal of the hand-
held transmitter, refer to ``Rolling Code Pro-
gramming'' later in this section.
PROGRAMMING HomeLinkTFOR
CANADIAN CUSTOMERS
Prior to 1992, D.O.C. regulations required
hand-held transmitters to stop transmitting
after 2 seconds. To program your hand-held
transmitter to HomeLinkT, continue to press
SPA0609A
2-36Instruments and controls
ZX
Page 106 of 249
WARNING
cThe air conditioner cooling function
operates only when the engine is
running.
c
Do not leave children, impaired adults,
or pets alone in your vehicle. On hot
sunny days, temperatures in a closed
vehicle could quickly become high
enough to cause severe or possibly
fatal injuries to people or animals.
cDo not use the recirculation mode
for long periods as it may cause the
interior air to become stale and the
windows to fog up.
cPositioning of the heating or air con-
ditioning controls should not be
done while driving, so full attention
may be given to vehicle operation.
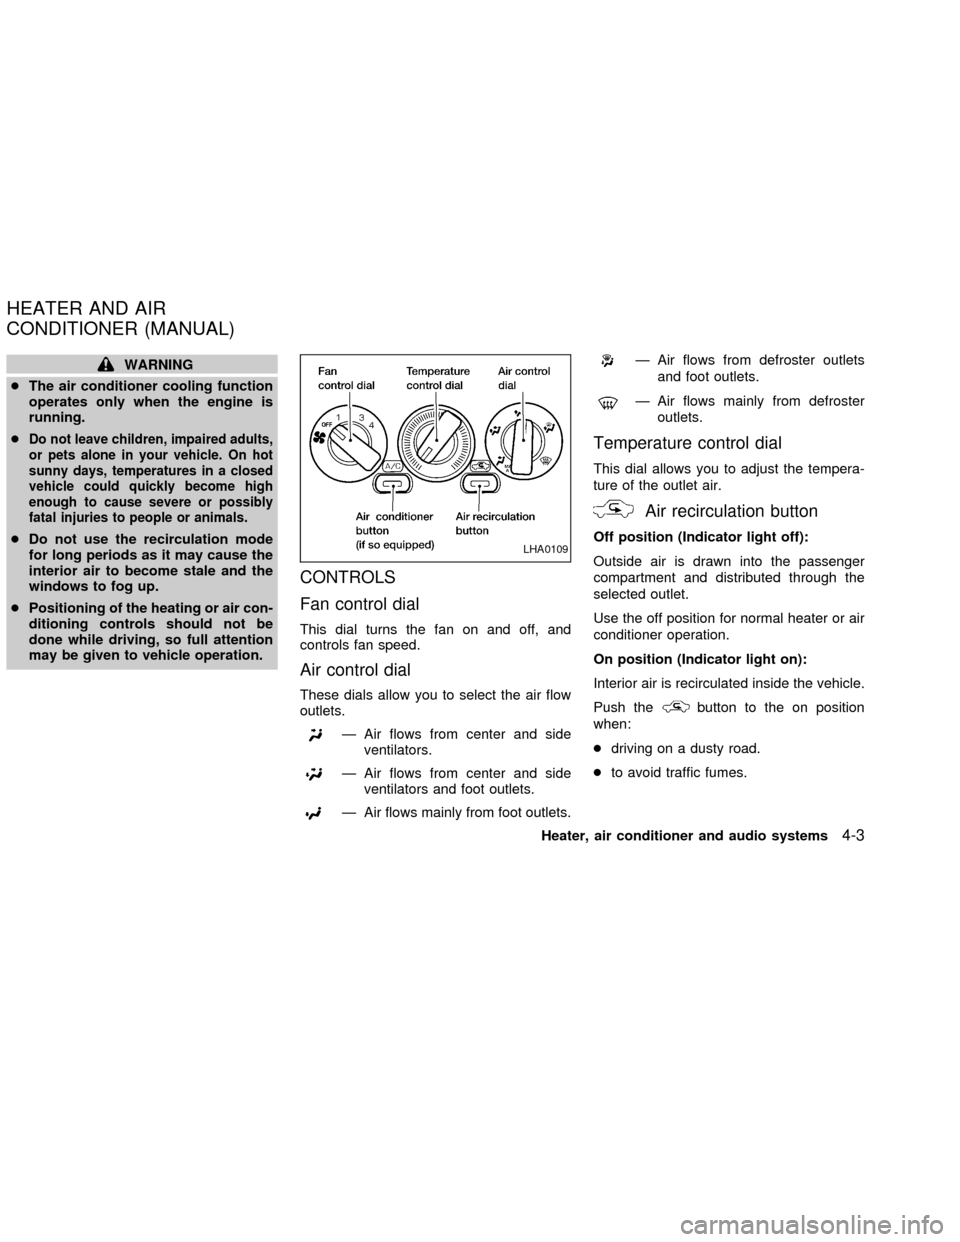
CONTROLS
Fan control dial
This dial turns the fan on and off, and
controls fan speed.
Air control dial
These dials allow you to select the air flow
outlets.
Ð Air flows from center and side
ventilators.
Ð Air flows from center and side
ventilators and foot outlets.
Ð Air flows mainly from foot outlets.
Ð Air flows from defroster outlets
and foot outlets.
Ð Air flows mainly from defroster
outlets.
Temperature control dial
This dial allows you to adjust the tempera-
ture of the outlet air.
Air recirculation button
Off position (Indicator light off):
Outside air is drawn into the passenger
compartment and distributed through the
selected outlet.
Use the off position for normal heater or air
conditioner operation.
On position (Indicator light on):
Interior air is recirculated inside the vehicle.
Push the
button to the on position
when:
cdriving on a dusty road.
cto avoid traffic fumes.
LHA0109
HEATER AND AIR
CONDITIONER (MANUAL)
Heater, air conditioner and audio systems4-3
ZX
Page 112 of 249
WARNING
cThe air conditioner cooling function
operates only when the engine is
running.cDo not leave children, impaired
adults, or pets alone in your vehicle.
On hot, sunny days, temperatures in
a closed vehicle could quickly be-
come high enough to cause severe orpossibly fatal injuries to people or
animals.
cDo not use the recirculation mode
for long periods as it may cause the
interior air to become stale and the
windows to fog up.
cPositioning of the heating or air con-
ditioning controls should not be
done while driving, so full attention
may be given to vehicle operation.
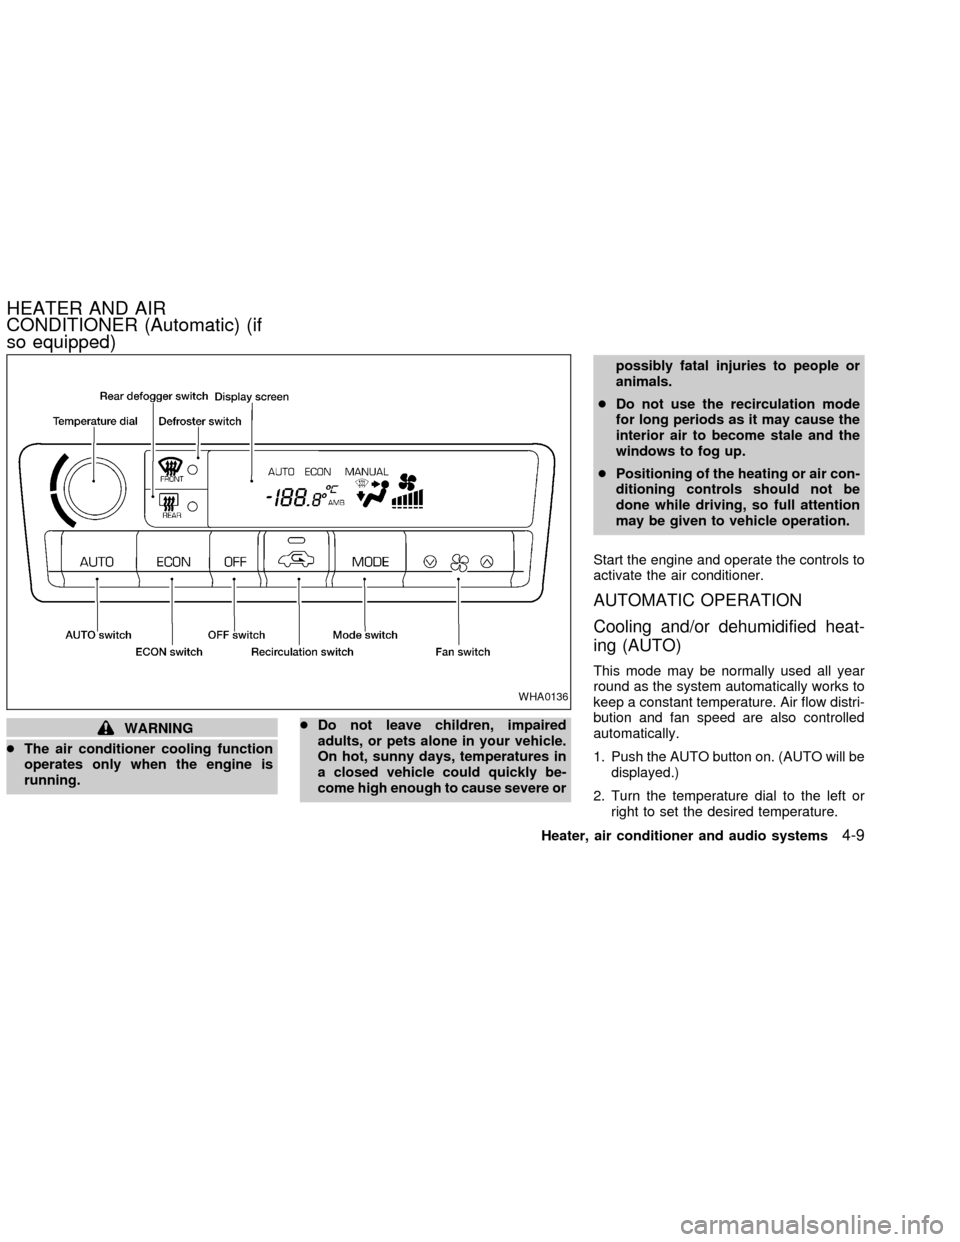
Start the engine and operate the controls to
activate the air conditioner.
AUTOMATIC OPERATION
Cooling and/or dehumidified heat-
ing (AUTO)
This mode may be normally used all year
round as the system automatically works to
keep a constant temperature. Air flow distri-
bution and fan speed are also controlled
automatically.
1. Push the AUTO button on. (AUTO will be
displayed.)
2. Turn the temperature dial to the left or
right to set the desired temperature.
WHA0136
HEATER AND AIR
CONDITIONER (Automatic) (if
so equipped)
Heater, air conditioner and audio systems4-9
ZX