2002 NISSAN ALTIMA glove box
[x] Cancel search: glove boxPage 21 of 249

Supplemental front air bag system
The driver supplemental air bag is located in
the center of the steering wheel; the front
passenger supplemental air bag is mounted in
the dashboard above the glove box. Thesesystems are designed to meet optional certi-
fication requirements under U.S. regulations.
They are also permitted in Canada. The op-
tional certification allows front air bags to be
designed to inflate somewhat less forcefully
than previously.However, all of the informa-tion, cautions and warnings in this manual
still apply and must be followed.The front
air bags are designed to inflate in higher
severity frontal collisions, although they may
inflate if the forces in another type of collision
are similar to those of a higher severity frontal
impact. They may not inflate in certain frontal
collisions. Vehicle damage (or lack of it) is not
always an indication of proper supplemental
air bag operation.
The supplemental air bag system has dual
stage inflators for both the driver and pas-
senger air bags. The system monitors infor-
mation from the crash zone sensor, the
diagnosis sensor unit and seat belt buckle
sensors that detect if the seat belts are
fastened. Inflator operation is based on the
severity of a collision and whether the seat
belts are being used.
When the supplemental front air bag in-
flates, a fairly loud noise may be heard,
followed by release of smoke. This smoke is
not harmful and does not indicate a fire.
Care should be taken not to inhale it, as it
may cause irritation and choking. Those
with a history of a breathing condition
should get fresh air promptly.
Supplemental front air bags, along with the
LRS0104
1-14Seats, restraints and supplemental air bag systems
ZX
Page 49 of 249

2 Instruments and controls
Instrument panel ....................................................2-2
Meters and gauges ................................................2-3
Speedometer and odometer .............................2-3
Trip computer ....................................................2-3
Tachometer........................................................2-6
Engine coolant temperature gauge ...................2-6
Fuel gauge ........................................................2-7
Warning/indicator lights and audible
reminders................................................................2-8
Checking bulbs ..................................................2-8
Warning lights ....................................................2-8
Indicator lights .................................................2-11
Audible reminders............................................2-12
Security systems ..................................................2-13
Nissan vehicle immobilizer system
(NVIS) ..............................................................2-13
Vehicle security system (if so equipped) ........2-14
Windshield wiper and washer switch ...................2-17
Switch operation ..............................................2-17
Rear window defogger switch ..............................2-17
Headlight and turn signal switch ..........................2-18
Xenon headlights .............................................2-18Headlight switch ..............................................2-19
Autolamp system (if so equipped)...................2-20
Turn signal switch............................................2-21
Fog light switch (if so equipped) ..........................2-21
Hazard warning flasher switch .............................2-23
Horn ......................................................................2-23
Heated seats (if so equipped) ..............................2-24
Traction control system (TCS) cancel switch
(if so equipped) ....................................................2-25
Power outlet .......................................................2-25
Storage .................................................................2-26
Seatback pockets (if so equipped) ..................2-26
Seatback side pockets (if so equipped) ..........2-26
Sunglasses case .............................................2-26
Cup holders .....................................................2-27
Glove box ........................................................2-28
Console box ....................................................2-28
Covered storage box .......................................2-29
Cargo net (if so equipped) ..............................2-30
Windows ...............................................................2-31
Power windows................................................2-31
Sunroof (if so equipped).......................................2-33
ZX
Page 51 of 249

1. Headlight and turn signal switch
2. Meters and gauges
3. Windshield wiper/washer switch
4. Center ventilator
5. Audio system
6. Front passenger supplemental air bag
7. Glove box
8. Heater and air conditioner
9. Hazard warning flasher switch
10. Power point
11. Rear window defogger switch
12. Cruise control main/set switch
13. Driver supplemental air bag
14. Steering wheel switch for audio control
15. Tilt/telescopic steering wheel lever
16. Traction control system (TLS) cancel
switch
17. Instrument brightness control
18. Outside mirror remote control
LIC0161
INSTRUMENT PANEL
2-2Instruments and controls
ZX
Page 77 of 249
cUse only soft cups in the cup holder.
Hard objects can injure you in an
accident.
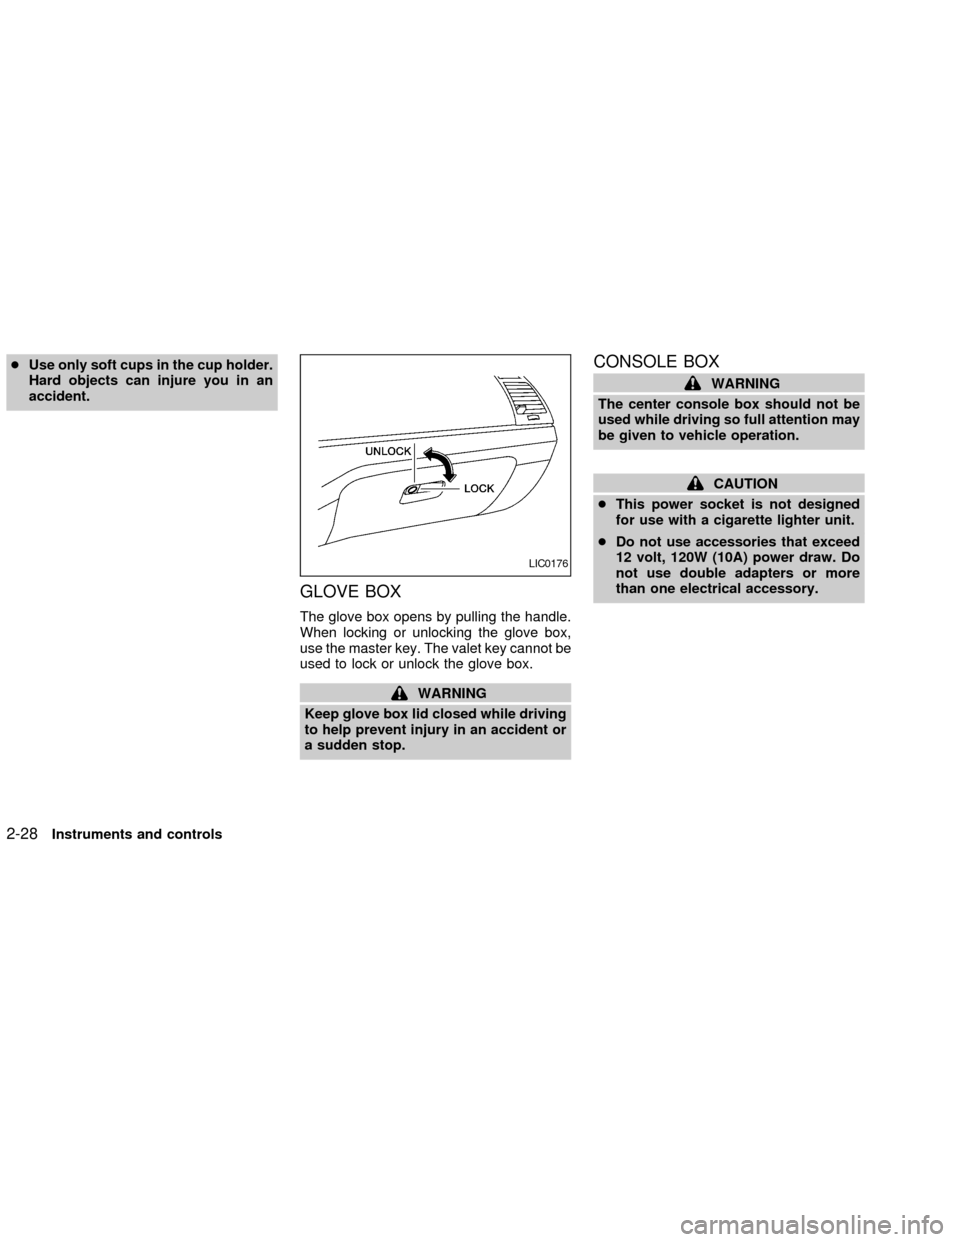
GLOVE BOX
The glove box opens by pulling the handle.
When locking or unlocking the glove box,
use the master key. The valet key cannot be
used to lock or unlock the glove box.
WARNING
Keep glove box lid closed while driving
to help prevent injury in an accident or
a sudden stop.
CONSOLE BOX
WARNING
The center console box should not be
used while driving so full attention may
be given to vehicle operation.
CAUTION
cThis power socket is not designed
for use with a cigarette lighter unit.
cDo not use accessories that exceed
12 volt, 120W (10A) power draw. Do
not use double adapters or more
than one electrical accessory.
LIC0176
2-28Instruments and controls
ZX
Page 89 of 249
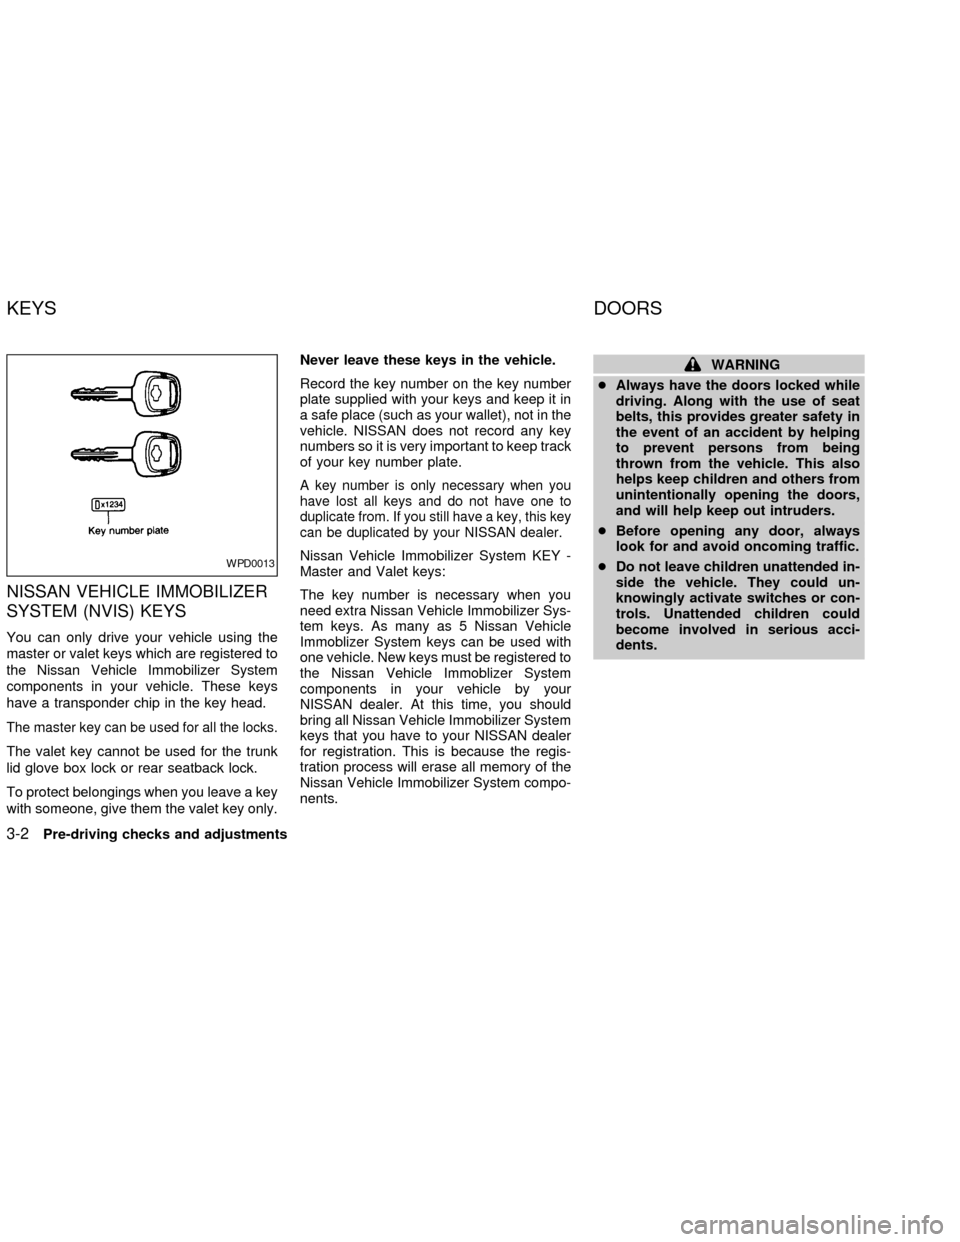
NISSAN VEHICLE IMMOBILIZER
SYSTEM (NVIS) KEYS
You can only drive your vehicle using the
master or valet keys which are registered to
the Nissan Vehicle Immobilizer System
components in your vehicle. These keys
have a transponder chip in the key head.
The master key can be used for all the locks.
The valet key cannot be used for the trunk
lid glove box lock or rear seatback lock.
To protect belongings when you leave a key
with someone, give them the valet key only.Never leave these keys in the vehicle.
Record the key number on the key number
plate supplied with your keys and keep it in
a safe place (such as your wallet), not in the
vehicle. NISSAN does not record any key
numbers so it is very important to keep track
of your key number plate.
A key number is only necessary when you
have lost all keys and do not have one to
duplicate from. If you still have a key, this key
can be duplicated by your NISSAN dealer.
Nissan Vehicle Immobilizer System KEY -
Master and Valet keys:
The key number is necessary when you
need extra Nissan Vehicle Immobilizer Sys-
tem keys. As many as 5 Nissan Vehicle
Immoblizer System keys can be used with
one vehicle. New keys must be registered to
the Nissan Vehicle Immoblizer System
components in your vehicle by your
NISSAN dealer. At this time, you should
bring all Nissan Vehicle Immobilizer System
keys that you have to your NISSAN dealer
for registration. This is because the regis-
tration process will erase all memory of the
Nissan Vehicle Immobilizer System compo-
nents.
WARNING
cAlways have the doors locked while
driving. Along with the use of seat
belts, this provides greater safety in
the event of an accident by helping
to prevent persons from being
thrown from the vehicle. This also
helps keep children and others from
unintentionally opening the doors,
and will help keep out intruders.
cBefore opening any door, always
look for and avoid oncoming traffic.
cDo not leave children unattended in-
side the vehicle. They could un-
knowingly activate switches or con-
trols. Unattended children could
become involved in serious acci-
dents.
WPD0013
KEYS DOORS
3-2Pre-driving checks and adjustments
ZX
Page 98 of 249
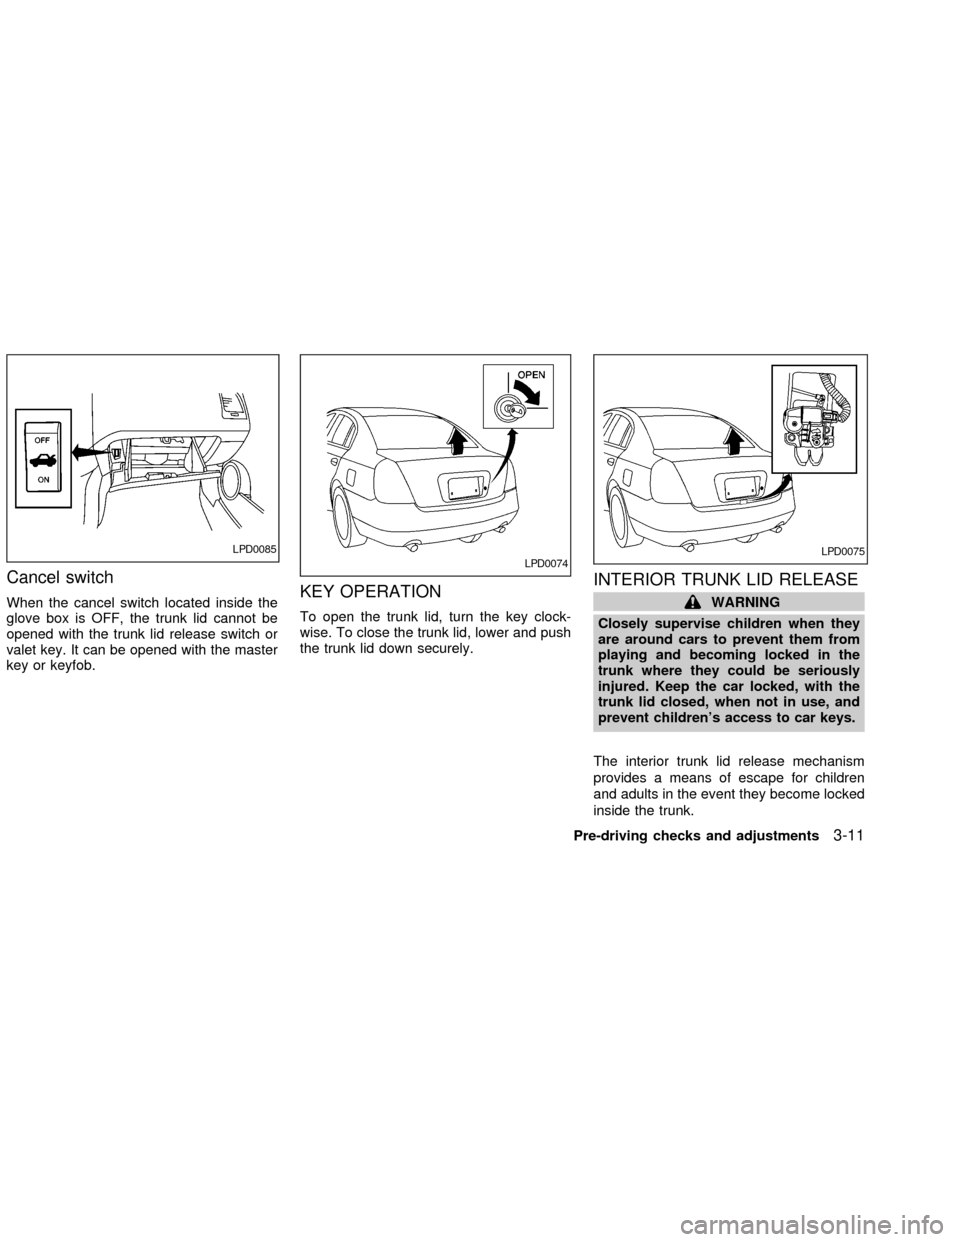
Cancel switch
When the cancel switch located inside the
glove box is OFF, the trunk lid cannot be
opened with the trunk lid release switch or
valet key. It can be opened with the master
key or keyfob.KEY OPERATION
To open the trunk lid, turn the key clock-
wise. To close the trunk lid, lower and push
the trunk lid down securely.
INTERIOR TRUNK LID RELEASE
WARNING
Closely supervise children when they
are around cars to prevent them from
playing and becoming locked in the
trunk where they could be seriously
injured. Keep the car locked, with the
trunk lid closed, when not in use, and
prevent children's access to car keys.
The interior trunk lid release mechanism
provides a means of escape for children
and adults in the event they become locked
inside the trunk.
LPD0085LPD0074LPD0075
Pre-driving checks and adjustments3-11
ZX
Page 198 of 249
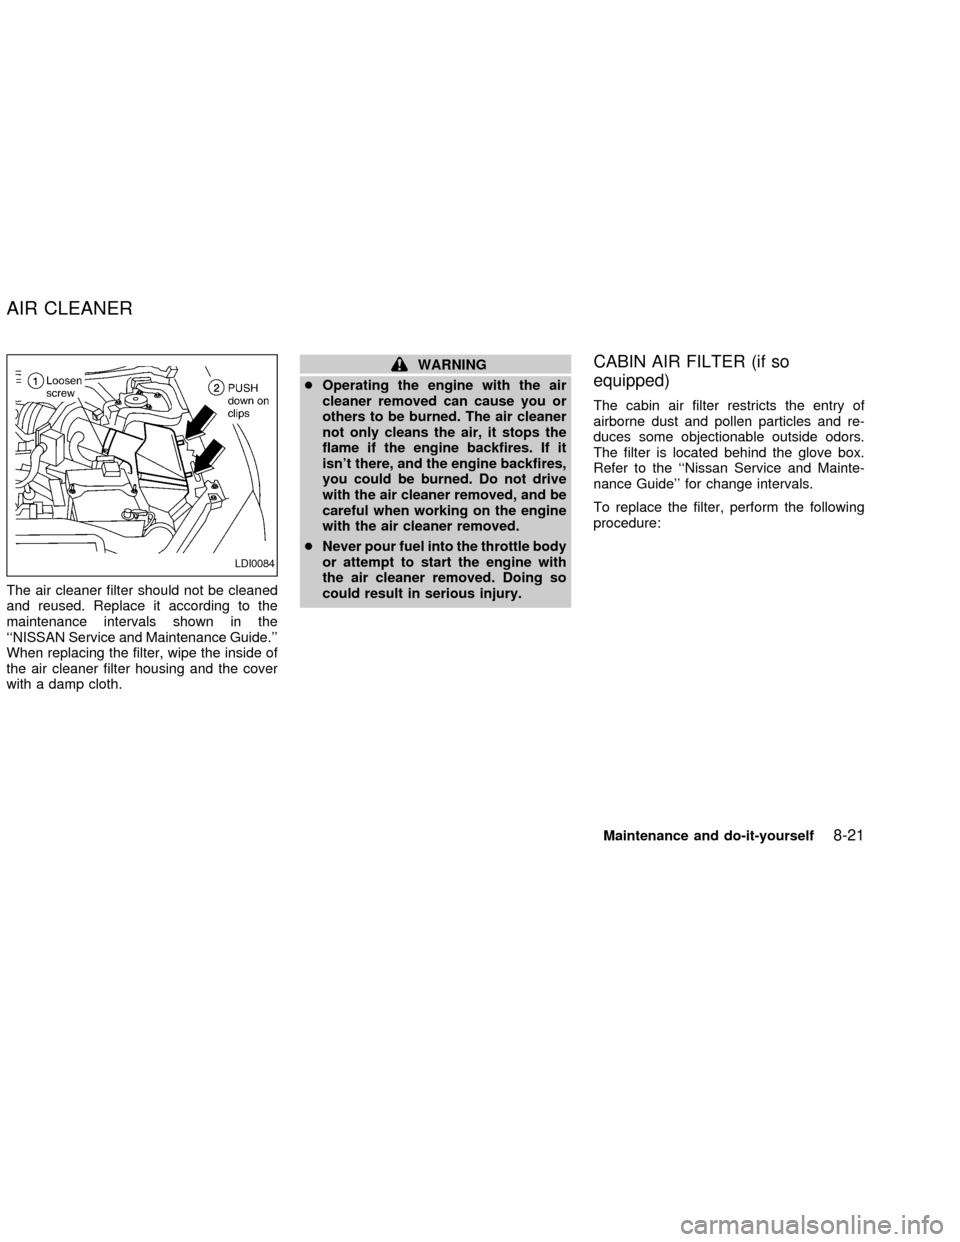
The air cleaner filter should not be cleaned
and reused. Replace it according to the
maintenance intervals shown in the
``NISSAN Service and Maintenance Guide.''
When replacing the filter, wipe the inside of
the air cleaner filter housing and the cover
with a damp cloth.
WARNING
cOperating the engine with the air
cleaner removed can cause you or
others to be burned. The air cleaner
not only cleans the air, it stops the
flame if the engine backfires. If it
isn't there, and the engine backfires,
you could be burned. Do not drive
with the air cleaner removed, and be
careful when working on the engine
with the air cleaner removed.
cNever pour fuel into the throttle body
or attempt to start the engine with
the air cleaner removed. Doing so
could result in serious injury.CABIN AIR FILTER (if so
equipped)
The cabin air filter restricts the entry of
airborne dust and pollen particles and re-
duces some objectionable outside odors.
The filter is located behind the glove box.
Refer to the ``Nissan Service and Mainte-
nance Guide'' for change intervals.
To replace the filter, perform the following
procedure:
LDI0084
AIR CLEANER
Maintenance and do-it-yourself8-21
ZX
Page 199 of 249
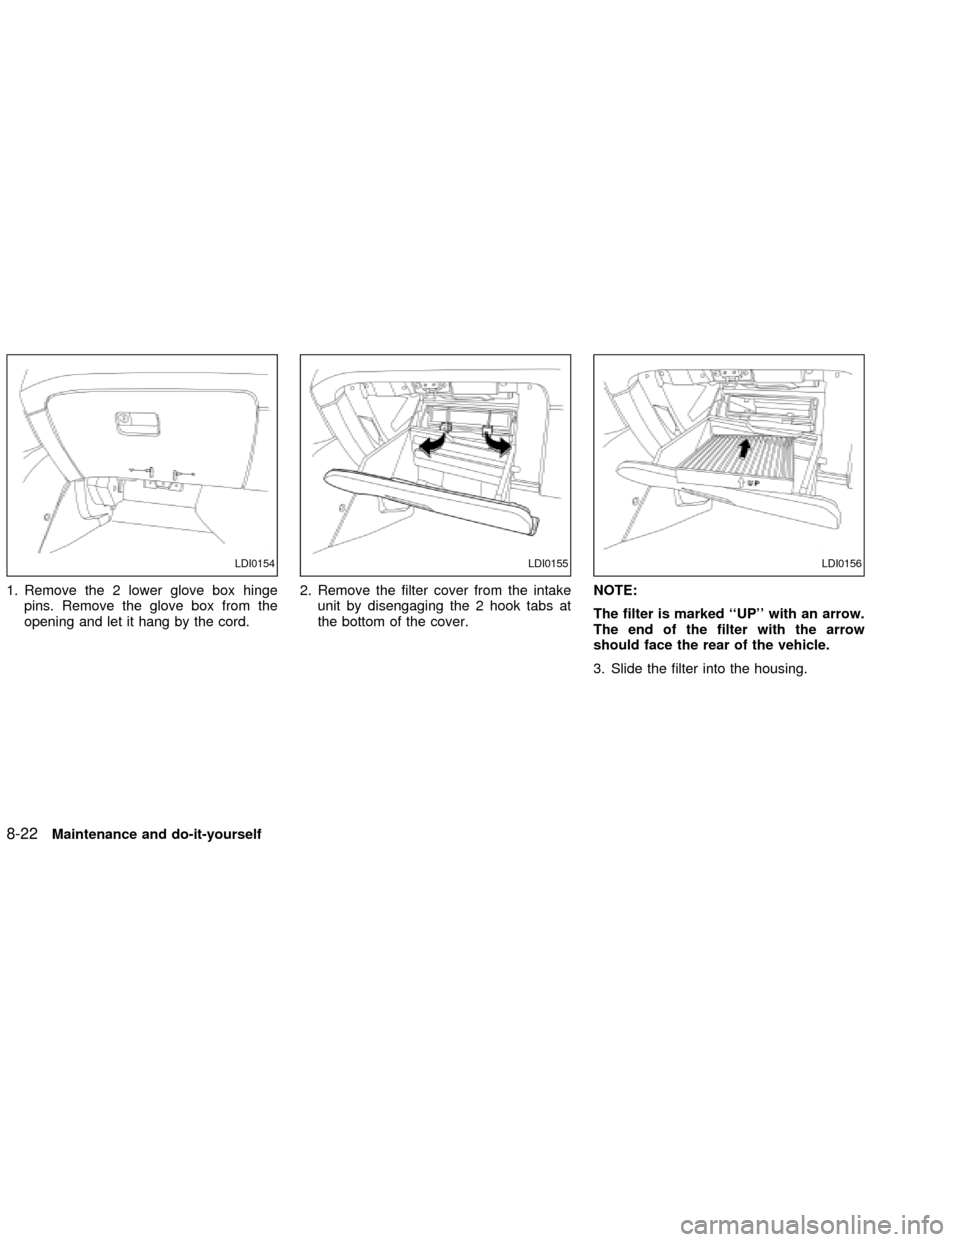
1. Remove the 2 lower glove box hinge
pins. Remove the glove box from the
opening and let it hang by the cord.2. Remove the filter cover from the intake
unit by disengaging the 2 hook tabs at
the bottom of the cover.NOTE:
The filter is marked ``UP'' with an arrow.
The end of the filter with the arrow
should face the rear of the vehicle.
3. Slide the filter into the housing.
LDI0154LDI0155LDI0156
8-22Maintenance and do-it-yourself
ZX