2002 NISSAN ALTIMA clock
[x] Cancel search: clockPage 98 of 249

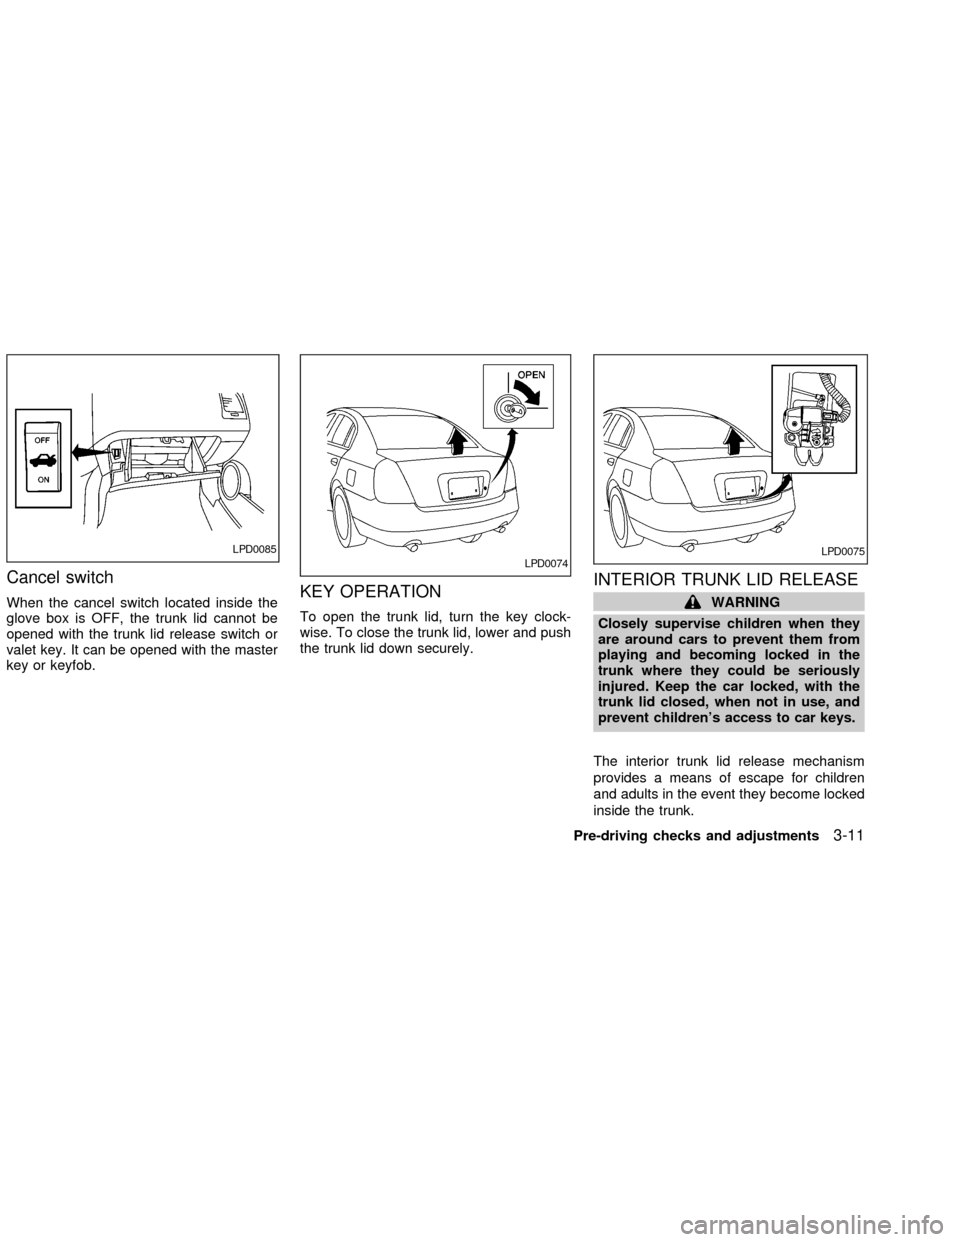
Cancel switch
When the cancel switch located inside the
glove box is OFF, the trunk lid cannot be
opened with the trunk lid release switch or
valet key. It can be opened with the master
key or keyfob.KEY OPERATION
To open the trunk lid, turn the key clock-
wise. To close the trunk lid, lower and push
the trunk lid down securely.
INTERIOR TRUNK LID RELEASE
WARNING
Closely supervise children when they
are around cars to prevent them from
playing and becoming locked in the
trunk where they could be seriously
injured. Keep the car locked, with the
trunk lid closed, when not in use, and
prevent children's access to car keys.
The interior trunk lid release mechanism
provides a means of escape for children
and adults in the event they become locked
inside the trunk.
LPD0085LPD0074LPD0075
Pre-driving checks and adjustments3-11
ZX
Page 99 of 249

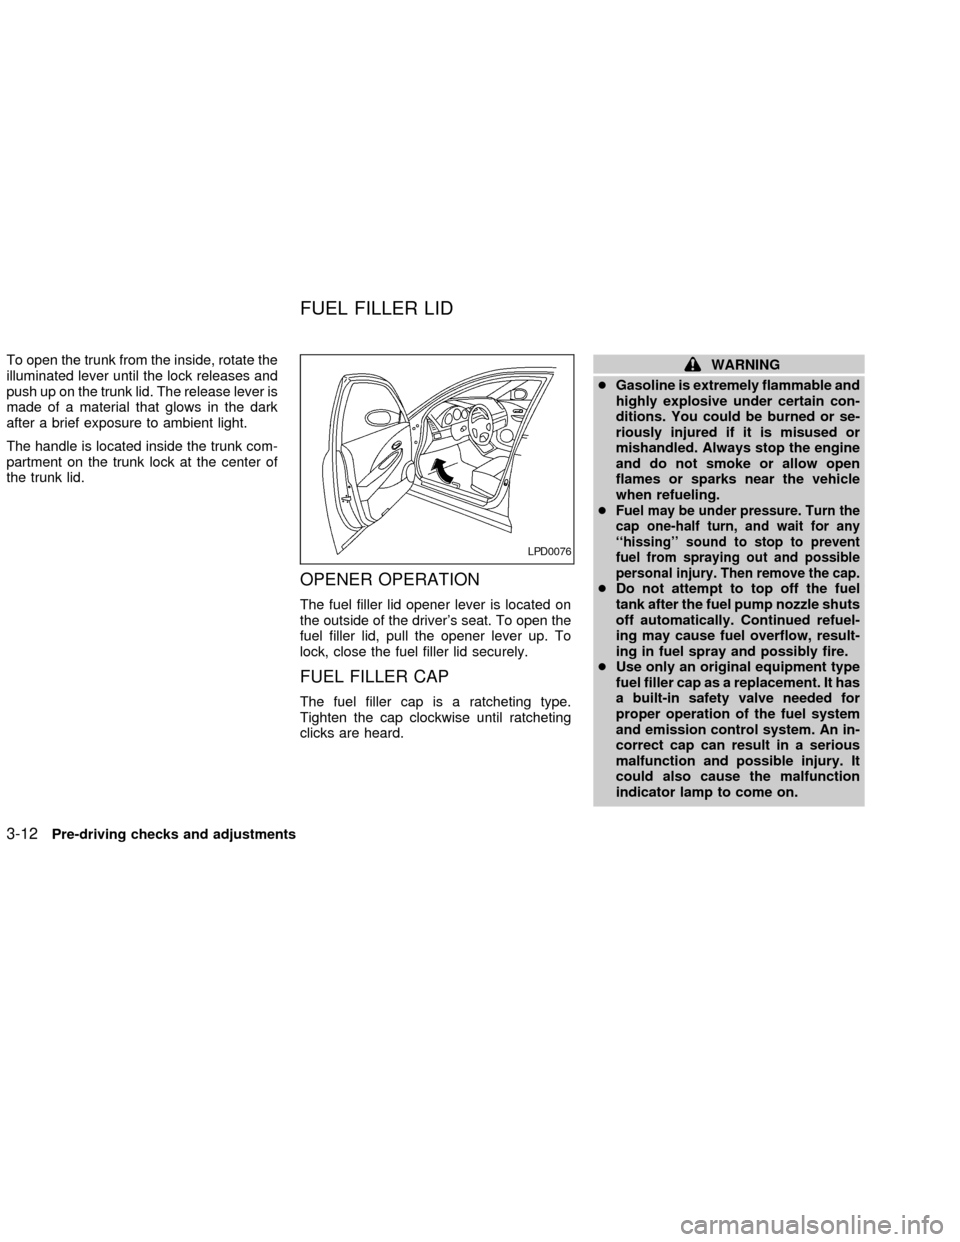
To open the trunk from the inside, rotate the
illuminated lever until the lock releases and
push up on the trunk lid. The release lever is
made of a material that glows in the dark
after a brief exposure to ambient light.
The handle is located inside the trunk com-
partment on the trunk lock at the center of
the trunk lid.
OPENER OPERATION
The fuel filler lid opener lever is located on
the outside of the driver's seat. To open the
fuel filler lid, pull the opener lever up. To
lock, close the fuel filler lid securely.
FUEL FILLER CAP
The fuel filler cap is a ratcheting type.
Tighten the cap clockwise until ratcheting
clicks are heard.
WARNING
cGasoline is extremely flammable and
highly explosive under certain con-
ditions. You could be burned or se-
riously injured if it is misused or
mishandled. Always stop the engine
and do not smoke or allow open
flames or sparks near the vehicle
when refueling.
c
Fuel may be under pressure. Turn the
cap one-half turn, and wait for any
``hissing'' sound to stop to prevent
fuel from spraying out and possible
personal injury. Then remove the cap.
cDo not attempt to top off the fuel
tank after the fuel pump nozzle shuts
off automatically. Continued refuel-
ing may cause fuel overflow, result-
ing in fuel spray and possibly fire.
cUse only an original equipment type
fuel filler cap as a replacement. It has
a built-in safety valve needed for
proper operation of the fuel system
and emission control system. An in-
correct cap can result in a serious
malfunction and possible injury. It
could also cause the malfunction
indicator lamp to come on.
LPD0076
FUEL FILLER LID
3-12Pre-driving checks and adjustments
ZX
Page 115 of 249

RADIO
Turn the ignition key to ACC or ON and
press the power on switch to turn on the
radio. If you listen to the radio with the
engine not running, the key should be
turned to the ACC position.
Radio reception is affected by station signal
strength, distance from radio transmitter,
buildings, bridges, mountains and other ex-
ternal influences. Intermittent changes in
reception quality normally are caused by
these external influences.
Using a cellular phone in or near the
vehicle may influence radio reception
quality.
Radio reception
Your NISSAN radio system is equipped with
state-of-the-art electronic circuits to en-
hance radio reception. These circuits are
designed to extend reception range, and to
enhance the quality of that reception.
However there are some general character-
istics of both FM and AM radio signals that
can affect radio reception quality in a mov-
ing vehicle, even when the finest equipment
is used. These characteristics are com-pletely normal in a given reception area,
and do not indicate any malfunction in your
NISSAN radio system.
Reception conditions will constantly change
because of vehicle movement. Buildings,
terrain, signal distance and interference
from other vehicles can work against ideal
reception. Described below are some of the
factors that can affect your radio reception.
FM RADIO RECEPTION
Range: FM range is normally limited to 25 to
30 miles (40 to 48 km), with monaural
(single channel) FM having slightly more
range than stereo FM. External influences
may sometimes interfere with FM station
reception even if the FM station is within 25
miles (40 km). The strength of the FM signal
is directly related to the distance between
the transmitter and receiver. FM signals
follow a line-of-sight path, exhibiting many
of the same characteristics as light. For
example they will reflect off objects.
Fade and drift: As your vehicle moves away
from a station transmitter, the signals will
tend to fade and/or drift.
Static and flutter: During signal interference
from buildings, large hills or due to antennaposition (usually in conjunction with in-
creased distance from the station transmit-
ter) static or flutter can be heard. This can
be reduced by adjusting the treble control
counterclockwise to reduce treble re-
sponse.
Multipath reception: Because of the reflec-
tive characteristics of FM signals, direct and
reflected signals reach the receiver at the
same time. The signals may cancel each
other, resulting in momentary flutter or loss
of sound.
AM RADIO RECEPTION
AM signals, because of their low frequency,
can bend around objects and skip along the
ground. In addition, the signals can be
bounced off the ionosphere and bent back
to earth. Because of these characteristics.
AM signals are also subject to interference
as they travel from transmitter to receiver.
Fading: Occurs while the vehicle is passing
through freeway underpasses or in areas
with many tall buildings. It can also occur for
several seconds during ionospheric turbu-
lence even in areas where no obstacles
exist.
Static: Caused by thunderstorms, electrical
AUDIO SYSTEM
4-12Heater, air conditioner and audio systems
ZX
Page 118 of 249

1. PRESET ABC button
2. MIX button
3. CD select button
4. Display
5. FM band select button
6. AM band select button
7. CD eject button
8. TRAVEL button
9. TUNE FF-REV button
10. CLOCK button or MENU/CLOCK button
for radios with SCV
11. Priority scan button
12. AUDIO button
13. SCAN button
14. Station select buttons
15. POWER/VOL control knob
16. CD insert slot
17. SEEK/TRACK button
LHA0115
Heater, air conditioner and audio systems4-15
ZX
Page 119 of 249

FM-AM RADIO WITH COMPACT
DISC (CD) PLAYER
ONzOFF/VOL control
Turn the ignition key to the ACC or ON
position, then push the PWR control knob. If
you listen to the radio with the engine not
running, turn the key to the ACC position.
The mode (radio or CD) that was playing
immediately before the system was turned
off resumes playing.
When no CD is loaded, the radio comes on.
Pushing the PWR control knob again turns
the system off.
Turn the PWR control knob to the right to
increase volume or to the left to decrease
volume.
Adjusting tone quality and speaker bal-
ance
Press the AUDIO button to enter the audio
adjust mode:
Bass!Mid!Treb!Fade!Bal
Press the TUNE/FF-REV (
or)or
SEEK/TRACK (or) to adjust to the
desired levels. The display will return to the
regular radio display after 7 seconds, or youmay press the AUDIO button again to return
to the regular radio display.
Clock operation
Pressing the MENU or CLOCK button dis-
plays the clock with the radio on or off.
Press the MENU or CLOCK button again to
turn off the clock display.
Clock set
1. Press and hold the MENU or CLOCK
button until it beeps (>2 seconds).
2. The hours will start flashing. Press
TUNE/FF-REV (
or)or
SEEK/TRACK (or) to adjust the
hours.
3. Press the MENU or CLOCK button to
switch to the minute adjustment.
4. Press TUNE/FF-REV (
or)or
SEEK/TRACK (or) to adjust
the minutes.
5. Press the MENU or CLOCK button again
to exit the clock set mode.
The display will return to the regular clock
display after 7 seconds, or you may press
the MENU or CLOCK button again to return
to the regular clock display.
FM-AM radio operation
FM-AM band select
Push the AM or the FM button to change
from AM to FM reception.
The FM stereo indicator, ST, illuminates
during FM stereo reception. When the ste-
reo broadcast signal is weak, the radio
automatically changes from stereo to mon-
aural reception.
Station signal strength, distance from radio
transmitter, buildings, bridges, mountains,
and other external influences affect radio
reception. Intermittent changes in reception
quality normally are caused by these exter-
nal influences.
Using a cellular phone in or near the
vehicle may influence radio reception
quality.
4-16Heater, air conditioner and audio systems
ZX
Page 121 of 249

radio displaysªNO STATIONºand
mutes the audio.
5. If the radio cannot fill all the presets, the
remaining presets are stored with 87.9
for FM, and 600 for AM.
The TUNE, SCAN, SEEK and preset
memory functions are available while Travel
Preset mode is on.
Canceling Travel Preset
Press the TRAVEL preset button (<1.5 sec-
onds) to clear the Travel Preset memory.
This turns off the Travel icon. The radio
returns to the last used preset of A, B or C in
the permanent preset memory.
Storing Travel Preset stations in perma-
nent memory
1. While in Travel Preset mode, press and
hold the TRAVEL preset button until it
beeps (>3 seconds).
2. The presets are transferred from Travel
Preset memory to the permanent preset
memory for A, B, and C.ªLOADºis
displayed.
3. The TRAVEL preset indicator turns off.Preset Scan
Pressing the Preset Scan button (<1.5 sec-
onds) scans the permanent preset memory
that is selected (A, B or C) from 1-6 for 5
seconds. If the Travel Preset is ON, the
travel preset that is selected (A, B, or C)
from 1-6 is scanned for 5 seconds.
All Preset Scan
Pressing the Preset Scan button (>1.5 sec-
onds) scans all the permanent preset
memory banks (A, B or C) from 1-6 for 5
seconds. If the Travel Preset is ON, all the
travel preset memory banks (A, B, or C)
from 1-6 are scanned for 5 seconds.
Canceling preset scan mode
Pressing any button except CLOCK,
EJECT, MIX and CD cancels the Preset
Scan mode.
Speed Sensitive Control Volume (SCV)
(if so equipped)
Your vehicle has Speed Sensitive Control
Volume (SCV) for audio. The audio volume
changes as the driving speed changes.
Press and hold the MENU button (>2 sec-
onds) until the radio beeps to start the
editing mode. Press the MENU button untilthe display showsªSCVº. This display will
last 2 seconds and then change toªOFFº.
Press TUNE/FF-REV (
or)to
change between:
Off!Low!Mid!High
Compact disc (CD) operation
Turn the ignition key to the ACC or ON
position.
CAUTION
cDo not force a compact disc (CD)
into the CD insert slot. This could
damage the CD and/or CD changer.
cTrying to load a CD with the CD door
closed could damage the CD and/or
CD changer.
CD button
When the CD button is pressed with a
compact disc loaded and the radio playing,
the radio turns off and the last used com-
pact disc starts to play.
FF (fast forward) REW
(rewind) buttons
When the TUNE/FF-REV (
or) but-
ton is pressed while the compact disc is
4-18Heater, air conditioner and audio systems
ZX
Page 123 of 249

1. PRESET ABC button
2. LOAD button
3. CD select button
4. Display
5. FM band select button
6. AM band select button
7. CD eject button
8. TRAVEL button
9. TUNE FF-REV button
10. MENU/CLOCK button
11. MIX/PTY button
12. AUDIO button
13. SCAN button
14. Station select buttons
15. POWER/VOL control knob
16. CD insert slot
17. SEEK/TRACK button
LHA0116
4-20Heater, air conditioner and audio systems
ZX
Page 124 of 249

FM-AM RADIO WITH COMPACT
DISC (CD) CHANGER (if so
equipped)
ONzOFF/VOL control
Turn the ignition key to the ACC or ON
position, then push the PWR control knob. If
you listen to the radio with the engine not
running, turn the key to the ACC position.
The mode (radio or CD) that was playing
immediately before the system was turned
off resumes playing.
When no CD is loaded, the radio comes on.
Pushing the PWR control knob again turns
the system off.
Turn the PWR control knob to the right to
increase volume or to the left to decrease
volume.
Adjusting tone quality and speaker bal-
ance
Press the AUDIO button to enter the audio
adjust mode:
Bass!Treb!Fade!Bal
Press the TUNE/FF-REV (
or)or
SEEK/TRACK (or) to adjust to
the desired levels. The display will return tothe regular radio display after 7 seconds, or
youmay press the AUDIO button again to
return to the regular radio display.
Clock operation
Pressing the MENU button displays the
clock with the radio on or off. Press the
MENU button again to turn off the clock
display.
Clock set
1. Press and hold the MENU button until it
beeps (>2 seconds).
2. The hours will start flashing. Press
TUNE/FF-REV (
or)or
SEEK/TRACK (
or) to adjust
the hours.
3. Press the MENU button to switch to the
minute adjustment.
4. Press TUNE/FF-REV (
or)or
SEEK/TRACK (
or) to adjust
the minutes.
5. Press the MENU button again to exit the
clock set mode.
The display will return to the regular clock
display after 7 seconds, or you may pressthe MENU button again to return to the
regular clock display.
FM-AM radio operation
FM-AM band select
Push the AM or the FM button to change
from AM to FM reception.
The FM stereo indicator, ST, illuminates
during FM stereo reception. When the ste-
reo broadcast signal is weak, the radio
automatically changes from stereo to mon-
aural reception.
Station signal strength, distance from radio
transmitter, buildings, bridges, mountains,
and other external influences affect radio
reception. Intermittent changes in reception
quality normally are caused by these exter-
nal influences.
Using a cellular phone in or near the
vehicle may influence radio reception
quality.
Heater, air conditioner and audio systems
4-21
ZX