2002 NISSAN ALTIMA trunk
[x] Cancel search: trunkPage 13 of 249

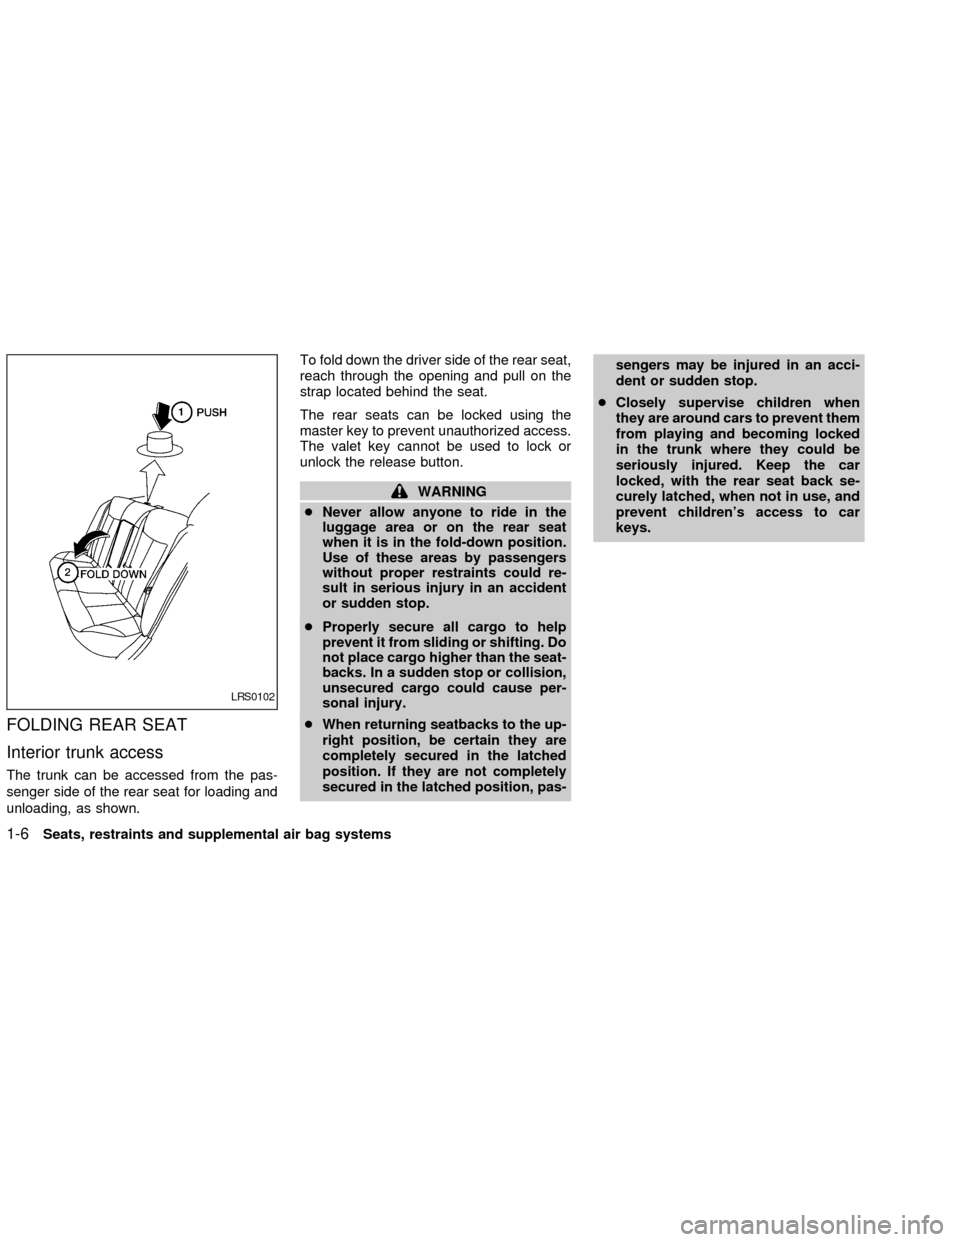
FOLDING REAR SEAT
Interior trunk access
The trunk can be accessed from the pas-
senger side of the rear seat for loading and
unloading, as shown.To fold down the driver side of the rear seat,
reach through the opening and pull on the
strap located behind the seat.
The rear seats can be locked using the
master key to prevent unauthorized access.
The valet key cannot be used to lock or
unlock the release button.
WARNING
cNever allow anyone to ride in the
luggage area or on the rear seat
when it is in the fold-down position.
Use of these areas by passengers
without proper restraints could re-
sult in serious injury in an accident
or sudden stop.
cProperly secure all cargo to help
prevent it from sliding or shifting. Do
not place cargo higher than the seat-
backs. In a sudden stop or collision,
unsecured cargo could cause per-
sonal injury.
cWhen returning seatbacks to the up-
right position, be certain they are
completely secured in the latched
position. If they are not completely
secured in the latched position, pas-sengers may be injured in an acci-
dent or sudden stop.
cClosely supervise children when
they are around cars to prevent them
from playing and becoming locked
in the trunk where they could be
seriously injured. Keep the car
locked, with the rear seat back se-
curely latched, when not in use, and
prevent children's access to car
keys.
LRS0102
1-6Seats, restraints and supplemental air bag systems
ZX
Page 50 of 249

Interior light...........................................................2-34
Map lights .............................................................2-34
Trunk light.............................................................2-35
HomeLinkTuniversal transceiver (if so
equipped) .............................................................2-35
Programming HomeLinkT................................2-36
Programming HomeLinkTfor Canadian
customers ........................................................2-36Operating the HomeLinkTuniversal
transceiver .......................................................2-37
Programming trouble-diagnosis.......................2-37
Clearing the programmed information.............2-37
Rolling code programming ..............................2-37
Reprogramming a single HomeLinkT
button ...............................................................2-38
If your vehicle is stolen....................................2-38
ZX
Page 57 of 249

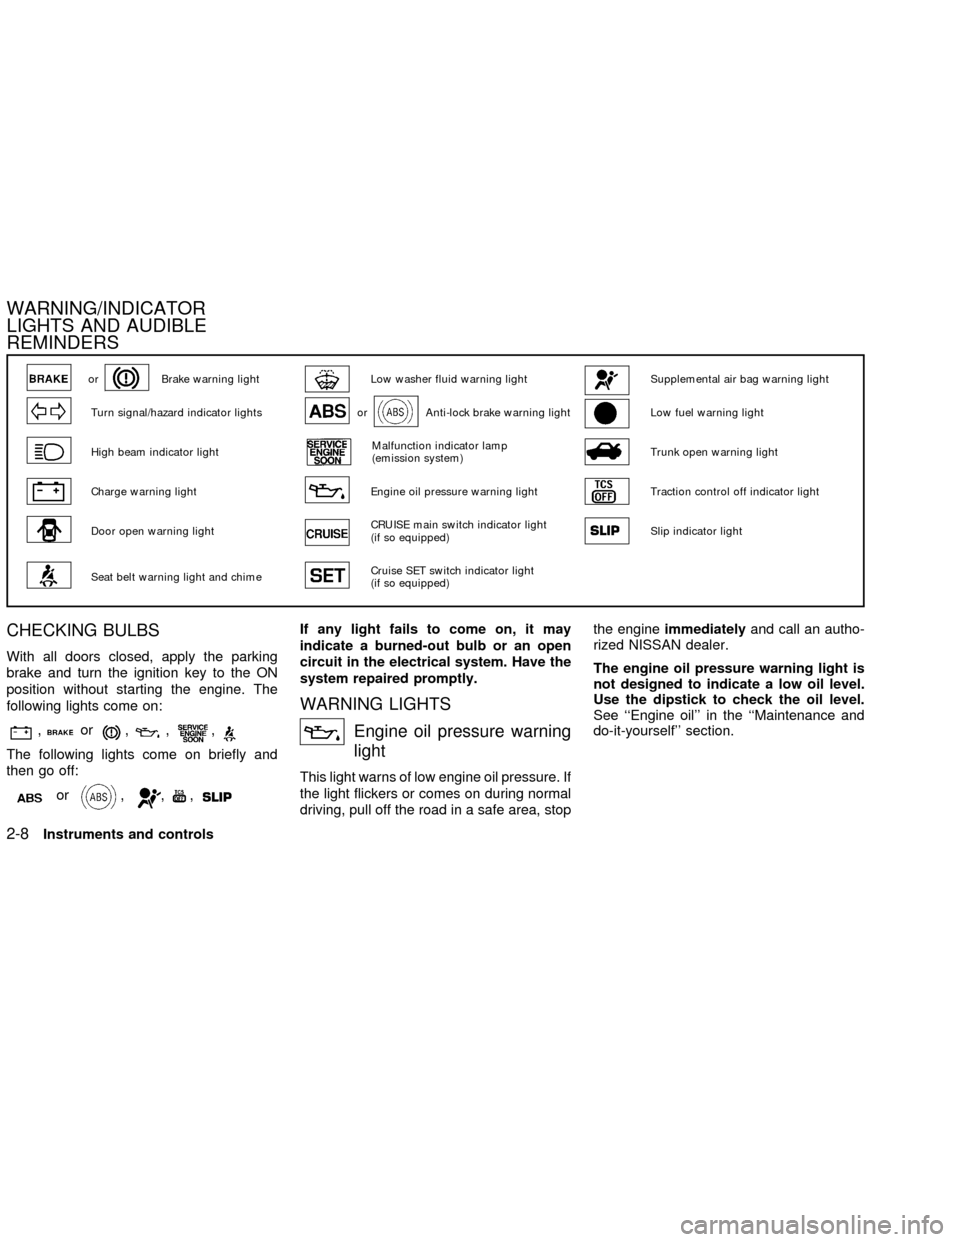
CHECKING BULBS
With all doors closed, apply the parking
brake and turn the ignition key to the ON
position without starting the engine. The
following lights come on:
,or,,,
The following lights come on briefly and
then go off:
or,,,
If any light fails to come on, it may
indicate a burned-out bulb or an open
circuit in the electrical system. Have the
system repaired promptly.
WARNING LIGHTS
Engine oil pressure warning
light
This light warns of low engine oil pressure. If
the light flickers or comes on during normal
driving, pull off the road in a safe area, stopthe engineimmediatelyand call an autho-
rized NISSAN dealer.
The engine oil pressure warning light is
not designed to indicate a low oil level.
Use the dipstick to check the oil level.
See ``Engine oil'' in the ``Maintenance and
do-it-yourself'' section.
orBrake warning lightLow washer fluid warning lightSupplemental air bag warning light
Turn signal/hazard indicator lightsorAnti-lock brake warning lightLow fuel warning light
High beam indicator lightMalfunction indicator lamp
(emission system)Trunk open warning light
Charge warning lightEngine oil pressure warning lightTraction control off indicator light
Door open warning lightCRUISE main switch indicator light
(if so equipped)Slip indicator light
Seat belt warning light and chimeCruise SET switch indicator light
(if so equipped)
WARNING/INDICATOR
LIGHTS AND AUDIBLE
REMINDERS
2-8Instruments and controls
ZX
Page 58 of 249

CAUTION
Running the engine with the engine oil
pressure warning light on could cause
serious damage to the engine almost
immediately. Such damage is not cov-
ered by warranty. Turn off the engine as
soon as it is safe to do so.
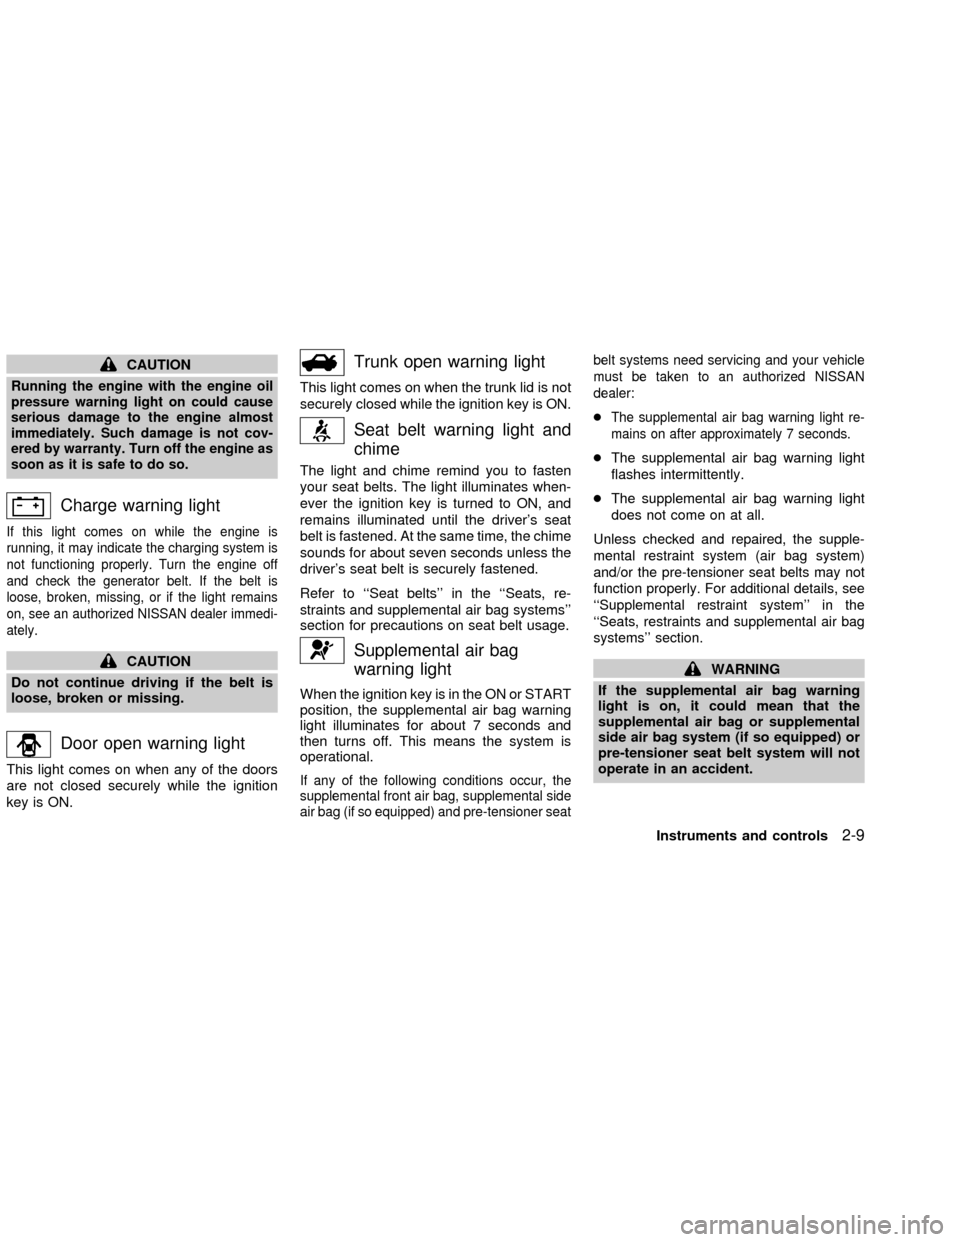
Charge warning light
If this light comes on while the engine is
running, it may indicate the charging system is
not functioning properly. Turn the engine off
and check the generator belt. If the belt is
loose, broken, missing, or if the light remains
on, see an authorized NISSAN dealer immedi-
ately.
CAUTION
Do not continue driving if the belt is
loose, broken or missing.
Door open warning light
This light comes on when any of the doors
are not closed securely while the ignition
key is ON.
Trunk open warning light
This light comes on when the trunk lid is not
securely closed while the ignition key is ON.
Seat belt warning light and
chime
The light and chime remind you to fasten
your seat belts. The light illuminates when-
ever the ignition key is turned to ON, and
remains illuminated until the driver's seat
belt is fastened. At the same time, the chime
sounds for about seven seconds unless the
driver's seat belt is securely fastened.
Refer to ``Seat belts'' in the ``Seats, re-
straints and supplemental air bag systems''
section for precautions on seat belt usage.
Supplemental air bag
warning light
When the ignition key is in the ON or START
position, the supplemental air bag warning
light illuminates for about 7 seconds and
then turns off. This means the system is
operational.
If any of the following conditions occur, the
supplemental front air bag, supplemental side
air bag (if so equipped) and pre-tensioner seatbelt systems need servicing and your vehicle
must be taken to an authorized NISSAN
dealer:
cThe supplemental air bag warning light re-
mains on after approximately 7 seconds.
cThe supplemental air bag warning light
flashes intermittently.
cThe supplemental air bag warning light
does not come on at all.
Unless checked and repaired, the supple-
mental restraint system (air bag system)
and/or the pre-tensioner seat belts may not
function properly. For additional details, see
``Supplemental restraint system'' in the
``Seats, restraints and supplemental air bag
systems'' section.
WARNING
If the supplemental air bag warning
light is on, it could mean that the
supplemental air bag or supplemental
side air bag system (if so equipped) or
pre-tensioner seat belt system will not
operate in an accident.
Instruments and controls
2-9
ZX
Page 64 of 249

How to arm the vehicle security
system
1. Close all windows.(The system can be
armed even if the windows are open).
2. Remove the key from the ignition switch.
3. Close the hood, trunk lid and all doors.
Lock all doors. The doors can be locked
with the key, power door lock switch or
with the keyfob.
Keyfob operation:
cPush the
button on the keyfob. All
doors lock. The hazard lights flash
twice and the horn beeps once to
indicate all doors are locked.
cWhen the
button is pushed with all
doors locked, the hazard lights flash
twice and the horn beeps once as a
reminder that the doors are already
locked.
The horn may or may not beep once.
Refer to ``Silencing the horn beep fea-
ture'' later in this section for details.
4.
Confirm that the SECURITY indicator light
comes on. The SECURITY light stays on
for about 30 seconds. The vehicle security
system is now pre-armed. After about 30seconds the vehicle security system auto-
matically shifts into the armed phase. The
SECURITY light begins to flash once ev-
ery three seconds. If, during the 30-
second pre-arm time period, the door is
unlocked by the key or the keyfob, or the
ignition key is turned to ACC or ON, the
system will not arm.
cIf the key is turned slowly when lock-
ing the door, the system may not arm.
Furthermore, if the key is turned ex-
cessively to the unlock position, the
system may be disarmed when the key
is removed. If the indicator light fails to
glow for 30 seconds, unlock the door
once and lock it again.
cEven when the driver and/or passen-
gers are in the vehicle, the system will
arm with all doors, hood and trunk lid
closed and locked with the ignition
key in the OFF position.
Vehicle security system activation
The vehicle security system will give the
following alarm:
cThe headlights blink and the horn sounds
intermittently.
LIC0053
Instruments and controls2-15
ZX
Page 65 of 249

cThe alarm automatically turns off after
approximately 1 minute. However, the
alarm reactivates if the vehicle is tam-
pered with again. The alarm can be shut
off by unlocking a door or trunk lid with
the key, or by pressing the
button on
the keyfob.
The alarm is activated by:
copening the door or trunk lid without
using the key or keyfob (even if the door
is unlocked by releasing the door inside
lock switch) or opening the trunk lid by
operating the opener lever.
copening the hood.
How to stop an activated alarm
The alarm stops only by unlocking a door or
the trunk lid with the key, or by pressing
the
button on the keyfob.
Silencing the horn beep feature
If desired, the horn beep feature can be
deactivated using the keyfob. The instruc-
tions are on the back of the keyfob.
To deactivate:Press and hold the
and
buttonsfor at least two seconds.
The hazard lights will flash three times to
confirm that the horn beep feature has been
deactivated.
To activate:Press and hold the
and
buttonsfor at least two seconds once
more.The hazard lights will flash once and the
horn will sound once to confirm that the horn
beep feature has been reactivated.
Deactivating the horn feature does not si-
lence the horn if the alarm is triggered.
If the system does not operate as de-
scribed above, have it checked by an
authorized NISSAN dealer.
LIC0168
2-16Instruments and controls
ZX
Page 84 of 249

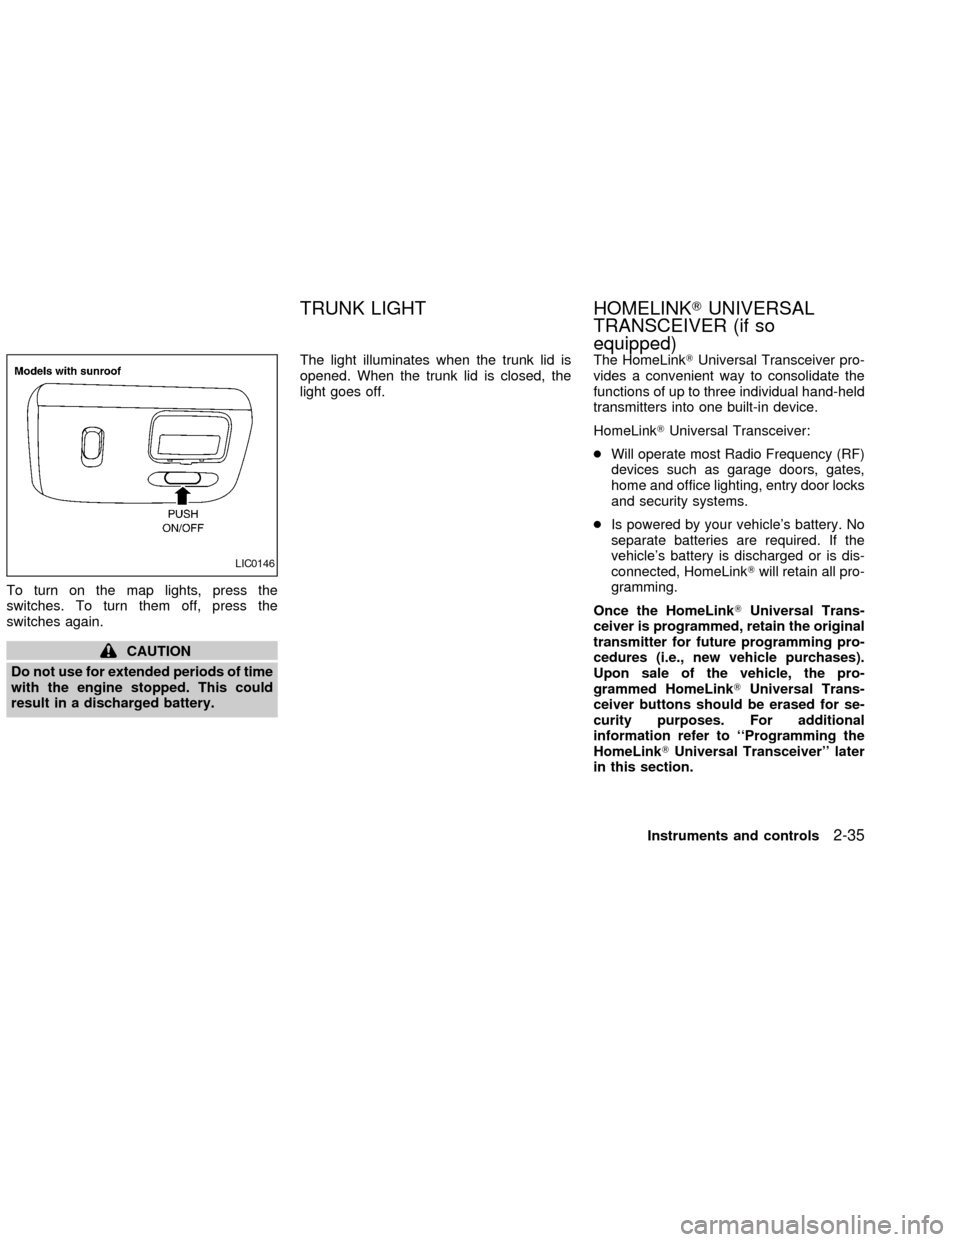
To turn on the map lights, press the
switches. To turn them off, press the
switches again.
CAUTION
Do not use for extended periods of time
with the engine stopped. This could
result in a discharged battery.The light illuminates when the trunk lid is
opened. When the trunk lid is closed, the
light goes off.The HomeLinkTUniversal Transceiver pro-
vides a convenient way to consolidate the
functions of up to three individual hand-held
transmitters into one built-in device.
HomeLinkTUniversal Transceiver:
cWill operate most Radio Frequency (RF)
devices such as garage doors, gates,
home and office lighting, entry door locks
and security systems.
cIs powered by your vehicle's battery. No
separate batteries are required. If the
vehicle's battery is discharged or is dis-
connected, HomeLinkTwill retain all pro-
gramming.
Once the HomeLinkTUniversal Trans-
ceiver is programmed, retain the original
transmitter for future programming pro-
cedures (i.e., new vehicle purchases).
Upon sale of the vehicle, the pro-
grammed HomeLinkTUniversal Trans-
ceiver buttons should be erased for se-
curity purposes. For additional
information refer to ``Programming the
HomeLinkTUniversal Transceiver'' later
in this section.
LIC0146
TRUNK LIGHT HOMELINKTUNIVERSAL
TRANSCEIVER (if so
equipped)
Instruments and controls2-35
ZX
Page 88 of 249

3 Pre-driving checks and adjustments
Keys .......................................................................3-2
Nissan vehicle immobilizer system
(NVIS) keys .......................................................3-2
Doors ......................................................................3-2
Locking with key ................................................3-3
Locking with inside lock knob............................3-3
Locking with power door lock switch.................3-4
Child safety rear door lock ................................3-4
Remote keyless entry system (if so equipped)......3-5
How to use remote keyless entry
system ...............................................................3-5
Battery replacement ..........................................3-8
Hood .......................................................................3-9
Trunk lid................................................................3-10
Opener operation ............................................3-10Key operation ..................................................3-11
Interior trunk lid release...................................3-11
Fuel filler lid ..........................................................3-12
Opener operation ............................................3-12
Fuel filler cap ...................................................3-12
Steering wheel .....................................................3-13
Tilt operation ....................................................3-13
Telescopic operation .......................................3-14
Sun visors.............................................................3-14
Vanity mirrors ..................................................3-14
Mirrors ..................................................................3-15
Inside mirror.....................................................3-15
Automatic anti-glare inside mirror
(if so equipped)................................................3-15
Outside mirror remote control .........................3-16
ZX