2002 MERCEDES-BENZ ML320 steering wheel
[x] Cancel search: steering wheelPage 87 of 342

84 Instrument cluster
Te ch n i c a l
data Instruments
and controlsOperationDrivingInstrument
cluster displayPractical hints Car care Index
Indicator lamps in the instrument cluster
High beam
BAS malfunction, see page 243
ESP malfunction, see page 243
4-ETS+ malfunction, see page 243
ABS malfunction, see page 244
Brake pads worn down, see page 247
Engine oil level low, see page 246
Coolant level low, see page 246
Transmission in LOW RANGE mode,
see page 243ESP and 4-ETS+. Adjust driving to road
condition, see page 243
Brake fluid low, see page 241
EBP malfunction, see page 222
Parking brake engaged, see page 191
Front passenger airbag automatically
switched off, see page 55
Front fog lamp, see page 103
Steering wheel adjustment not locked,
see page 74
Fasten seat belts,
see page 245
Battery not being charged properly,
see page 245
SRS malfunction, see page 242
Fluid level for windshield and headlamp
washer system low, see page 247.
BAS
ESPABSLOW
RANGE
BRAKESRS
Page 100 of 342
97 Exterior lamp switch
Te ch n i c a l
data Instruments
and controlsOperationDrivingInstrument
cluster displayPractical hints Car care Index Exterior lamp switch
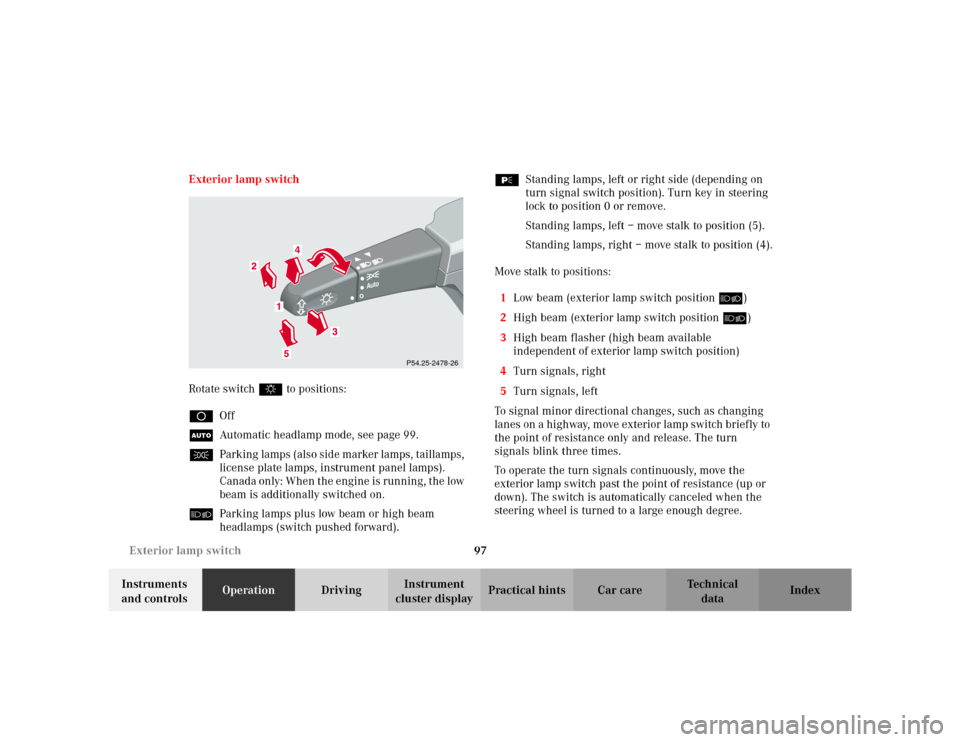
Rotate switch $ to positions:
DOff
UAutomatic headlamp mode, see page 99.
CParking lamps (also side marker lamps, taillamps,
license plate lamps, instrument panel lamps).
Canada only: When the engine is running, the low
beam is additionally switched on.
õParking lamps plus low beam or high beam
headlamps (switch pushed forward).ƒStanding lamps, left or right side (depending on
turn signal switch position). Turn key in steering
lock to position 0 or remove.
Standing lamps, left – move stalk to position (5).
Standing lamps, right – move stalk to position (4).
Move stalk to positions:
1Low beam (exterior lamp switch position õ)
2High beam (exterior lamp switch position õ)
3High beam flasher (high beam available
independent of exterior lamp switch position)
4Turn signals, right
5Turn signals, left
To signal minor directional changes, such as changing
lanes on a highway, move exterior lamp switch brief ly to
the point of resistance only and release. The turn
signals blink three times.
To operate the turn signals continuously, move the
exterior lamp switch past the point of resistance (up or
down). The switch is automatically canceled when the
steering wheel is turned to a large enough degree.
Auto
P54.25-2478-26
Page 107 of 342
104 Hazard warning flasher
Te ch n i c a l
data Instruments
and controlsOperationDrivingInstrument
cluster displayPractical hints Car care Index
Hazard warning flasher switch
The hazard warning flasher switch is located on top of
the steering column.
The hazard warning flasher can be activated either
manually via the switch located in the dashboard, or it
is activated automatically at the time an airbag is
deployed.
To activate hazard warning flasher, press switch once.
To deactivate, press switch again.
Note:
To signal turns while being towed with hazard warning
flasher in use, turn key in steering lock to position 2
and activate combination switch for left or right turn
signal in usual manner. Now deactivate the hazard
warning flasher, only the selected turn signal will
operate. Upon canceling the turn signal, the hazard
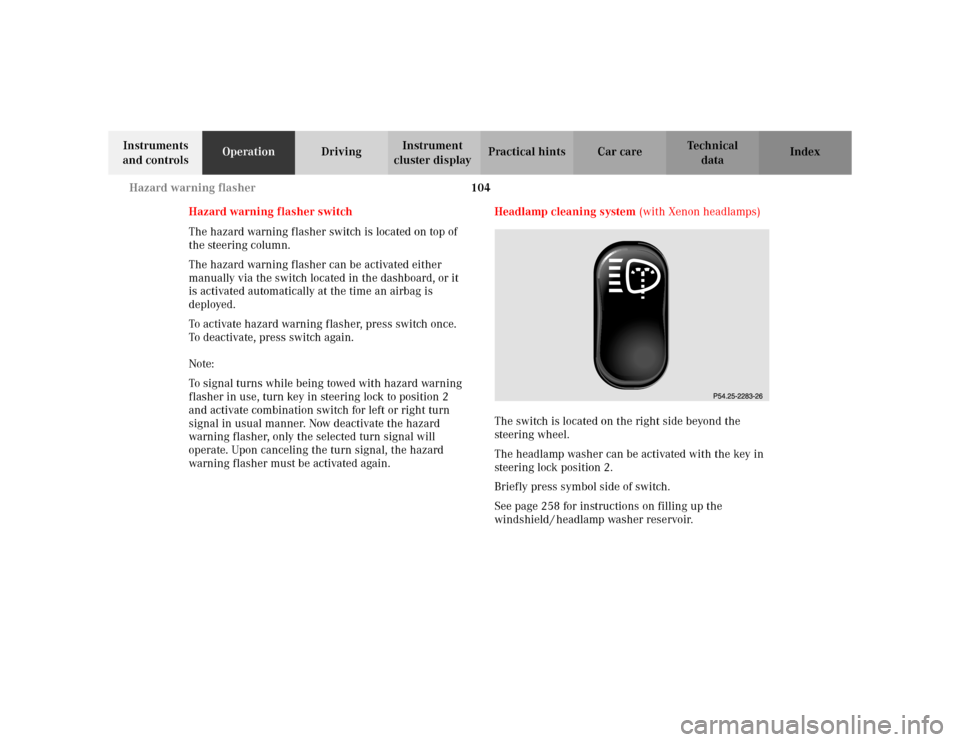
warning flasher must be activated again.Headlamp cleaning system (with Xenon headlamps)
The switch is located on the right side beyond the
steering wheel.
The headlamp washer can be activated with the key in
steering lock position 2.
Briefly press symbol side of switch.
See page 258 for instructions on filling up the
windshield / headlamp washer reservoir.
Page 108 of 342

105 Windshield wiper/washer
Te ch n i c a l
data Instruments
and controlsOperationDrivingInstrument
cluster displayPractical hints Car care Index Windshield wiper/washer switch
Move stalk briefly up for single wipe without adding
washer fluid (use only when windshield is wet).
Pull stalk toward steering wheel and hold to activate
wiper and washer.
Wiper off
Move stalk down for:
Intermittent wiping
(Interval is vehicle speed dependent
1). Optional rain sensor:
(Canada: standard on ML 500;
USA: standard on ML 55 AMG)
One initial wipe, pauses between wipes are
automatically controlled by a rain sensor
monitoring wetness of windshield.)
Notes:
With vehicle at a standstill, a front door open and
the key in steering lock position 2 there will be no
operation of windshield wipers in intermittent
setting.
With the intermittent wiping on, turn the
electronic key in steering lock from position 1 to
position 2 and keep the key in that position for
longer than 2 seconds and the wipe interval will
be set to approx. 5 seconds.
Optional rain sensor:
Do not leave in intermittent setting when vehicle
is taken to an automatic car wash or when
cleaning the windshield. Wipers will operate in
presence of water spray at windshield, and wipers
may be damaged as a result.
1 At speeds of approximately 105 mph (170 km/h) the wiper
switches automatically to continuous wiping. (Always obey local
speed limits.)
Page 166 of 342

163 Contents - Driving
Te ch n i c a l
data Instruments
and controlsOperationDrivingInstrument
cluster displayPractical hints Car care Index
DrivingControl and operation of
radio transmitters ..................... 164
The first 1 000 miles
(1 500 km) ................................. 165
Maintenance ................................... 165
Tele Aid ........................................... 166
Catalytic converter ........................ 178
Emission control ............................ 179
Steering lock ................................... 180
Starting and turning off
the engine .................................. 182
Automatic transmission ............... 183
Parking brake ................................. 191Driving instructions .......................192
Drive sensibly – save fuel .........192
Drinking and driving .................192
Pedals ...........................................192
Power assistance .........................193
Brakes ...........................................193
Driving off ....................................194
Parking .........................................195
Tires ..............................................195
Snow chains ................................199
Winter driving instructions ......199
Deep water .................................. 201
Passenger compartment ........... 201
Traveling abroad ........................ 201
Off-Road driving ............................ 202
Trailer towing ................................ 209
Cruise control .................................214Brake assi st system
(BAS) ........................................... 217
Antilock brake system
(ABS) ........................................... 219
Four-wheel electronic
traction system (4-ETS+) .......... 221
Electronic brake proportioning
(EBP) ...........................................222
Electronic stability program
(ESP) ...........................................223
Transmission control –
LOW RANGE mode ...................227
Parking assist
(Parktronic) ..............................230
What you should know
at the gas station .......................235
Check regularly and
before a long trip ......................238
Page 183 of 342
180 Steering lock
Te ch n i c a l
data Instruments
and controlsOperationDrivingInstrument
cluster displayPractical hints Car care Index
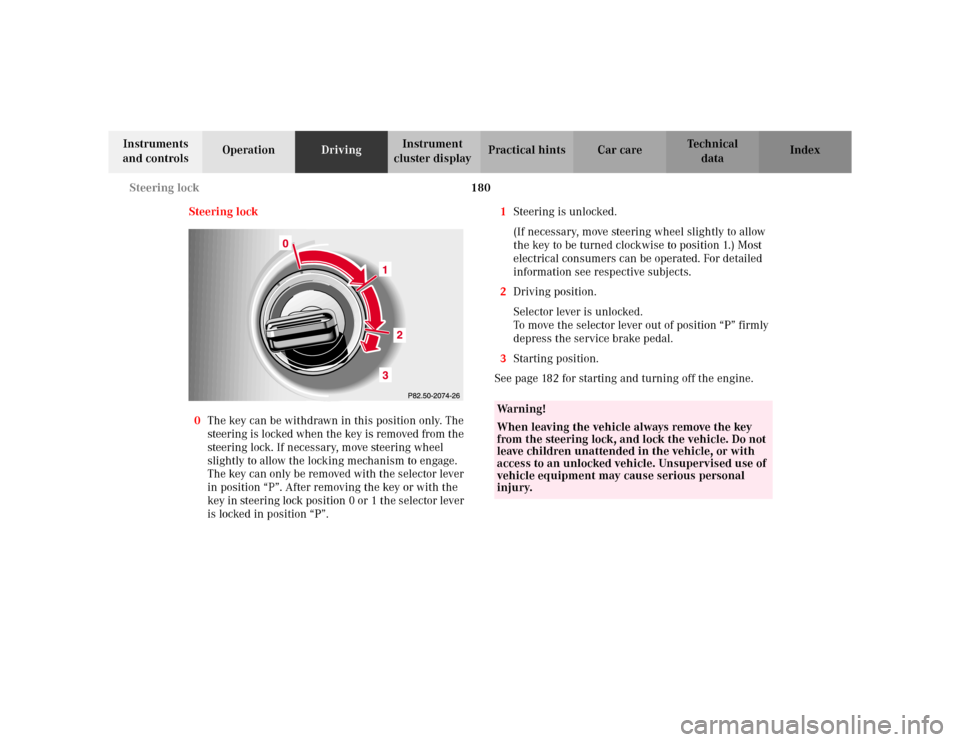
Steering lock
0The key can be withdrawn in this position only. The
steering is locked when the key is removed from the
steering lock. If necessary, move steering wheel
slightly to allow the locking mechanism to engage.
The key can only be removed with the selector lever
in position “P”. After removing the key or with the
key in steering lock position 0 or 1 the selector lever
is locked in position “P”.1Steering is unlocked.
(If necessary, move steering wheel slightly to allow
the key to be turned clockwise to position 1.) Most
electrical consumers can be operated. For detailed
information see respective subjects.
2Driving position.
Selector lever is unlocked.
To move the selector lever out of position “P” firmly
depress the service brake pedal.
3Starting position.
See page 182 for starting and turning off the engine.
Wa r n i n g !
When leaving the vehicle always remove the key
from the steering lock, and lock the vehicle. Do not
leave children unattended in the vehicle, or with
access to an unlocked vehicle. Unsupervised use of
vehicle equipment may cause serious personal
injury.
Page 188 of 342
185 Automatic transmission
Te ch n i c a l
data Instruments
and controlsOperationDrivingInstrument
cluster displayPractical hints Car care Index Maneuvering
To maneuver in tight areas, e.g. when pulling into a
parking space, control the vehicle speed by gradually
releasing the brakes. Accelerate gently and never
abruptly step on the accelerator.
To rock a vehicle out of soft ground (mud or snow),
alternately shift from forward to reverse, while applying
slight partial throttle.
Rocking a vehicle free in this manner may cause the
ABS or traction system malfunction indicator lamp to
come on. Turn off and restart the engine to clear the
malfunction indication.Towing a trailer
If the transmission hunts between gears on inclines,
manually shift to a lower gear (select “4”, “3”, “2”
or “1”). A lower gear and reduction of speed reduces the
chance of engine overloading and / or overheating.
At very steep inclines, not manageable with selector
lever in position “1”, switch transfer case to LOW
RANGE, see page 227 for instructions on how to engage
LOW RANGE.
For instructions on trailer towing refer to page 209.
Wa r n i n g !
Getting out of your vehicle with the selector lever
not fully engaged in position “P” is dangerous.
Also, when parked on an incline, position “P” alone
may not prevent your vehicle from moving,
possibly hitting people or objects.Always set the parking brake in addition to shifting
to position “P”, see page 191 for parking brake. When parked on an incline, also turn front wheel
against curb.
Wa r n i n g !
When leaving the vehicle always remove the key
from the steering lock, and lock the vehicle. Do not
leave children unattended in the vehicle, or with
access to an unlocked vehicle. Children could move
the gear selector lever from position “P”, which
could result in an accident or serious injury.
Page 198 of 342
195 Driving instructions
Te ch n i c a l
data Instruments
and controlsOperationDrivingInstrument
cluster displayPractical hints Car care Index Parking
Important!
It is advisable to set the parking brake whenever
parking or leaving the vehicle. In addition, move
selector lever to position “P”.
When parking on hills, always set the parking brake.Tires
Tread wear indicators (TWI) are required by law. These
indicators are located in six places on the tread
circumference and become visible at a tread depth of
approximately
1/16in (1.5 mm), at which point the tire is
considered worn and should be replaced.
The tread wear indicator appears as a solid band across
the tread.
Wa r n i n g !
To reduce the risk of personal injury as a result of
vehicle movement, before
turning off the engine
and leaving the vehicle, always:
1. Keep right foot on the service brake pedal.
2. Firmly depress parking brake pedal.
3. Move the selector lever to position “P”.
4. Slowly release the service brake pedal.
5. Turn front wheels towards the road curb.
6. Turn the key to steering lock position 0 and
remove.
7. Take the key and lock vehicle when leaving.
Wa r n i n g !
If you feel a sudden significant vibration or ride
disturbance, or you suspect that possible damage to
your vehicle has occurred, you should turn on the
hazard warning flashers, carefully slow down, and
drive with caution to an area which is a safe
distance from the roadway.Inspect the tires and under the vehicle for possible
damage. If the vehicle or tires appear unsafe, have
it towed to the nearest Mercedes-Benz Light Truck
Center or tire dealer for repairs.