Page 25 of 48

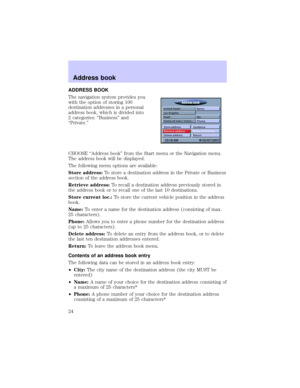
²Road:The road name of the destination address *
²Intersection:An intersection to specify your destination more
precisely* or
²a special facility from ªPoints of interestº*
* Optional
Notes:
²30 entries are the guaranteed minimum for the personal address book.
The number of entries can increase up to 100 dependent on the
amount of information stored (with or without name etc.).
²If no address is stored in the address book, the ªRetrieve addressº
option can not be selected.
²If the memory is full, the ªStore addressº option can no longer be
selected.
Storing addresses in the address book
If a destination address has not been entered yet:
1. Enter the data (city, road, intersection or points of interest) of the
desired destination address in the Navigation menu.
2. CHOOSE ªAddress bookº from the Navigation menu or from the Start
menu. If you want to enter a name and phone number associated with
the destination address you have to CHOOSE ªAddress bookº from the
Start Menu, otherwise you can choose it from the Navigation Menu.
3. If you like, you can enter a name for the destination address. CHOOSE
ªNameº and enter any character string of a maximum of 25 characters.
4. If you like, you can enter a phone number name for the destination
address. CHOOSE ªPhoneº and enter any character string of a maximum
of 25 characters. To confirm your entry, CHOOSE OK.
5. CHOOSE ªStore address.º
6. CHOOSE ªPrivateº or ªBusiness.º
²The address is now stored in the address book.
²The menu title will now change back to ªNameº.
Address book
25
Page 26 of 48

Retrieve addresses from the address book
1. CHOOSE ªRetrieve addressº from the Navigation menu.
2. CHOOSE ªPrivateº or ªBusinessº.
²The list of addresses already stored in the address book is displayed .
²The list is sorted in alphabetical order
3. CHOOSE the desired address from the list.
²The selected address is entered as the new destination address.
Storing the current car position in the address book
If you are at a location you would like to store in the address book, such
as a new restaurant:
1. CHOOSE ªAddress bookº from the Navigation menu.
2. CHOOSE ªStore current loc.º from the Address book menu.
Editing an address book entry
1. CHOOSE the ªAddress bookº function in the ªStart Menu.º
²If, for example, you would like to load an address for editing, then
choose the ªRetrieve addressº function (not accessible if no addresses
have been stored in the address book).
²If you want to delete an entry, the choose the ªDelete addressº
function.
2. Select the desired address book category.
²A list with the names of the stored addresses is then displayed (only if
the list is not empty). Press ENTER and the entire address will be
displayed.
3. Confirm the address selection by pressing ENTER.
²The selected address is deleted or shown in the ªAddress bookº menu
where it can now be modified and stored again.
²Select the ªGuidanceº function in the menu if you want to activate
guidance for the address shown in the ªAddress bookº menu.
Address book
26
Page 27 of 48

VIA POINTS
If you want to pass certain
addresses or locations on the way to
your ultimate destination, you can
store these via points in the
Navigation menu. The navigation
system will calculate the route to
next via point and will continue
planning to the following via point,
when the previous one was reached.
Select ªVia pointsº from the Navigation menu.
²The ªVia Pointº menu is displayed.
The following options are available:
Country (United States):To enter the country destination address. In
the picture above there is already the ªUnited Statesº entered as country.
Because of this, you cannot see the word ªCountry.º
City (Los Angeles):To enter the city of the destination address. In the
picture above there is already ªLos Angelesº entered as city. Because of
this you cannot see the word ªCity.º
Road:To enter the road name. In case a road is already selected, the
word ªRoadº disappears and the selected road is displayed.
No:To enter the house number.
Points of interest:To select a facility stored in the database (such as
airports, hotels restaurants, gas stations, etc.) as the destination address.
Once a road is entered, the field will be renamed to ªPoints of
int./Intersº. By selecting this field, a pop-up menu appears and lets you
choose between Points of Interest and Intersection.
Destination map:To enter a destination by means of a map.
Address book:To recall a destination address from a private business
database or to recall the last used destination addresses.
Store via point:To store the entered via point in the memory.
1. Select ªVia pointº from the Naviation menu. The ªVia Point Inputº
menu will be displayed.
2. You can enter the via point in the same way as the destination address
or you can select a point of interest, load an address from the address
book or use the destination map for help.
Via points
27
Page 28 of 48
.
²Select ªList via pointº in the Navigation menu. The list o")
3. Select ªStore via point,º and confirm by pressing ENTER.
List via point:To show the list of stored via points. (max. listing of 25).
²Select ªList via pointº in the Navigation menu. The list of stored via
points will be displayed.
Delete via point:To delete an entry from the list of via points.
1. Select ªDelete via pointº. The list of stored via points will be displayed.
2. Select the via point you want to delete. A security check prevents you
from deleting via points by mistake. If you select ªYes,º the selected via
point is deleted from the memory.
Tip:How to delete all via points without deleting the current destination
address. If you already have stored the current destination address in the
address book, skip number one.
1. Store the current destination address in the address book
2. Select ªDelete Destinationº from the ªSelect destinationº menu.
3. Confirm the security check ªDelete via points?º with ªYes.º All via
points and the destination address are deleted.
4. Retrieve the last used destination address with ªRetrieve addressº
from the Navigation menu.
Return:To return to the Navigation menu.
²The maximum number of via points is limited to 25.
²The via points are reached in the order of entry.
²View via points can be entered at any time on the way to the
destination address.
²When a certain via point has been passed, it is deleted from the list of
via points.
Via points
28
Page 29 of 48

EMERGENCY SCREEN
Select ªEmergencyº from the Start
menu to display the emergency
screen.
The Emergency menu shows you the following information:
²The Emergency screen shows the current vehicle position (city, state,
road and vehicle latitude and longitude position as determined by the
GPS data).
²The country-specific emergency phone number.
²A user-programmable assistance phone number. The Lincoln Customer
Assistance Center phone number will be pre-programmed into the
Emergency screen (1-800-521-4140).
The Emergency screen will pinpoint your current location within
approximately 30 m (100 ft).
Storing an assistance number
You can store a telephone number of your own choice in the Emergency
menu, for example a roadside assistance service, an automobile club, etc.
1. CHOOSE ªSettingº from the Emergency screen.
²The keyboard window will be opened.
2. Enter the telephone number you want to store for assistance.
3. CHOOSE ªOKº from the keyboard window to confirm the entry.
²The stored number will appear in the Emergency screen.
4. To exit the Emergency screen, CHOOSE ªReturnº.
Emergency
29
Page 30 of 48

Limitations of the Emergency Feature
The performance of the Navigation System Emergency function is limited
by the following conditions:
²If the ignition switch is not in the ON or ACC position.
²If the vehicle is involved in an accident, damage to equipment may
have occurred.
²If the vehicle battery is dead, discharged or disconnected, the system
will not operate.
²If a CD digital road map is not loaded, the Emergency feature will not
perform properly. The correct CD digital road map must be loaded and
your location must be digitized in detail, in order for the name of the
street where you are currently located to show up on the display.
²Obstructions may cause the system to be temporarily inoperative.
Global positioning satellite signals and cellular telephone signals that
relay vehicle positioning and communications data may be obstructed
while inside tunnels, parking garages etc.
In some instances, the street name may not be displayed. For example,
you traveled outside the CD digital road map boundaries, the incorrect
CD is loaded, or you are in a remote, non-digitized area on the CD.
However, as long as the global positioning system is operating properly,
your current longitude and latitude will be displayed.
Emergency
30
Page 31 of 48

SYSTEM SETTINGS
To adjust the Navigation System to
your own preferences, you can
select many different settings.
²Select ªSettingsº from the Start Menu.
²The ªSystem Settingsº menu is displayed with the following options:
Language
There are two languages available, either American English or French.
The default language is American English.
Route selection
The following four criteria influence the route planning:
²Fastest
(good compromise for most situations)
²Shortest
(recommended for routes within a city)
²Main roads
(recommended, if travelling on main roads is
preferred)
²No main roads
(recommended, if travelling on main roads is not
preferred)
The route planning can also be modified during guidance by selecting
ªInfoº from the guidance screen.
You can also minimize the use of toll routes for route planning:
²Select the ªMinimize toll routesº option.
²If no toll-free roads are available for route planning, toll roads will be
used.
If the ªMinimize toll routesº option is activated, route planning may take
longer than without this function activated. Therefore, it is recommended
to use this function only if it is necessary.
System settings
31
Page 32 of 48

Screen config.
A variety of color combinations along with information shown in the
satus line of the screen can be selected.
²Select ªScreen config.º from the Settings menu.
²The ªScreen Settingsº menu is displayed.
The following options are available:
Day color / Night color
Select one out of six color combinations for day or nighttime display.
²Optimized daytime contrast is provided by the options blue, green and
red. This color combination is active when the headlights are off.
²The options dark blue, dark green and dark red provide optimized
nighttime contrast. This color combination is active when the
headlights are turned on.
Map Color
Select one of the three options for Map color:
Automatic switching:The Map color changes automatically when the
headlights are switched on.
Always day color:The Map color remains in day mode independent of
headlight activation.
Always night color:The Map color remains in night mode independent
of headlight deactivation.
Status line left/Status line right
Select the kind of information shown in the lower left corner of the
screen:
²None:Status line left switched off.
²Clock:Time display.
²Date:Date display.
²Remaining travel time:Estimated time remaining until you arrive at
the next via point or the destination address (if o via points were
entered) as calculated by the navigation system.
System settings
32