2002 LAND ROVER DISCOVERY transmission
[x] Cancel search: transmissionPage 1162 of 1672
INTERIOR TRIM COMPONENTS
REPAIRS 76-3-9
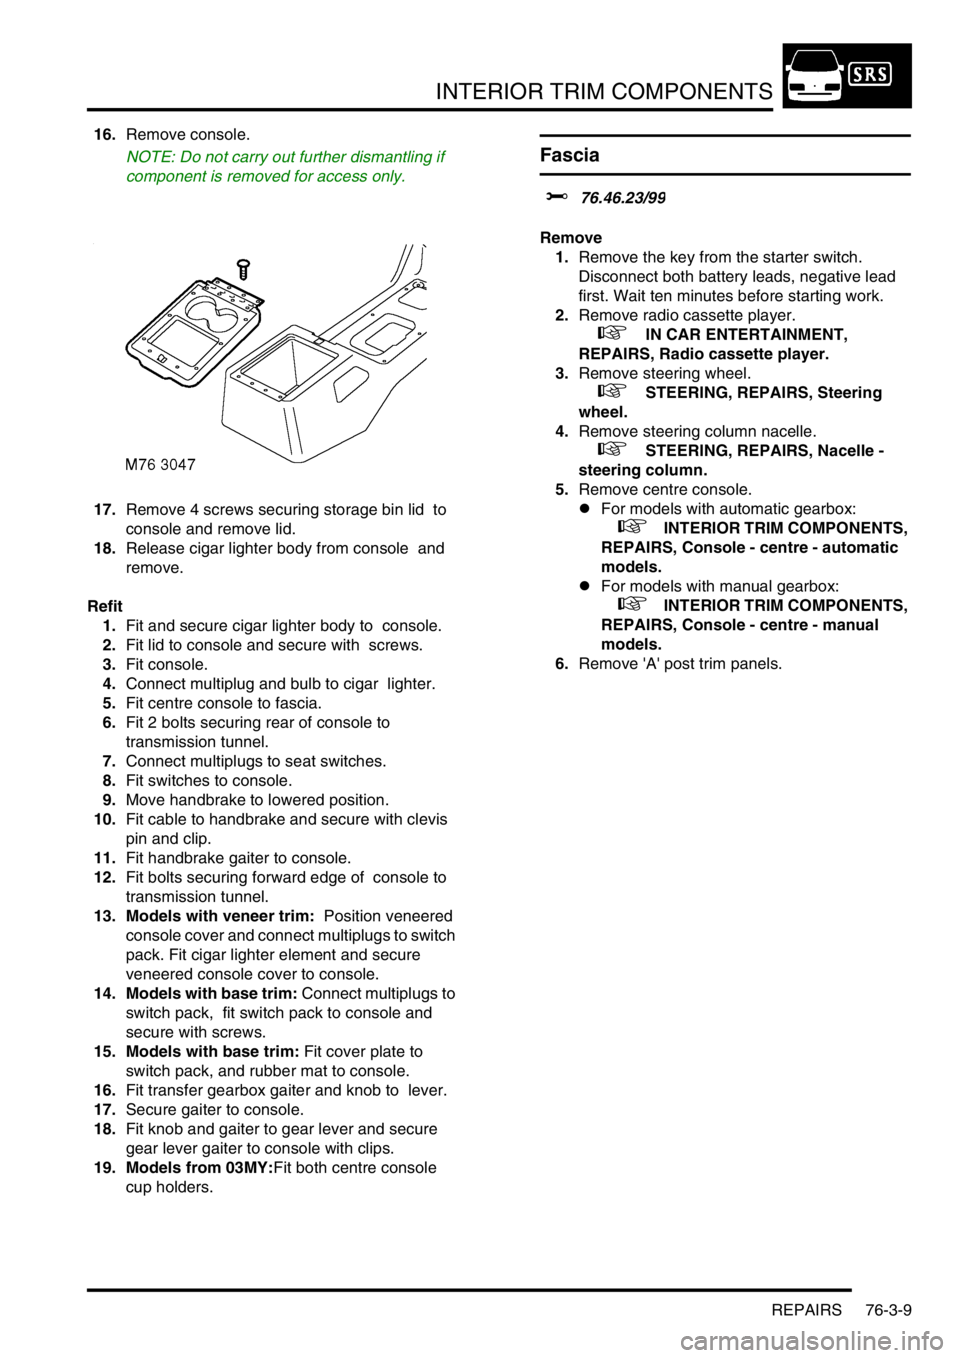
16.Remove console.
NOTE: Do not carry out further dismantling if
component is removed for access only.
17.Remove 4 screws securing storage bin lid to
console and remove lid.
18.Release cigar lighter body from console and
remove.
Refit
1.Fit and secure cigar lighter body to console.
2.Fit lid to console and secure with screws.
3.Fit console.
4.Connect multiplug and bulb to cigar lighter.
5.Fit centre console to fascia.
6.Fit 2 bolts securing rear of console to
transmission tunnel.
7.Connect multiplugs to seat switches.
8.Fit switches to console.
9.Move handbrake to lowered position.
10.Fit cable to handbrake and secure with clevis
pin and clip.
11.Fit handbrake gaiter to console.
12.Fit bolts securing forward edge of console to
transmission tunnel.
13. Models with veneer trim: Position veneered
console cover and connect multiplugs to switch
pack. Fit cigar lighter element and secure
veneered console cover to console.
14. Models with base trim: Connect multiplugs to
switch pack, fit switch pack to console and
secure with screws.
15. Models with base trim: Fit cover plate to
switch pack, and rubber mat to console.
16.Fit transfer gearbox gaiter and knob to lever.
17.Secure gaiter to console.
18.Fit knob and gaiter to gear lever and secure
gear lever gaiter to console with clips.
19. Models from 03MY:Fit both centre console
cup holders.
Fascia
$% 76.46.23/99
Remove
1.Remove the key from the starter switch.
Disconnect both battery leads, negative lead
first. Wait ten minutes before starting work.
2.Remove radio cassette player.
+ IN CAR ENTERTAINMENT,
REPAIRS, Radio cassette player.
3.Remove steering wheel.
+ STEERING, REPAIRS, Steering
wheel.
4.Remove steering column nacelle.
+ STEERING, REPAIRS, Nacelle -
steering column.
5.Remove centre console.
lFor models with automatic gearbox:
+ INTERIOR TRIM COMPONENTS,
REPAIRS, Console - centre - automatic
models.
lFor models with manual gearbox:
+ INTERIOR TRIM COMPONENTS,
REPAIRS, Console - centre - manual
models.
6.Remove 'A' post trim panels.
Page 1165 of 1672
INTERIOR TRIM COMPONENTS
76-3-12 REPAIRS
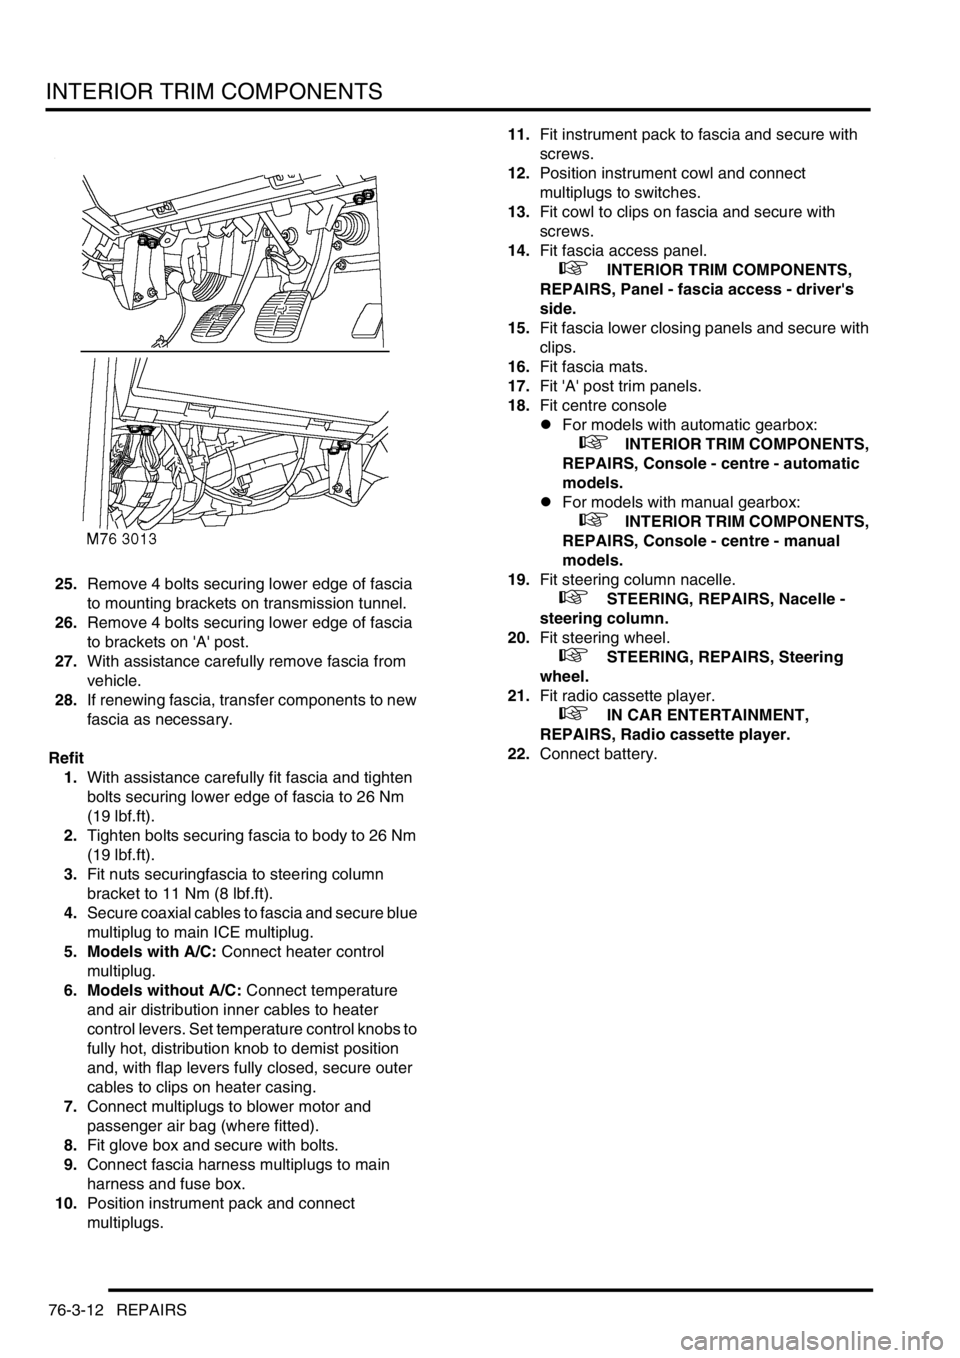
25.Remove 4 bolts securing lower edge of fascia
to mounting brackets on transmission tunnel.
26.Remove 4 bolts securing lower edge of fascia
to brackets on 'A' post.
27.With assistance carefully remove fascia from
vehicle.
28.If renewing fascia, transfer components to new
fascia as necessary.
Refit
1.With assistance carefully fit fascia and tighten
bolts securing lower edge of fascia to 26 Nm
(19 lbf.ft).
2.Tighten bolts securing fascia to body to 26 Nm
(19 lbf.ft).
3.Fit nuts securingfascia to steering column
bracket to 11 Nm (8 lbf.ft).
4.Secure coaxial cables to fascia and secure blue
multiplug to main ICE multiplug.
5. Models with A/C: Connect heater control
multiplug.
6. Models without A/C: Connect temperature
and air distribution inner cables to heater
control levers. Set temperature control knobs to
fully hot, distribution knob to demist position
and, with flap levers fully closed, secure outer
cables to clips on heater casing.
7.Connect multiplugs to blower motor and
passenger air bag (where fitted).
8.Fit glove box and secure with bolts.
9.Connect fascia harness multiplugs to main
harness and fuse box.
10.Position instrument pack and connect
multiplugs.11.Fit instrument pack to fascia and secure with
screws.
12.Position instrument cowl and connect
multiplugs to switches.
13.Fit cowl to clips on fascia and secure with
screws.
14.Fit fascia access panel.
+ INTERIOR TRIM COMPONENTS,
REPAIRS, Panel - fascia access - driver's
side.
15.Fit fascia lower closing panels and secure with
clips.
16.Fit fascia mats.
17.Fit 'A' post trim panels.
18.Fit centre console
lFor models with automatic gearbox:
+ INTERIOR TRIM COMPONENTS,
REPAIRS, Console - centre - automatic
models.
lFor models with manual gearbox:
+ INTERIOR TRIM COMPONENTS,
REPAIRS, Console - centre - manual
models.
19.Fit steering column nacelle.
+ STEERING, REPAIRS, Nacelle -
steering column.
20.Fit steering wheel.
+ STEERING, REPAIRS, Steering
wheel.
21.Fit radio cassette player.
+ IN CAR ENTERTAINMENT,
REPAIRS, Radio cassette player.
22.Connect battery.
Page 1170 of 1672
INTERIOR TRIM COMPONENTS
REPAIRS 76-3-17
9.Fit drinks tray.
+ INTERIOR TRIM COMPONENTS,
REPAIRS, Drink tray assembly - centre
fascia.
10.Fit and secure radio DIN socket.
11.Fit screw cover to radio aperture.
12.Fit radio cassette player.
+ IN CAR ENTERTAINMENT,
REPAIRS, Radio cassette player.
Carpet - front
$% 76.49.02
Remove
1. Models with premium ICE: Remove power
amplifier.
+ IN CAR ENTERTAINMENT,
REPAIRS, Amplifier - power.
2. Models with premium ICE: Remove CD
autochanger.
+ IN CAR ENTERTAINMENT,
REPAIRS, CD autochanger.
3.Remove centre console.
lFor models with manual gearbox:
+ INTERIOR TRIM COMPONENTS,
REPAIRS, Console - centre - manual
models.
lFor models with automatic gearbox:
+ INTERIOR TRIM COMPONENTS,
REPAIRS, Console - centre - automatic
models.
4.Remove both lower 'A' post trim panels.
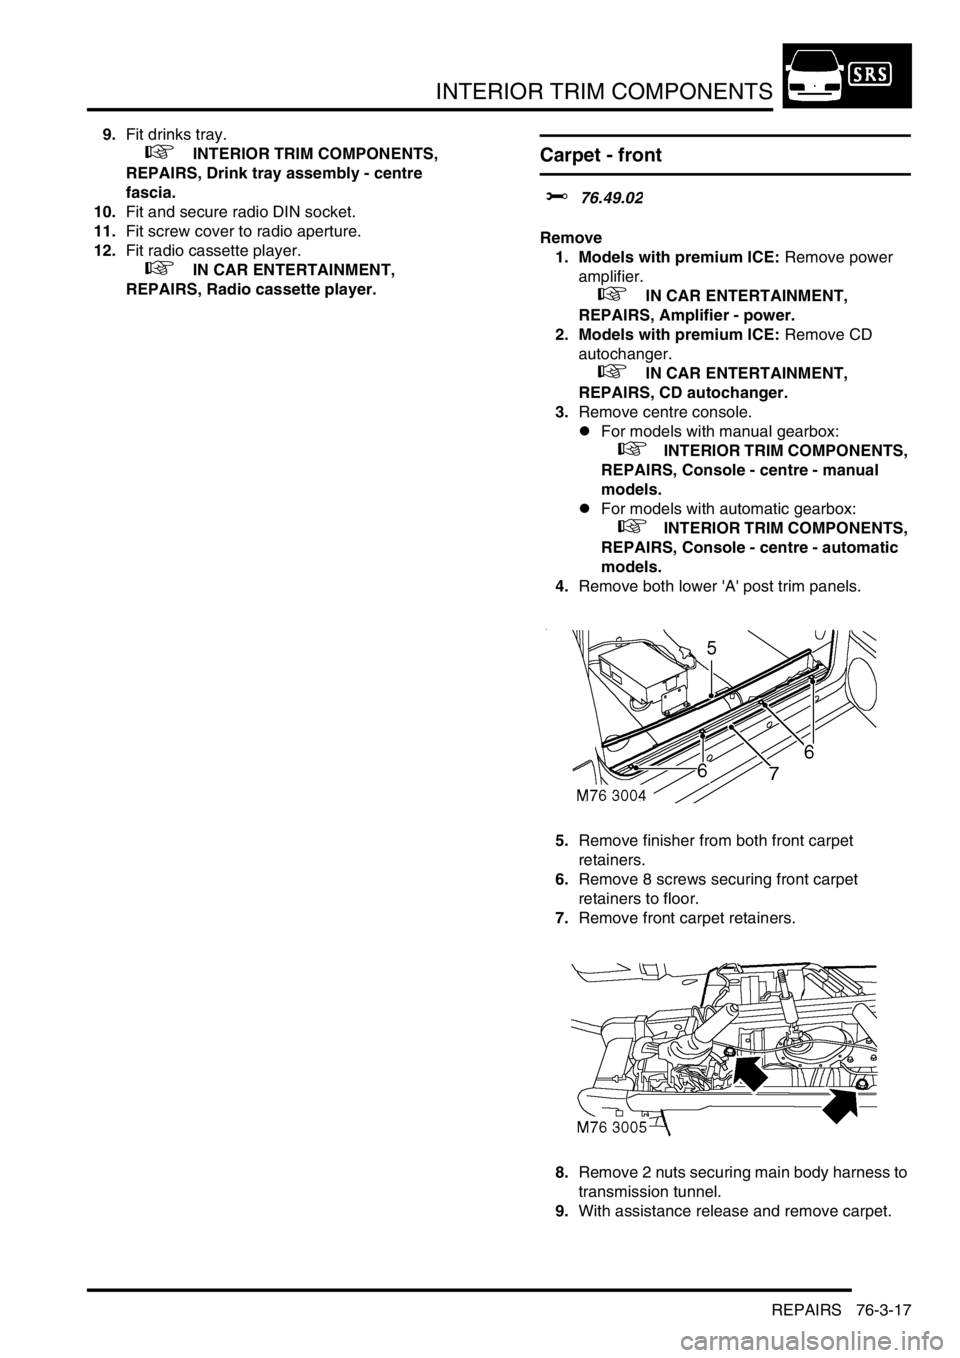
5.Remove finisher from both front carpet
retainers.
6.Remove 8 screws securing front carpet
retainers to floor.
7.Remove front carpet retainers.
8.Remove 2 nuts securing main body harness to
transmission tunnel.
9.With assistance release and remove carpet.
Page 1171 of 1672
INTERIOR TRIM COMPONENTS
76-3-18 REPAIRS
Refit
1.With assistance position carpet.
2.Secure main body harness to transmission
tunnel with nuts.
3.Position front carpet retainers and secure to
floor with screws.
4.Fit finishers to front carpet retainers
5.Fit both lower 'A' post trim panels.
6.Fit centre console.
lFor models with manual gearbox:
+ INTERIOR TRIM COMPONENTS,
REPAIRS, Console - centre - manual
models.
lFor models with automatic gearbox:
+ INTERIOR TRIM COMPONENTS,
REPAIRS, Console - centre - automatic
models.
7. Models with premium ICE: Fit CD
autochanger.
+ IN CAR ENTERTAINMENT,
REPAIRS, CD autochanger.
8. Models with premium ICE: Fit power
amplifier.
+ IN CAR ENTERTAINMENT,
REPAIRS, Amplifier - power.
Carpet - rear
$% 76.49.03
Remove
1. Models with premium ICE: Remove power
amplifier.
+ IN CAR ENTERTAINMENT,
REPAIRS, Amplifier - power.
2.Remove RH front seat.
+ SEATS, REPAIRS, Seat - front.
3.Remove both 'B' post lower trim panels.
+ INTERIOR TRIM COMPONENTS,
REPAIRS, Trim casing - lower - 'B' post.
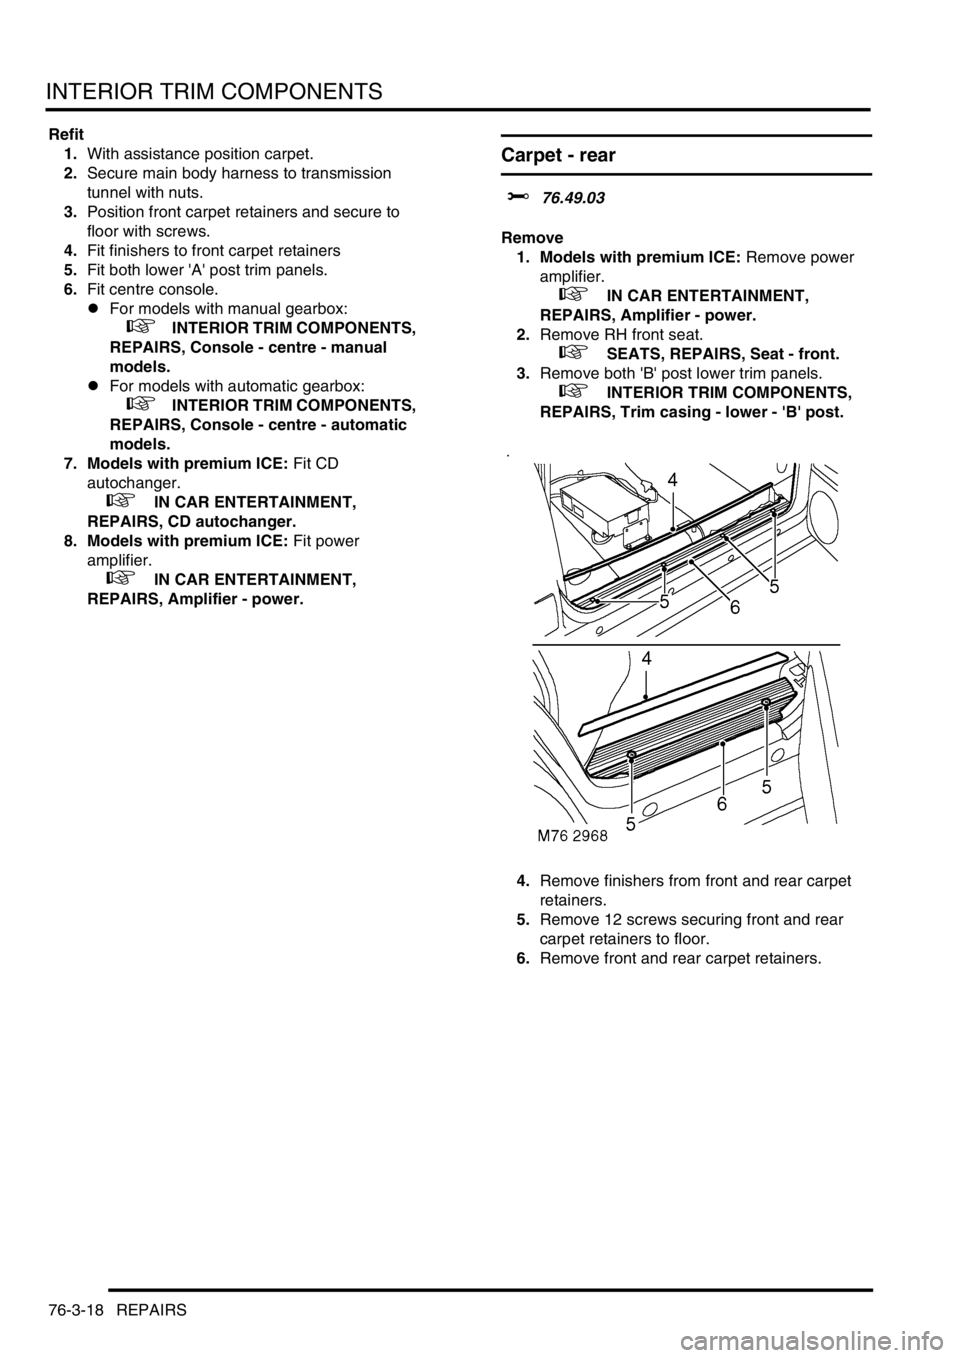
4.Remove finishers from front and rear carpet
retainers.
5.Remove 12 screws securing front and rear
carpet retainers to floor.
6.Remove front and rear carpet retainers.
Page 1346 of 1672
HEATING AND VENTILATION
DESCRIPTION AND OPERATION 80-5
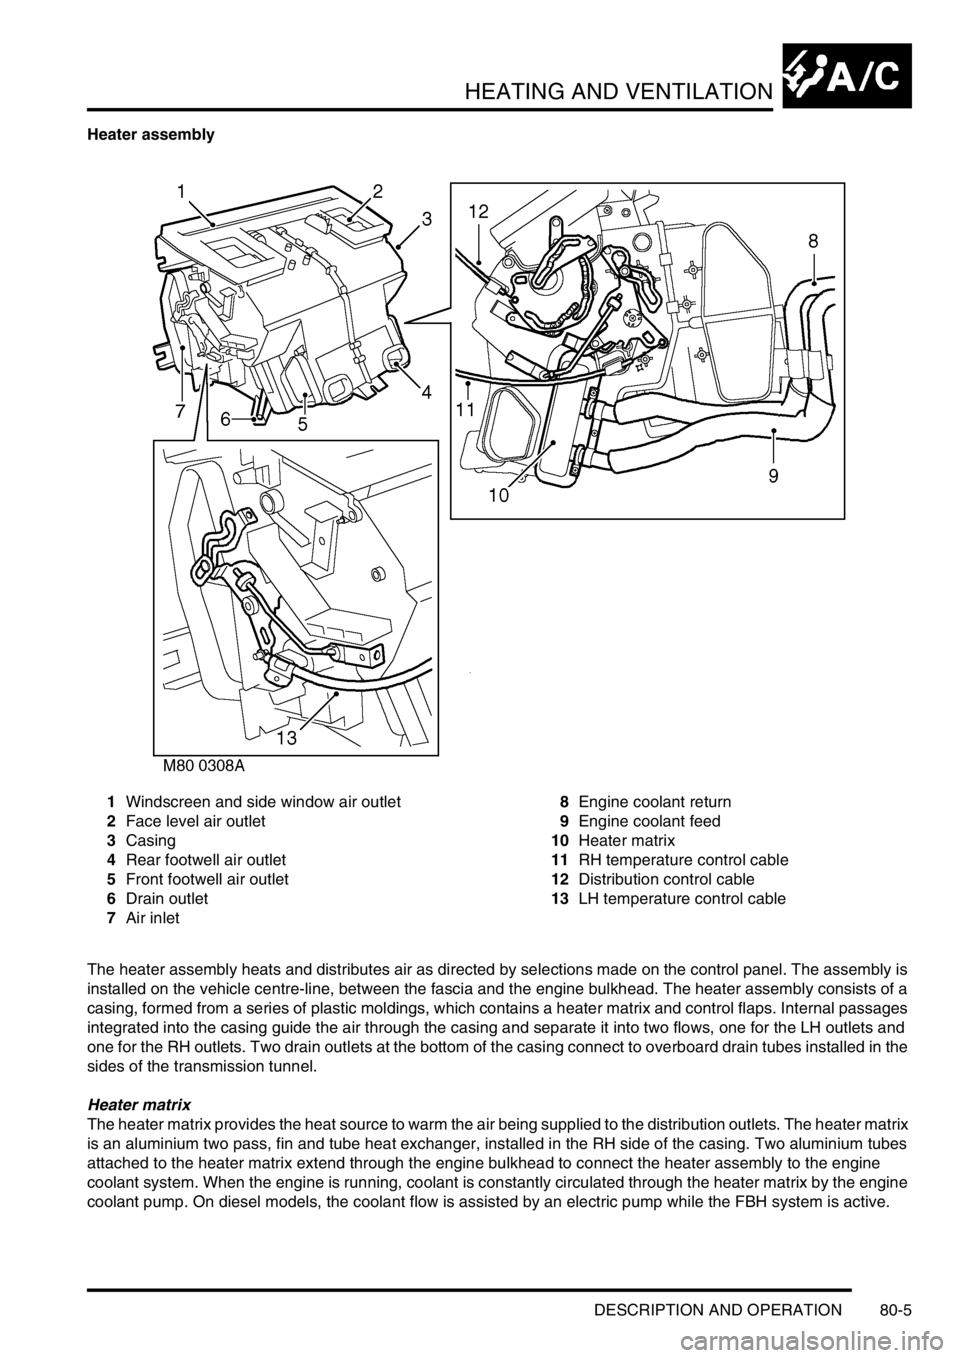
Heater assembly
1Windscreen and side window air outlet
2Face level air outlet
3Casing
4Rear footwell air outlet
5Front footwell air outlet
6Drain outlet
7Air inlet8Engine coolant return
9Engine coolant feed
10Heater matrix
11RH temperature control cable
12Distribution control cable
13LH temperature control cable
The heater assembly heats and distributes air as directed by selections made on the control panel. The assembly is
installed on the vehicle centre-line, between the fascia and the engine bulkhead. The heater assembly consists of a
casing, formed from a series of plastic moldings, which contains a heater matrix and control flaps. Internal passages
integrated into the casing guide the air through the casing and separate it into two flows, one for the LH outlets and
one for the RH outlets. Two drain outlets at the bottom of the casing connect to overboard drain tubes installed in the
sides of the transmission tunnel.
Heater matrix
The heater matrix provides the heat source to warm the air being supplied to the distribution outlets. The heater matrix
is an aluminium two pass, fin and tube heat exchanger, installed in the RH side of the casing. Two aluminium tubes
attached to the heater matrix extend through the engine bulkhead to connect the heater assembly to the engine
coolant system. When the engine is running, coolant is constantly circulated through the heater matrix by the engine
coolant pump. On diesel models, the coolant flow is assisted by an electric pump while the FBH system is active.
Page 1438 of 1672

WIPERS AND WASHERS
DESCRIPTION AND OPERATION 84-17
Front flick wipe
Flick wipe operation will only activate when the following conditions are met:
lIgnition switch is in position I or II.
lFront flick switch is operated.
Pressing the flick wipe switch operates the front wiper motor at high speed. The front wiper motor operates as long
as the flick switch is activated. Releasing the flick switch causes the front wiper motor to run through the park switch
circuitry. The park switch only permits low speed operation. Thus if the flick switch is pressed and immediately
released, the wipers operate at low speed.
Rear intermittent wipe variable delay
The rear intermittent wipe variable delay operation allows the driver to adjust the interval between wipes to suit local
conditions. Rear variable delay operation only activates if the following conditions are met:
lIgnition switch in position I or II.
lFront wash/ wipe switch on intermittent.
lRear wipe switch is operated.
The BCU determines the desired delay interval based on the setting of the variable delay switch. The rear wash/ wipe
delay is nominally twice as long as that of the front. This information passes from the IDM to the rear wiper relay and
activates the rear wiper motor.
If the delay duration is decreased during operation of the rear wiper, the wipers immediately operate once and the
delay cycle is reset.
If the delay duration is increased during operation of the rear wiper, the delay cycle is automatically increased by the
BCU.
Reverse wiping
Reverse wiping operates the rear wiper motor when reverse gear is selected. The transmission must be in reverse
for longer then 0.5 seconds before reversing wipe activates. Reversing wipe activates if the following conditions are
met:
lIgnition switch is in position II.
lReverse gear is selected.
lRear wiper or front wipers operating.
If the rear wiper is active in any mode when reverse gear is selected, the rear wiper activates for 4 second. After 4
seconds the rear wiper operates in a delay operation at the same delay interval set by the variable delay switch until
reverse gear is deselected.
If the front wipers are operating on either low or high speed when reverse gear is selected, the rear wiper activates
continuously until reverse gear is deselected.
In order to enable reversing wipe functions, the BCU utilises the reversing light switch located within the transmission
to determine when reverse gear has been selected.
If the front intermittent wipe is active when reverse gear is selected, the rear wiper completes 2 cycles before operating
at the same intermittent delay as the front wipers.
Page 1480 of 1672

BODY CONTROL UNIT
DESCRIPTION AND OPERATION 86-3-11
Programmable options
The BCU can be programmed with a number of options to satisfy specific market requirements and customer
preferences. The options can be set using TestBook.
Function Option Details
Transmission Manual The vehicle is fitted with manual transmission.
Automatic The vehicle is fitted with automatic transmission.
Front fog lamps None The vehicle is not fitted with front fog lamps.
Main The front fog lamps will operate if the headlamps are on main
beam.
No main The front fog lamps will not operate if the headlamps are on main
beam.
Interlocks None The vehicle is not fitted with key, shift or transfer box interlocks.
Shift The vehicle is fitted with key, shift and transfer box interlocks.
No transfer The vehicle is fitted with key and shift interlocks, but not a transfer
box interlock.
Daylight running lamps None The vehicle is not fitted with daylight running lamps.
No main The daylight running lamps are on if the headlamp main beams
are off.
No heads The daylight running lights are on with headlamp main and dipped
beams off and the gearbox not in Park.
Programmed wash/ wipe Normal The front wipers operate if the front wash is operated.
No wipe The front wipers do not operate if the front wash is operated.
Key-in warning Disabled The ignition key in audible warning is disabled.
Enabled The ignition key in audible warning is generated if the ignition key
is in and the driver's door is open.
Electric front seats None The vehicle is not fitted with electric front seats.
Normal Electric seat adjustment is available for 45 seconds after the
driver's door opens or if the ignition is on.
Ignition II Electric seat adjustment is available if the ignition is on.
Electric front windows Driver cancel The front windows will be disabled 44 seconds after the driver's
door is opened.
All cancel The front windows will be disabled 44 seconds after any door is
opened.
No cancel The front windows will be disabled when the ignition is turned off.
Heated front screen Fitted The vehicle is fitted with heated front screens.
None The vehicle is not fitted with heated front screens.
Rear windows and
sunroofDriver cancel The rear windows and sunroof will be disabled 44 seconds after
the driver's door is opened.
All cancel The rear windows and sunroof will be disabled 44 seconds after
any door is opened.
No cancel The rear windows and sunroof will be disabled when the ignition
switch is turned off.
Gear position indicator
illuminationAlways The automatic gearbox selector illumination is on when the
ignition is on.
Sidelights The automatic gearbox selector illumination is on when the
ignition is on and the sidelights are off.
Hill descent control None The vehicle is not fitted with hill descent control.
Fitted The vehicle is fitted with hill descent control.
Courtesy headlamps Disabled The vehicle is not fitted with courtesy headlamps.
Enabled The vehicle is fitted with courtesy headlamps.
Odometer error warning Disabled The odometer will not flash if there is an odometer error.
Enabled The odometer will flash if there is an odometer error.
Page 1485 of 1672

BODY CONTROL UNIT
86-3-16 DESCRIPTION AND OPERATION
Headlamps
The BCU contains a feature which allow the vehicle headlamps to be turned on when the remote transmitter is
pressed (courtesy headlamps).
For markets with daylight running lamps, the BCU controls the logical operation of the daylight running lamps. Options
are daylight running lamps are on if the main beam headlamps are off, or the daylight running lamps are on with main
and dipped beam off and the gearbox not in Park.
Front fog lamps
For markets with front fog lamps fitted, the BCU controls the operation of the front fog lamps. Options can be selected
so that the fog lamps will operate with or without the headlamps on main beam.
Instrument pack
The BCU communicates with the instrument pack via a serial data bus.
+ INSTRUMENTS, DESCRIPTION AND OPERATION, Description.
lThe instrument pack provides the BCU and IDM with details of vehicle speed.
lSignals are provided from the IDM to the instrument pack and BCU when the direction indicator lamps are active.
lFor certain markets, the BCU provides a signal to the instrument pack for indicating when the transfer box is in
neutral.
lThe IDM can signal the instrument pack to illuminate a trailer warning lamp. This operates when the IDM senses
that the current drawn by the indicator circuit exceeds a preset threshold.
lThe odometer reading displayed on the instrument pack LCD screen is also stored in non volatile memory in the
BCU. Whenever the ignition is turned from position I to position II, the instrument pack and the BCU compare
their stored values.
lThe gear selector position is displayed on the instrument pack LCD screen under the direction of the BCU.
Starting
The starting system comprises a starter motor and solenoid located at the rear right hand side of the engine. A starter
relay controlled by the BCU is used to supply battery power for starter solenoid operation. The starter motor receives
its feed directly from the battery.
Cruise control
The BCU processes several signals used for cruise control:
lWhen the brake pedal is pressed, a low voltage brake lamp signal is sent via the BCU to the cruise control ECU.
lThe gear position switch sends an input via the BCU to the cruise control ECU if the selector lever is in Park,
Neutral or Reverse.
lA voltage supply is fed from the BCU to the cruise control SET+ switch.
lA voltage supply is fed from the BCU to the cruise control RES switch.
On vehicles with automatic transmission, if the BCU receives an input from the gear position switch or the brake pedal
switch, the BCU sends a signal to the cruise control ECU to cancel or inhibit cruise control operation.
+ ENGINE MANAGEMENT SYSTEM - Td5, DESCRIPTION AND OPERATION, Description.
+ ENGINE MANAGEMENT SYSTEM - V8, DESCRIPTION AND OPERATION, Description - cruise control.
Shift interlock (where fitted)
On automatic gearbox models, the BCU and IDM combine with an interlock relay located in the passenger
compartment fuse box to operate a shift interlock solenoid, so that the gear selector lever cannot be moved out of
Park until certain logical conditions have been satisfied. Operation of the interlock may be affected, if the battery
becomes discharged.
+ AUTOMATIC GEARBOX - ZF4HP22 - 24, DESCRIPTION AND OPERATION, Description.