Page 1282 of 1672

PANEL REPAIRS
REPAIRS 77-2-33
6. RHD models: Fit brake servo.
7. Diesel models: Fit EGR modulator mounting
bracket.
8. Petrol models: Fit cruise control actuator
mounting bracket.
9.Fit radiator expansion tank.
10.Fit fusebox and secure wiring.
11.Fit front bulkhead assembly.
+ PANEL REPAIRS, REPAIRS, Front
bulkhead assembly.
12.Connect battery leads, negative lead last.
Front valance assembly - LH
Remove
1.Disconnect both battery leads, negative lead
first.
2.Disconnect leads/multiplug from alternator.
3.Remove front bulkhead assembly.
+ PANEL REPAIRS, REPAIRS, Front
bulkhead assembly.
4.Remove ABS modulator unit.
+ BRAKES, REPAIRS, Modulator unit
- ABS.
5. LHD models: Remove brake servo.
+ BRAKES, REPAIRS, Servo - brake.
6.Remove brake pipes from valance assembly.
7.Remove PAS/ACE reservoir.
8. Models with A/C: Remove A/C pipes from
valance assembly.
9.Remove wiring harness from valance
assembly.
10.Remove LH front road wheel.
11.Remove LH front mud flap.
12.Remove insulation pad from engine bulkhead.
13.Remove windscreen side finisher.
+ EXTERIOR FITTINGS, REPAIRS,
Side finisher - windscreen.
Repair
1.Remove existing panel(s), prepare panel joint
faces and install new panel(s) in accordance
with Panel Replacement Procedure. Punch or
drill holes in new panel for plug welding as
shown.
M77 1742
Page 1406 of 1672

AIR CONDITIONING
REPAIRS 82-33
Fan - condenser
$% 82.15.01
Remove
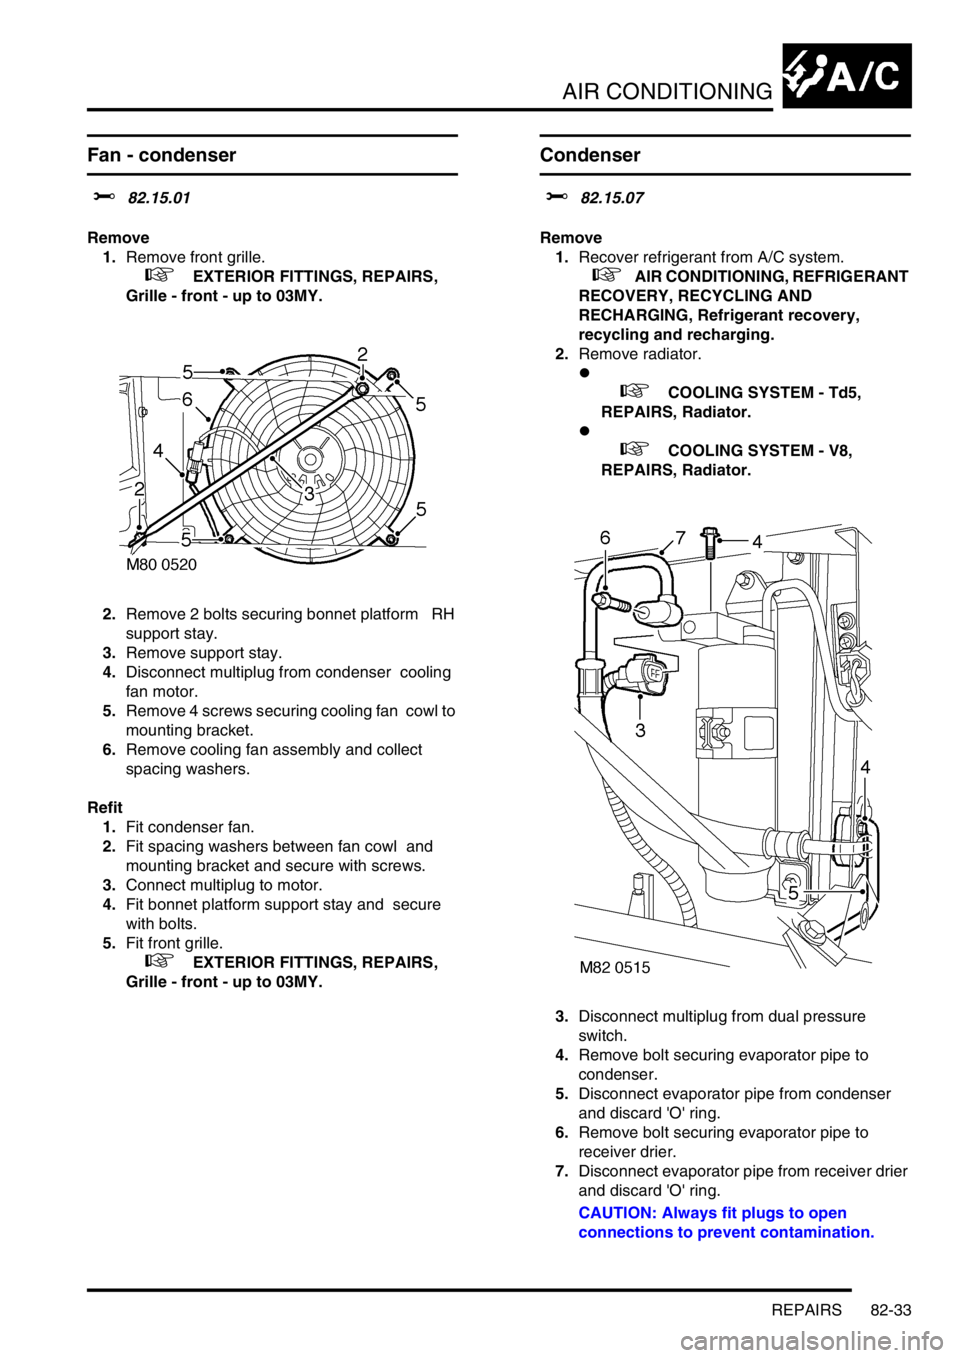
1.Remove front grille.
+ EXTERIOR FITTINGS, REPAIRS,
Grille - front - up to 03MY.
2.Remove 2 bolts securing bonnet platform RH
support stay.
3.Remove support stay.
4.Disconnect multiplug from condenser cooling
fan motor.
5.Remove 4 screws securing cooling fan cowl to
mounting bracket.
6.Remove cooling fan assembly and collect
spacing washers.
Refit
1.Fit condenser fan.
2.Fit spacing washers between fan cowl and
mounting bracket and secure with screws.
3.Connect multiplug to motor.
4.Fit bonnet platform support stay and secure
with bolts.
5.Fit front grille.
+ EXTERIOR FITTINGS, REPAIRS,
Grille - front - up to 03MY.
Condenser
$% 82.15.07
Remove
1.Recover refrigerant from A/C system.
+ AIR CONDITIONING, REFRIGERANT
RECOVERY, RECYCLING AND
RECHARGING, Refrigerant recovery,
recycling and recharging.
2.Remove radiator.
l
+ COOLING SYSTEM - Td5,
REPAIRS, Radiator.
l
+ COOLING SYSTEM - V8,
REPAIRS, Radiator.
3.Disconnect multiplug from dual pressure
switch.
4.Remove bolt securing evaporator pipe to
condenser.
5.Disconnect evaporator pipe from condenser
and discard 'O' ring.
6.Remove bolt securing evaporator pipe to
receiver drier.
7.Disconnect evaporator pipe from receiver drier
and discard 'O' ring.
CAUTION: Always fit plugs to open
connections to prevent contamination.
Page 1408 of 1672

AIR CONDITIONING
REPAIRS 82-35
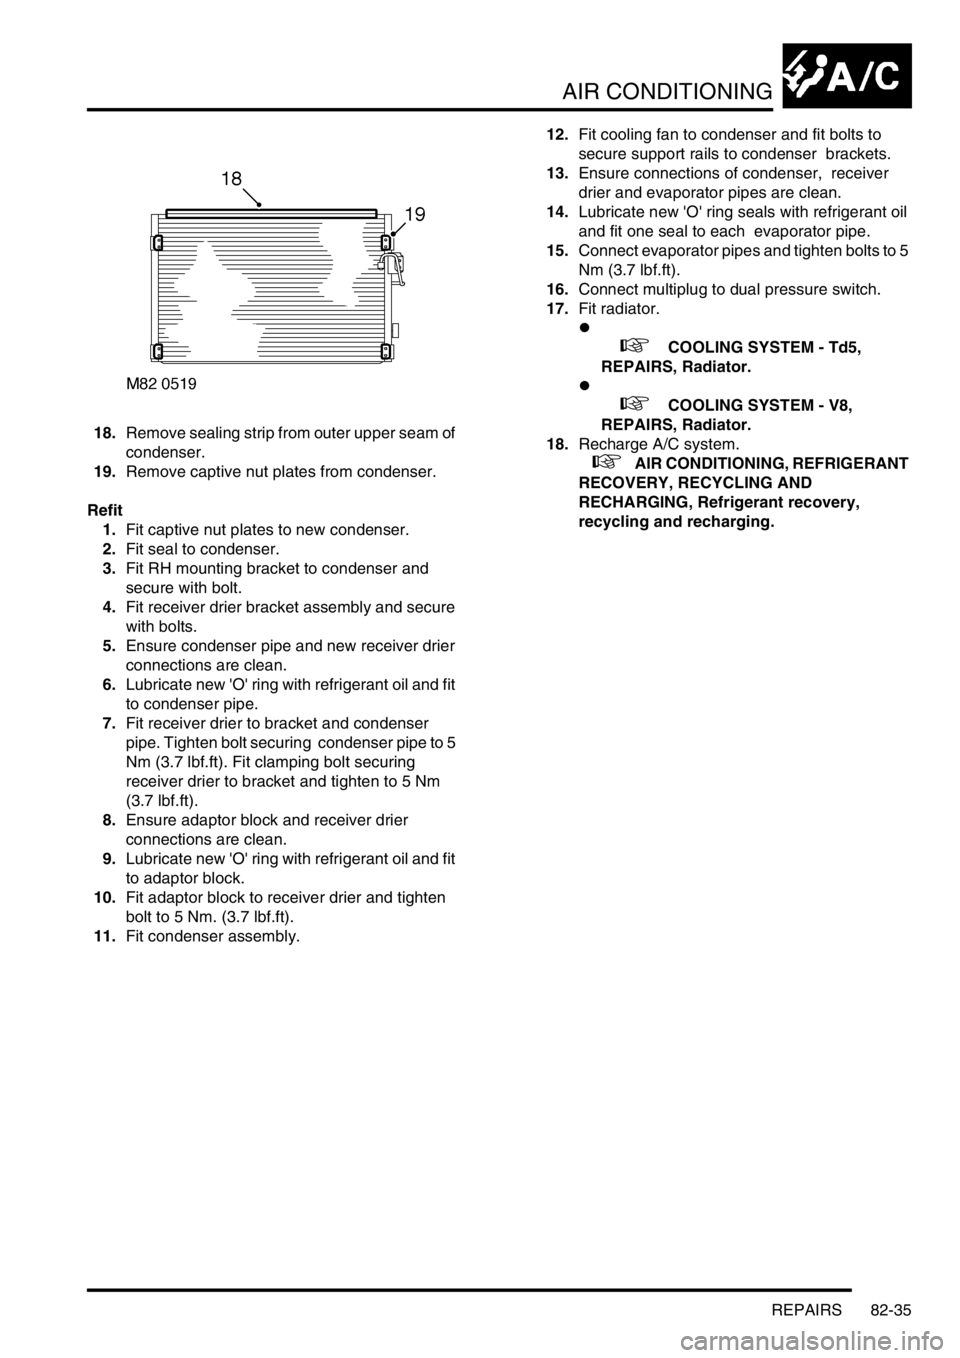
18.Remove sealing strip from outer upper seam of
condenser.
19.Remove captive nut plates from condenser.
Refit
1.Fit captive nut plates to new condenser.
2.Fit seal to condenser.
3.Fit RH mounting bracket to condenser and
secure with bolt.
4.Fit receiver drier bracket assembly and secure
with bolts.
5.Ensure condenser pipe and new receiver drier
connections are clean.
6.Lubricate new 'O' ring with refrigerant oil and fit
to condenser pipe.
7.Fit receiver drier to bracket and condenser
pipe. Tighten bolt securing condenser pipe to 5
Nm (3.7 lbf.ft). Fit clamping bolt securing
receiver drier to bracket and tighten to 5 Nm
(3.7 lbf.ft).
8.Ensure adaptor block and receiver drier
connections are clean.
9.Lubricate new 'O' ring with refrigerant oil and fit
to adaptor block.
10.Fit adaptor block to receiver drier and tighten
bolt to 5 Nm. (3.7 lbf.ft).
11.Fit condenser assembly. 12.Fit cooling fan to condenser and fit bolts to
secure support rails to condenser brackets.
13.Ensure connections of condenser, receiver
drier and evaporator pipes are clean.
14.Lubricate new 'O' ring seals with refrigerant oil
and fit one seal to each evaporator pipe.
15.Connect evaporator pipes and tighten bolts to 5
Nm (3.7 lbf.ft).
16.Connect multiplug to dual pressure switch.
17.Fit radiator.
l
+ COOLING SYSTEM - Td5,
REPAIRS, Radiator.
l
+ COOLING SYSTEM - V8,
REPAIRS, Radiator.
18.Recharge A/C system.
+ AIR CONDITIONING, REFRIGERANT
RECOVERY, RECYCLING AND
RECHARGING, Refrigerant recovery,
recycling and recharging.
Page 1450 of 1672
CHARGING AND STARTING
REPAIRS 86-1-1
CHARGING AND STARTING REPAIRS
Alternator - diesel
$% 86.10.02
Remove
1.Remove auxiliary drive belt.
+ CHARGING AND STARTING,
REPAIRS, Belt - auxiliary drive.
2.Release cover and remove nut securing lead
to alternator.
3.Disconnect alternator multiplug.
4.Remove bolt (LH thread) and remove auxiliary
drive belt tensioner. 5.Remove bolt securing support stay to
alternator.
6.Release clip and disconnect oil drain hose from
vacuum pump.
7.Disconnect vacuum pump oil supply pipe from
cylinder head and discard 'O' ring.
8.Remove bolt securing alternator and release
from mounting bracket.
9.Disconnect vacuum hose from vacuum pump.
10.Remove alternator. Take care not to damage
radiator cooling fins.
11.Remove 4 bolts, and remove vacuum pump
from alternator.
CAUTION: Always fit plugs to open
connections to prevent contamination.