Page 836 of 1672

AUTOMATIC GEARBOX - ZF4HP22 - 24
REPAIRS 44-39
7.Note position and remove pump locating dowel.
8.Remove and discard 'O' ring from pump
housing.
9.Remove 6 bolts securing converter housing to
intermediate plate, and release intermediate
plate from converter housing.Refit
1.Clean intermediate plate and mating faces with
a lint free cloth.
2.Position intermediate plate to converter
housing, fit bolts and tighten evenly to 46 Nm
(34 lbf.ft)
3.Fit new sealing washers to M14 Allen plugs, fit
plugs and tighten to 40 Nm (30 lbf.ft).
4.Fit new sealing washers to M20 plugs, fit plugs
and tighten to 50 Nm (37 lbf.ft).
5.Fit oil cooler adaptors and tighten to 42 Nm (30
lbf.ft)
6.Clean pump housing and mating face on
intermediate plate with lint free cloth.
7.Lubricate new 'O' ring with transmission fluid
and fit to pump housing.
8.Position pump locating dowel into intermediate
plate.
9.Align pump to dowel and position in
intermediate plate.
10.Fit bolts and tighten in a diagonal sequence to
10 Nm (7 lbf.ft)
11.Position LRT-44-003/1 into pump and check
that the pump rotors turn freely.
12.Fit intermediate plate gasket.
+ AUTOMATIC GEARBOX - ZF4HP22
- 24, REPAIRS, Gasket - intermediate plate.
M44 1341
M44 1357
M44 1342
LRT-44-003/1
Page 837 of 1672
AUTOMATIC GEARBOX - ZF4HP22 - 24
44-40 REPAIRS
Pump - fluid
$% 44.32.01
Remove
1.Remove intermediate plate gasket.
+ AUTOMATIC GEARBOX - ZF4HP22
- 24, REPAIRS, Gasket - intermediate plate.
2.Remove 8 bolts securing fluid pump to
intermediate plate and carefully remove pump
from intermediate plate.
3.Note position and remove pump locating dowel.
4.Remove and discard 'O' ring from pump
housing.
Refit
1.Clean pump housing and mating face on
intermediate plate with lint free cloth.
2.Lubricate new 'O' ring with transmission fluid
and fit to pump housing.
3.Position pump locating dowel into intermediate
plate.
4.Align fluid pump to dowel and position in
intermediate plate.5.Fit bolts and tighten in a diagonal sequence to
10 Nm (7 lbf.ft)
6.Position LRT-44-003/1 into pump and check
that the pump rotors turn freely.
7.Fit intermediate plate gasket.
+ AUTOMATIC GEARBOX - ZF4HP22
- 24, REPAIRS, Gasket - intermediate plate.
M44 1336
M44 1341
M44 1342
LRT-44-003/1
Page 838 of 1672
AUTOMATIC GEARBOX - ZF4HP22 - 24
REPAIRS 44-41
Seal - rear extension housing
$% 44.20.18
Remove
1.Remove transfer box
+ TRANSFER BOX - LT230SE,
REPAIRS, Transfer box - Diesel.
+ TRANSFER BOX - LT230SE,
REPAIRS, Transfer box - V8.
2.Drain automatic gearbox oil.
+ MAINTENANCE, PROCEDURES,
Automatic gearbox.
3.Remove rear extension housing oil seal from
gearbox.
Refit
1.Clean oil seal recess in gearbox and running
surface on input shaft.
2.Lubricate oil seal running surface with
transmission oil. 3.Using tool LRT-44-001 fit oil seal to extension
housing.
4.Fit transfer box
+ TRANSFER BOX - LT230SE,
REPAIRS, Transfer box - Diesel.
+ TRANSFER BOX - LT230SE,
REPAIRS, Transfer box - V8.
5.Fill automatic gearbox with oil.
+ MAINTENANCE, PROCEDURES,
Automatic gearbox.
Page 850 of 1672
AUTOMATIC GEARBOX - ZF4HP22 - 24
REPAIRS 44-53
6.Disconnect and remove speed sensor from
harness.
Refit
1.Connect speed sensor to harness multiplug.
2.Position harness to valve body.
3.Connect multiplugs to shift control solenoid
valves MV 1 and MV 2 and lock-up solenoid
valve.
4.Connect multiplug to pressure regulator
solenoid valve and secure solenoid valve
harness with clip to valve body.
5.Position and secure harness in clips on valve
body.
6.Fit valve body assembly.
+ AUTOMATIC GEARBOX - ZF4HP22
- 24, REPAIRS, Valve body assembly.
Electronic control unit - automatic
transmission
$% 44.15.46
Remove
1.Release fixings and remove battery cover.
2.Disconnect battery earth lead.
3.Remove 3 screws and trim clip securing lower
trim casing to LH front seat.
4.Remove 3 nuts securing speaker power
amplifier bracket to the body.
5.Disconnect multiplug from automatic
transmission ECU located on underside of
amplifier mounting bracket.
M44 1359
Page 1081 of 1672

BRAKES
70-36 REPAIRS
Cable - handbrake
$% 70.35.25
Remove
1.Remove centre console.
+ INTERIOR TRIM COMPONENTS,
REPAIRS, Console - centre - automatic
models.
+ INTERIOR TRIM COMPONENTS,
REPAIRS, Console - centre - manual
models.
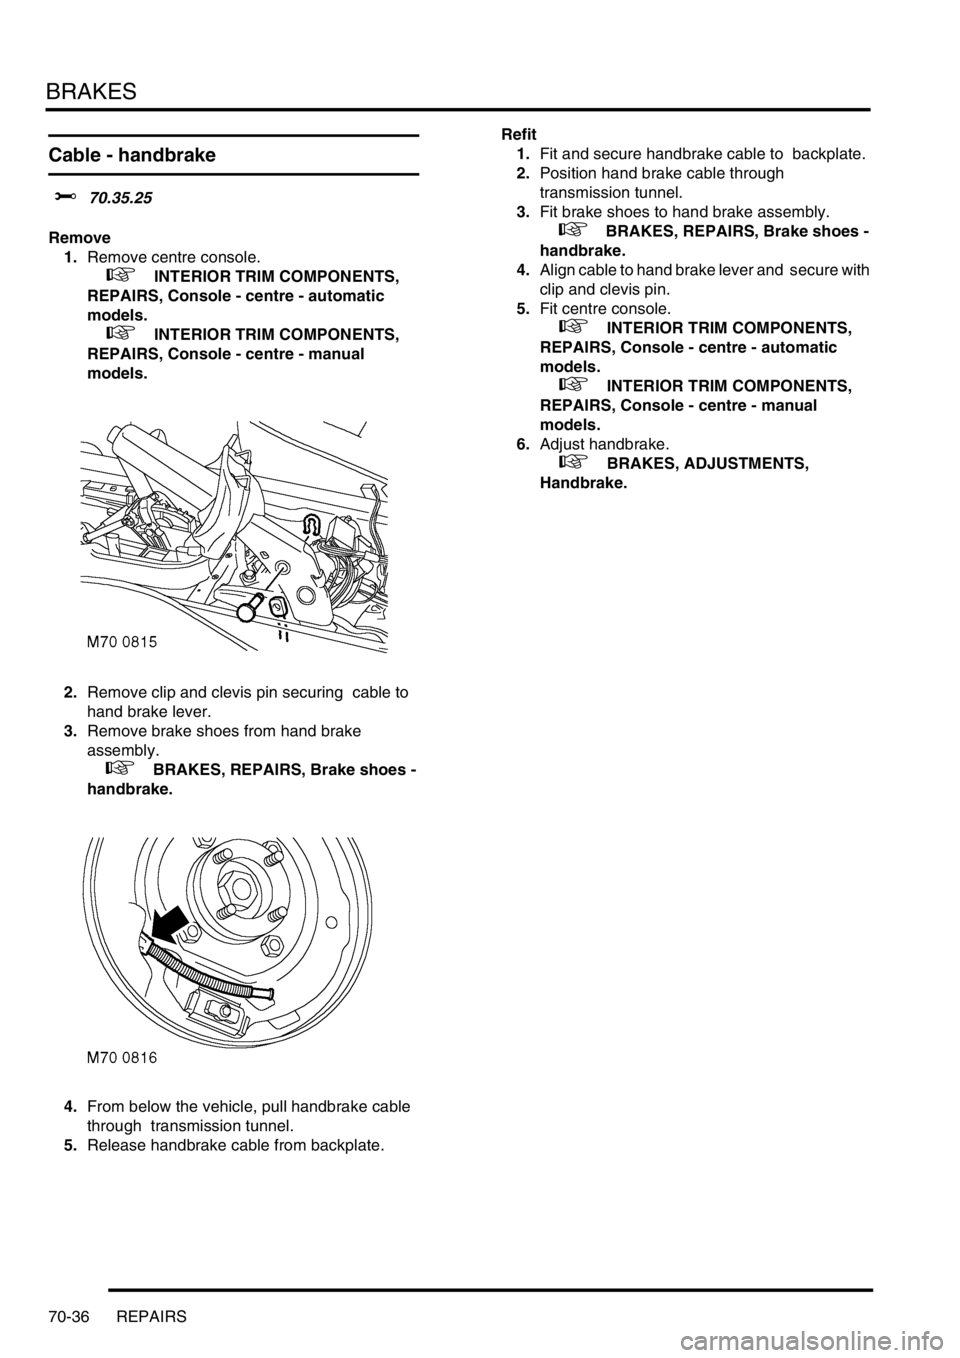
2.Remove clip and clevis pin securing cable to
hand brake lever.
3.Remove brake shoes from hand brake
assembly.
+ BRAKES, REPAIRS, Brake shoes -
handbrake.
4.From below the vehicle, pull handbrake cable
through transmission tunnel.
5.Release handbrake cable from backplate. Refit
1.Fit and secure handbrake cable to backplate.
2.Position hand brake cable through
transmission tunnel.
3.Fit brake shoes to hand brake assembly.
+ BRAKES, REPAIRS, Brake shoes -
handbrake.
4.Align cable to hand brake lever and secure with
clip and clevis pin.
5.Fit centre console.
+ INTERIOR TRIM COMPONENTS,
REPAIRS, Console - centre - automatic
models.
+ INTERIOR TRIM COMPONENTS,
REPAIRS, Console - centre - manual
models.
6.Adjust handbrake.
+ BRAKES, ADJUSTMENTS,
Handbrake.
Page 1162 of 1672

INTERIOR TRIM COMPONENTS
REPAIRS 76-3-9
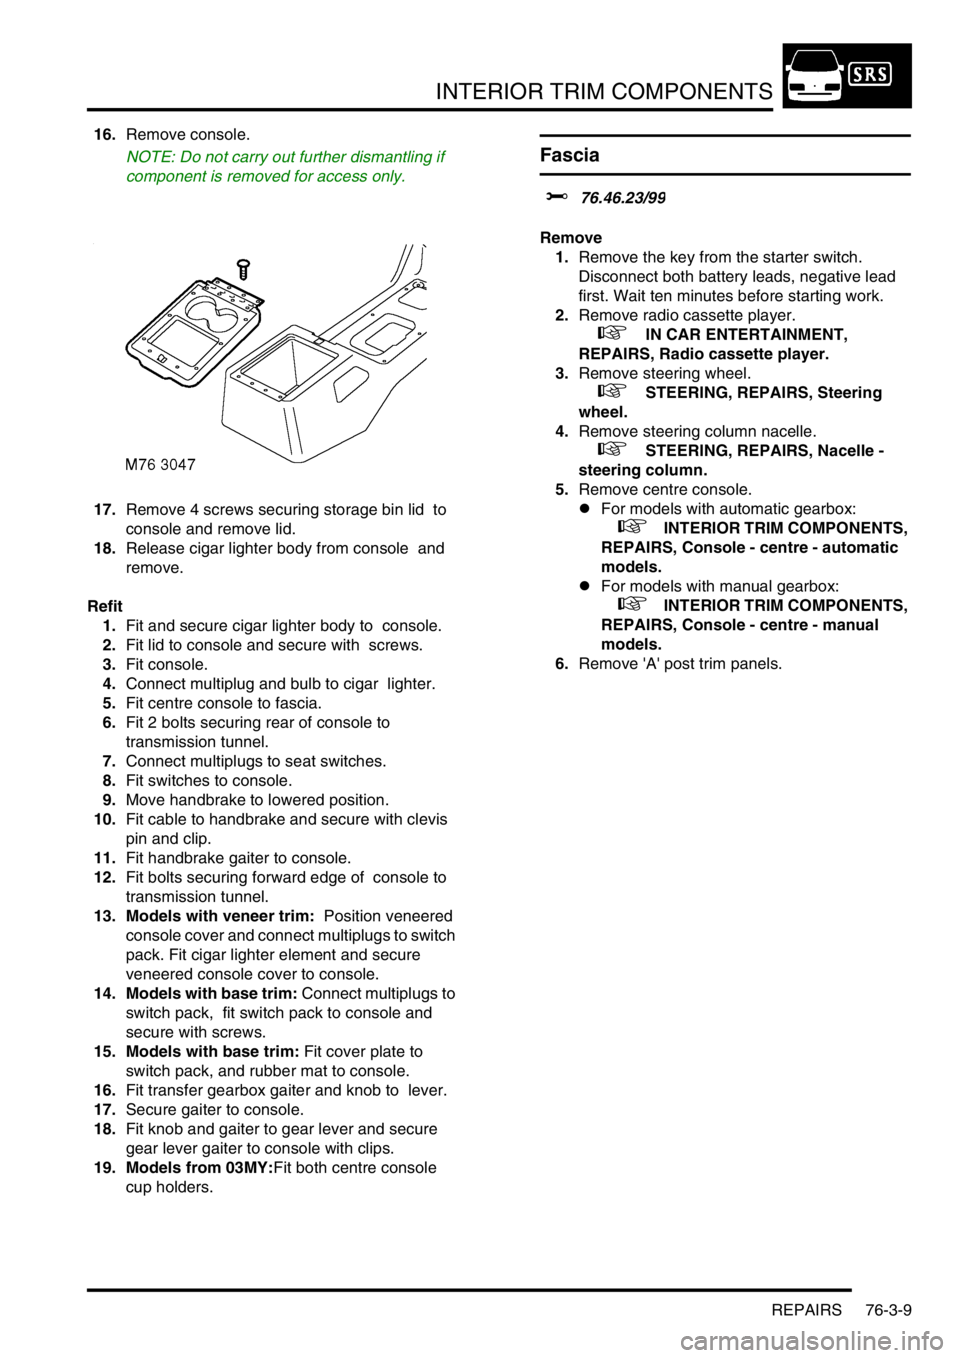
16.Remove console.
NOTE: Do not carry out further dismantling if
component is removed for access only.
17.Remove 4 screws securing storage bin lid to
console and remove lid.
18.Release cigar lighter body from console and
remove.
Refit
1.Fit and secure cigar lighter body to console.
2.Fit lid to console and secure with screws.
3.Fit console.
4.Connect multiplug and bulb to cigar lighter.
5.Fit centre console to fascia.
6.Fit 2 bolts securing rear of console to
transmission tunnel.
7.Connect multiplugs to seat switches.
8.Fit switches to console.
9.Move handbrake to lowered position.
10.Fit cable to handbrake and secure with clevis
pin and clip.
11.Fit handbrake gaiter to console.
12.Fit bolts securing forward edge of console to
transmission tunnel.
13. Models with veneer trim: Position veneered
console cover and connect multiplugs to switch
pack. Fit cigar lighter element and secure
veneered console cover to console.
14. Models with base trim: Connect multiplugs to
switch pack, fit switch pack to console and
secure with screws.
15. Models with base trim: Fit cover plate to
switch pack, and rubber mat to console.
16.Fit transfer gearbox gaiter and knob to lever.
17.Secure gaiter to console.
18.Fit knob and gaiter to gear lever and secure
gear lever gaiter to console with clips.
19. Models from 03MY:Fit both centre console
cup holders.
Fascia
$% 76.46.23/99
Remove
1.Remove the key from the starter switch.
Disconnect both battery leads, negative lead
first. Wait ten minutes before starting work.
2.Remove radio cassette player.
+ IN CAR ENTERTAINMENT,
REPAIRS, Radio cassette player.
3.Remove steering wheel.
+ STEERING, REPAIRS, Steering
wheel.
4.Remove steering column nacelle.
+ STEERING, REPAIRS, Nacelle -
steering column.
5.Remove centre console.
lFor models with automatic gearbox:
+ INTERIOR TRIM COMPONENTS,
REPAIRS, Console - centre - automatic
models.
lFor models with manual gearbox:
+ INTERIOR TRIM COMPONENTS,
REPAIRS, Console - centre - manual
models.
6.Remove 'A' post trim panels.
Page 1165 of 1672

INTERIOR TRIM COMPONENTS
76-3-12 REPAIRS
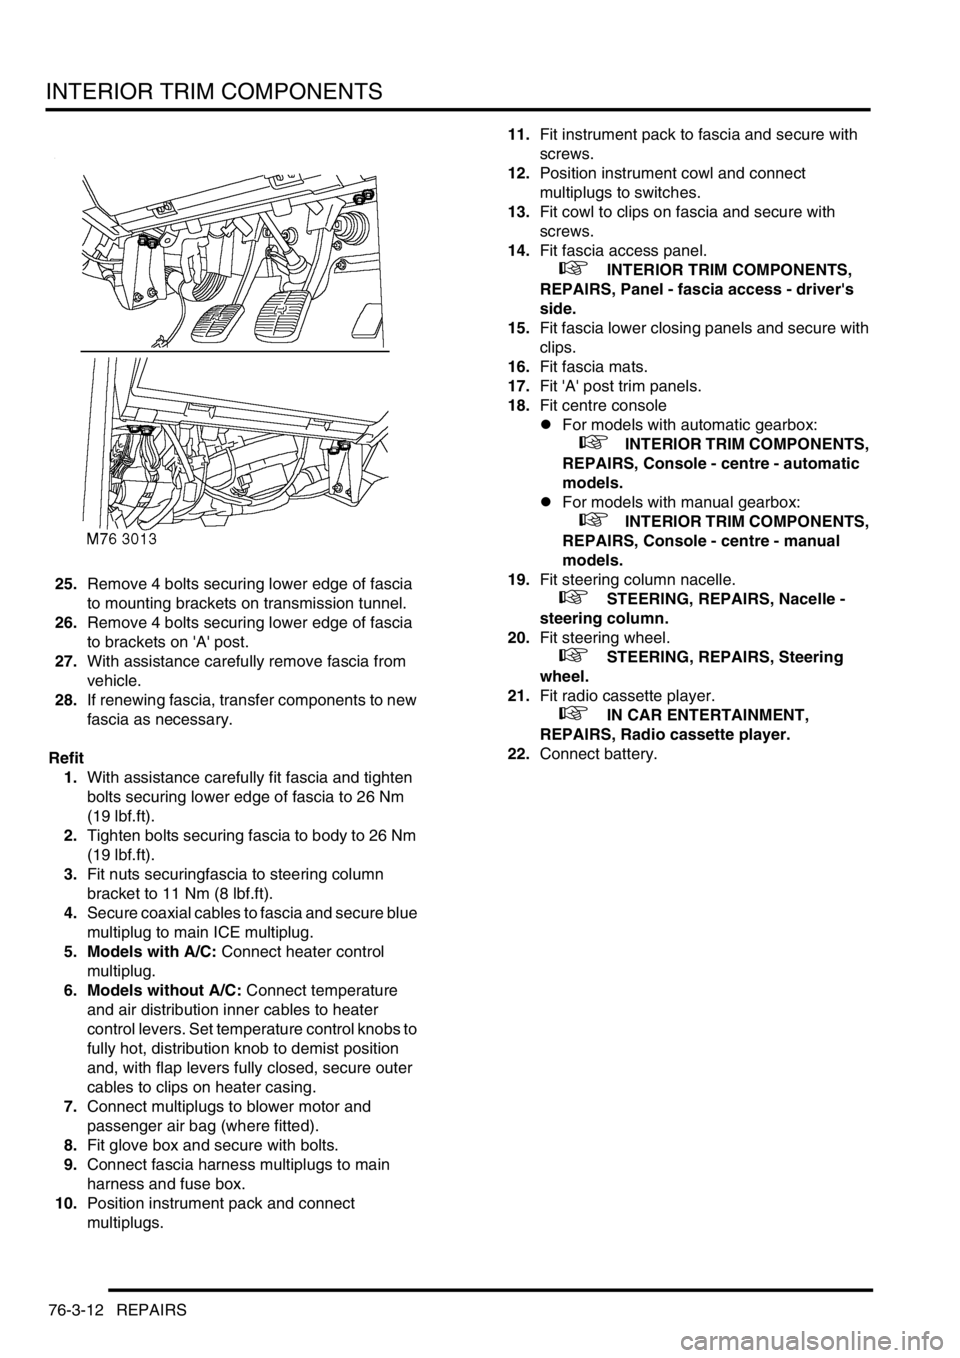
25.Remove 4 bolts securing lower edge of fascia
to mounting brackets on transmission tunnel.
26.Remove 4 bolts securing lower edge of fascia
to brackets on 'A' post.
27.With assistance carefully remove fascia from
vehicle.
28.If renewing fascia, transfer components to new
fascia as necessary.
Refit
1.With assistance carefully fit fascia and tighten
bolts securing lower edge of fascia to 26 Nm
(19 lbf.ft).
2.Tighten bolts securing fascia to body to 26 Nm
(19 lbf.ft).
3.Fit nuts securingfascia to steering column
bracket to 11 Nm (8 lbf.ft).
4.Secure coaxial cables to fascia and secure blue
multiplug to main ICE multiplug.
5. Models with A/C: Connect heater control
multiplug.
6. Models without A/C: Connect temperature
and air distribution inner cables to heater
control levers. Set temperature control knobs to
fully hot, distribution knob to demist position
and, with flap levers fully closed, secure outer
cables to clips on heater casing.
7.Connect multiplugs to blower motor and
passenger air bag (where fitted).
8.Fit glove box and secure with bolts.
9.Connect fascia harness multiplugs to main
harness and fuse box.
10.Position instrument pack and connect
multiplugs.11.Fit instrument pack to fascia and secure with
screws.
12.Position instrument cowl and connect
multiplugs to switches.
13.Fit cowl to clips on fascia and secure with
screws.
14.Fit fascia access panel.
+ INTERIOR TRIM COMPONENTS,
REPAIRS, Panel - fascia access - driver's
side.
15.Fit fascia lower closing panels and secure with
clips.
16.Fit fascia mats.
17.Fit 'A' post trim panels.
18.Fit centre console
lFor models with automatic gearbox:
+ INTERIOR TRIM COMPONENTS,
REPAIRS, Console - centre - automatic
models.
lFor models with manual gearbox:
+ INTERIOR TRIM COMPONENTS,
REPAIRS, Console - centre - manual
models.
19.Fit steering column nacelle.
+ STEERING, REPAIRS, Nacelle -
steering column.
20.Fit steering wheel.
+ STEERING, REPAIRS, Steering
wheel.
21.Fit radio cassette player.
+ IN CAR ENTERTAINMENT,
REPAIRS, Radio cassette player.
22.Connect battery.
Page 1170 of 1672

INTERIOR TRIM COMPONENTS
REPAIRS 76-3-17
9.Fit drinks tray.
+ INTERIOR TRIM COMPONENTS,
REPAIRS, Drink tray assembly - centre
fascia.
10.Fit and secure radio DIN socket.
11.Fit screw cover to radio aperture.
12.Fit radio cassette player.
+ IN CAR ENTERTAINMENT,
REPAIRS, Radio cassette player.
Carpet - front
$% 76.49.02
Remove
1. Models with premium ICE: Remove power
amplifier.
+ IN CAR ENTERTAINMENT,
REPAIRS, Amplifier - power.
2. Models with premium ICE: Remove CD
autochanger.
+ IN CAR ENTERTAINMENT,
REPAIRS, CD autochanger.
3.Remove centre console.
lFor models with manual gearbox:
+ INTERIOR TRIM COMPONENTS,
REPAIRS, Console - centre - manual
models.
lFor models with automatic gearbox:
+ INTERIOR TRIM COMPONENTS,
REPAIRS, Console - centre - automatic
models.
4.Remove both lower 'A' post trim panels.
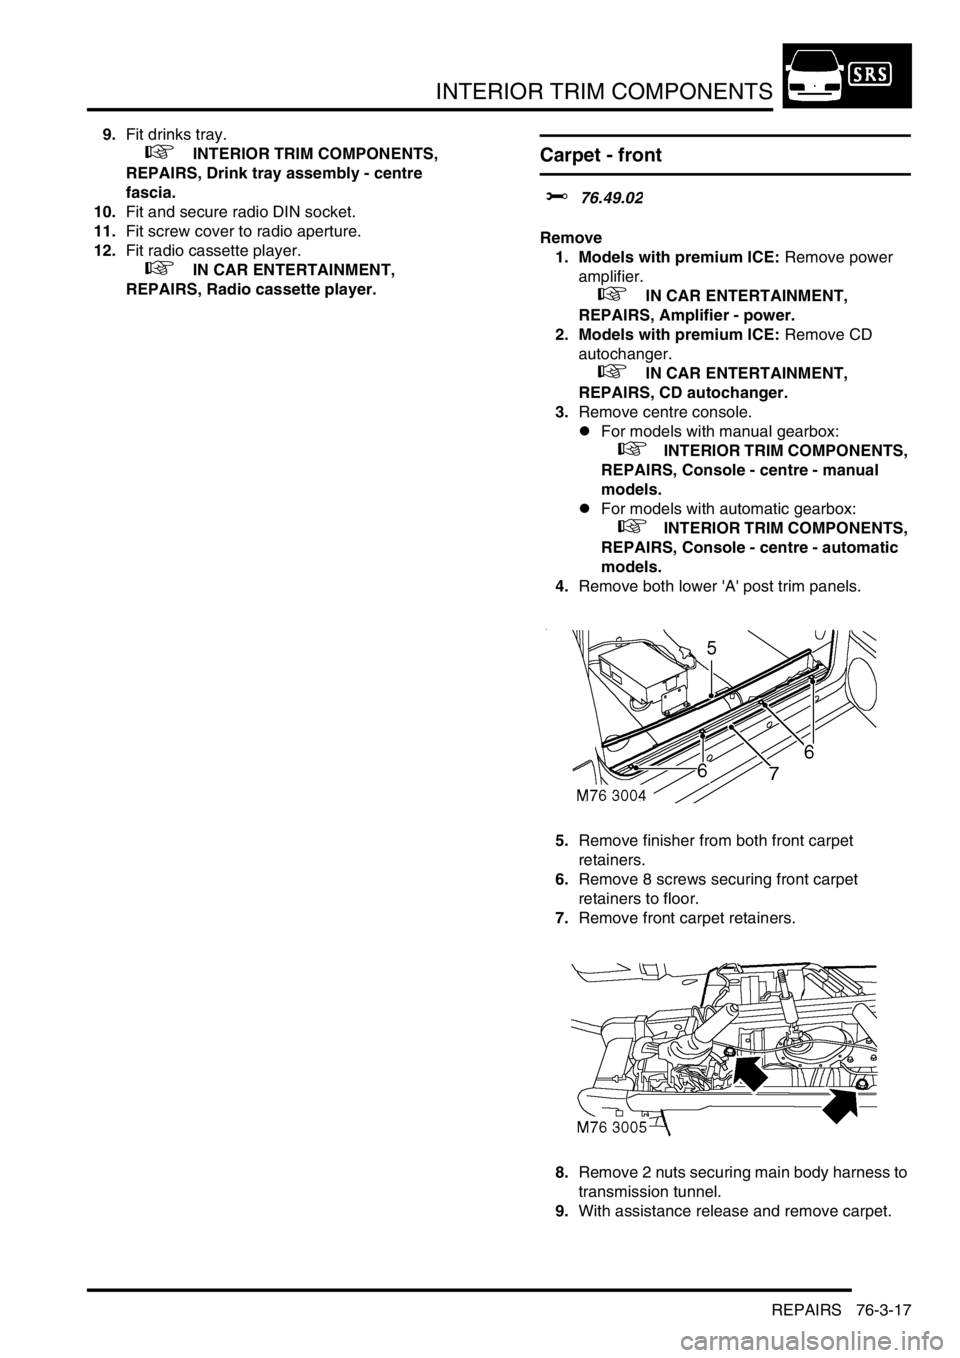
5.Remove finisher from both front carpet
retainers.
6.Remove 8 screws securing front carpet
retainers to floor.
7.Remove front carpet retainers.
8.Remove 2 nuts securing main body harness to
transmission tunnel.
9.With assistance release and remove carpet.