2002 LAND ROVER DISCOVERY oil pressure
[x] Cancel search: oil pressurePage 959 of 1672

FRONT SUSPENSION
60-20 DESCRIPTION AND OPERATION
ACE Electronic control unit (ECU)
1Body Control Unit (Ref. only)
2Bracket
3ACE Electronic control unit
4Attachment nuts 3 off
The ACE ECU is mounted on a bracket behind the passenger glove box and is identified from the other ECU's by its
single electrical harness connector. The single 36 pin connector is located on the lower face of the ECU and mates
with a connector from the main harness. The connector supplies power, ground, signal and sensor information to/from
the ECU for control of the ACE system.
The ACE ECU receives a battery power supply from fuse 15 in the engine compartment fusebox via the ACE relay,
also located in the engine compartment fusebox. The ECU provides an earth path for the relay coil, energising the
coil and supplying power to the ECU.
An ignition on signal is supplied from the ignition switch via fuse 29 in the passenger compartment fusebox. The
ignition on signal provides an input to the ECU which tells the ECU that ignition has been selected on and initiates a
250 ms start time. The start time is used to prevent functions operating when software routines are being initialised.
The ignition on signal, when removed, tells the ECU that the ignition is off. The ECU will remain powered for thirty
seconds after the ignition is turned off. The thirty second period allows the ECU to store values and fault flags in the
memory. These values are read by the ECU when the next ignition on signal is received.
An engine speed signal is transmitted to the ECU from the Engine Control Module (ECM) as a pulsed digital signal.
The engine speed signal is used by the ACE ECU to detect that the engine is running and hydraulic pressure for ACE
system operation is available.
Page 1011 of 1672

REAR SUSPENSION
64-6 DESCRIPTION AND OPERATION
Description
General
The rear suspension comprises two dampers, two radius arms, a Watts linkage and an anti-roll bar assembly. On
vehicles without Self Levelling Suspension (SLS) coil springs are used. On vehicles with SLS air springs are used.
The anti-roll bar is an essential part of the rear suspension. On vehicles without ACE, a conventional 'passive' anti-
roll bar is fitted. On vehicles fitted with the ACE system, a thicker diameter anti-roll bar, known as a torsion bar, is used
with an actuator at one end.
+ FRONT SUSPENSION, DESCRIPTION AND OPERATION, Description - ACE.
The hydraulic dampers and springs provide springing for each rear wheel. The long travel dampers, springs and
radius arms provide maximum axle articulation and wheel travel for off-road driving. The rear axle is controlled
longitudinally by two forged steel radius arms and transversely by a Watts linkage.
Radius arms
Each radius arm is manufactured from forged steel. Two bushes are pressed into the rear of the radius arm. The rear
of the radius arm is located between a fabricated bracket on the axle and secured through the bushes with two bolts
and nuts. A bush is pressed into the forward end of the radius arm which is located in a fabricated bracket on each
chassis longitudinal and secured through the bush with a bolt and nut. Each radius arm is similar in its construction
to the front radius arms. The rear radius arms are shorter than the front and have a lug for attachment of the SLS
height sensor (when fitted).
The radius arms prevent longitudinal movement of the rear axle and because of their length allow maximum axle
articulation. The stiffness of the bushes in each radius arm also contributes to the vehicle roll stiffness.
Each radius arm has a notch on its lower edge which provides location for the vehicle jack.
Dampers
Two conventional telescopic dampers are used to control body/axle movement. The upper damper mounting is fitted
with a bush which locates in a bracket on the chassis longitudinal. The damper is secured with a bolt which screws
into a captive nut on the bracket. The lower damper mounting is also fitted with a bush and locates in a fabricated
bracket attached to the rear axle. The lower mounting is secured with a bolt which screws into a captive nut on the
bracket. The upper and lower bushes are replaceable items.
Air springs (vehicles with SLS)
On vehicles with SLS fitted, air springs are fitted between the rear axle and the chassis. Each spring is located at its
base on a fabricated platform on the rear axle. The top of the spring locates in a fabricated bracket attached to the
outside of each chassis longitudinal.
The plastic base of the air spring has two lugs which locate in a slotted hole in the rear axle platform. The spring is
secured by rotating the spring through 90
°, locating the lug in the platform. The plastic top of the air spring has two
grooved pins which locate in holes in the bracket on the chassis. Two spring clips locate on the grooved pins and
retain the top of the spring in position.
Each air spring comprises a top plate assembly, an air bag and a base piston. The air bag is attached to the top plate
and the piston with a crimped ring. The air bag is made from a flexible rubber material which allows the bag to expand
with air pressure and deform under load. The top plate assembly comprises the plastic top plate with two bonded
grooved pins on its top face. In the centre of the top face is a female connector which allows for the attachment of the
air hose from the SLS compressor. The piston is made from plastic and is shaped to allow the air bag to roll over its
outer diameter. The base of the piston is recessed with a boss moulded in the centre. The boss has two lugs which
provide attachment to the axle platform.
Page 1021 of 1672
REAR SUSPENSION
64-16 DESCRIPTION AND OPERATION
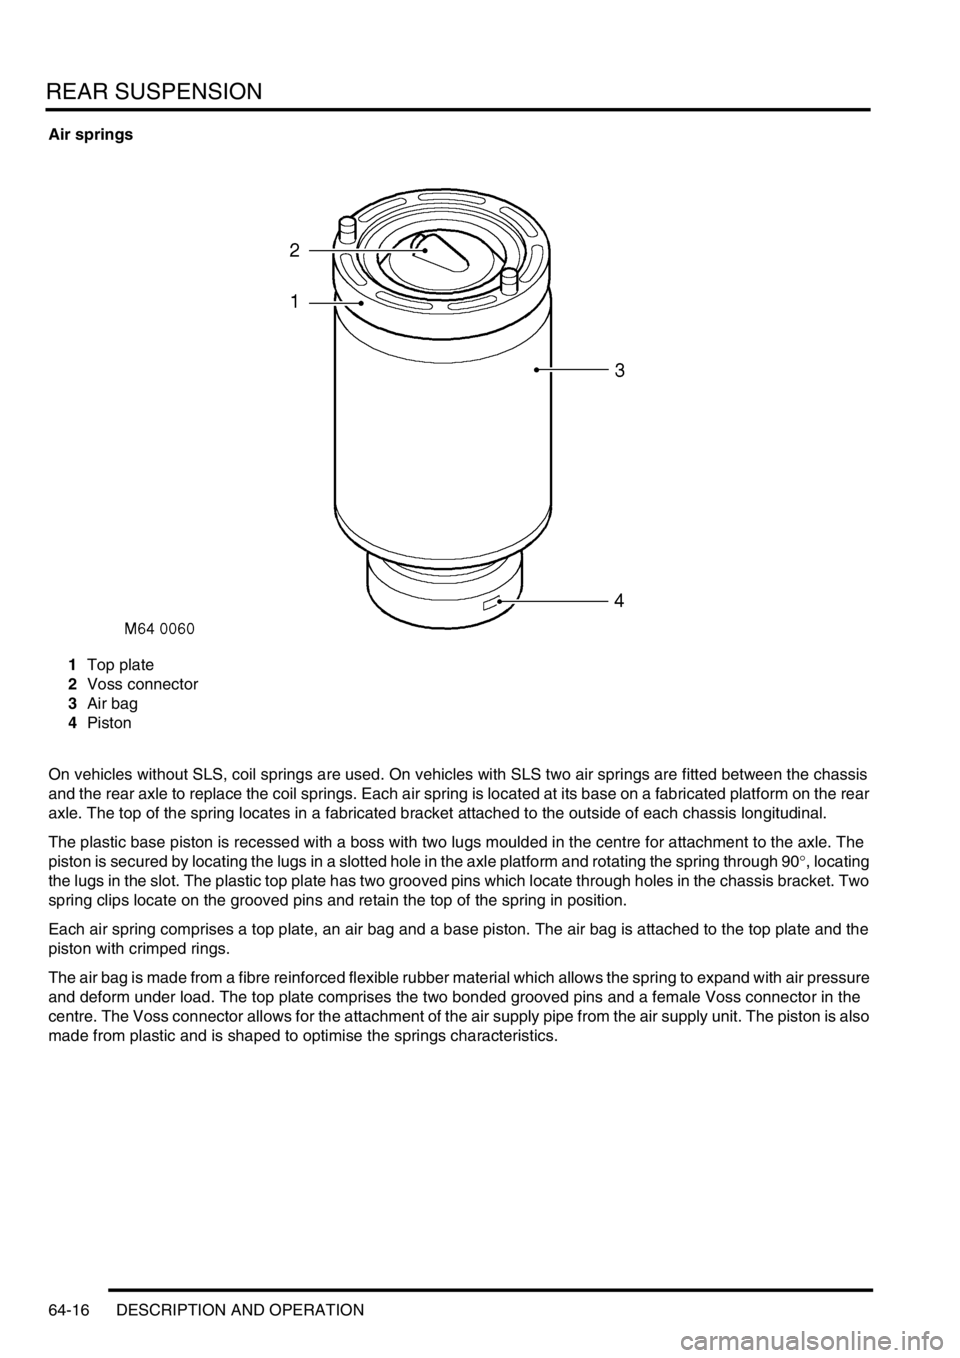
Air springs
1Top plate
2Voss connector
3Air bag
4Piston
On vehicles without SLS, coil springs are used. On vehicles with SLS two air springs are fitted between the chassis
and the rear axle to replace the coil springs. Each air spring is located at its base on a fabricated platform on the rear
axle. The top of the spring locates in a fabricated bracket attached to the outside of each chassis longitudinal.
The plastic base piston is recessed with a boss with two lugs moulded in the centre for attachment to the axle. The
piston is secured by locating the lugs in a slotted hole in the axle platform and rotating the spring through 90
°, locating
the lugs in the slot. The plastic top plate has two grooved pins which locate through holes in the chassis bracket. Two
spring clips locate on the grooved pins and retain the top of the spring in position.
Each air spring comprises a top plate, an air bag and a base piston. The air bag is attached to the top plate and the
piston with crimped rings.
The air bag is made from a fibre reinforced flexible rubber material which allows the spring to expand with air pressure
and deform under load. The top plate comprises the two bonded grooved pins and a female Voss connector in the
centre. The Voss connector allows for the attachment of the air supply pipe from the air supply unit. The piston is also
made from plastic and is shaped to optimise the springs characteristics.
Page 1377 of 1672
AIR CONDITIONING
82-4DESCRIPTION AND OPERATION
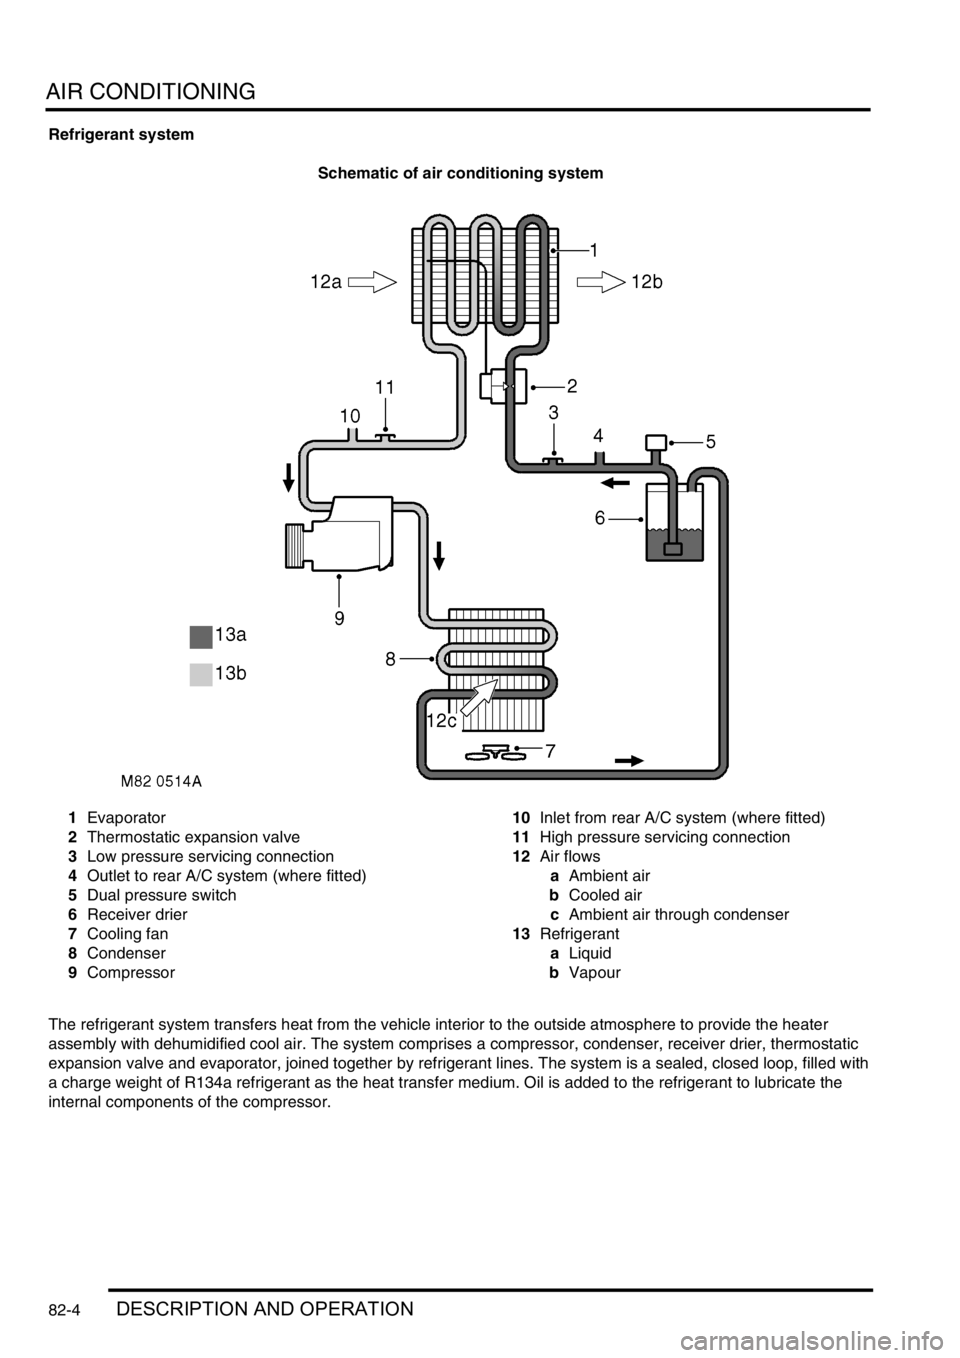
Refrigerant system
Schematic of air conditioning system
1Evaporator
2Thermostatic expansion valve
3Low pressure servicing connection
4Outlet to rear A/C system (where fitted)
5Dual pressure switch
6Receiver drier
7Cooling fan
8Condenser
9Compressor10Inlet from rear A/C system (where fitted)
11High pressure servicing connection
12Air flows
aAmbient air
bCooled air
cAmbient air through condenser
13Refrigerant
aLiquid
bVapour
The refrigerant system transfers heat from the vehicle interior to the outside atmosphere to provide the heater
assembly with dehumidified cool air. The system comprises a compressor, condenser, receiver drier, thermostatic
expansion valve and evaporator, joined together by refrigerant lines. The system is a sealed, closed loop, filled with
a charge weight of R134a refrigerant as the heat transfer medium. Oil is added to the refrigerant to lubricate the
internal components of the compressor.
Page 1390 of 1672

AIR CONDITIONING
DESCRIPTION AND OPERATION 82-17
RH temperature. Illuminates to show the RH temperature selection, external air temperature or diagnostic fault code.
Blower speed. Illuminates when the blower speed is manually selected. Also illuminates in the automatic modes when
one of the temperatures is set to LO or HI.
External air temperature. EXT illuminates to show that external air temperature is selected on.
All temperature indications on the display are in either
°C or °F. For 1 second after the system is first switched on, the
display shows only
°C or °F, in the LH temperature window, to indicate which temperature scale is in use. After 1
second, the
°C or °F indication goes off and the display shows all relevant outputs.
Temperature conversion: While the system is on, the temperature indications on the display can be switched between
the two scales by pressing and holding the fresh/recirculated air switch, then pressing and holding the A/C on/off
switch until the audible warning sounds (approximately 3 seconds).
Dual pressure switch
The dual pressure switch protects the refrigerant system from extremes of pressure. The normally closed switch is
installed in the top of the receiver drier. If minimum or maximum pressure limits are exceeded the switch contacts
open, causing the compressor clutch to be disengaged. The minimum pressure limit protects the compressor, by
preventing operation of the system unless there is a minimum refrigerant pressure (and thus refrigerant and
lubricating oil) in the system. The maximum pressure limit keeps the refrigerant system within a safe operating
pressure.
Dual pressure switch nominal operating pressures
Evaporator temperature sensor
The evaporator temperature sensor is an encapsulated thermistor that provides the ATC ECU with an input of the
evaporator air outlet temperature. The evaporator temperature sensor is installed in a clip which locates in the
evaporator matrix in the heater assembly. The ATC ECU uses the input to prevent the formation of ice on the
evaporator.
In-car temperature sensor
The in-car temperature sensor is an encapsulated thermistor that provides the ATC ECU with an input of cabin air
temperature. The sensor is integrated into the inlet of an electric fan, which is installed behind a grille in the fascia
outboard of the steering column. The fan runs continuously, while the ignition is on, to draw air through the grille and
across the sensor.
Sunlight sensor
The sunlight sensor consists of two diodes that provide the ATC ECU with inputs of light intensity, one as sensed
coming from the left of the vehicle and one as sensed coming from the right. The inputs are used as a measure of the
solar heating effect on vehicle occupants. The sensor is installed in the centre of the fascia upper surface.
Heater coolant temperature sensor
The heater coolant temperature sensor is an encapsulated thermistor that provides the ATC ECU with an input related
to heater matrix coolant temperature. The sensor is installed in the casing of the heater assembly and presses against
the end tank of the heater matrix.
Ambient temperature sensor
The ambient temperature sensor is an encapsulated thermistor that provides the ATC ECU with an input of external
air temperature. The sensor is attached to the cooling fan mounting bracket in front of the condenser.
Limit Opening pressure, bar (lbf.in2) Closing pressure, bar (lbf.in2)
Minimum 2.0 (29.0), pressure decreasing 2.3 (33.4), pressure increasing
Maximum 32 (464), pressure increasing 26 (377), pressure decreasing
Page 1402 of 1672
AIR CONDITIONING
REFRIGERANT RECOVERY, RECYCLING AND RECHARGING 82-29
REFRIGERANT RECOVERY, RECYCLING AND RECHARGING
Refrigerant recovery, recycling and
recharging
$% 82.30.02
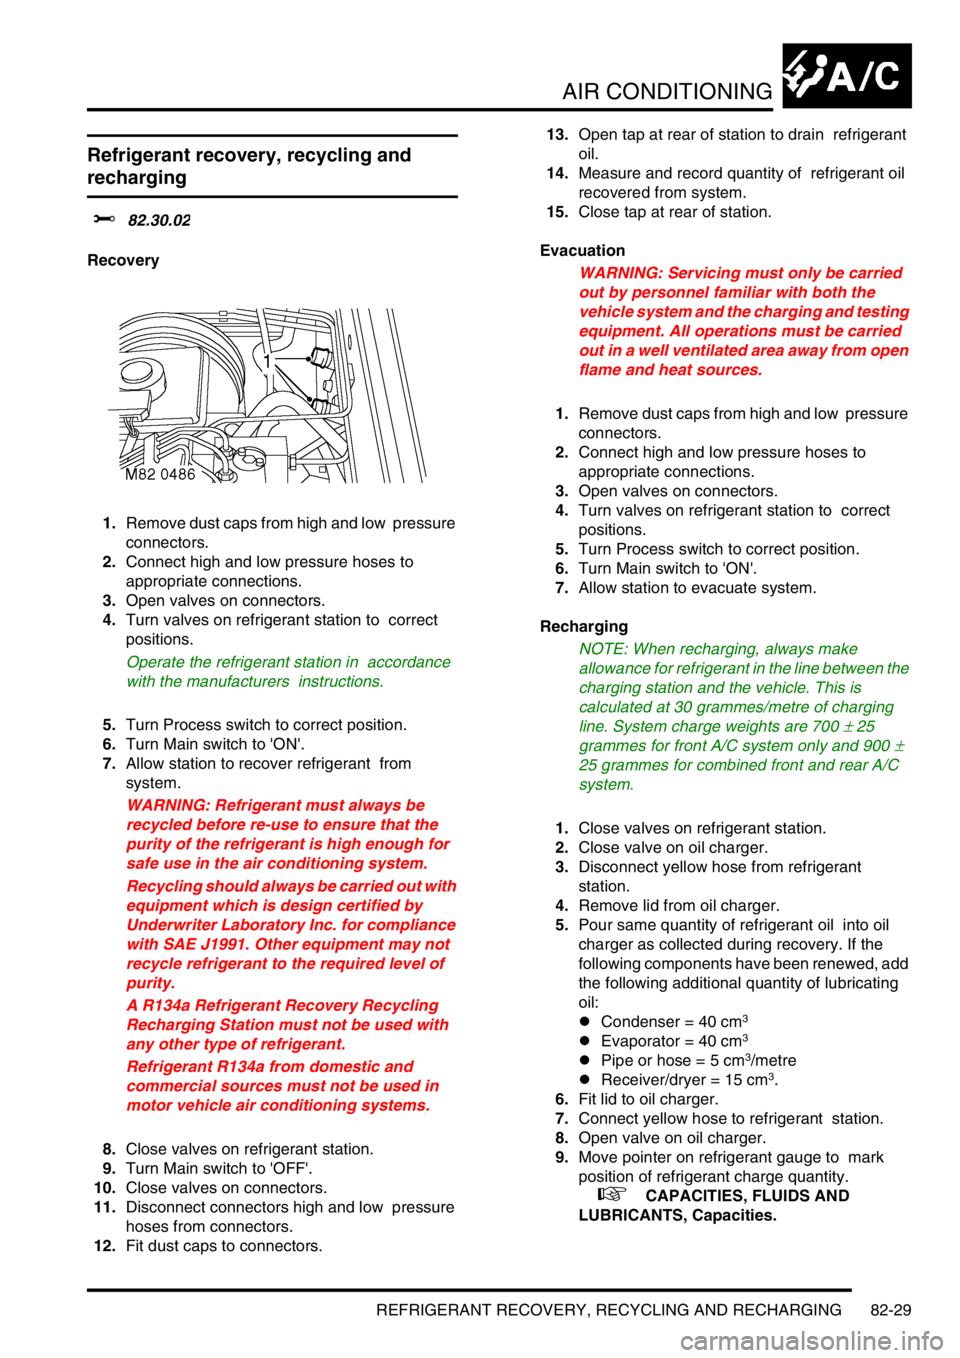
Recovery
1.Remove dust caps from high and low pressure
connectors.
2.Connect high and low pressure hoses to
appropriate connections.
3.Open valves on connectors.
4.Turn valves on refrigerant station to correct
positions.
Operate the refrigerant station in accordance
with the manufacturers instructions.
5.Turn Process switch to correct position.
6.Turn Main switch to 'ON'.
7.Allow station to recover refrigerant from
system.
WARNING: Refrigerant must always be
recycled before re-use to ensure that the
purity of the refrigerant is high enough for
safe use in the air conditioning system.
Recycling should always be carried out with
equipment which is design certified by
Underwriter Laboratory Inc. for compliance
with SAE J1991. Other equipment may not
recycle refrigerant to the required level of
purity.
A R134a Refrigerant Recovery Recycling
Recharging Station must not be used with
any other type of refrigerant.
Refrigerant R134a from domestic and
commercial sources must not be used in
motor vehicle air conditioning systems.
8.Close valves on refrigerant station.
9.Turn Main switch to 'OFF'.
10.Close valves on connectors.
11.Disconnect connectors high and low pressure
hoses from connectors.
12.Fit dust caps to connectors. 13.Open tap at rear of station to drain refrigerant
oil.
14.Measure and record quantity of refrigerant oil
recovered from system.
15.Close tap at rear of station.
Evacuation
WARNING: Servicing must only be carried
out by personnel familiar with both the
vehicle system and the charging and testing
equipment. All operations must be carried
out in a well ventilated area away from open
flame and heat sources.
1.Remove dust caps from high and low pressure
connectors.
2.Connect high and low pressure hoses to
appropriate connections.
3.Open valves on connectors.
4.Turn valves on refrigerant station to correct
positions.
5.Turn Process switch to correct position.
6.Turn Main switch to 'ON'.
7.Allow station to evacuate system.
Recharging
NOTE: When recharging, always make
allowance for refrigerant in the line between the
charging station and the vehicle. This is
calculated at 30 grammes/metre of charging
line. System charge weights are 700
± 25
grammes for front A/C system only and 900
±
25 grammes for combined front and rear A/C
system.
1.Close valves on refrigerant station.
2.Close valve on oil charger.
3.Disconnect yellow hose from refrigerant
station.
4.Remove lid from oil charger.
5.Pour same quantity of refrigerant oil into oil
charger as collected during recovery. If the
following components have been renewed, add
the following additional quantity of lubricating
oil:
lCondenser = 40 cm
3
lEvaporator = 40 cm3
lPipe or hose = 5 cm3/metre
lReceiver/dryer = 15 cm3.
6.Fit lid to oil charger.
7.Connect yellow hose to refrigerant station.
8.Open valve on oil charger.
9.Move pointer on refrigerant gauge to mark
position of refrigerant charge quantity.
+ CAPACITIES, FLUIDS AND
LUBRICANTS, Capacities.
Page 1408 of 1672
AIR CONDITIONING
REPAIRS 82-35
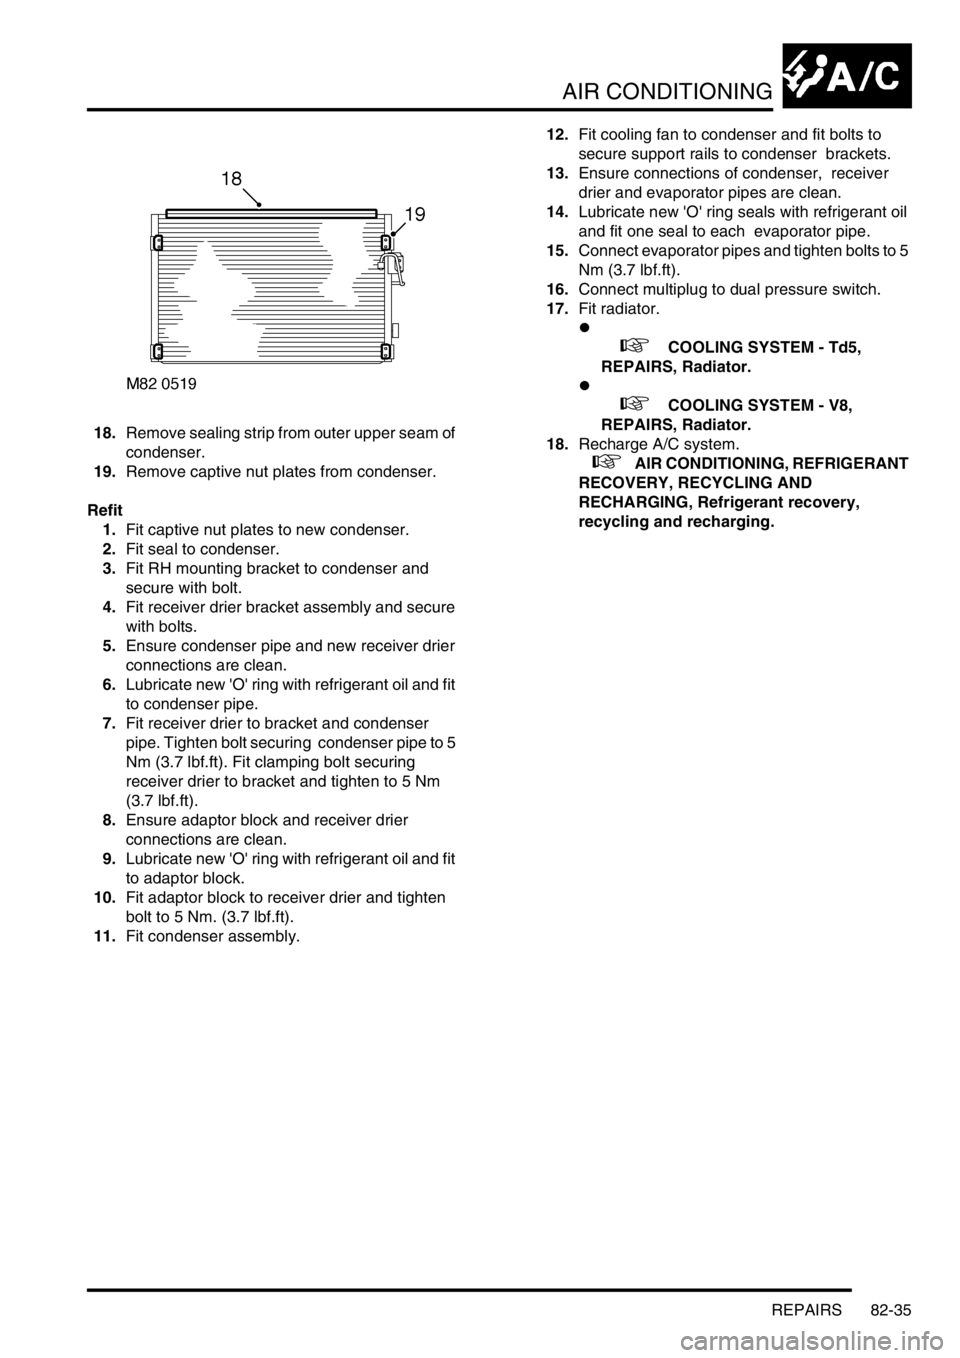
18.Remove sealing strip from outer upper seam of
condenser.
19.Remove captive nut plates from condenser.
Refit
1.Fit captive nut plates to new condenser.
2.Fit seal to condenser.
3.Fit RH mounting bracket to condenser and
secure with bolt.
4.Fit receiver drier bracket assembly and secure
with bolts.
5.Ensure condenser pipe and new receiver drier
connections are clean.
6.Lubricate new 'O' ring with refrigerant oil and fit
to condenser pipe.
7.Fit receiver drier to bracket and condenser
pipe. Tighten bolt securing condenser pipe to 5
Nm (3.7 lbf.ft). Fit clamping bolt securing
receiver drier to bracket and tighten to 5 Nm
(3.7 lbf.ft).
8.Ensure adaptor block and receiver drier
connections are clean.
9.Lubricate new 'O' ring with refrigerant oil and fit
to adaptor block.
10.Fit adaptor block to receiver drier and tighten
bolt to 5 Nm. (3.7 lbf.ft).
11.Fit condenser assembly. 12.Fit cooling fan to condenser and fit bolts to
secure support rails to condenser brackets.
13.Ensure connections of condenser, receiver
drier and evaporator pipes are clean.
14.Lubricate new 'O' ring seals with refrigerant oil
and fit one seal to each evaporator pipe.
15.Connect evaporator pipes and tighten bolts to 5
Nm (3.7 lbf.ft).
16.Connect multiplug to dual pressure switch.
17.Fit radiator.
l
+ COOLING SYSTEM - Td5,
REPAIRS, Radiator.
l
+ COOLING SYSTEM - V8,
REPAIRS, Radiator.
18.Recharge A/C system.
+ AIR CONDITIONING, REFRIGERANT
RECOVERY, RECYCLING AND
RECHARGING, Refrigerant recovery,
recycling and recharging.
Page 1410 of 1672
AIR CONDITIONING
REPAIRS 82-37
12.Remove receiver drier from mounting bracket.
13.Remove dual pressure switch from receiver
drier
Refit
1.Fit dual pressure switch to receiver drier and
tighten to 10 Nm (7 lbf.ft).
2.Fit receiver drier to mounting bracket and
tighten clamping bolt.
3.Fit receiver drier assembly to condenser.
4.Fit bolts securing receiver drier mounting
bracket to condenser and tighten to 5 Nm (3.7
lbf.ft).
5.Remove caps from air conditioning pipes and
receiver drier.
6.Remove old 'O' rings from pipes.
7.Fit new 'O' rings to pipes and lubricate with
refrigerant oil.
8.Connect air conditioning pipes to receiver
drier.
9.Fit bolts securing air conditioning pipes to
receiver drier and tighten to 5 Nm (3.7 lbf.ft).
10.Connect multiplug to dual pressure switch.
11.Fit front grille.
+ EXTERIOR FITTINGS, REPAIRS,
Grille - front - up to 03MY.
12.Recharge air conditioning system.
+ AIR CONDITIONING, REFRIGERANT
RECOVERY, RECYCLING AND
RECHARGING, Refrigerant recovery,
recycling and recharging.
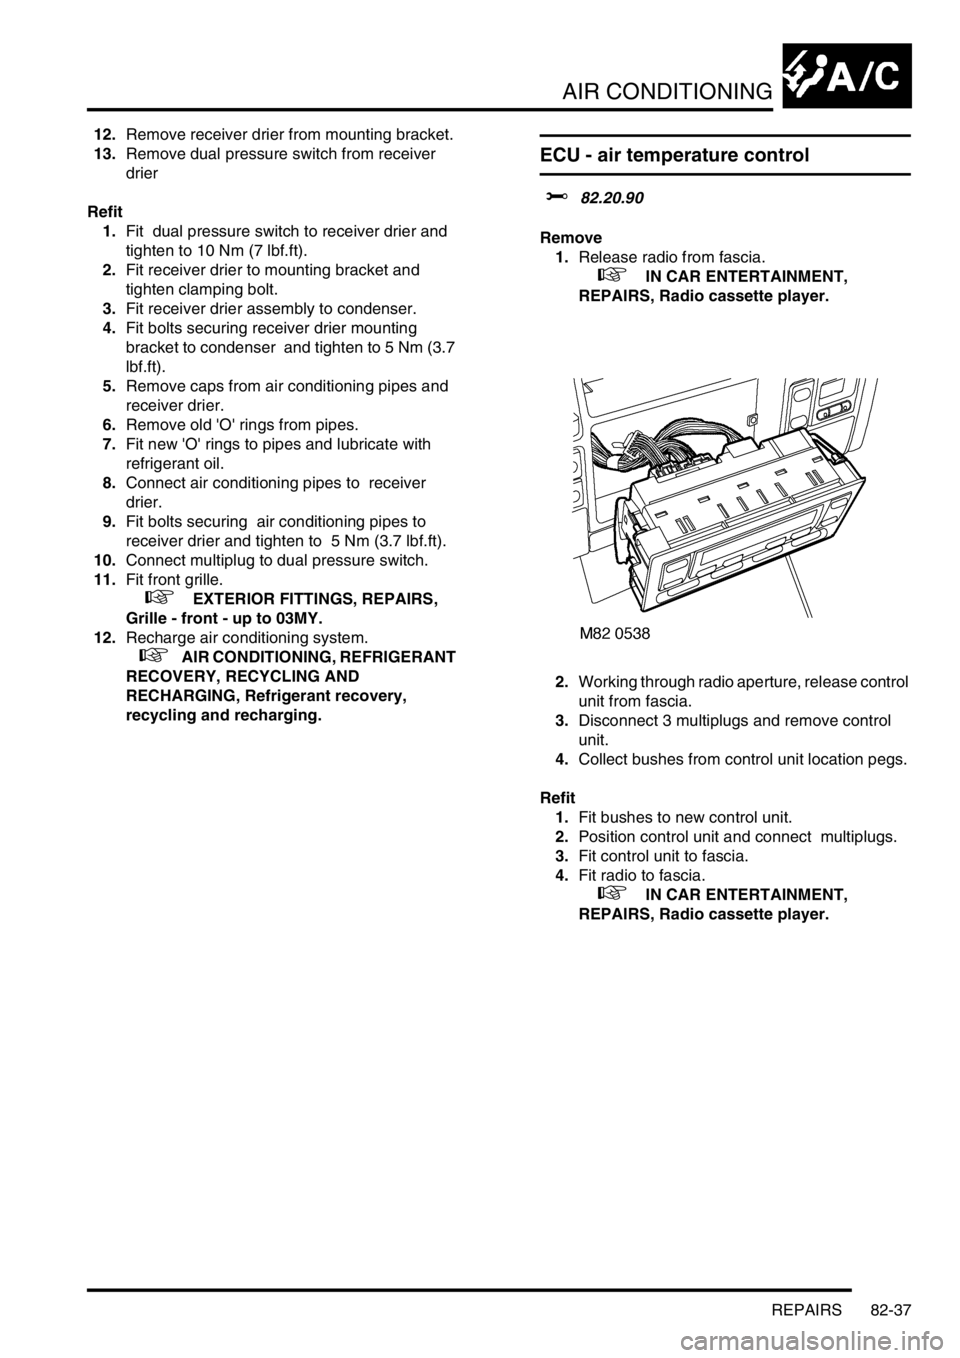
ECU - air temperature control
$% 82.20.90
Remove
1.Release radio from fascia.
+ IN CAR ENTERTAINMENT,
REPAIRS, Radio cassette player.
2.Working through radio aperture, release control
unit from fascia.
3.Disconnect 3 multiplugs and remove control
unit.
4.Collect bushes from control unit location pegs.
Refit
1.Fit bushes to new control unit.
2.Position control unit and connect multiplugs.
3.Fit control unit to fascia.
4.Fit radio to fascia.
+ IN CAR ENTERTAINMENT,
REPAIRS, Radio cassette player.