Page 227 of 249
DO-IT-YOURSELF MAINTENANCE 6-9
AS60160A
ZG080A1-A
WINDSHIELD WIPER BLADES
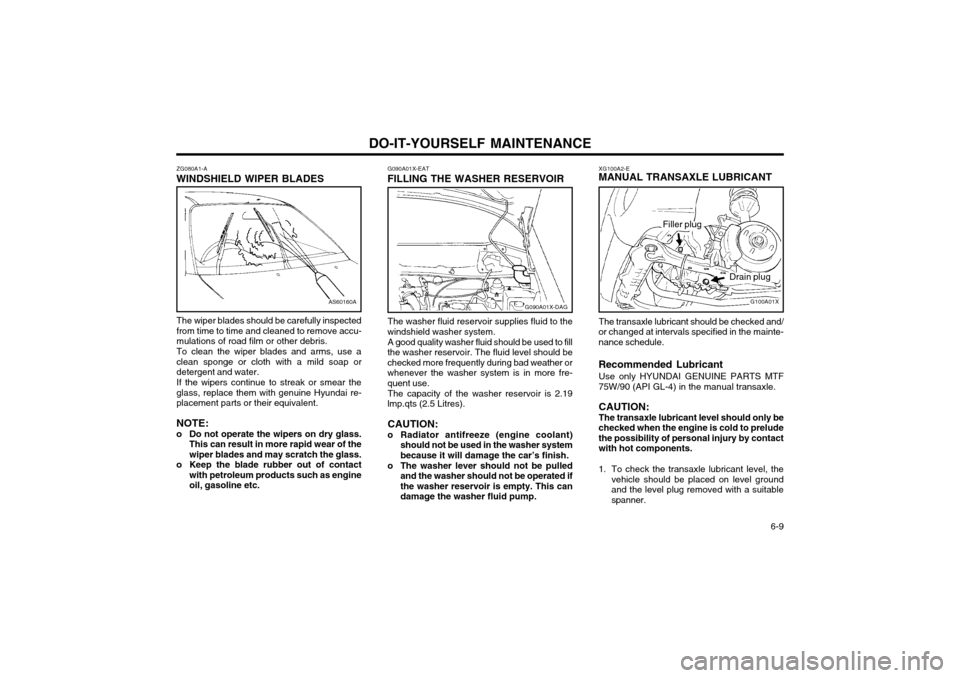
The wiper blades should be carefully inspected from time to time and cleaned to remove accu-mulations of road film or other debris. To clean the wiper blades and arms, use a clean sponge or cloth with a mild soap ordetergent and water. If the wipers continue to streak or smear the glass, replace them with genuine Hyundai re-placement parts or their equivalent. NOTE:
o Do not operate the wipers on dry glass. This can result in more rapid wear of the wiper blades and may scratch the glass.
o Keep the blade rubber out of contact with petroleum products such as engineoil, gasoline etc.G090A01X-EAT
FILLING THE WASHER RESERVOIR
The washer fluid reservoir supplies fluid to the
windshield washer system.
A good quality washer fluid should be used to fill
the washer reservoir. The fluid level should be checked more frequently during bad weather orwhenever the washer system is in more fre-quent use.
The capacity of the washer reservoir is 2.19
lmp.qts (2.5 Litres).
CAUTION:
o Radiator antifreeze (engine coolant) should not be used in the washer systembecause it will damage the car’s finish.
o The washer lever should not be pulled and the washer should not be operated ifthe washer reservoir is empty. This can
damage the washer fluid pump. XG100A2-E
MANUAL TRANSAXLE LUBRICANT
G100A01X
Filler plug
Drain plug
The transaxle lubricant should be checked and/
or changed at intervals specified in the mainte- nance schedule. Recommended Lubricant
Use only HYUNDAI GENUINE PARTS MTF
75W/90 (API GL-4) in the manual transaxle.
CAUTION: The transaxle lubricant level should only be
checked when the engine is cold to preludethe possibility of personal injury by contactwith hot components.
1. To check the transaxle lubricant level, the vehicle should be placed on level ground and the level plug removed with a suitablespanner.
G090A01X-DAG
Page 229 of 249
DO-IT-YOURSELF MAINTENANCE 6-11
While the engine is idling, apply the brakes and move the gear selector lever from "P" to each
of its other positions — "R", "N", "D", "2", "L" —and then return to "N". With the engine stillidling:
1. Open the hood, being careful to keep hands, long hair and clothing clear of any movingparts.
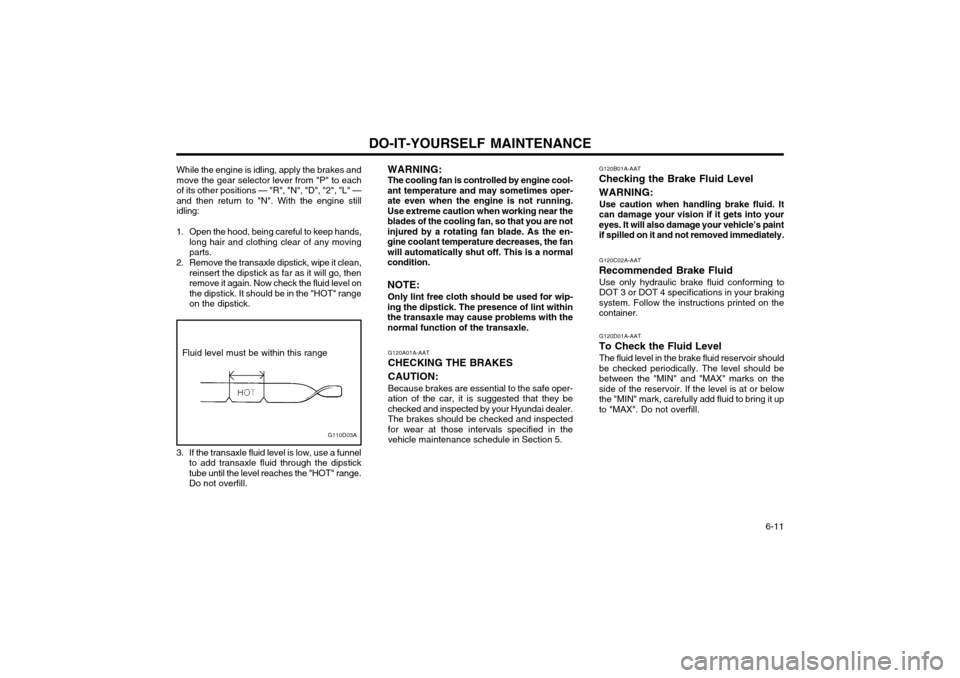
2. Remove the transaxle dipstick, wipe it clean, reinsert the dipstick as far as it will go, thenremove it again. Now check the fluid level on
the dipstick. It should be in the "HOT" rangeon the dipstick.
Fluid level must be within this range
3. If the transaxle fluid level is low, use a funnel to add transaxle fluid through the dipsticktube until the level reaches the "HOT" range.
Do not overfill.
G110D03A
G120A01A-AAT CHECKING THE BRAKES CAUTION: Because brakes are essential to the safe oper- ation of the car, it is suggested that they bechecked and inspected by your Hyundai dealer.The brakes should be checked and inspectedfor wear at those intervals specified in thevehicle maintenance schedule in Section 5. G120B01A-AAT
Checking the Brake Fluid Level WARNING:
Use caution when handling brake fluid. It
can damage your vision if it gets into your eyes. It will also damage your vehicle’s paint
if spilled on it and not removed immediately.
G120C02A-AAT
Recommended Brake Fluid Use only hydraulic brake fluid conforming to
DOT 3 or DOT 4 specifications in your brakingsystem. Follow the instructions printed on thecontainer.
G120D01A-AAT
To Check the Fluid Level The fluid level in the brake fluid reservoir should
be checked periodically. The level should bebetween the "MIN" and "MAX" marks on theside of the reservoir. If the level is at or below
the "MIN" mark, carefully add fluid to bring it upto "MAX". Do not overfill.
WARNING: The cooling fan is controlled by engine cool-
ant temperature and may sometimes oper- ate even when the engine is not running.
Use extreme caution when working near theblades of the cooling fan, so that you are notinjured by a rotating fan blade. As the en-
gine coolant temperature decreases, the fanwill automatically shut off. This is a normalcondition. NOTE:
Only lint free cloth should be used for wip-
ing the dipstick. The presence of lint within the transaxle may cause problems with thenormal function of the transaxle.
Page 235 of 249

DO-IT-YOURSELF MAINTENANCE 6-17
WARNING: The halogen bulb contains gas under pres-
sure and if impacted could shatter, and re- sulting in flying fragments. Always wear eye
protection when servicing the bulb. Protectthe bulb against abrasions or scratches andagainst liquids when lighted. Turn on thebulb only when installing in a headlight.Replace the headlight if damaged or cracked.Keep the bulb out of the reach of childrenand dispose of the used bulb with care.
G290A01X-EAT
HEADLIGHT AIMING ADJUSTMENT
G290A01V
Before performing aiming adjustment, make sure
of the following.
Vertical aiming
1. Keep all tires inflated to the correct pres- sure.
2. Place the vehicle on level ground and press the front bumper & rear bumper down sev- eral times.
3. See that the vehicle is unloaded (except for full levels of coolant, engine oil and fuel, andspare tire, jack, and tools). Have the driveror equivalent weight placed in driver's seat.
4. Clean the head lights lens and turn on the headlight (Low beam).
5. Open the bonnet.
6. Draw the vertical line (through the center of each headlight) and the horizontal line(through the centre of each headlight) on theaiming screen.
1) Horizontal line dimension from ground:25.43 in. (646 mm)
2) Distance between each vertical line: 38.89 in. (988 mm)And then, draw the parallel line at 1.18 in. (30 mm) place under the horizontal line.
7. Adjust each cut-off line of the low beam to the parallel line with a phillips screwdriver -VERTICAL AIMING
8. Adjust each cut-off line of the low beam to the each vertical line with a phillips screw-driver - HORIZONTAL AIMING. G290B01X-EAT
Adjustment After Headlight Assembly Replacement
If the vehicle has had front body repair and the headlight assembly has been replaced, theheadlight aiming should be checked using theaiming screen as shown in the illustration. Turnon the headlight switch. (Low Beam Position)
1. Adjust headlights so that main axis of light is parallel to centre line of the body and isaligned with point "P" shown in the illustra-tion.
2. Dotted lines in the illustration show centre of headlights. G290B01S-DAG
Horizontal lineVertical line
W
0.59 in.
"P" 1.18 in.
Cut-off line
Ground line H
H L