2002 Hyundai Atos reset
[x] Cancel search: resetPage 57 of 249
FEATURES OF YOUR HYUNDAI
FEATURES OF YOUR HYUNDAI FEATURES OF YOUR HYUNDAI
FEATURES OF YOUR HYUNDAI
FEATURES OF YOUR HYUNDAI
1- 48
B922B03X-GAT
1. POWER ON-OFF/VOLUME
CONTROL KNOB
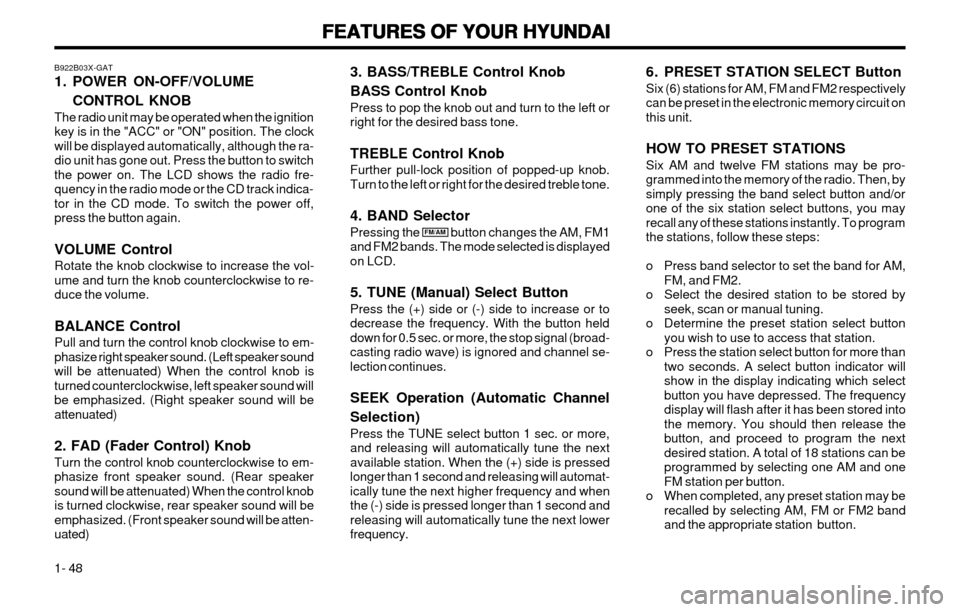
The radio unit may be operated when the ignition key is in the "ACC" or "ON" position. The clockwill be displayed automatically, although the ra-dio unit has gone out. Press the button to switchthe power on. The LCD shows the radio fre-quency in the radio mode or the CD track indica-tor in the CD mode. To switch the power off,press the button again. VOLUME Control Rotate the knob clockwise to increase the vol- ume and turn the knob counterclockwise to re-duce the volume. BALANCE Control Pull and turn the control knob clockwise to em- phasize right speaker sound. (Left speaker soundwill be attenuated) When the control knob isturned counterclockwise, left speaker sound willbe emphasized. (Right speaker sound will beattenuated) 2. FAD (Fader Control) Knob Turn the control knob counterclockwise to em- phasize front speaker sound. (Rear speakersound will be attenuated) When the control knobis turned clockwise, rear speaker sound will beemphasized. (Front speaker sound will be atten-uated)
FM/AM 6. PRESET STATION SELECT Button Six (6) stations for AM, FM and FM2 respectively can be preset in the electronic memory circuit onthis unit. HOW TO PRESET STATIONS Six AM and twelve FM stations may be pro- grammed into the memory of the radio. Then, bysimply pressing the band select button and/orone of the six station select buttons, you mayrecall any of these stations instantly. To programthe stations, follow these steps:
o Press band selector to set the band for AM,
FM, and FM2.
o Select the desired station to be stored by seek, scan or manual tuning.
o Determine the preset station select button you wish to use to access that station.
o Press the station select button for more than two seconds. A select button indicator will show in the display indicating which selectbutton you have depressed. The frequencydisplay will flash after it has been stored intothe memory. You should then release thebutton, and proceed to program the nextdesired station. A total of 18 stations can beprogrammed by selecting one AM and oneFM station per button.
o When completed, any preset station may be recalled by selecting AM, FM or FM2 bandand the appropriate station button.
3. BASS/TREBLE Control Knob BASS Control Knob Press to pop the knob out and turn to the left or right for the desired bass tone. TREBLE Control Knob Further pull-lock position of popped-up knob. Turn to the left or right for the desired treble tone. 4. BAND Selector Pressing the button changes the AM, FM1 and FM2 bands. The mode selected is displayedon LCD. 5. TUNE (Manual) Select Button Press the (+) side or (-) side to increase or to decrease the frequency. With the button helddown for 0.5 sec. or more, the stop signal (broad-casting radio wave) is ignored and channel se-lection continues. SEEK Operation (Automatic Channel Selection) Press the TUNE select button 1 sec. or more, and releasing will automatically tune the nextavailable station. When the (+) side is pressedlonger than 1 second and releasing will automat-ically tune the next higher frequency and whenthe (-) side is pressed longer than 1 second andreleasing will automatically tune the next lowerfrequency.
Page 59 of 249
FEATURES OF YOUR HYUNDAI
FEATURES OF YOUR HYUNDAI FEATURES OF YOUR HYUNDAI
FEATURES OF YOUR HYUNDAI
FEATURES OF YOUR HYUNDAI
1- 50
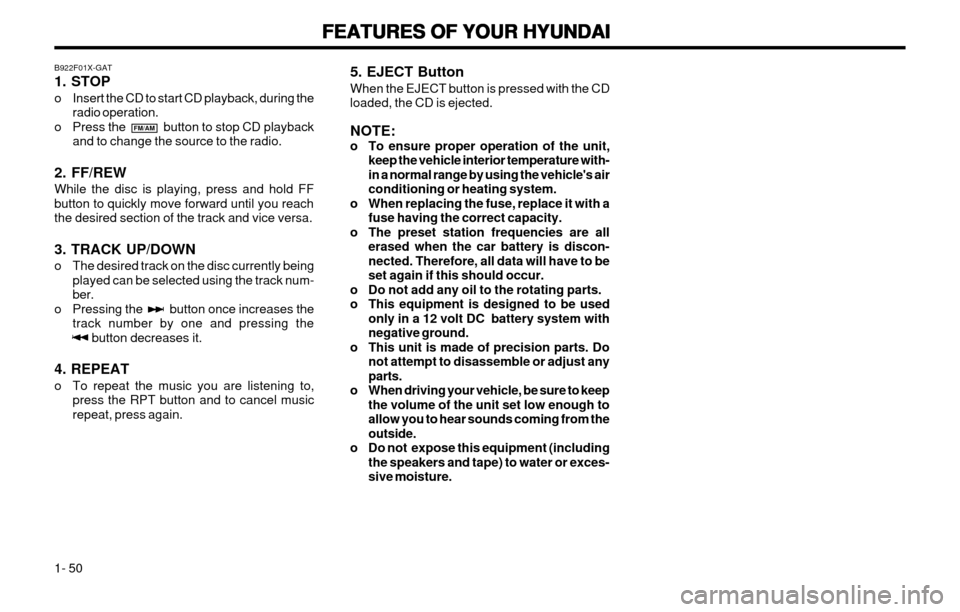
B922F01X-GAT 1. STOP
o Insert the CD to start CD playback, during the
radio operation.
o Press the button to stop CD playback and to change the source to the radio.
2. FF/REWWhile the disc is playing, press and hold FF button to quickly move forward until you reachthe desired section of the track and vice versa. 3. TRACK UP/DOWN
o The desired track on the disc currently being played can be selected using the track num- ber.
o Pressing the button once increases the track number by one and pressing the button decreases it.
4. REPEAT
o To repeat the music you are listening to, press the RPT button and to cancel music repeat, press again.
FM/AM
5. EJECT Button When the EJECT button is pressed with the CD loaded, the CD is ejected. NOTE:
o To ensure proper operation of the unit,keep the vehicle interior temperature with-in a normal range by using the vehicle's airconditioning or heating system.
o When replacing the fuse, replace it with a fuse having the correct capacity.
o The preset station frequencies are all erased when the car battery is discon-nected. Therefore, all data will have to beset again if this should occur.
o Do not add any oil to the rotating parts.
o This equipment is designed to be used only in a 12 volt DC battery system withnegative ground.
o This unit is made of precision parts. Do not attempt to disassemble or adjust anyparts.
o When driving your vehicle, be sure to keep the volume of the unit set low enough toallow you to hear sounds coming from theoutside.
o Do not expose this equipment (including the speakers and tape) to water or exces-sive moisture.
Page 60 of 249
FEATURES OF YOUR HYUNDAI
FEATURES OF YOUR HYUNDAI FEATURES OF YOUR HYUNDAI
FEATURES OF YOUR HYUNDAI
FEATURES OF YOUR HYUNDAI
1- 51
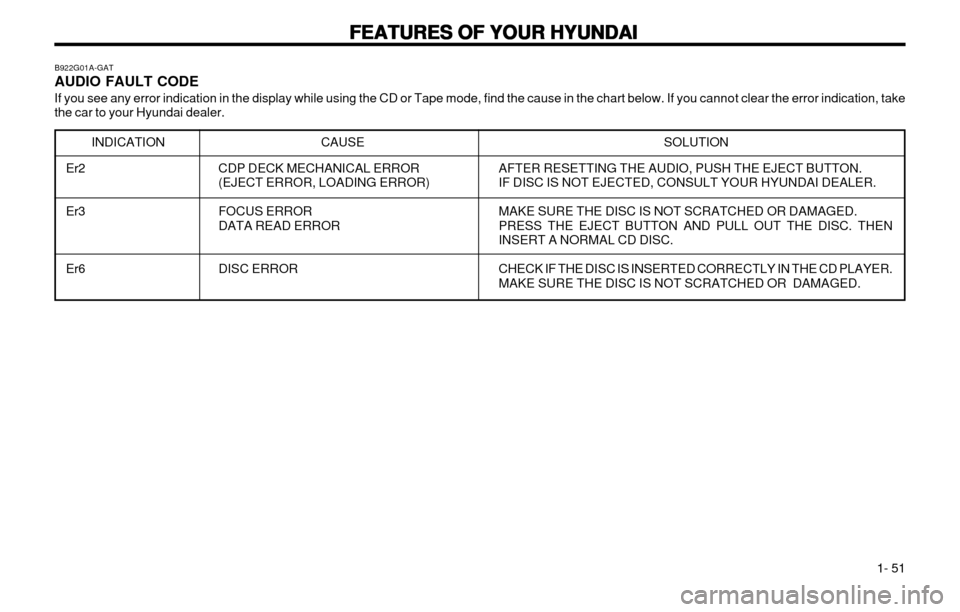
B922G01A-GAT AUDIO FAULT CODE
If you see any error indication in the display while using the CD or Tape mode, find the cause in the chart below. If you cannot clear the error indication, take the car to your Hyundai dealer.
INDICATION
CAUSE SOLUTION
Er2 Er3 Er6 CDP DECK MECHANICAL ERROR (EJECT ERROR, LOADING ERROR) FOCUS ERROR DATA READ ERROR DISC ERROR AFTER RESETTING THE AUDIO, PUSH THE EJECT BUTTON. IF DISC IS NOT EJECTED, CONSULT YOUR HYUNDAI DEALER. MAKE SURE THE DISC IS NOT SCRATCHED OR DAMAGED. PRESS THE EJECT BUTTON AND PULL OUT THE DISC. THENINSERT A NORMAL CD DISC. CHECK IF THE DISC IS INSERTED CORRECTLY IN THE CD PLAYER. MAKE SURE THE DISC IS NOT SCRATCHED OR DAMAGED.
Page 154 of 249

FEATURES OF YOUR HYUNDAI 1-17
B260A04X-EAT INSTRUMENT CLUSTER AND INDICATOR
1. Temperature Gauge
2. Turn Signal Indicator Light
3. Speedometer
4. Odometer
5. Trip Odometer
6. Trip Odometer Reset Button
7. Fuel Gauge 8. Immobilizer Warning Indicator Light
9. Door Ajar Warning Light
10. Seat Belt Warning Light
11. Malfunction Indicator Lamp (MIL)
12. Low Fuel Warning Light
13. High Beam Indicator Light
14. ABS Service Reminder Indicator
(Not all models) 15. Parking Brake/Brake Fluid Level Warning
Light
16. SRS Service Reminder Indicator (Not all models)
17. Charging System Warning Light
18. Oil Pressure Warning Light
19. Overdrive Off Indicator Light (Auto T/A only)
1 356
981011 12 13B260A03X-DAG
2427
141516171819
Page 158 of 249

FEATURES OF YOUR HYUNDAI 1-21
B340B01X-DAG
ZB120A1-E MULTI FUNCTION SWITCH Turn Signal Operation
To signal an intention to turn right, the switch
lever should be pulled down. To signal an intention to turn left, the switch lever should bepushed upwards. In both instances, the turnsignal lamps on one side of the car will flashand the warning lamp located in the instrumentcluster will flash in sympathy. Upon completionof the manoeuvre, the lever will, under normalcircumstances, return to the "Off" position.However, if the manoeuvre involved only asmall movement of the steering wheel, thesignal may need to be cancelled manually. Ifeither turn signal indicator flashes more rapidlythan normal or refuses to flash at all, a malfunc-tion of the turn signal system may exist.
ZB110U1-A SPEEDOMETER Your Hyundai’s speedometer is calibrated in
miles per hour (on the outer scale) and kilome- ters per hour (on the inner scale).
B300A01X-DAG
ZB110W1-E TRIP ODOMETER The trip odometer may be used to more accu-
rately record trip distances. Push the reset knob to set the counter to zero. ZB110V1-E ODOMETERThe odometer records the total driving distance
in miles, and is useful for keeping a record for maintenance intervals.
ZB120C1-A HEADLIGHT SWITCH
B340C01X-DAG
ZB120D1-E HIGH AND LOW BEAMTo turn on the headlight high beams, push the
lever forward (away from you). For low beams, pull the lever back (toward you). The appropri-ate headlight beam indicator light will come onat the same time.
To operate the headlights, turn the barrel on the
end of the multi-function switch. The first posi- tion turns on the parking lights, sidelights, taillights and instrument panel lights. The secondposition turns on the headlights.
Page 161 of 249
FEATURES OF YOUR HYUNDAI
1-24 ZB210A1-A CIGAR LIGHTER
B420A01X.DAG
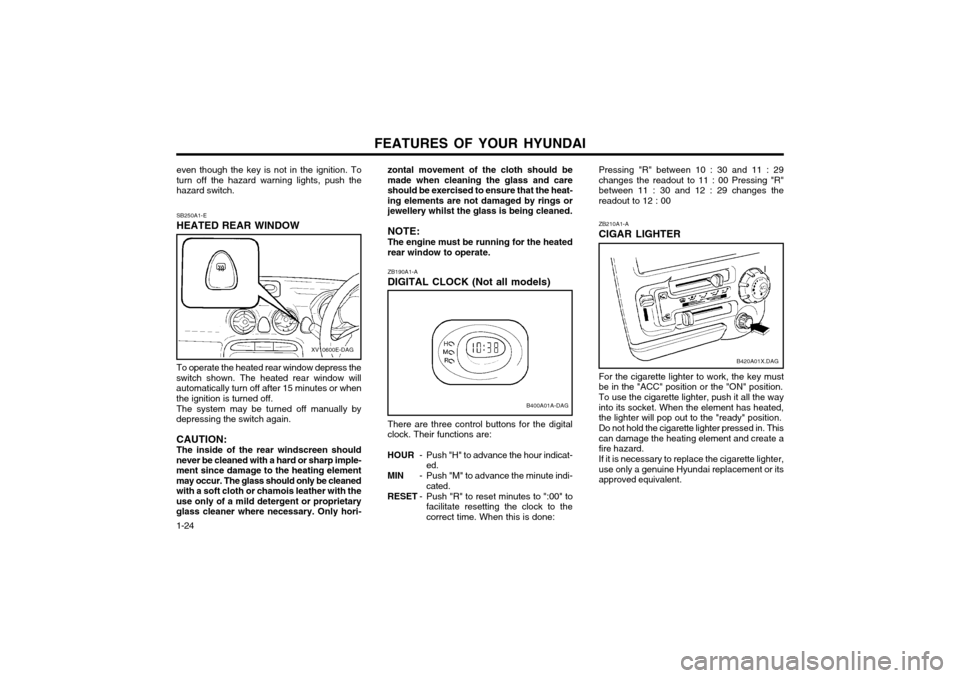
For the cigarette lighter to work, the key must be in the "ACC" position or the "ON" position. To use the cigarette lighter, push it all the way into its socket. When the element has heated,the lighter will pop out to the "ready" position. Do not hold the cigarette lighter pressed in. This can damage the heating element and create afire hazard. If it is necessary to replace the cigarette lighter, use only a genuine Hyundai replacement or itsapproved equivalent.
Pressing "R" between 10 : 30 and 11 : 29changes the readout to 11 : 00 Pressing "R"between 11 : 30 and 12 : 29 changes thereadout to 12 : 00
ZB190A1-A DIGITAL CLOCK (Not all models)
B400A01A-DAG
There are three control buttons for the digital clock. Their functions are:
HOUR - Push "H" to advance the hour indicat-
ed.
MIN - Push "M" to advance the minute indi-
cated.
RESET - Push "R" to reset minutes to ":00" to
facilitate resetting the clock to thecorrect time. When this is done:
zontal movement of the cloth should bemade when cleaning the glass and careshould be exercised to ensure that the heat-ing elements are not damaged by rings orjewellery whilst the glass is being cleaned. NOTE: The engine must be running for the heated rear window to operate.
SB250A1-E HEATED REAR WINDOW
XV10600E-DAG
To operate the heated rear window depress the
switch shown. The heated rear window will automatically turn off after 15 minutes or whenthe ignition is turned off.
The system may be turned off manually by
depressing the switch again. CAUTION: The inside of the rear windscreen should
never be cleaned with a hard or sharp imple- ment since damage to the heating elementmay occur. The glass should only be cleanedwith a soft cloth or chamois leather with theuse only of a mild detergent or proprietaryglass cleaner where necessary. Only hori- even though the key is not in the ignition. Toturn off the hazard warning lights, push thehazard switch.
Page 177 of 249
FEATURES OF YOUR HYUNDAI
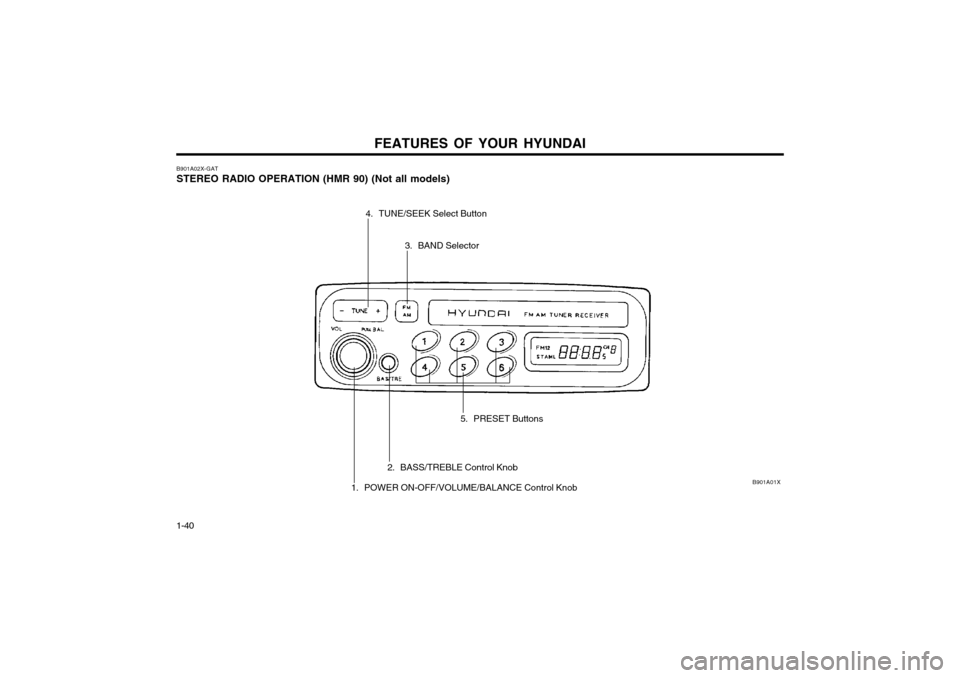
1-40 B901A02X-GAT STEREO RADIO OPERATION (HMR 90) (Not all models)
B901A01X
5. PRESET Buttons
3. BAND Selector
4. TUNE/SEEK Select Button
2. BASS/TREBLE Control Knob
1. POWER ON-OFF/VOLUME/BALANCE Control Knob
Page 178 of 249
FEATURES OF YOUR HYUNDAI 1-41
3. BAND Selector Pressing the button changes the AM, FM1
and FM2 bands. The mode selected is dis- played on LCD.
4. TUNE (Manual) Select Button Press the (+) side or (-) side to increase or to
decrease the frequency. With the button held down for 0.5 sec. or more, the stop signal(broadcasting radio wave) is ignored and chan-nel selection continues.
SEEK Operation (Automatic Channel
Selection) Press the TUNE select button 1 sec. or more.
When the (+) side is pressed, the unit willautomatically tune to the next higher frequencyand when the (-) side is pressed, it will automat-ically tune to the next lower frequency.
5. PRESET STATION SELECT Six (6) stations for AM, FM and FM2 respec-
tively can be preset in the electronic memory circuit on this unit.
HOW TO PRESET STATIONS Six AM and twelve FM stations may be pro-
grammed into the memory of the radio. Then, by simply pressing the band select button and/or one of the six station select buttons, you mayrecall any of these stations instantly. To pro-gram the stations, follow these steps:
B901B02X-GAT
1. POWER ON-OFF/VOLUME CON-
TROL KNOB
The radio unit may be operated when the igni-
tion key is in the "ACC" or "ON" position. Rotate the knob clockwise to switch the radio unit on,
and to increase the volume.
The LCD shows the radio frequency in the radio
mode. Turn the knob counterclockwise to re-duce the volume, and to switch the radio unitoff.
BAL (Balance Control) Knob Pull and turn the control knob clockwise to
emphasize right speaker sound (Left speaker sound will be attenuated). When the controlknob is turned counterclockwise, left speakersound will be emphasized (Right speaker sound
will be attenuated). 2. BASS Control Knob Press to pop the knob out and turn to the left or
right for the desired bass tone.
TREBLE Control Knob Further pull-lock position of popped-up knob.
Turn to the left or right for the desired treble tone.
FM
AMo Press band selector to set the band for AM,
FM and FM2.
o Select the desired station to be stored by seek, scan or manual tuning.
o Determine the preset station select button you wish to use to access that station.
o Press the station select button for more than two seconds. A select button indicator will show in the display indicating which selectbutton you have depressed. The frequencydisplay will flash after it has been stored intothe memory. You should then release thebutton, and proceed to program the nextdesired station. A total of 18 stations can beprogrammed by selecting one AM and twoFM stations per button.
o When completed, any preset station may be recalled by selecting AM, FM or FM2 bandand the appropriate station button.