Page 2 of 200
Seating and Safety Restraints 68
Seating 68
Safety restraints 73
Air bags 83
Child restraints 87
Driving 99
Starting 99
Brakes 103
Transmission operation 106
Roadside Emergencies 125
Getting roadside assistance 125
Fuses and relays 127
Changing tires 135
Jump starting 141
Wrecker towing 143
Customer Assistance 144
The dispute settlement board 147
Utilizing the mediation/arbitration 150
Getting assistance outside the U.S. and Canada 150
Ordering additional owner’s literature 151
Reporting safety defects (U.S. only) 152
Cleaning 153
Table of Contents
2
Page 9 of 200

Anti-lock brake system:If the
ABS light stays illuminated or
continues to flash, a malfunction has
been detected, have the system
serviced immediately. Normal
braking is still functional unless the brake warning light also is
illuminated.
Air bag readiness:If this light fails
to illuminate when ignition is turned
to ON, continues to flash or remains
on, have the system serviced
immediately. A chime will also
sound when a malfunction in the supplemental restraint system has been
detected.
Safety belt:Reminds you to fasten
your safety belt. A chime will also
sound to remind you to fasten your
safety belt.
Charging system:Illuminates when
the battery is not charging properly.
Check gage:Illuminates when any
of the following conditions has
occurred:
•The engine coolant temperature
is high.
•The engine oil pressure is low.
•The fuel gauge is at or near empty.
Door ajar:Illuminates when the
ignition is in the ON position and
any door is open.
Overdrive off:Illuminates when
the overdrive function of the
transmission has been turned off,
refer to theDrivingchapter. If the
light flashes steadily, have the system serviced immediately.
ABS
CHECK
GAGE
DOOR
AJAR
O/D
OFF
Instrument Cluster
9
Page 81 of 200

Do not sit on top of a buckled safety belt to avoid the Belt
Minder chime. Sitting on the safety belt will increase the risk of
injury in an accident. To disable (one-time) or deactivate the Belt
Minder feature please follow the directions stated below.
One time disable
Any time the safety belt is buckled and then unbuckled during an
ignition ON cycle, BeltMinder will be disabled for that ignition cycle only.
Deactivating/activating the BeltMinder feature
Before following the procedure, make sure that:
•The ignition switch and headlamp control are in the OFF position and
all the doors are closed.
•The parking brake is set and the gearshift is in P (Park) (automatic
transmission) or neutral (manual transmission).
•The driver’s safety belt is unbuckled.
Read steps1-9before proceeding with the deactivation/activation
procedure.
BeltMinder deactivation/activation procedure:
To reduce the risk of injury, do not deactivate/activate the Belt
Minder feature while driving the vehicle.
1. Turn the ignition switch to the RUN (or ON) position without starting
the engine.
2. Wait for the safety belt warning light to turn off. (Approximately 1–2
minutes.)
•Steps 3–5 must be completed within 60 seconds or the procedure will
have to be repeated.
3. Buckle, then unbuckle, the safety belt three times, ending with the
safety belt unbuckled. This can be done before or during BeltMinder
warning activation.
4. Turn on the headlamp control, then turn it off.
5. Buckle then unbuckle the safety belt three times, ending with the
safety belt unbuckled.
•After step 5, the safety belt warning light will be turned on for three
seconds.
Seating and Safety Restraints
81
Page 99 of 200

STARTING YOUR VEHICLE
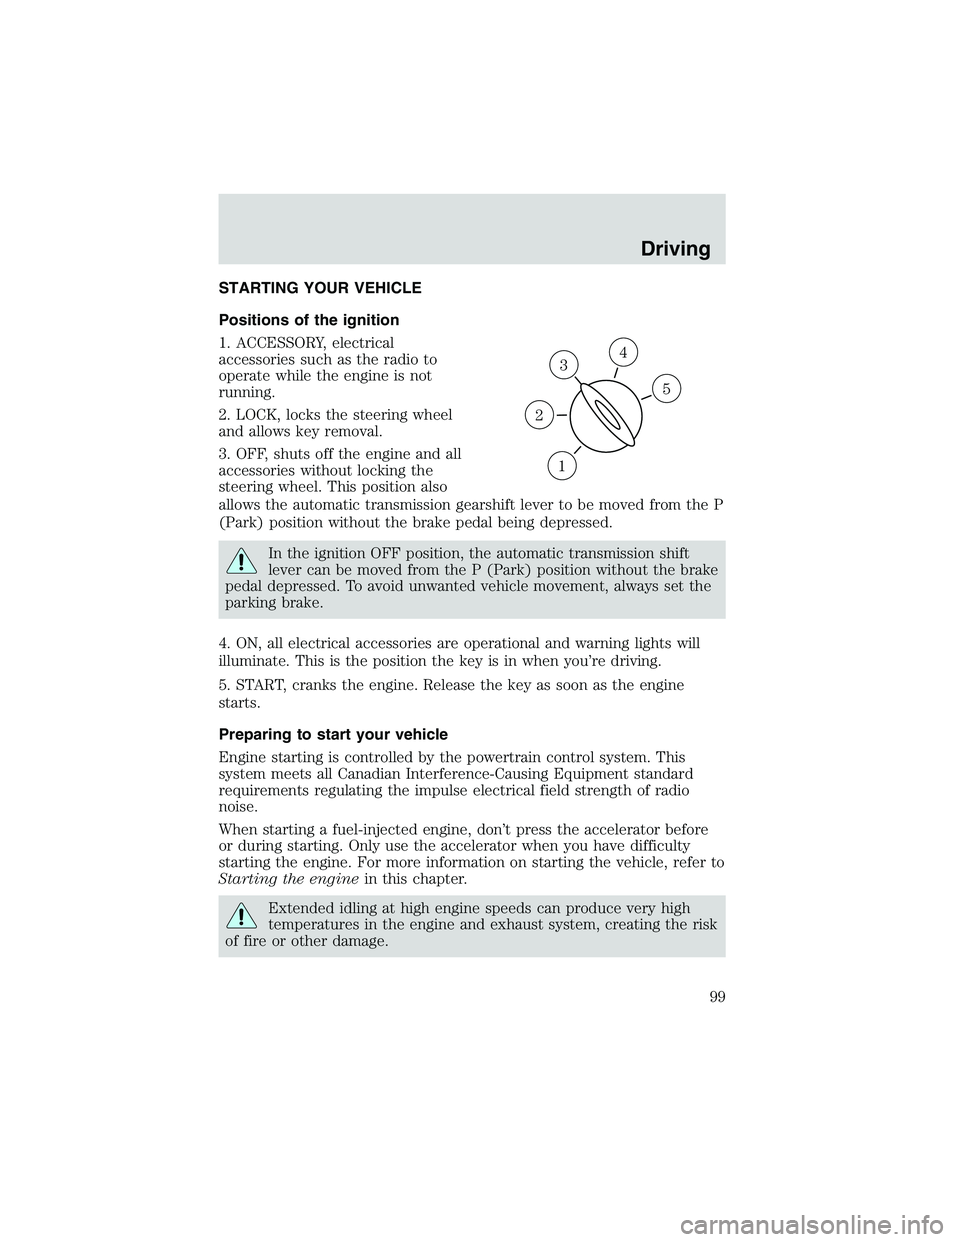
Positions of the ignition
1. ACCESSORY, electrical
accessories such as the radio to
operate while the engine is not
running.
2. LOCK, locks the steering wheel
and allows key removal.
3. OFF, shuts off the engine and all
accessories without locking the
steering wheel. This position also
allows the automatic transmission gearshift lever to be moved from the P
(Park) position without the brake pedal being depressed.
In the ignition OFF position, the automatic transmission shift
lever can be moved from the P (Park) position without the brake
pedal depressed. To avoid unwanted vehicle movement, always set the
parking brake.
4. ON, all electrical accessories are operational and warning lights will
illuminate. This is the position the key is in when you’re driving.
5. START, cranks the engine. Release the key as soon as the engine
starts.
Preparing to start your vehicle
Engine starting is controlled by the powertrain control system. This
system meets all Canadian Interference-Causing Equipment standard
requirements regulating the impulse electrical field strength of radio
noise.
When starting a fuel-injected engine, don’t press the accelerator before
or during starting. Only use the accelerator when you have difficulty
starting the engine. For more information on starting the vehicle, refer to
Starting the enginein this chapter.
Extended idling at high engine speeds can produce very high
temperatures in the engine and exhaust system, creating the risk
of fire or other damage.
3
1
2
5
4
Driving
99
Page 100 of 200

Do not park, idle, or drive your vehicle in dry grass or other dry
ground cover. The emission system heats up the engine
compartment and exhaust system, which can start a fire.
Do not start your vehicle in a closed garage or in other enclosed
areas. Exhaust fumes can be toxic. Always open the garage door
before you start the engine. SeeGuarding against exhaust fumesin
this chapter for more instructions.
If you smell exhaust fumes inside your vehicle, have your dealer
inspect your vehicle immediately. Do not drive if you smell
exhaust fumes.
Important safety precautions
When the engine starts, the idle RPM runs faster to warm the engine. If
the engine idle speed does not slow down automatically, have the vehicle
checked.
Before starting the vehicle:
1. Make sure all occupants buckle their safety belts. For more
information on safety belts and their proper usage, refer to theSeating
and safety restraintschapter.
2. Make sure the headlamps and electrical accessories are off.
If starting a vehicle with an automatic transmission:
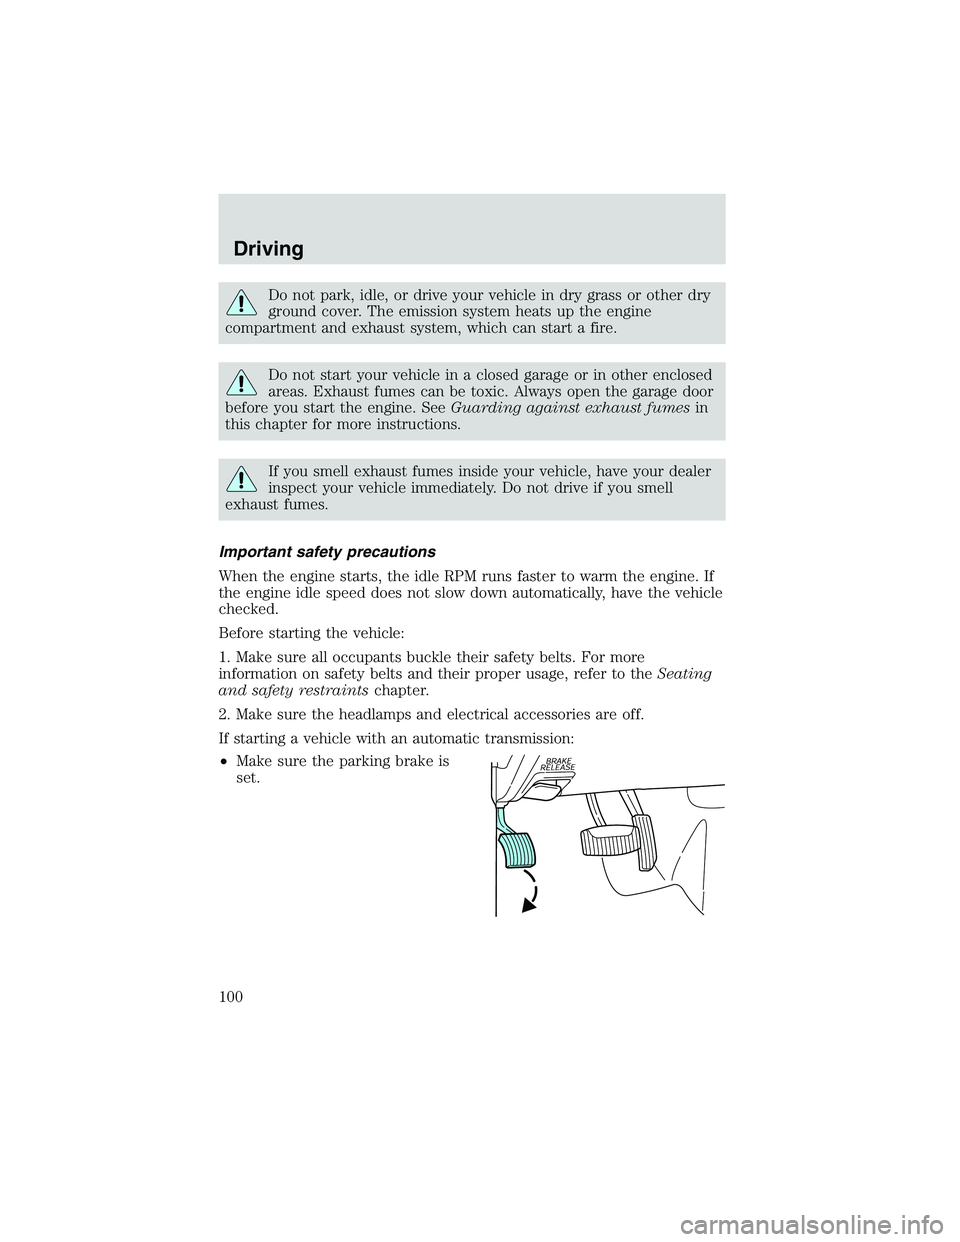
•Make sure the parking brake is
set.
Driving
100
Page 101 of 200
•Make sure the gearshift is in P
(Park).
If starting a vehicle with a manual
transmission:
1. Make sure the parking brake is
set.
2. Push the clutch pedal to the floor.
•Turn the key to 4 (ON) without
turning the key to 5 (START).
Make sure the corresponding lights illuminate or illuminate briefly. If a
light fails to illuminate, have the vehicle serviced.
•If the driver’s safety belt is fastened, the
light may not illuminate.
1
2
34
5
C12345
6
RPMx1000
ABS
CHECK
ENGINE
EFH
H
H
PRN D 2 1THEFT
SPEED
CONT
4WD
HIGH
4WD
LOW
O/D
OFFL
L
MPH 2060
4080
km/h
00
1
20
160100
140
180
20
DOOR
AJAR
CHECK
GAGE
!
BRAKE
CHECK
FUEL
CAP
Driving
101
Page 104 of 200

Even when the ABS is disabled,
normal braking is still effective. (If
your BRAKE warning lamp
illuminates with the parking brake
released, have your brake system
serviced immediately.)
Using ABS
When hard braking is required, apply continuous force on the brake
pedal; do not pump the brake pedal since this will reduce the
effectiveness of the ABS and will increase your vehicle’s stopping
distance. The ABS will be activated immediately, allowing you to retain
full steering control during hard braking and on slippery surfaces.
However, the ABS does not decrease stopping distance.
Parking brake
To set the parking brake (1), press
the parking brake pedal down until
the pedal stops. The BRAKE
warning lamp will illuminate and will
remain illuminated until the parking
brake is released.
To release, pull the lever (2).
Always set the parking
brake fully and make sure
that the gearshift is securely
latched in P (Park) (automatic
transmission) or in 1 (First)
(manual transmission).
STEERING
To prevent damage to the power steering system:
•Never hold the steering wheel at it’s furthest turning points (until it
stops) for more than a few seconds when the engine is running.
•Do not operate the vehicle with a low power steering pump fluid level
(below the MIN mark on the reservoir).
!
BRAKE
Driving
104
Page 106 of 200

Loaded vehicles, with a higher center of gravity, may handle
differently than unloaded vehicles. Extra precautions, such as
slower speeds and increased stopping distance, should be taken when
driving a heavily loaded vehicle.
AUTOMATIC TRANSMISSION OPERATION (IF EQUIPPED)
Brake-shift interlock
This vehicle is equipped with a brake-shift interlock feature that prevents
the gearshift lever from being moved from P (Park) when the ignition is
in the ON position unless brake pedal is depressed.
If you cannot move the gearshift lever out of P (Park) with ignition in
the ON position and the brake pedal depressed:
1. Apply the parking brake, turn ignition key to LOCK, then remove the
key.
2. Insert the key and turn it to OFF.Apply the brake pedal and shift
to N (Neutral).
In the ignition OFF position, the automatic transmission shift
lever can be moved from the P (Park) position without the brake
pedal depressed. To avoid unwanted vehicle movement, always set the
parking brake.
3. Start the vehicle.
If it is necessary to use the above procedure to move the gearshift lever,
it is possible that a fuse has blown or the vehicle’s brakelamps are not
operating properly. Refer toFuses and relaysin theRoadside
emergencieschapter.
Do not drive your vehicle until you verify that the brakelamps
are working.
Always set the parking brake fully and make sure the gearshift is
latched in P (Park). Turn the ignition to the LOCK position and
remove the key whenever you leave your vehicle.
Driving
106