2002 FORD EXPLORER automatic transmission
[x] Cancel search: automatic transmissionPage 134 of 312
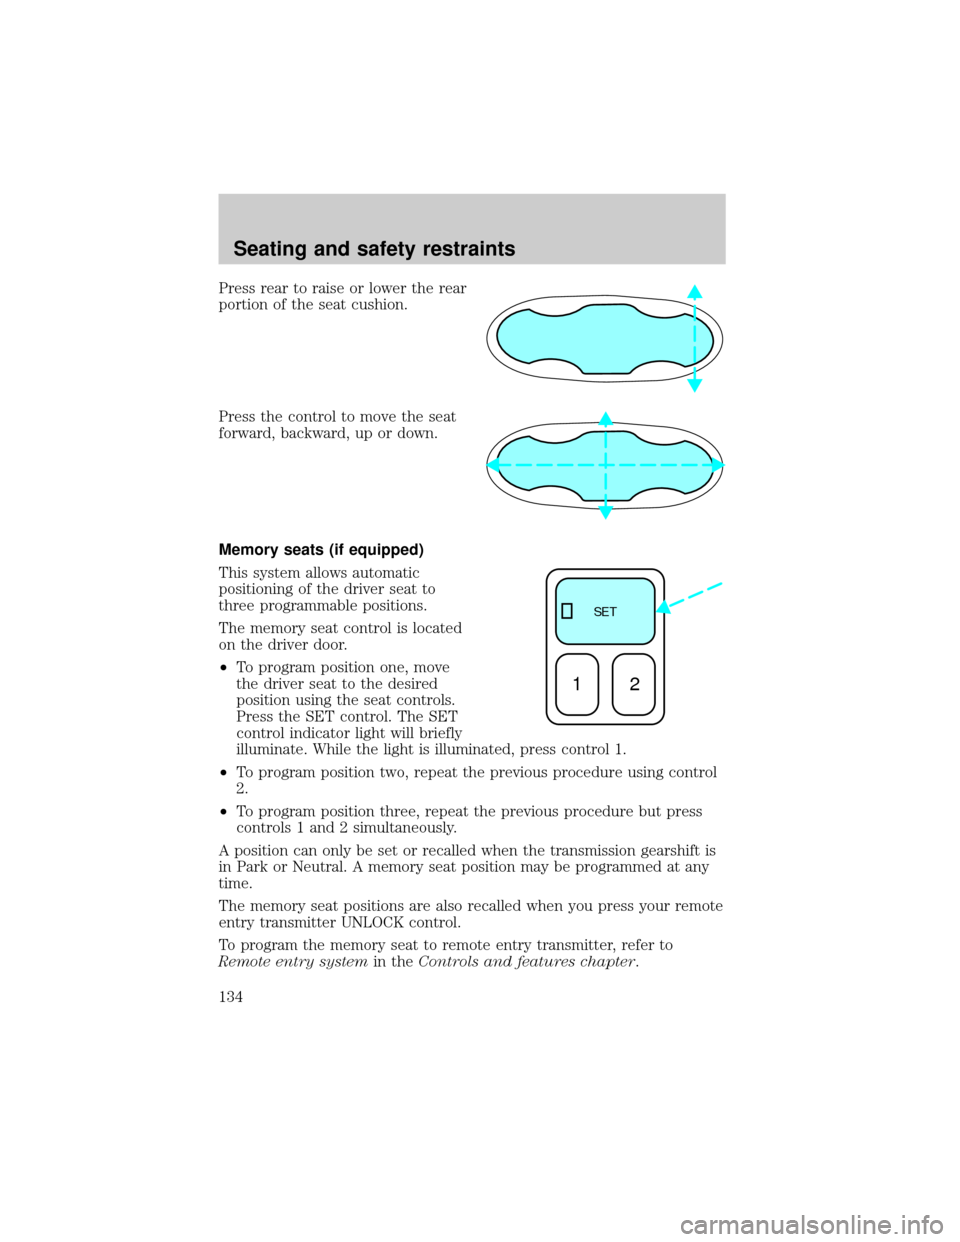
Press rear to raise or lower the rear
portion of the seat cushion.
Press the control to move the seat
forward, backward, up or down.
Memory seats (if equipped)
This system allows automatic
positioning of the driver seat to
three programmable positions.
The memory seat control is located
on the driver door.
²To program position one, move
the driver seat to the desired
position using the seat controls.
Press the SET control. The SET
control indicator light will briefly
illuminate. While the light is illuminated, press control 1.
²To program position two, repeat the previous procedure using control
2.
²To program position three, repeat the previous procedure but press
controls 1 and 2 simultaneously.
A position can only be set or recalled when the transmission gearshift is
in Park or Neutral. A memory seat position may be programmed at any
time.
The memory seat positions are also recalled when you press your remote
entry transmitter UNLOCK control.
To program the memory seat to remote entry transmitter, refer to
Remote entry systemin theControls and features chapter.
SE T
12
Seating and safety restraints
134
Page 153 of 312
One time disable
Anytime the safety belt is buckled and then unbuckled during an ignition
ON cycle, Belt Minder will be disabled for that ignition cycle only.
Deactivating/activating the belt minder feature
Read steps1-9thoroughly before proceeding with the
deactivation/activation programming procedure.
The Belt Minder feature can be deactivated/activated by performing the
following procedure:
Before following the procedure, make sure that:
²the parking brake is set
²the gearshift is in P (Park) (automatic transmission) or the neutral
position (manual transmission).
²the ignition switch is in the OFF position
²all vehicle doors are closed
²the driver's safety belt is unbuckled
²the parklamps/headlamps are in OFF position (If vehicle is equipped
with Autolamps, the Autolamps featureMUSTbe turned off.)
To reduce the risk of injury, do not deactivate/activate the Belt
Minder feature while driving the vehicle.
1. Turn the ignition switch to the RUN (or ON) position. (DO NOT
START THE ENGINE)
2. Wait until the safety belt warning light turns off. (Approximately 1±2
minutes)
²Steps 3±5 must be completed within 60 seconds or the procedure will
have to be repeated.
3. Buckle then unbuckle the safety belt three times, ending with the
safety belt unbuckled. This can be done before or during Belt Minder
warning activation.
4. Turn on the parklamps/headlamps, turn off the parklamps/headlamps.
5. Buckle then unbuckle the safety belt three times, ending with the
safety belt unbuckled.
²After step 5 the safety belt warning light will be turned on for three
seconds.
Seating and safety restraints
153
Page 178 of 312
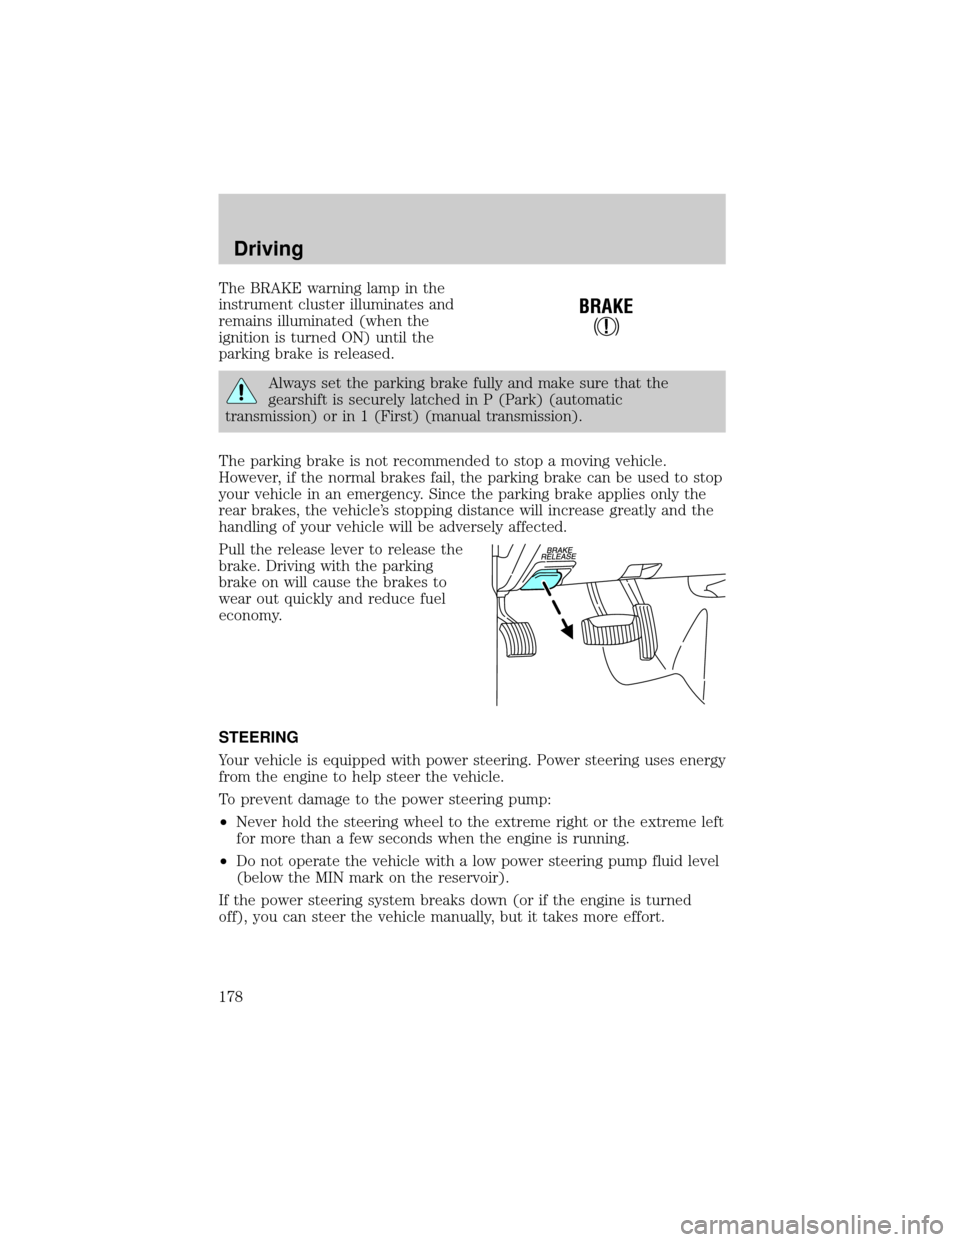
The BRAKE warning lamp in the
instrument cluster illuminates and
remains illuminated (when the
ignition is turned ON) until the
parking brake is released.
Always set the parking brake fully and make sure that the
gearshift is securely latched in P (Park) (automatic
transmission) or in 1 (First) (manual transmission).
The parking brake is not recommended to stop a moving vehicle.
However, if the normal brakes fail, the parking brake can be used to stop
your vehicle in an emergency. Since the parking brake applies only the
rear brakes, the vehicle's stopping distance will increase greatly and the
handling of your vehicle will be adversely affected.
Pull the release lever to release the
brake. Driving with the parking
brake on will cause the brakes to
wear out quickly and reduce fuel
economy.
STEERING
Your vehicle is equipped with power steering. Power steering uses energy
from the engine to help steer the vehicle.
To prevent damage to the power steering pump:
²Never hold the steering wheel to the extreme right or the extreme left
for more than a few seconds when the engine is running.
²Do not operate the vehicle with a low power steering pump fluid level
(below the MIN mark on the reservoir).
If the power steering system breaks down (or if the engine is turned
off), you can steer the vehicle manually, but it takes more effort.
!
BRAKE
Driving
178
Page 180 of 312
Your vehicle has the capability to haul more cargo and people than most
passenger cars. Depending upon the type and placement of the load,
hauling people and cargo may raise the center of gravity of the vehicle.
Use extra caution while becoming familiar with your vehicle. Know the
capabilities and limitations of both you as a driver and your vehicle.
AUTOMATIC TRANSMISSION OPERATION (IF EQUIPPED)
Brake-shift interlock
This vehicle is equipped with a brake-shift interlock feature that prevents
the gearshift lever from being moved from P (Park) when the ignition is
in the ON position unless brake pedal is depressed.
If you cannot move the gearshift lever out of P (Park) with ignition in
the ON position and the brake pedal depressed:
1. Apply the parking brake, turn ignition key to LOCK, then remove the
key.
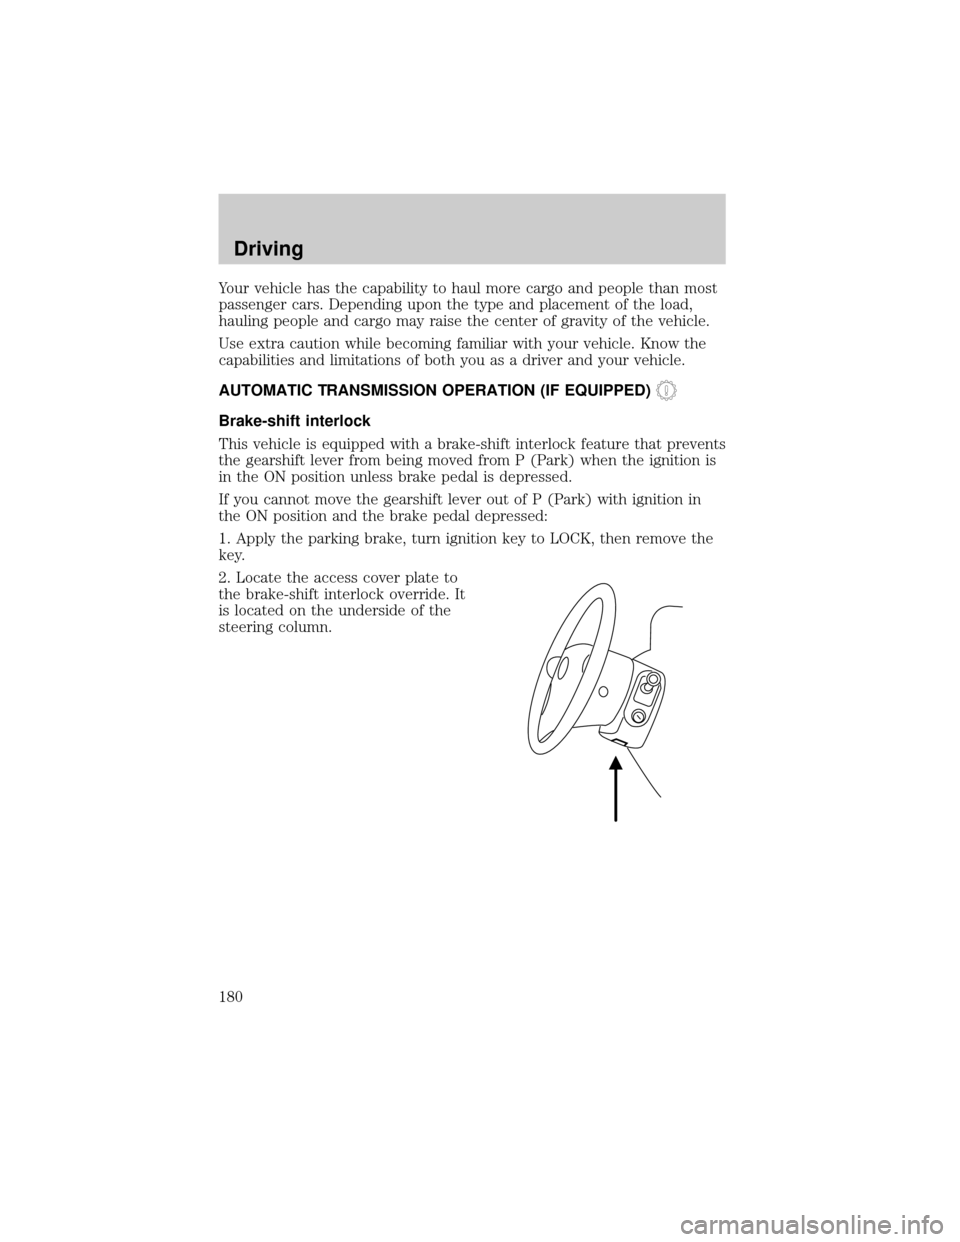
2. Locate the access cover plate to
the brake-shift interlock override. It
is located on the underside of the
steering column.
Driving
180
Page 182 of 312

If your vehicle gets stuck in mud or snow it may be rocked out by
shifting between forward and reverse gears, stopping between shifts, in a
steady pattern. Press lightly on the accelerator in each gear.
Do not rock the vehicle if the engine is not at normal operating
temperature or damage to the transmission may occur.
Do not rock the vehicle for more than a few minutes or damage
to the transmission and tires may occur or the engine may
overheat.
Always set the parking brake fully and make sure the gearshift is
latched in P (Park). Turn off the ignition whenever you leave
your vehicle.
If the parking brake is fully released, but the brake warning lamp
remains illuminated, the brakes may not be working properly.
See your dealer or a qualified service technician.
Driving with a 5±speed automatic transmission (if equipped)
Your automatic transmission electronically controls the shift feel by using
an adaptive learning strategy. This feature is designed to increase
durability, and provide consistent shift feel over the life of the vehicle. It
is normal for a new transmission to shift firmly. This operation is
considered normal and will not affect function or durability of the
transmission. Once the vehicle is at operating temperature it may take
several shifts at the same operating condition for the transmission to
properly adapt. Over time the adaptive learning process will fully update
transmission operation. The more varied the driving habits, speed and
torque, the longer it may take to adapt but the more complete the
process will be.
When the battery is disconnected or a new battery installed, the
transmission must relearn its adaptive strategy. As a result of this, the
transmission may shift firmly. This operation is considered normal and
will fully update transmission operation to its optimum shift feel.
Driving
182
Page 184 of 312

The transmission control indicator
light (TCIL) will illuminate on the
instrument cluster.
Drive (overdrive deactivated)
Activate by pressing the
transmission control switch on the
end of the gearshift lever with the
gearshift in the D(Drive) position. The transmission with overdrive off
operates in gears one through four, providing more engine braking than
D(Drive) with Overdrive ON and is useful whenever driving conditions
(i.e., city traffic, hilly terrain, etc.) cause the transmission to excessively
shift between D (Overdrive) and other gears. Deactivate D (Overdrive)
when:
²driving with a heavy load.
²towing a trailer up or down steep hills.
²additional engine braking is desired. If towing a trailer, refer to
Driving while you towin theTrailer Towingchapter.
To return to D (Overdrive) mode, press the transmission control switch.
The TCIL will no longer be illuminated.
Each time the vehicle is started, the transmission will automatically
return to normal D (Overdrive) mode.
3 (Third)
Transmission operates in third gear
only.
Used from improved traction on
slippery roads. Slecting 3 (Third) provides engine braking.
2 (Second)
Use 2 (Second) to start-up on
slippery roads or to provide
additional engine braking on
downgrades.
O/ D
OFF
Driving
184
Page 190 of 312
Utility and four-wheel drive vehicles arenotdesigned for
cornering at speeds as high as passenger cars any more than
low-slung sports cars are designed to perform satisfactorily under
off-road conditions. Avoid sharp turns or abrupt maneuvers in these
vehicles.
Using the Control-Trac system
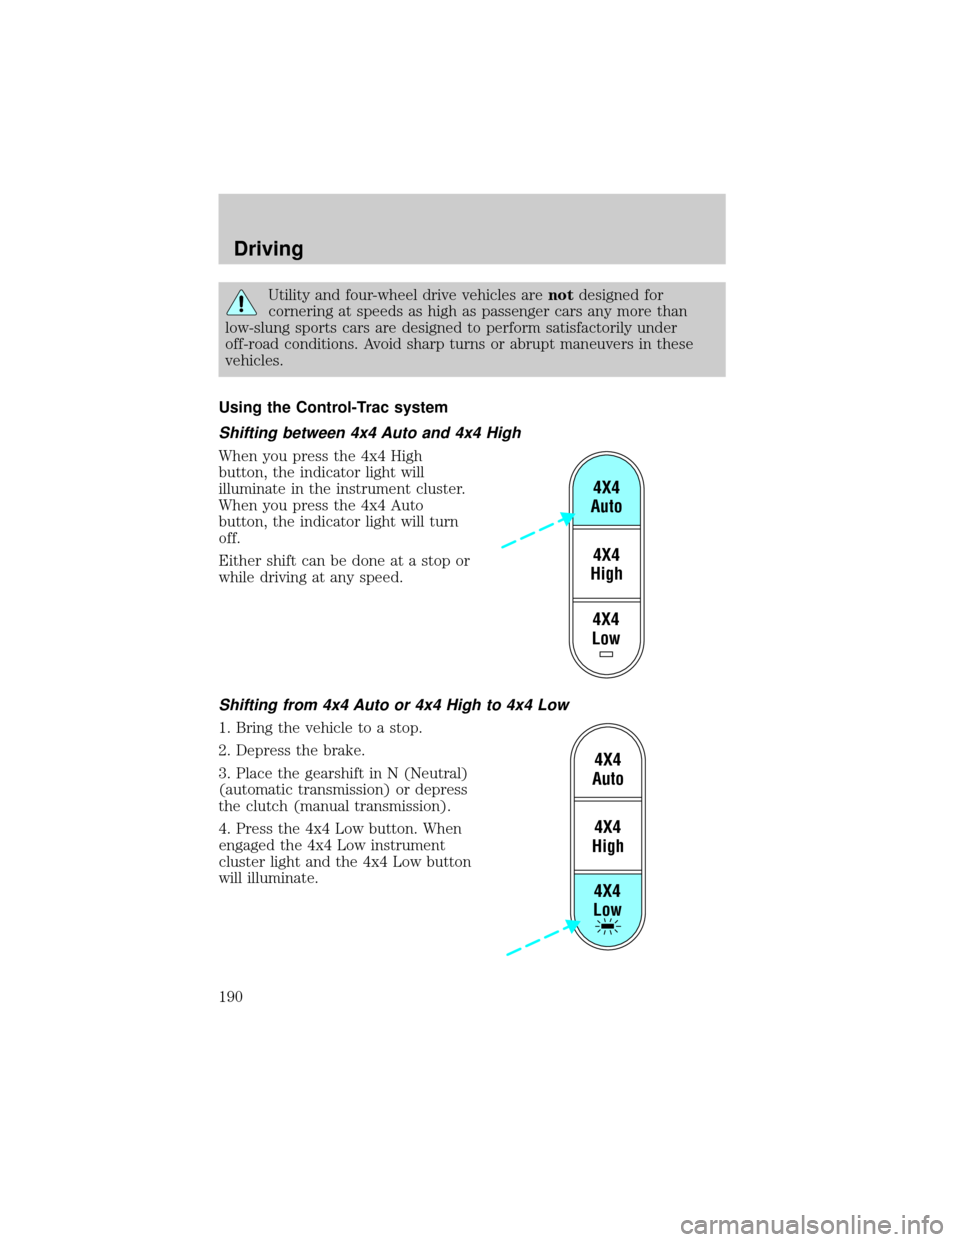
Shifting between 4x4 Auto and 4x4 High
When you press the 4x4 High
button, the indicator light will
illuminate in the instrument cluster.
When you press the 4x4 Auto
button, the indicator light will turn
off.
Either shift can be done at a stop or
while driving at any speed.
Shifting from 4x4 Auto or 4x4 High to 4x4 Low
1. Bring the vehicle to a stop.
2. Depress the brake.
3. Place the gearshift in N (Neutral)
(automatic transmission) or depress
the clutch (manual transmission).
4. Press the 4x4 Low button. When
engaged the 4x4 Low instrument
cluster light and the 4x4 Low button
will illuminate.
4X4
Low4X4
High4X4
Auto
4X4
Low4X4
High4X4
Auto
Driving
190
Page 191 of 312
The 4X4 LOW button will flash if:
1. The system is waiting for driver input (brake and/or neutral gear). OR
2. There is a 4X4 low shift in progress.
If the driver inputs are not engaged, the button selection will time-out
and the 4X4 system will reamin in its current mode.
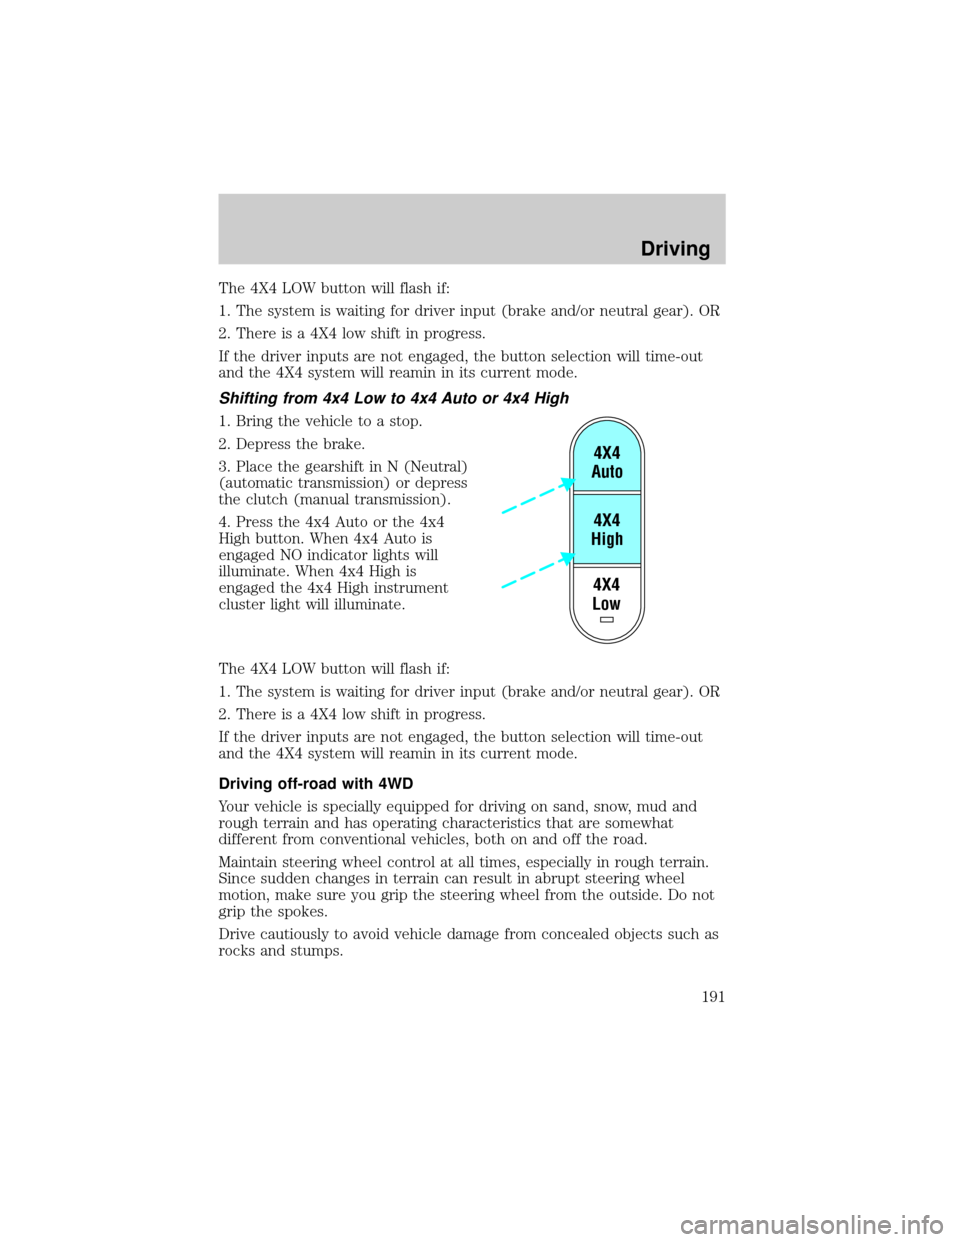
Shifting from 4x4 Low to 4x4 Auto or 4x4 High
1. Bring the vehicle to a stop.
2. Depress the brake.
3. Place the gearshift in N (Neutral)
(automatic transmission) or depress
the clutch (manual transmission).
4. Press the 4x4 Auto or the 4x4
High button. When 4x4 Auto is
engaged NO indicator lights will
illuminate. When 4x4 High is
engaged the 4x4 High instrument
cluster light will illuminate.
The 4X4 LOW button will flash if:
1. The system is waiting for driver input (brake and/or neutral gear). OR
2. There is a 4X4 low shift in progress.
If the driver inputs are not engaged, the button selection will time-out
and the 4X4 system will reamin in its current mode.
Driving off-road with 4WD
Your vehicle is specially equipped for driving on sand, snow, mud and
rough terrain and has operating characteristics that are somewhat
different from conventional vehicles, both on and off the road.
Maintain steering wheel control at all times, especially in rough terrain.
Since sudden changes in terrain can result in abrupt steering wheel
motion, make sure you grip the steering wheel from the outside. Do not
grip the spokes.
Drive cautiously to avoid vehicle damage from concealed objects such as
rocks and stumps.
4X4
Low4X4
High4X4
Auto
Driving
191