2002 FIAT DUCATO 244 ECO mode
[x] Cancel search: ECO modePage 156 of 246

CONNECT Nav+
155
CHOOSING THE
OPERATING MODE
The operating mode is selected
pressing one of the following keys
fig. 1:
– MAIN key 17= MAIN SCREEN
– AUDIO key 18= RADIO WITH
CD PLAYER
– TEL key 19= TELEPHONE
– NAV key 20= NAVIGATOR
– key 14= VOICE RECOGNITION
– TRIP key 21= ON-BOARD
COMPUTER
– key •25= CALL FOR INFOR-
MATION AND ASSISTANCE.
For each operating mode the corre-
sponding menu is shown on the dis-
play.CHOOSING THE MENU
FUNCTIONS
The different operating modes of the
CONNECT Nav+ allow access to dif-
ferent menus, with functions that in
turn show other submenus on the dis-
play and so on.
The procedures for choosing and
confirming the functions of the differ-
ent menus and submenus are howev-
er the same and they are described be-
low.
To go back to the previous screen
from a submenu or to exit the various
operating modes, press “ESC” 23-
fig. 1.Choosing a function
To select a function of the menu on
the display, simply turn the knob 22-
fig. 1in one of the two directions un-
til showing the function required.
Confirming the function chosen
To confirm the function selected,
press the knob 22-fig. 1.
IMPORTANTOn the menu or
submenu pages showing “OK”, to
store the functions chosen it is nec-
essary to exit the corresponding
screen confirming the “OK” function.
Leaving the page of the menu or sub-
menu with the “ESC” key 23-fig. 1,
the previous functions are restored in-
stead of the new settings.
Page 157 of 246

CONNECT Nav+
156
VOLUME ADJUSTMENT
To increase the volume: turn the
knob 16-fig. 1clockwise.
To lower the volume: turn the knob
16-fig. 1counter-clockwise.
During adjustment, the volume lev-
el is shown graphically on the display
(only in the main menu of audio
sources).
IMPORTANTThe volume of
PTY31 Alarm/Traffic Announcement
(TA), telephone, telephone ringer and
voice recognition can be adjusted sep-
arately.
Automatic volume lowering
during phone calls
During phone calls, the radio volume
is turned down automatically and the
screen shows the telephone symbol.MUTE function (turning down
the audio volume)
To turn off the volume of the audio
system (Radio, CD), with any operat-
ing mode on (MAIN, NAV, TRIP),
keep the button 18-fig. 1pressed; this
way the radio turns off and the display
shows the wording “Audio OFF”. To
turn the radio on again, briefly press
the button 18-fig. 1, thereby turning
the audio function on again with the
corresponding screen.
NAV MUTE function (excluding
navigator voice messages)
To turn off the navigator voice in-
structions keep the “NAV” key
pressed 20-fig. 1. The volume will
lower gradually (Soft Mute function)
and the display will show the word-
ing “NAV MUTE”.
Too high a volume may be
a danger for the driver and
for other persons in the traffic. The
volume should therefore always be
adjusted in such a way as to still be
able to hear the noises in the sur-
rounding environment (for example
horns, ambulances, police cars,
etc.).
WARNING
Page 161 of 246

CONNECT Nav+
160
DROP-DOWN
MENU
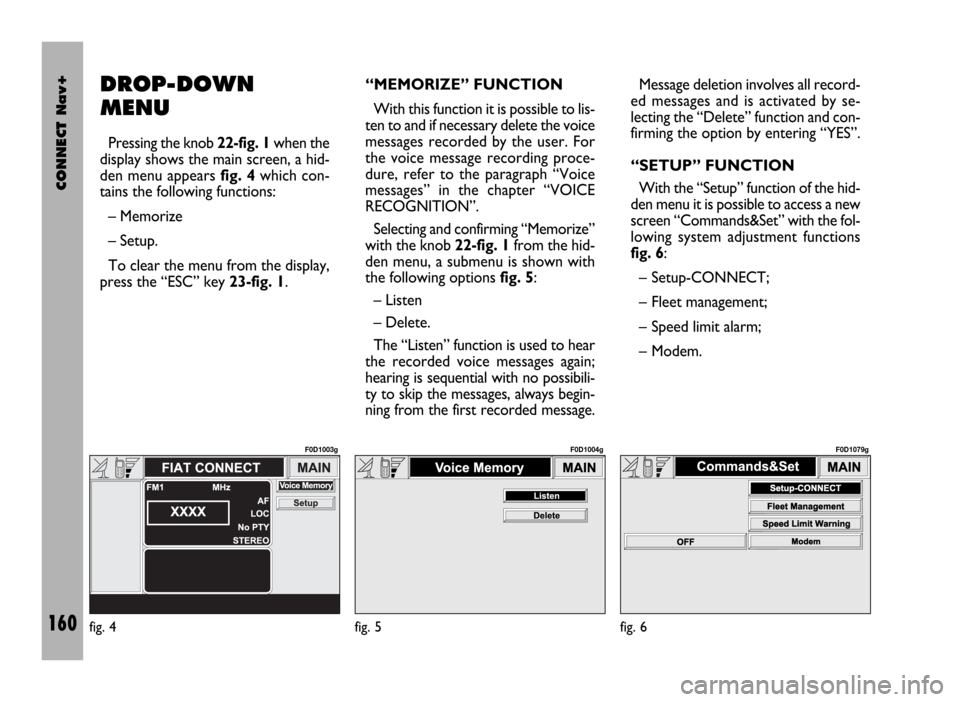
Pressing the knob 22-fig. 1when the
display shows the main screen, a hid-
den menu appears fig. 4which con-
tains the following functions:
– Memorize
– Setup.
To clear the menu from the display,
press the “ESC” key 23-fig. 1.“MEMORIZE” FUNCTION
With this function it is possible to lis-
ten to and if necessary delete the voice
messages recorded by the user. For
the voice message recording proce-
dure, refer to the paragraph “Voice
messages” in the chapter “VOICE
RECOGNITION”.
Selecting and confirming “Memorize”
with the knob 22-fig. 1from the hid-
den menu, a submenu is shown with
the following options fig. 5:
– Listen
– Delete.
The “Listen” function is used to hear
the recorded voice messages again;
hearing is sequential with no possibili-
ty to skip the messages, always begin-
ning from the first recorded message.Message deletion involves all record-
ed messages and is activated by se-
lecting the “Delete” function and con-
firming the option by entering “YES”.
“SETUP” FUNCTION
With the “Setup” function of the hid-
den menu it is possible to access a new
screen “Commands&Set” with the fol-
lowing system adjustment functions
fig. 6:
– Setup-CONNECT;
– Fleet management;
– Speed limit alarm;
– Modem.
fig. 4
F0D1003g
fig. 5
F0D1004g
fig. 6
F0D1079g
Page 169 of 246

CONNECT Nav+
168
IMPORTANTStarting the engine
when the modem function is on, will
cause the connection drop with data
loss as a consequence. Stooping the
engine has no effect on data transmis-
sion since the CONNECT Nav+ will
stay on for other 20 minutes. If a GSM
communication is in progress the sys-
tem will automatically activate a new
window for other 20 minutes. Long
GSM communications (with data
transmission) can run down the vehi-
cle battery.
Operation requirements
The modem function is operational
if the following conditions are present:
– CONNECT Nav+ on;
– SIM card inserted;
– sufficient credit;
– GSM coverage.Portable computer setting
SERIAL PORT SETTING
The computer serial port shall be set
for 9600bps data transmission speed.
For “Windows 95” proceed as fol-
lows:
– open “computer resources”
– open “control panel”
– open “system”
– open “peripheral control”
– select “com and LPT ports”
– select “COM1 communications
port”
– select “port setting”
– check: bit per second = 9600
data bit = 8
parity = no parity
stop bit = 1
flow control = Xon/Xoff
MODEM SETTING
The portable computer shall have the
modem. For “Windows 95” proceed
as follows:
– open “computer resources”
– open “control panel”
– open “modem”:
select add
select “modem types” = other
select “next” and follow the dis-
played instructions.
Page 173 of 246

CONNECT Nav+
172
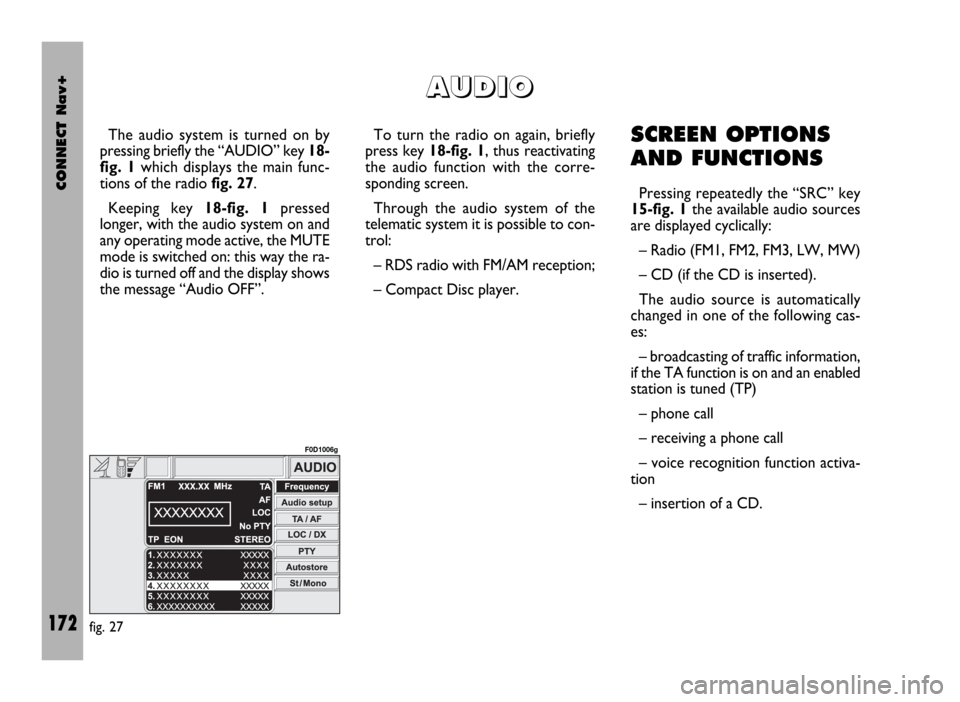
The audio system is turned on by
pressing briefly the “AUDIO” key 18-
fig. 1which displays the main func-
tions of the radio fig. 27.
Keeping key 18-fig. 1pressed
longer, with the audio system on and
any operating mode active, the MUTE
mode is switched on: this way the ra-
dio is turned off and the display shows
the message “Audio OFF”. To turn the radio on again, briefly
press key 18-fig. 1, thus reactivating
the audio function with the corre-
sponding screen.
Through the audio system of the
telematic system it is possible to con-
trol:
– RDS radio with FM/AM reception;
– Compact Disc player.SCREEN OPTIONS
AND FUNCTIONS
Pressing repeatedly the “SRC” key
15-fig. 1the available audio sources
are displayed cyclically:
– Radio (FM1, FM2, FM3, LW, MW)
– CD (if the CD is inserted).
The audio source is automatically
changed in one of the following cas-
es:
– broadcasting of traffic information,
if the TA function is on and an enabled
station is tuned (TP)
– phone call
– receiving a phone call
– voice recognition function activa-
tion
– insertion of a CD.
A A
U U
D D
I I
O O
fig. 27
F0D1006g
Page 181 of 246

CONNECT Nav+
180
“LOC/DX” FUNCTION
(TUNER SENSITIVITY
ADJUSTMENT)
With this function it is possible to
change the sensitivity of automatic ra-
dio station searching. When low sen-
sitivity “LOC” is set, only stations with
excellent reception are sought; when
high sensitivity “DX” is set, all the sta-
tions are sought. If you are in an area
with a large number of broadcasters
and you want the ones with the
strongest signal, choose low sensitivi-
ty “LOC”.
To choose between low or high
tuner sensitivity, repeatedly press the
knob 22-fig. 1after selecting the
“LOC/DX” function. The abbreviation
of the sensitivity chosen will be shown
on the display:
– LOC = low sensitivity;
– DX = high sensitivity.“PTY” FUNCTION
(CHOOSING A TYPE OF
PROGRAMME)
The PTY function (Program Type),
when present, makes it possible to
give priority to broadcasters trans-
mitting programmes classified accord-
ing to the type of PTY. PTY pro-
grammes may concern emergency an-
nouncements or various subjects (e.g.
music, news). To access the list of PTY
programmes, choose the and confirm
the PTY function with the knob 22-
fig. 1; the display will show the screen
with the list of PTY programmes
fig. 34and the subject of the last sta-
tion heard (e.g. “NEWS”). To scroll the list of PTY programmes
turn the knob 22-fig. 1. To choose a
type of programme press the knob af-
ter choosing the type.
IMPORTANTThe PTY function
can only be turned on in the FM band.
If the station does not broadcast in
the PTY mode, the display will show
the wording “NO-PTY” for 5 seconds.
After 2 seconds the display shows
the station name or frequency.
The list of PTY programmes is the
following:
– No PTY
– News
– Current Affairs
– Information
– Sport
– Education
– Drama
– Culture
– Science
– Varied
– Pop music
fig. 34
F0D1013g
Page 185 of 246

CONNECT Nav+
184
“TA” FUNCTION
(TRAFFIC INFORMATION)
To turn the TA function (Traffic An-
nouncement) on/off while listening to
a CD, press the knob 22-fig. 1after
selecting the function.
For the description of the function,
refer to the corresponding paragraph
in the “RADIO MODE” chapter.
“SCAN” FUNCTION
(BRIEF PLAYBACK)
The “Scan” function is turned on/off
pressing the knob 22-fig. 1after se-
lecting the function.
When this function is on, all the CD
tracks are played for about 10 seconds
in the actual sequence on the CD.
Press the knob again to turn the
function off 22-fig. 1.
The “Scan” function is turned off au-
tomatically when “Shuffle” is turned on.“SHUFFLE” FUNCTION
(RANDOM PLAYBACK)
The “Shuffle” function is turned on/off
pressing the knob 22-fig. 1after se-
lecting the function.
With this function on, the CD tracks
are played in random sequence. To
turn the function off press the knob
again 22-fig. 1. The “Shuffle” function
is turned off automatically when the
“Scan” function is turned on.
“CD SETUP” MENU
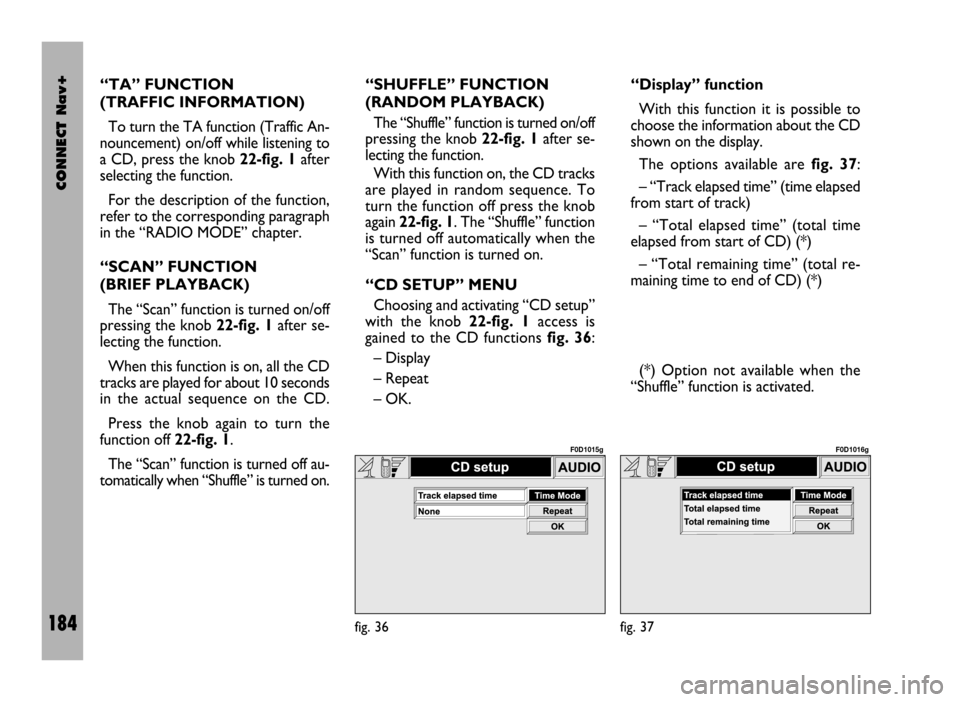
Choosing and activating “CD setup”
with the knob 22-fig. 1access is
gained to the CD functions fig. 36:
– Display
– Repeat
– OK.“Display” function
With this function it is possible to
choose the information about the CD
shown on the display.
The options available are fig. 37:
– “Track elapsed time” (time elapsed
from start of track)
– “Total elapsed time” (total time
elapsed from start of CD) (*)
– “Total remaining time” (total re-
maining time to end of CD) (*)
(*) Option not available when the
“Shuffle” function is activated.
fig. 36
F0D1015g
fig. 37
F0D1016g
Page 190 of 246

CONNECT Nav+
189
– emergency call in progress warning
– credit available in case of a prepaid
SIM card (if the Network Provider
makes these data available).
During an incoming or outgoing call,
the lower part of the display provides
the following information:
– interlocutor’s name (if present in
the telephone directory) or telephone
number (for calls received, if available)
– interlocutor telephone number (if
made available by the network
provider)
– time from beginning of the call (mm
: ss - minutes and seconds).
Information provided in the display
lower part are replaced, at the end of
the call, by the telephone number di-
alling sector.ACCEPTING CALLS
Any incoming call while a conversa-
tion is in progress is shown on the dis-
play by the name (if present in the di-
rectory) and by the number (if avail-
able) of the caller and by the options
“Accept” or “Refuse”. To choose and
confirm the options use the knob 22-
fig. 1.
If the new call is accepted, the pre-
vious one will wait till the end of the
new call or till the interlocutor decides
to hang up.
If the incoming call is refused, the dis-
played message disappears and the
first telephone call continues with no
disturbance.
Incoming calls are signalled, regard-
less of the active mode of the inte-
grated system (radio, CD player etc.),
by a screen that shows the caller’s
name (if present in the directory) and
number (if available) and the prompt
to accept or refuse the call.
To accept the call, briefly press key
ò13-fig. 1, to refuse the call keep the
key pressed longer.
To interrupt a telephone call, press
key
ò13-fig. 1at length.TELEPHONE CALL
To make a telephone call, select the
“telephone” function using key 19-
fig. 1, then press key
ò13-fig. 1af-
ter dialling the telephone number us-
ing the keypad located on the control
panel left-hand side or after retriev-
ing it using one of the dedicated menu
functions (directory, frequent num-
bers, last received or called numbers).
When calling, the display left-hand
side shows information associated
with the call in progress, the vehicle
radio is switched off, connection is
made and, if the called person an-
swers, the call duration counter is
started.
To interrupt the forwarding of a
call, keep key
ò13-fig. 1pressed.