2002 FIAT DUCATO 244 reset
[x] Cancel search: resetPage 39 of 246
CONNECT Nav
38
“BAND SCAN” FUNCTION
The “BAND SCAN” function acti-
vates station scanning in the chosen
frequency band. Each station frequen-
cy will be displayed for about 10 sec-
onds.
To turn on the “BAND SCAN” func-
tion, select and confirm “BAND
SCAN” with the knob 22-fig. 1from
the main audio menu.
During scanning, the display will
show “BAND SCAN”.
To stop the band scan function, press
“ESC” 23-fig. 1.“PRESET SCAN” FUNCTION
The “PRESET SCAN” function acti-
vates stored station scanning in the
chosen frequency band. Each stored
station will be played for about 10 sec-
onds.
To turn on the “PRESET SCAN”
function, select and confirm “PRESET
SCAN” with the knob 22-fig. 1, from
the main audio menu.
During scanning, the display will show
“PRES. SCAN”. To stop the band scan
function, press “ESC” 23-fig. 1.
“STATION LIST” FUNCTION
The “STATION LIST” function dis-
plays a screen fig. 22, listing the ra-
dio stations previously stored in the
tuned band, the RDS codes and the
corresponding frequencies.
To turn this function on, select and
confirm “STATION LIST” with the
knob 22-fig. 1from the main audio
menu. To scroll the stored station list
use the encoder 14-fig. 1.“RADIO SETUP” FUNCTION
To turn this function on, select and
confirm “RADIO SETUP” with the
knob 22-fig. 1from the main audio
menu.
This function enables to go to next
window to adjust radio settings. When
in this window it is not possible to
change the audio source. The follow-
ing functions are displayed:
– LOC/DX
– MONO/STEREO
– REGIONAL
– NEWS.
Page 46 of 246
45
CONNECT Nav
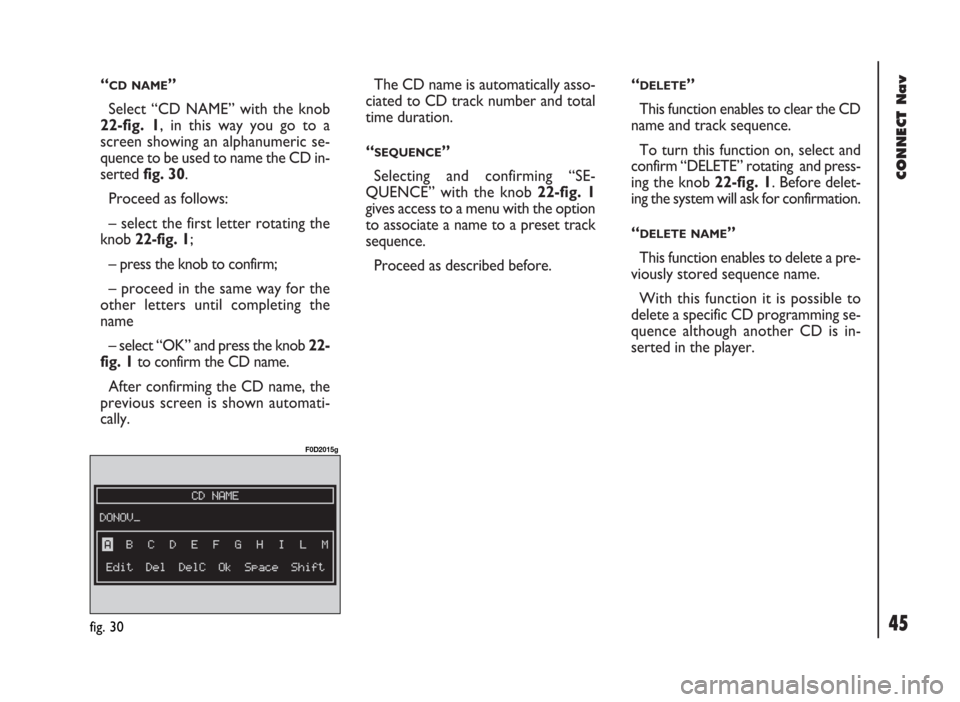
“CD NAME”
Select “CD NAME” with the knob
22-fig. 1, in this way you go to a
screen showing an alphanumeric se-
quence to be used to name the CD in-
serted fig. 30.
Proceed as follows:
– select the first letter rotating the
knob 22-fig. 1;
– press the knob to confirm;
– proceed in the same way for the
other letters until completing the
name
– select “OK” and press the knob 22-
fig. 1to confirm the CD name.
After confirming the CD name, the
previous screen is shown automati-
cally.The CD name is automatically asso-
ciated to CD track number and total
time duration.
“
SEQUENCE”
Selecting and confirming “SE-
QUENCE” with the knob 22-fig. 1
gives access to a menu with the option
to associate a name to a preset track
sequence.
Proceed as described before.“
DELETE”
This function enables to clear the CD
name and track sequence.
To turn this function on, select and
confirm “DELETE” rotating and press-
ing the knob 22-fig. 1. Before delet-
ing the system will ask for confirmation.
“
DELETE NAME”
This function enables to delete a pre-
viously stored sequence name.
With this function it is possible to
delete a specific CD programming se-
quence although another CD is in-
serted in the player.
fig. 30
F0D2015g
Page 52 of 246
51
CONNECT Nav
– turn and press the knob 22-fig. 1
to select and confirm “BALANCE”,
the function that changes the sound
distribution in the passenger com-
partment between the right and left
speakers, the display will show the
screen in fig. 36.
– turn the knob 22-fig. 1to change
the sound distribution in the passenger
compartment between the right and
left speakers (cursor moving along the
horizontal axis), then press the knob
to confirm.
In the same way, choose and confirm
the “FADER” function to change the
sound distribution between the front
and rear speakers (cursor moving
along the vertical axis).
After adjustment, select “OK” with
the knob 22-fig. 1and then press it to
confirm the setting and to go back to
the previous screen.
If “ESC” 23-fig. 1is pressedyou go
back to the previous screen with the
settings stored previously.AUTOCLIP DETECT
(dynamic distortion limiter)
With the “AUTOCLIP DETECT”
function the radio output level is re-
duced automatically when excessive
distortion level (that could damage the
speakers) is detected.
To turn this function on and off, se-
lect “AUTOCLIP DETECT” with the
knob 22-fig. 1, then press it to con-
firm. The function status (on or off) is
shown on the display by wording
“YES” or “NO”.MAX. VOL. AT ON
The “MAX. VOL. AT ON” function
clips radio volume (at level 10) at pow-
er on. If the radio was switched off
with a volume setting higher than 10,
when activating this function (ignition
key at STOP, at power on the vol-
ume is reset to the above limit.
To turn this function on and off, se-
lect and confirm “MAX. VOL. AT
ON” rotating and pressing the knob
22-fig. 1.
“OK”
At the end, select “OK” with the
knob 22-fig. 1and then press it to
confirm and go back to the main “AU-
DIO SETUP” menu.
Page 53 of 246
CONNECT Nav
52
MP3 MODE
To guarantee optimum playing, use
top quality CDs duplicated at as low
as possible speed.
The system can recognize the type
of Compact Disc inserted.
During the reading procedure to rec-
ognize the disk the display shows
“WARNING - Reading CD. Please
wait” and then “Exploring MP3..”.
IMPORTANTNever use 8 cm au-
dio or MP3 CDs, even with the spe-
cific adapter, since this format will
damage the system.
IMPORTANTThe system builds
MP3 CD folder-organized structure of
files; folders are organized in sequence
with their own mp3 tracks (up to max.
four levels of folders/subdirectories).
Folder and file name length shall not ex-
ceed 20 characters.
Characters: blank, ‘(apostrophe), (
and )(open and closed brackets) are
not admitted in track names.When creating MP3 CD you must not
use these characters to name files oth-
erwise the system will not be able to
play it.
Since a full MP3 CD could hypotheti-
cally include thousands of MP3 files, a
999 music pieces limit is imposed by the
system. If the user inserts a MP3 CD
which has more than 999 tracks (files)
in it, then only the first 999 files will be
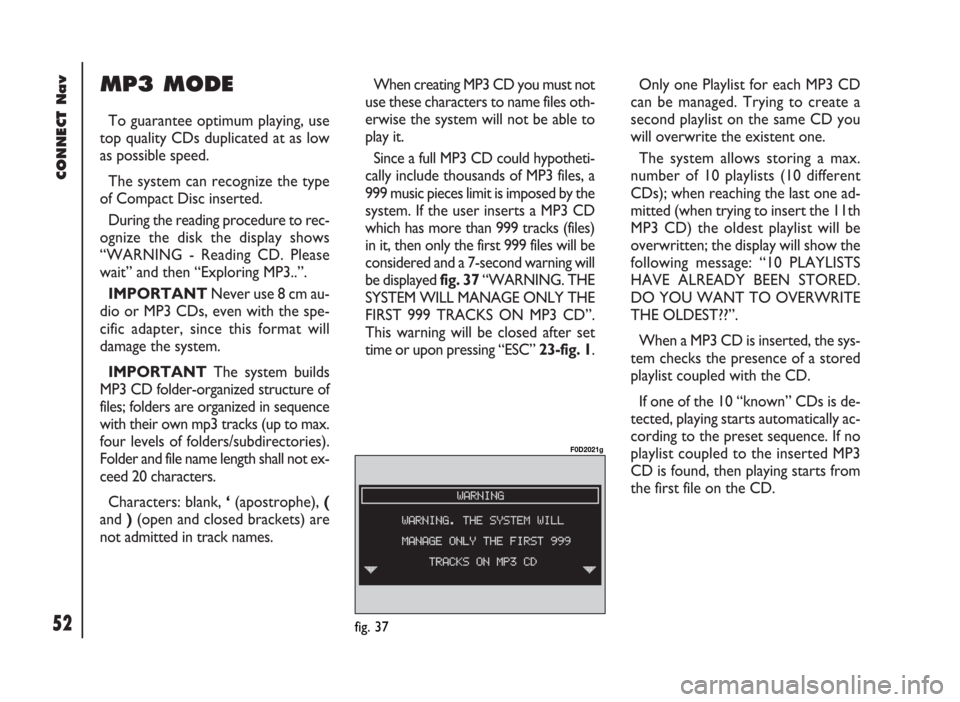
considered and a 7-second warning will
be displayed fig. 37 “WARNING. THE
SYSTEM WILL MANAGE ONLY THE
FIRST 999 TRACKS ON MP3 CD”.
This warning will be closed after set
time or upon pressing “ESC” 23-fig. 1.Only one Playlist for each MP3 CD
can be managed. Trying to create a
second playlist on the same CD you
will overwrite the existent one.
The system allows storing a max.
number of 10 playlists (10 different
CDs); when reaching the last one ad-
mitted (when trying to insert the 11th
MP3 CD) the oldest playlist will be
overwritten; the display will show the
following message: “10 PLAYLISTS
HAVE ALREADY BEEN STORED.
DO YOU WANT TO OVERWRITE
THE OLDEST??”.
When a MP3 CD is inserted, the sys-
tem checks the presence of a stored
playlist coupled with the CD.
If one of the 10 “known” CDs is de-
tected, playing starts automatically ac-
cording to the preset sequence. If no
playlist coupled to the inserted MP3
CD is found, then playing starts from
the first file on the CD.
fig. 37
F0D2021g
Page 56 of 246
“VIEW PLAYLIST”
FUNCTION
This function enables to display
stored playlists and to edit them part-
ly or completely.
This function is disabled if there is no
playlist.
“COMPRESSION”
FUNCTION
This function optimizes MP3 CD
sound quality when playing it in the
vehicle.
To turn this function on/off, select
and confirm “COMPRESSION” rotat-
ing and pressing the knob 22-fig. 1.
“TA” FUNCTION
(traffic information)
To turn the TA function (Traffic An-
nouncement) on/off while listening to
a MP3 CD, select “TA” with the knob
22-fig. 1 and press it to confirm “YES”
or “NO”.For the description of the function,
refer to the corresponding paragraph
in the “RADIO MODE” chapter.
Select “YES” or “NO” by rotating
and pressing the knob 22-fig. 1 .
“SCAN” FUNCTION (brief
playback)
To turn this function on/off, select
“SCAN” by turning and pressing the
knob 22-fig. 1.
When the SCAN function is on, the
display shows “SCAN”.
When this function is on, all the MP3
CD tracks are played for about 10 sec-
onds in the actual sequence on the
MP3 CD or the preset playlist is played
(depending on “Playlist” enable/dis-
able).
Press “ENTER” 15-fig. 1to turn the
function off. “SHUFFLE” FUNCTION
(random playing)
To turn this function on/off, select and
confirm “SHUFFLE” rotating and press-
ing the knob 22-fig. 1.
When the SHUFFLE function is on,
the display shows “SFL”.
With this function on, the MP3 CD
tracks or the playlist are played in ran-
dom sequence (depending on
“Playlist” enable/disable).
Press the knob 22-fig. 1to turn the
function off.
55
CONNECT Nav
Page 90 of 246
CONNECT Nav
89
– “REDIAL”: in case of busy line, re-
dials automatically the called number
(for a preset number of times); to stop
redialling press key 2-fig. 1at length.
– “CALL FORWARDING”: enables
or disables call divert;
– “CALL FORWARDING NO.”: al-
lows input of the phone number to
which call is diverted.
– “ENABLE CALL WAITING”: en-
ables or disables incoming call an-
nouncement;A beep will be heard to indicate an
incoming call during an active phone
conversation. To accept the incoming
call press the knob 22-fig. 1; the first
call will wait until the second conver-
sation is ended or until the first caller
hangs up the phone.
To refuse the incoming call press
“ESC” 23-fig. 1; no interference with
the active call will be generated.
– “OK”: to accept and store settings.When the user modifies the call for-
warding settings, the display shows
“WARNING! OPERATION IN
PROGRESS: PLEASE WAIT …”.
When this operation is ended, the dis-
play shows “CALL FORWARDING -
OPERATION CONCLUDED”.
Should it be impossible to modify set-
tings, the display shows “CALL FOR-
WARDING” – “OPERATION NOT
PERFORMED”.
Page 91 of 246
90
CONNECT Nav
GENERAL
INFORMATION
The navigator integrated in the
CONNECT system allows you to
reach the chosen destination by visu-
al and voice instructions. Use of the
navigation system is quick, convenient,
safe and above all very flexible because
it allows you to call up already pro-
grammed destinations or points of ref-
erence such as hotels, monuments,
public structures, fuel stations orFi-
at Dealerships.
The vehicle position is determined
through the GPS system (Global Posi-
tioning System) installed on the vehi-
cle. The GPS system is fitted with an
antenna and a reception module inte-
grated in the telematic system. This
system configuration dynamically
processes the satellite signals and
those provided by the vehicle system,
integrating them with the current po-
sition of the vehicle to obtain an “es-
timated vehicle point”.The navigation system helps the dri-
ver while he drives by suggesting vo-
cally and graphically the optimum rout-
ing to reach the preset destination.
The navigation system suggestions do
not exempt the driver from full re-
sponsibility due to his driving behav-
iour and to compliance with road and
other traffic regulations. The respon-
sibility for road safety always and in
any case lies with the vehicle driver.IMPORTANT NOTES
– GPS reception is difficult under
trees, among tall buildings, in multi-lev-
el car parks, tunnels and everywhere
reception of the satellite antenna may
be hindered.
– The GPS system needs about 15
minutes for activation if the vehicle
battery is disconnected.
– The GPS system needs a few min-
utes to determine the new position of
the vehicle if it is turned off and the ve-
hicle is moved with the system off (e.g.:
on ferryboat).
– The GPS satellite aerial must not
be covered with metal or damp ob-
jects.
The instantaneous vehicle position is
identified in the CD-ROM and shown
on the display together with the topo-
graphic characteristics of the area
memorised on the CD-ROM. Access
to data on the CD-ROM requires a
few moments waiting for the map dis-
plays.
N N
A A
V V
I I
G G
A A
T T
O O
R R
( (
N N
A A
V V
) )
Page 110 of 246
CONNECT Nav
109
GENERAL
INFORMATION
The on-board computer provides a
series of helpful data relevant to cur-
rent travel (e.g.: times, distances,
speed, fuel consumption). Certain in-
formation depends on set navigation
route.
IMPORTANTCertain informa-
tion/operations hereafter described
are available/possible only with ignition
key turned to MAR.
TRIP menu allows to set the desired
distance and fuel consumption mea-
sure unit.
TRIP menu also allows to input a
number of events (e.g. Tyre replace-
ment..., Birthday …) that can be trig-
gered both on set date or mileage.
O O
N N
- -
B B
O O
A A
R R
D D
C C
O O
M M
P P
U U
T T
E E
R R
( (
T T
R R
I I
P P
) )
TIME TO DESTINATION
This information shows the pre-
sumed time (calculated according to
average speed, from the last manual or
automatic reset), at which the desti-
nation set will be reached.
The time is shown in “hh:mm”
(hours and minutes).
If no route is set, “– –” is displayed.
fig. 146
F0D2140g
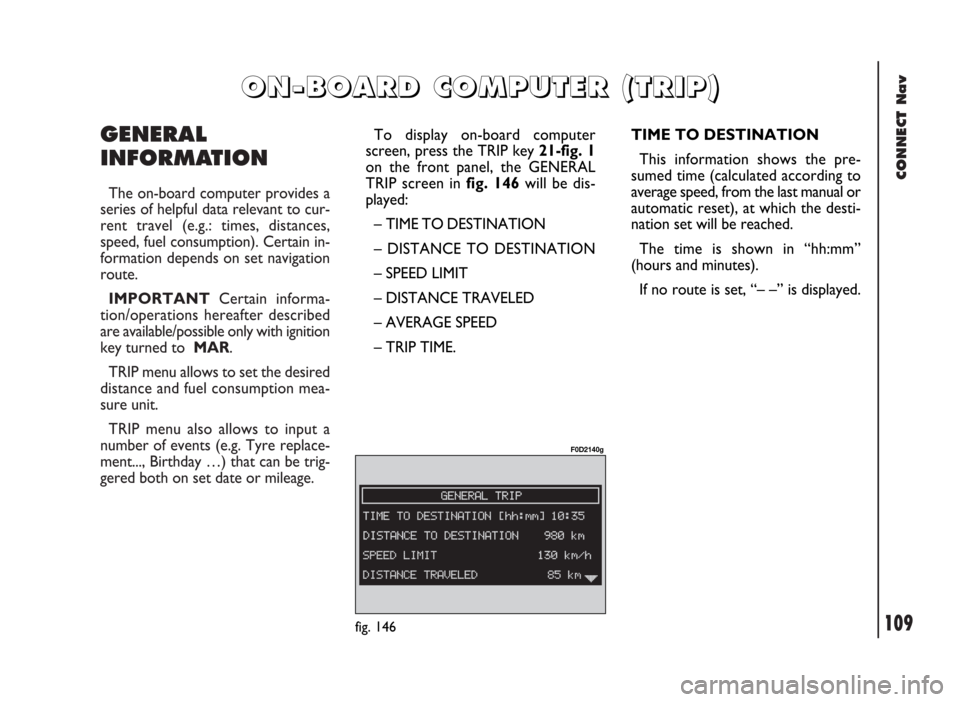
To display on-board computer
screen, press the TRIP key 21-fig. 1
on the front panel, the GENERAL
TRIP screen in fig. 146will be dis-
played:
– TIME TO DESTINATION
– DISTANCE TO DESTINATION
– SPEED LIMIT
– DISTANCE TRAVELED
– AVERAGE SPEED
– TRIP TIME.