Page 313 of 486

4-22
Freeway Driving
Mile for mile, freeways (also called thruways, parkways,
expressways, turnpikes or superhighways) are the safest
of all roads. But they have their own special rules.
The most important advice on freeway driving is: Keep
up with traffic and keep to the right. Drive at the same
speed most of the other drivers are driving. Too
-fast or
too
-slow driving breaks a smooth traffic flow. Treat the
left lane on a freeway as a passing lane.At the entrance, there is usually a ramp that leads to the
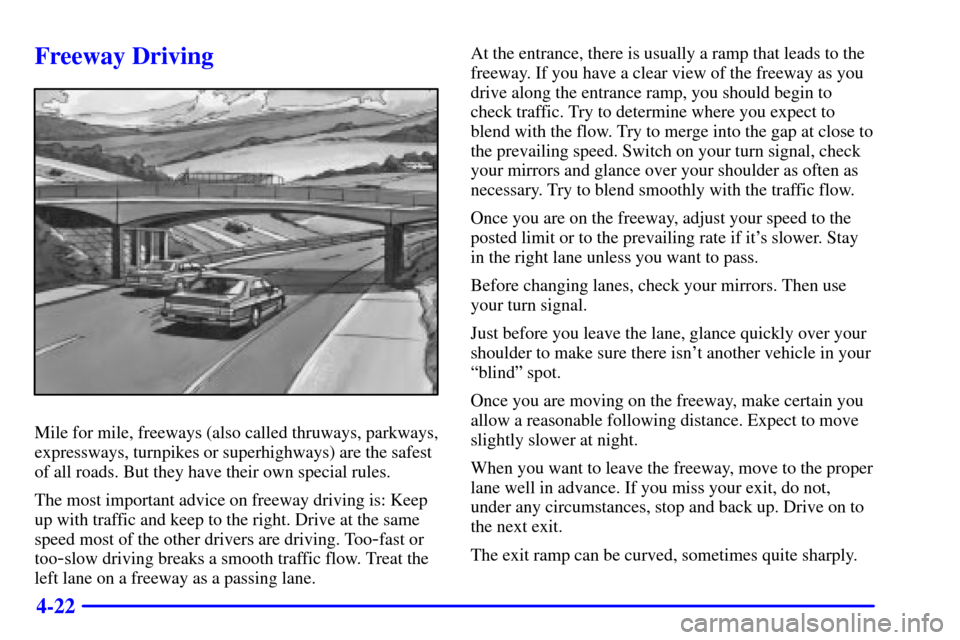
freeway. If you have a clear view of the freeway as you
drive along the entrance ramp, you should begin to
check traffic. Try to determine where you expect to
blend with the flow. Try to merge into the gap at close to
the prevailing speed. Switch on your turn signal, check
your mirrors and glance over your shoulder as often as
necessary. Try to blend smoothly with the traffic flow.
Once you are on the freeway, adjust your speed to the
posted limit or to the prevailing rate if it's slower. Stay
in the right lane unless you want to pass.
Before changing lanes, check your mirrors. Then use
your turn signal.
Just before you leave the lane, glance quickly over your
shoulder to make sure there isn't another vehicle in your
ªblindº spot.
Once you are moving on the freeway, make certain you
allow a reasonable following distance. Expect to move
slightly slower at night.
When you want to leave the freeway, move to the proper
lane well in advance. If you miss your exit, do not,
under any circumstances, stop and back up. Drive on to
the next exit.
The exit ramp can be curved, sometimes quite sharply.
Page 331 of 486

4-40 Passing
You'll need more passing distance up ahead when
you're towing a trailer. And, because you're a good deal
longer, you'll need to go much farther beyond the
passed vehicle before you can return to your lane.
Backing Up
Hold the bottom of the steering wheel with one hand.
Then, to move the trailer to the left, just move that hand
to the left. To move the trailer to the right, move your
hand to the right. Always back up slowly and, if
possible, have someone guide you.
Making Turns
NOTICE:
Making very sharp turns while trailering could
cause the trailer to come in contact with the
vehicle. Your vehicle could be damaged. Avoid
making very sharp turns while trailering.
When you're turning with a trailer, make wider turns
than normal. Do this so your trailer won't strike soft
shoulders, curbs, road signs, trees or other objects.
Avoid jerky or sudden maneuvers. Signal well
in advance.
Turn Signals When Towing a Trailer
When you tow a trailer, your vehicle has to have
extra wiring.
The arrows on your instrument panel will flash
whenever you signal a turn or lane change. Properly
hooked up, the trailer lamps will also flash, telling other
drivers you're about to turn, change lanes or stop.
When towing a trailer, the arrows on your instrument
panel will flash for turns even if the bulbs on the trailer
are burned out. Thus, you may think drivers behind you
are seeing your signal when they are not. It's important
to check occasionally to be sure the trailer bulbs are
still working.
Page 335 of 486
5-2
Hazard Warning Flashers
Your hazard warning flashers let you warn others. They
also let police know you have a problem. Your front and
rear turn signal lamps will flash on and off.
Your hazard warning
flashers button is located on
top of the steering column.
Your hazard warning flashers work no matter what
position your key is in, and even if the key isn't in.
Press the button to make the front and rear turn signal
lamps flash on and off. Press the button again to turn the
flashers off.
When the hazard warning flashers are on, your turn
signals won't work.
Other Warning Devices
If you carry reflective triangles, you can set one up at
the side of the road about 300 feet (100 m) behind
your vehicle.
Page 409 of 486
6-37 Headlamps
1. Open the hood.
2. Remove the front turn signal/parking lamp assembly.
See ªFront Turn Signal/Parking/Sidemarker Lampsº
later in this section.
3. Remove the two wing nuts located on top of the
headlamp assembly.
4. Unscrew the black retainer ring that holds the bulb
assembly in place.
5. Pull the bulb assembly straight up from the
lamp housing.
6. Unhook the electrical connector by lifting up the
blue tabs and pulling the bulb out.
Page 411 of 486
6-39
9. Align the pins on the bottom of the headlamp
assembly with the holes in the lamp support bracket
while placing the holes in the assembly over the
bolts where the wing nuts attach.
10. Reinstall the wing nuts.
11. To reinstall the front turn signal/parking
lamp assembly See ªFront Turn
Signal/Parking/Sidemarker Lampsº next.
Front Turn Signal/Parking/Sidemarker Lamps
1. Open the hood.
2. Remove the thumbscrew attaching the front
turn signal/parking lamp assembly to the
headlamp assembly.
3. Pull the front turn signal/parking lamp assembly
away from the vehicle.
4. Unscrew the bulb socket from the lamp assembly by
pressing the tab while turning it counterclockwise.
Page 412 of 486
6-40
Front Turn Signal/Parking LampFront Sidemarker Lamp
5. Replace the bulb by pulling the old one out and
gently pushing the new one into the lamp socket.
6. Line up the tabs on the socket with the gaps in the
socket holes and screw the bulb socket back into the
lamp housing until a click is heard (the tab popping
back out).
Page 413 of 486
6-41
7. To reinstall the lamp assembly, line up and insert the
tabs on the back of the assembly in the slots in the
fender. Engage the lower clip on the back of the
lamp assembly into the fender, keeping the upper tab
on the front turn signal/parking lamp assembly
inboard of the headlamp bracket tab.
8. To align the front turn signal/parking lamp assembly
with the headlamp assembly, lift up the front turn
signal/parking lamp assembly until the upper edge is
contacting the fender.
9. Fasten the front turn signal/parking lamp assembly to
the headlamp assembly with the thumbscrew
removed in Step 2.
Page 414 of 486
6-42 Taillamps, Back-Up Lamps, Rear Turn
Signals, Brake Lamps
1. Open the liftgate.
2. Remove the two screws from the taillamp housing
on the inboard side.
3. Pull off the entire taillamp housing.
The locator/retaining pins on the outboard side are
part of the lamp assembly and will remain intact
during removal.
4. Remove the bulb holder by pressing the four
retaining tabs and pulling the holder away from
the assembly.
A. Taillamp Bulb
B. Back
-Up Lamp Bulb
C. Turn Signal Lamp Bulb
D. Stop/Taillamp Bulb