Page 288 of 399
6-7
To open the fuel door, press the fuel door release
button upward. The vehicle must be in PARK (P) or
NEUTRAL (N) and the valet lockout button must
be in OFF.
An alternate fuel door
release strap is located
inside the trunk on the
driver's side of the vehicle.
Pull the strap to release the fuel door.
While refueling, hang the fuel cap by the tether from the
hook on the fuel door.
To remove the fuel cap, turn it slowly to the left
(counterclockwise). The fuel cap has a spring in it; if
you let go of the cap too soon, it will spring back to
the right.
Page 289 of 399

6-8
CAUTION:
If you get gasoline on yourself and then
something ignites it, you could be badly burned.
Gasoline can spray out on you if you open the
fuel cap too quickly. This spray can happen if
your tank is nearly full, and is more likely in hot
weather. Open the fuel cap slowly and wait for
any ªhissº noise to stop. Then unscrew the cap all
the way.
Be careful not to spill gasoline. Clean gasoline from
painted surfaces as soon as possible. See ªCleaning the
Outside of Your Vehicleº in the Index.
When you put the fuel cap back on, turn it to the right
(clockwise) until you hear a clicking sound. Make sure
you fully install the cap. The diagnostic system can
determine if the fuel cap has been left off or improperly
installed. This would allow fuel to evaporate into the
atmosphere. See ªMalfunction Indicator Lampº in
the Index.The CHECK GAS CAP message in the Driver
Information Center will come on if the fuel cap is not
properly reinstalled.
NOTICE:
If you need a new fuel cap, be sure to get the
right type. Your dealer can get one for you. If you
get the wrong type, it may not fit properly. This
may cause your malfunction indicator lamp to
light and may damage your fuel tank and
emissions system. See ªMalfunction Indicator
Lampº in the Index.
Page 293 of 399

6-12
Before closing the hood, be sure all filler caps are on
properly. Then pull the hood down and close it firmly.
Underhood Lamp
Turn the parking lamps on to operate the underhood
lamp. The underhood lamp will come on when the hood
is opened.
Engine Oil
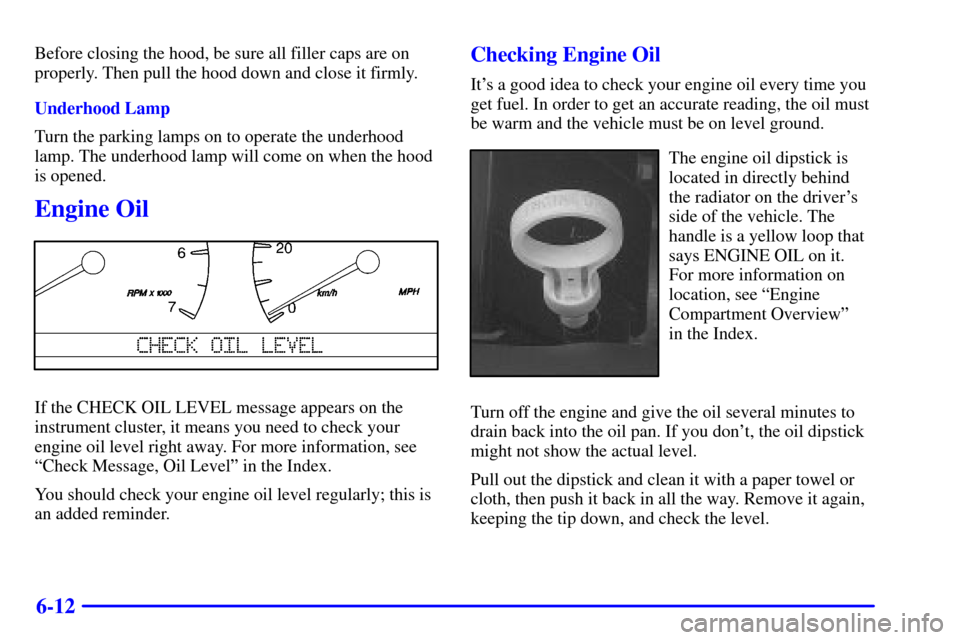
If the CHECK OIL LEVEL message appears on the
instrument cluster, it means you need to check your
engine oil level right away. For more information, see
ªCheck Message, Oil Levelº in the Index.
You should check your engine oil level regularly; this is
an added reminder.
Checking Engine Oil
It's a good idea to check your engine oil every time you
get fuel. In order to get an accurate reading, the oil must
be warm and the vehicle must be on level ground.
The engine oil dipstick is
located in directly behind
the radiator on the driver's
side of the vehicle. The
handle is a yellow loop that
says ENGINE OIL on it.
For more information on
location, see ªEngine
Compartment Overviewº
in the Index.
Turn off the engine and give the oil several minutes to
drain back into the oil pan. If you don't, the oil dipstick
might not show the actual level.
Pull out the dipstick and clean it with a paper towel or
cloth, then push it back in all the way. Remove it again,
keeping the tip down, and check the level.
Page 361 of 399

6-80 Capacities
Transaxle (4T80-E) 15.0 quarts (14.2 L). . . . . . . . . .
Engine Oil with Filter 7.5 quarts (7.1 L). . . . . . . . . .
Engine Cooling System 12.5 quarts (11.8 L). . . . . . . .
Fuel Tank 18.5 U.S. gallons (70.1L). . . . . . . . . . . . . .
All capacities are approximate. When adding, be sure to
fill to the approximate level, as recommended in this
manual. Recheck fluid level after filling.
Air Conditioning
Refrigerant Capacity
If you do your own service work, you'll need the proper
service manual. See ªDoing Your Own Service Workº in
the Index for additional information. It is recommended
that service work on your air conditioning system be
performed by a qualified technician.
Air Conditioning
Refrigerant R
-134a 2.2 lbs. (1.0 kg). . . . . . . . . . . . .
Use Refrigerant Oil, R134a Systems
Normal Maintenance
Replacement Parts
Engine Air Cleaner/Filter Element A1208C*. . . . . . .
Fuel Filter Element GF
-627* . . . . . . . . . . . . . . . . . . .
Engine Oil Filter PF
-58* . . . . . . . . . . . . . . . . . . . . . .
Spark Plugs PT16EPR
-C13* . . . . . . . . . . . . . . . . . . .
(GM Part 12561466)
Gap: 0.050 inches (1.3 mm)
Windshield Wiper Blade
(Hook Type) 22 inches (56.5 cm). . . . . . . . . . . . . . .
*AC Delco
� part number.
Page 382 of 399

7-21 Fuel System Inspection
Inspect the complete fuel system for damage or leaks.
Engine Cooling System Inspection
Inspect the hoses and have them replaced if they are
cracked, swollen or deteriorated. Inspect all pipes,
fittings and clamps; replace as needed. Clean the outside
of the radiator and air conditioning condenser. To help
ensure proper operation, a pressure test of the cooling
system and pressure cap is recommended at least once
a year.
Throttle System Inspection
Inspect the throttle system for interference or binding,
and for damaged or missing parts. Replace parts as
needed. Replace any components that have high effort
or excessive wear. Do not lubricate accelerator and
cruise control cables.
Brake System Inspection
Inspect the complete system. Inspect brake lines and
hoses for proper hook
-up, binding, leaks, cracks,
chafing, etc. Inspect disc brake pads for wear and rotors
for surface condition. Inspect other brake parts,
including calipers, parking brake, etc. You may need to
have your brakes inspected more often if your driving
habits or conditions result in frequent braking.