Page 67 of 427

2-
2-1
Section 2 Features and Controls
Here you can learn about the many standard and optional features on your vehicle, and information on starting,
shifting and braking. Also explained are the instrument panel and the warning systems that tell you if everything is
working properly
-- and what to do if you have a problem.
2
-2 Windows
2-4 Keys
2-6 Door Locks
2-8 Keyless Entry System
2
-11 Midgate�
2-22 Tailgate
2-23 Theft
2-24 Content Theft-Deterrent
2
-26 Passlock�
2-26 New Vehicle ªBreak-Inº
2-27 Ignition Positions
2-28 Starting Your Engine
2-29 Engine Coolant Heater (If Equipped)
2-31 Automatic Transmission Operation
2-35 Parking Brake
2-36 Shifting Into PARK (P)
2-38 Shifting Out of PARK (P)
2-39 Parking Over Things That Burn
2-39 Engine Exhaust
2-40 Running Your Engine While You're Parked
2-41 Road Sensing Suspension
2-41 Locking Rear Axle2
-41 All-Wheel Drive
2-41 Horn
2-42 Tilt Wheel
2-42 Turn Signal/Multifunction Lever
2-49 Exterior Lamps
2-53 Interior Lamps
2-55 Mirrors
2-62 Storage Compartments
2-64 Cargo Cover Panels
2-81 Ashtray and Cigarette Lighter
2-82 Accessory Power Outlets
2-83 Analog Clock
2
-84 OnStar� System (If Equipped)
2-87 Sunroof (If Equipped)
2
-88 Homelink� Transmitter
2-92 The Instrument Panel - Your
Information System
2
-94 Instrument Panel Cluster
2-96 Warning Lights, Gages and Indicators
2-109 Message Center
2-117 Secondary Information Center (SIC)
2
-124 Ultrasonic Rear Parking Assist (URPA)
Page 85 of 427
2-19
Lowering the Midgate
The Midgate can be lowered to allow the cargo area of
your vehicle to extend into the cab. The rear glass can be
either installed in its normal position, or it can be
removed and stored in the rear glass storage pocket.
To lower the Midgate, do the following:
1. Fold the rear seats. The front seats might have to
be moved forward slightly to allow the rear seats to
fold. See ªRear Seatsº in the Index for more
information.
At this point you may choose to remove the rear
glass following the instructions given previously or
leave the rear glass in place.
Rear Glass in Normal Position
2. Standing outside of the vehicle, place one hand
against the Midgate so it does not fall forward
unexpectedly. Turn the Midgate handle clockwise
and pull the Midgate toward you.
Page 86 of 427
2-20
3. Lower the Midgate until it is flat.Rear Glass Stored in Glass Storage Pocket
Standing outside of the vehicle, place one hand against
the crossbar so the Midgate does not fall forward
unexpectedly. Turn the Midgate handle clockwise and
pull the Midgate toward you.
Page 146 of 427

2-80
Luggage Carrier
You can load things on top of your vehicle with
this feature.
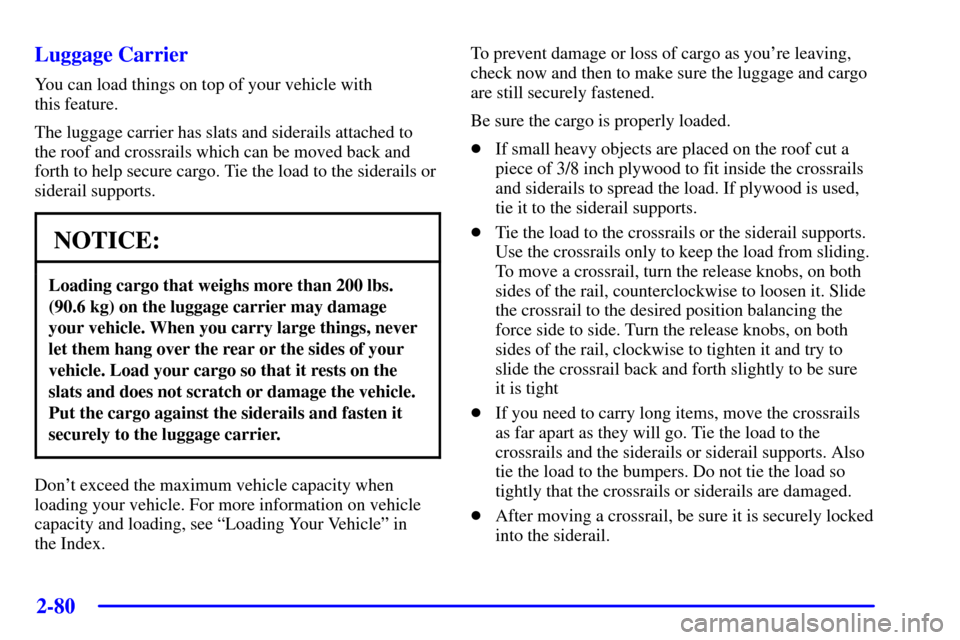
The luggage carrier has slats and siderails attached to
the roof and crossrails which can be moved back and
forth to help secure cargo. Tie the load to the siderails or
siderail supports.
NOTICE:
Loading cargo that weighs more than 200 lbs.
(90.6 kg) on the luggage carrier may damage
your vehicle. When you carry large things, never
let them hang over the rear or the sides of your
vehicle. Load your cargo so that it rests on the
slats and does not scratch or damage the vehicle.
Put the cargo against the siderails and fasten it
securely to the luggage carrier.
Don't exceed the maximum vehicle capacity when
loading your vehicle. For more information on vehicle
capacity and loading, see ªLoading Your Vehicleº in
the Index.To prevent damage or loss of cargo as you're leaving,
check now and then to make sure the luggage and cargo
are still securely fastened.
Be sure the cargo is properly loaded.
�If small heavy objects are placed on the roof cut a
piece of 3/8 inch plywood to fit inside the crossrails
and siderails to spread the load. If plywood is used,
tie it to the siderail supports.
�Tie the load to the crossrails or the siderail supports.
Use the crossrails only to keep the load from sliding.
To move a crossrail, turn the release knobs, on both
sides of the rail, counterclockwise to loosen it. Slide
the crossrail to the desired position balancing the
force side to side. Turn the release knobs, on both
sides of the rail, clockwise to tighten it and try to
slide the crossrail back and forth slightly to be sure
it is tight
�If you need to carry long items, move the crossrails
as far apart as they will go. Tie the load to the
crossrails and the siderails or siderail supports. Also
tie the load to the bumpers. Do not tie the load so
tightly that the crossrails or siderails are damaged.
�After moving a crossrail, be sure it is securely locked
into the siderail.
Page 148 of 427
2-82
Sun Visors
To block out glare, you can swing down the visors. You
can also swing them out to help block glare at the front
and side windows.
Illuminated Visor Vanity Mirrors
Pull the sunvisor down and lift the mirror cover to turn
on the lamps. There is a slide switch to adjust the
intensity of the lamps.
Accessory Power Outlets
With accessory power outlets you can power auxiliary
electrical equipment such as a cellular telephone or
CB radio.
Your vehicle is equipped with many accessory
power outlets.
One outlet is located on the instrument panel near the
analog clock. Lift up the door to access the power outlet.
There are also two power outlets located on the back of
the center console. Lift up the door to access the outlets.
NOTICE:
Adding some electrical equipment to your vehicle
can damage it or keep other things from working
as they should. This wouldn't be covered by your
warranty. Check with your dealer before adding
anything that exceeds the amperage rating.
Page 149 of 427
2-83
When adding an electrical accessory or an electrical
component to your vehicle, be sure to follow the
instructions included with it.
Certain power accessory plugs may not be compatible to
the accessory power outlets and could result in blown
vehicle or adapter fuses. If you experience a problem,
see your dealer for additional information on the
accessory power plugs.
NOTICE:
Power outlets are designed for accessory plugs
only. Do not hang any type of accessory or
accessory bracket from the plug. Improper use of
the power outlet can cause damage not covered
by your warranty.
Analog Clock
To adjust the clock,
do the following:
1. Locate the adjustment button to the lower left corner
of the clock.
2. Push and hold the adjustment button to spin the
clock hands. Release the button before you get to
the desired time.
3. Push and release the button to increase the time
by one minute increments until the desired time
is reached.
Page 159 of 427
2-93
The main components of your instrument panel are the following:
A. Dome Override Button
B. Exterior Lamps Control
C. Air Outlets
D. Folding Mirrors Button
E. Cargo/Top
-Box Lamps Button
F. Multifunction Lever
G. Instrument Panel Cluster
H. Shift Lever
I. Tow/Haul Selector Button
J. Audio System
K. Comfort Control System
L. Instrument Panel Fuse Block
M. Hood ReleaseN. Fog Lamps Button
O. Audio Steering Wheel Controls
P. Center Instrument Panel Utility Block
Q. Tilt Lever
R. Parking Brake Release
S. Secondary Information Center (SIC)
T. Rear Window Defogger Button
U. Compact Disc Changer
V. Ashtray
W. Clock
X. Ultrasonic Rear Parking Assist Button
Y. StabiliTrak Button
Z. OnStar Buttons
Page 194 of 427

3-2
Comfort Controls
Electronic Climate Control System
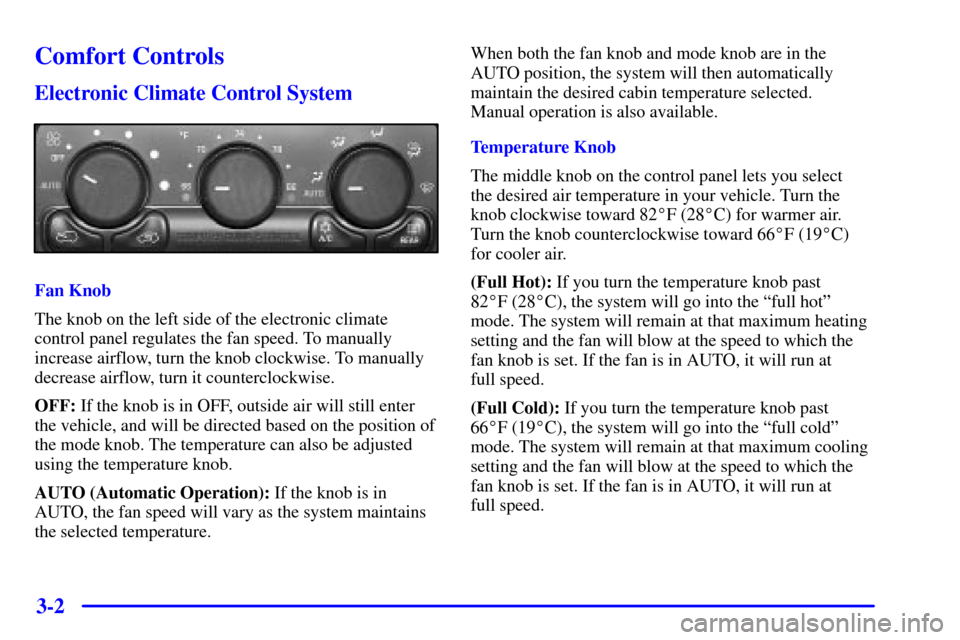
Fan Knob
The knob on the left side of the electronic climate
control panel regulates the fan speed. To manually
increase airflow, turn the knob clockwise. To manually
decrease airflow, turn it counterclockwise.
OFF: If the knob is in OFF, outside air will still enter
the vehicle, and will be directed based on the position of
the mode knob. The temperature can also be adjusted
using the temperature knob.
AUTO (Automatic Operation): If the knob is in
AUTO, the fan speed will vary as the system maintains
the selected temperature.When both the fan knob and mode knob are in the
AUTO position, the system will then automatically
maintain the desired cabin temperature selected.
Manual operation is also available.
Temperature Knob
The middle knob on the control panel lets you select
the desired air temperature in your vehicle. Turn the
knob clockwise toward 82�F (28�C) for warmer air.
Turn the knob counterclockwise toward 66�F (19�C)
for cooler air.
(Full Hot): If you turn the temperature knob past
82�F (28�C), the system will go into the ªfull hotº
mode. The system will remain at that maximum heating
setting and the fan will blow at the speed to which the
fan knob is set. If the fan is in AUTO, it will run at
full speed.
(Full Cold): If you turn the temperature knob past
66�F (19�C), the system will go into the ªfull coldº
mode. The system will remain at that maximum cooling
setting and the fan will blow at the speed to which the
fan knob is set. If the fan is in AUTO, it will run at
full speed.