2002 BMW Z3 tow
[x] Cancel search: towPage 12 of 187

Contents
Owner service procedures
Advanced technology
Technical data
Replacement procedures:
Onboard tool kit136
Windshield wiper blades136
Lamps and bulbs137
Master key with battery
lamp143
Remote control144
Wheel change146
Battery153
Fuses156
In case of electrical
malfunction:
Power convertible top157
Fuel filler door157
Assistance, giving and
receiving:
Jump-starting158
Towing the vehicle159Adaptive Transmission Control
(ATC)164
Airbags164
Automatic Stability Control plus
Traction (ASC+T)/Dynamic
Stability Control (DSC)165
Car radio reception166
Safety belt tensioner166Engine specifications170
Dimensions171
Weights172
Capacities173
Electrical system174
Drive belts174
Page 40 of 187

40n
Manual convertible top, roadsterWeather protectionThe convertible top combines reliable
protection from the elements with
simple, convenient operation. Here are
a few tips to ensure that you have plea-
sure with your roadster.
It is advisable to close the convertible
top when the vehicle is parked. The
closed convertible top not only protects
the passenger compartment from
unforeseeable damage from the
weather, it also provides a certain
degree of theft protection. In addition,
keep valuables only in the locked
luggage compartment, even with the
convertible top closed.
Never mount a roof-mounted luggage
rack on the convertible top. Please
contact your BMW center for suitable
securing devices and additional acces-
sories.
To prevent damage, do not operate the
convertible top at temperatures at the
freezing point.
To open 1. With the doors closed, lower the side
windows a few inches (centimeters)
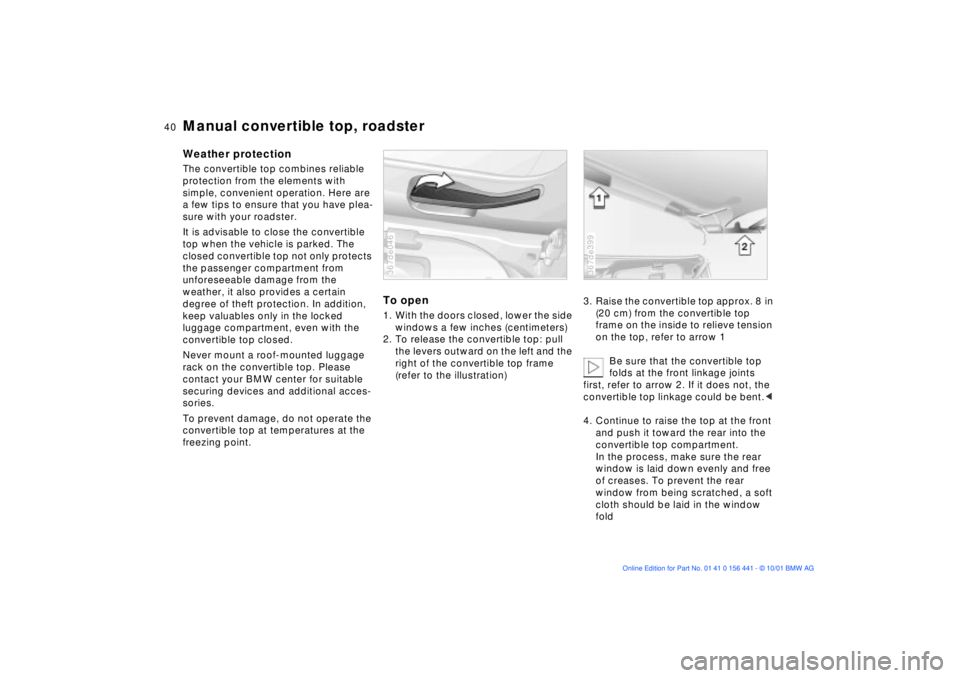
2. To release the convertible top: pull
the levers outward on the left and the
right of the convertible top frame
(refer to the illustration)367de046
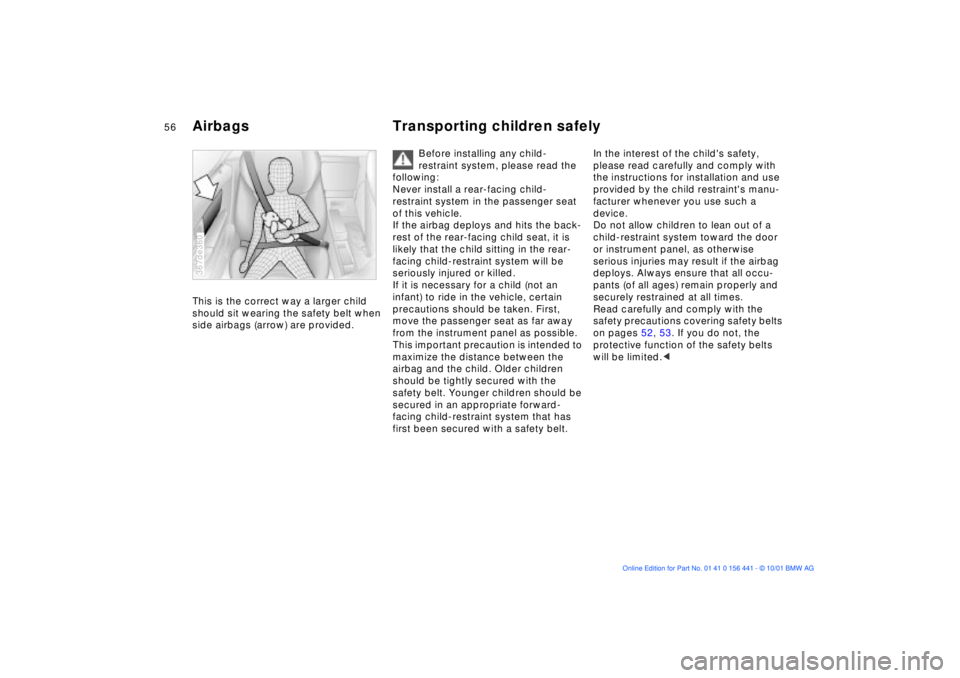
3. Raise the convertible top approx. 8 in
(20 cm) from the convertible top
frame on the inside to relieve tension
on the top, refer to arrow 1
Be sure that the convertible top
folds at the front linkage joints
first, refer to arrow 2. If it does not, the
convertible top linkage could be bent.<
4. Continue to raise the top at the front
and push it toward the rear into the
convertible top compartment.
In the process, make sure the rear
window is laid down evenly and free
of creases. To prevent the rear
window from being scratched, a soft
cloth should be laid in the window
fold367de399
Page 56 of 187

56n
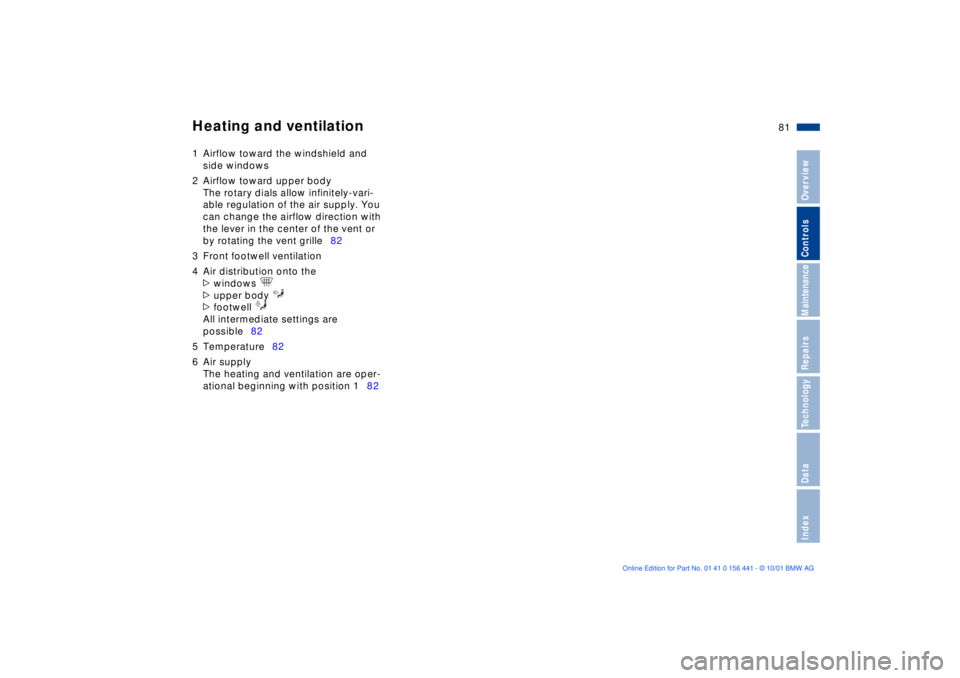
Airbags Transporting children safely This is the correct way a larger child
should sit wearing the safety belt when
side airbags (arrow) are provided.367de360
Before installing any child-
restraint system, please read the
following:
Never install a rear-facing child-
restraint system in the passenger seat
of this vehicle.
If the airbag deploys and hits the back-
rest of the rear-facing child seat, it is
likely that the child sitting in the rear-
facing child-restraint system will be
seriously injured or killed.
If it is necessary for a child (not an
infant) to ride in the vehicle, certain
precautions should be taken. First,
move the passenger seat as far away
from the instrument panel as possible.
This important precaution is intended to
maximize the distance between the
airbag and the child. Older children
should be tightly secured with the
safety belt. Younger children should be
secured in an appropriate forward-
facing child-restraint system that has
first been secured with a safety belt.
In the interest of the child's safety,
please read carefully and comply with
the instructions for installation and use
provided by the child restraint's manu-
facturer whenever you use such a
device.
Do not allow children to lean out of a
child-restraint system toward the door
or instrument panel, as otherwise
serious injuries may result if the airbag
deploys. Always ensure that all occu-
pants (of all ages) remain properly and
securely restrained at all times.
Read carefully and comply with the
safety precautions covering safety belts
on pages 52, 53. If you do not, the
protective function of the safety belts
will be limited.<
Page 64 of 187

64n
Automatic transmission with Steptronic
*
Turn signals/High beams
Available displays
S M1 M2 M3 M4 M5
Electronic transmission control
module
If the indicator lamp comes on
there is a fault in the transmis-
sion system.
All of the selector lever positions can
continue to be used; in the forward
drive positions, however, the vehicle
will be operating with restricted gear
availability.
If this happens, avoid extreme engine
loads and consult the nearest BMW
center.
367us723
Do not work in the engine
compartment when a drive gear
(forward or reverse) is engaged. If you
do so, the vehicle could move.<
Information on jump-starting, tow-
starting and towing, refer to
pages 158, 159.
1 High beams (blue indicator lamp)
2 Headlamp flasher (blue indicator
lamp)
3 Turn signal indicators (green indicator
lamp and rhythmic clicking of the
relay)
If the indicator lamp and the clicking
from the relay are both faster than
normal, one of the turn signal indicators
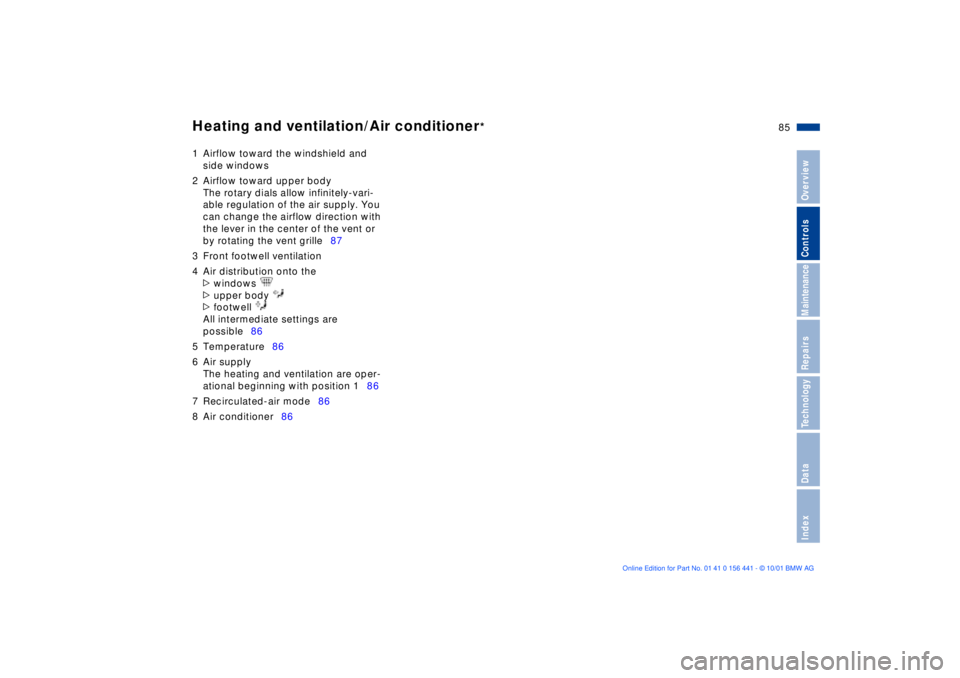
has failed.To signal brieflyPress the lever up to but not beyond
the pressure point. It then returns to the
center position when released.367us024
Page 81 of 187

81n
IndexDataTechnologyRepairsMaintenanceControlsOverview
Heating and ventilation 1 Airflow toward the windshield and
side windows
2 Airflow toward upper body
The rotary dials allow infinitely-vari-
able regulation of the air supply. You
can change the airflow direction with
the lever in the center of the vent or
by rotating the vent grille82
3 Front footwell ventilation
4 Air distribution onto the
>windows
>upper body
>footwell
All intermediate settings are
possible82
5 Temperature82
6 Air supply
The heating and ventilation are oper-
ational beginning with position 182
Page 82 of 187

82n
Heating and ventilationAir distribution
You can direct the airflow onto
the windows , toward the
upper body and into the foot-
well . All intermediate settings are
possible. In this position , a small
volume of air is directed onto the
windows in order to keep them free of
condensation.
A "6 o'clock" position is recommended
as the normal operating setting.
Temperature
In order to increase the temper-
ature of the passenger compart-
ment, turn to the right (red). For
rapid heating, turn completely to the
right. Then select an interior tempera-
ture which is pleasant for you.
Air supply
You can select blower speeds
from 1 to 4. Both heating and
ventilation become more effec-
tive as the air supply rate is increased.
In position 0, the blower and the heater
are switched off.
Draft-free ventilationYou can adjust the air outlets for the
upper body area completely for your
personal comfort:
Use the rotary dial 2 to open and close
the vent throughout an infinitely-vari-
able range. With the levers 1, you can
direct the airflow to the side. Adjust the
airflow up or down by rotating the vent
grill.
Set the outlets so that the air flows past
you and is not directed straight at you.367de224
Rapid ventilation1. Set the blower speed control for the
air supply rate to position 4
2. Turn the rotary temperature control
completely to the left (blue). Then
select an interior temperature which
is pleasant for you
3. Rotary control for air distribution in
position
4. Open the outlets for the upper body
area.367de705
Page 85 of 187

85n
IndexDataTechnologyRepairsMaintenanceControlsOverview
Heating and ventilation/Air conditioner
*
1 Airflow toward the windshield and
side windows
2 Airflow toward upper body
The rotary dials allow infinitely-vari-
able regulation of the air supply. You
can change the airflow direction with
the lever in the center of the vent or
by rotating the vent grille87
3 Front footwell ventilation
4 Air distribution onto the
>windows
>upper body
>footwell
All intermediate settings are
possible86
5 Temperature86
6 Air supply
The heating and ventilation are oper-
ational beginning with position 186
7 Recirculated-air mode86
8 Air conditioner86
Page 86 of 187

86n
Heating and ventilation/Air conditioner
*
Air distribution
You can direct the flow of air
onto the windows , toward
the upper body and into the
footwell . All intermediate settings
are possible. In position , a small
volume of air is directed onto the
windows in order to keep them free of
condensation.
A "6 o'clock" position is recommended
as the normal operating setting.
Temperature
In order to increase the temper-
ature of the passenger compart-
ment, turn to the right (red). For
rapid heating, turn completely to the
right. Then select an interior tempera-
ture which is pleasant for you.
Air supply
You can select blower speeds
from 1 to 4. Both heating and
ventilation become more effec-
tive as the air supply rate is increased.
In position 0, the blower and the heater
are switched off.
Air conditioner
The air is cooled and dehumidi-
fied and Ð depending on the
temperature setting Ð warmed
again when the air conditioner system
is switched on. Depending on the
weather, the windshield may fog over
briefly when the engine is started.
Use the button to switch the air condi-
tioner off at outside temperatures
below approx. 41 7(+5 6). This will
help to prevent condensation from
forming on the windows.
If the windows fog over after switching
the air conditioner off, switch it back
on.
Condensation forms in the air
conditioner system during opera-
tion, which then exits under the vehicle.
Traces of condensed water of this kind
are thus normal.<
Recirculated-air mode
If there are unpleasant odors in
the outside air, you can tempo-
rarily block the supply of the
incoming air. The system then recircu-
lates the air currently within the vehicle.
If the windows fog over in the
recirculated-air mode, switch this
mode off and increase the air supply as
required.<