Page 41 of 159

41n
OverviewControlsMaintenanceRepairsDataIndex
Convertible top1To
close
2 To open
To open and to closeFrom ignition key position 1, with the
vehicle stationary.
If at all possible, only operate the
convertible top if the engine is running.
This saves unnecessary battery wear.
1. Read and comply with the preceding
safety precautions
2. Before opening the convertible top,
make sure that the convertible top
compartment panel in the luggage
compartment is lowered, refer to
page 37
3. Make sure that the luggage compart-
ment lid is closed
4. Press and hold the corresponding
button for convertible top operation.
The red indicator lamp will light up
while the convertible top is in motion.
It goes out as soon as the opening or
closing operation has been
completed.
If the red indicator lamp flashes after
the button is released, then the
opening or closing operation is not
yet completed. The sequence can be
continued in the desired direction by
pressing this button.
If the yellow indicator lamp lights up
continuously with the button
pressed, then the convertible top
compartment panel is raised and the
convertible top cannot be moved,
refer to step 2.
The automatic sequence will be
interrupted immediately if release
the button that operates the top. The
sequence can be continued in the
desired direction by pressing this
button.<
During convertible top operation
the rear window moves toward the
passenger compartment. To prevent
injuries, make sure that the closing path
of the convertible top is unobstructed.<
When operating the convertible top, the
windows will lower slightly when you
press the button, and after the opening
or closing operation has finished, they
will go back up, if you keep holding the
button down for more than 2 seconds
after the indicator lamp has gone out.
The luggage compartment lid cannot be
opened while the convertible top is in
motion.
Do not close the side power
windows using the buttons if the
convertible top operation has been
interrupted.<
If the convertible top has been
stored in the convertible top
compartment for longer periods, e.g.
during the winter months while the
hardtop is being used, it may be neces-
sary to manually support the first auto-
matic closing operation: if the
convertible top should halt right before
the closing phase is completed, press
against the front part of the convertible
top frame from the outside to help the
closing process along. Keep pressing
the button while doing so until the top
starts up again on its own.<
Page 42 of 159

42n
Convertible top
If the opening or closing operation
is interrupted, the convertible top
remains in the respective position for
15 minutes, and the sequence can be
continued in the desired direction with
the button. After that, the convertible
top can be moved again and, if it is an
emergency situation, you may have to
help the top along manually. This can
also be done in ignition key position 0.
In certain cases, the luggage compart-
ment lid cannot be opened if the
opening or closing operation has been
interrupted.<
Convenience operation from the
driver's door lockRefer to page 29.
Closing manually in the event of
an electrical malfunction1 Emergency operation
2 Allen wrench
3 Recess
Only actuate the convertible top
manually to close it, however
never to open it, as the convertible top
compartment lid cannot be locked and
would open during driving.<
Manual closing is best carried out
with two persons from outside
with the driver's door open and the
driver's seat folded forward. No one is
to be in the rear seat while you are
doing this.<
1. Remove the center piece between
the rear seats. Take the trim off of the
guide rod and flip it forward. Press
down hard on the emergency lock 1.
After a brief pause, the mechanisms
for the convertible top compartment
will be unlocked
If the mechanisms for the convert-
ible top compartment lid do not
unlock, then insert the Allen wrench 2
into the recess 3 and turn clockwise
until the mechanisms unlock.c
2. If the luggage compartment lid is
closed, open the convertible top
compartment lid up as far as the stop
will allow
Page 43 of 159

43n
OverviewControlsMaintenanceRepairsDataIndex
Convertible top3. Lift out the convertible top by holding
on to the lateral guide section 1 and
the front convertible top frame 2.
Position the rear convertible top
frame vertically and flip the convert-
ible top compartment lid downward
and lay it down. Flip the rear convert-
ible top frame downward
4. Lift out the cover panel that is in the
center of the front convertible top
frame
5. Put the Allen wrench 2 (refer to
page 42) into the hex slot (arrow)
6. Pull down on the front convertible
top frame as far as possible.
Complete the closing process by
continuing to turn the wrench clock-
wise. Do this until the front convert-
ible top frame has locked onto the
windshield frame. The rear convert-
ible top frame will automatically be
pressed down onto the convertible
top compartment lid and because of
the tension, will close completely.
The closing operation must be
completed, as otherwise damage
and/or injuries may result.<
Please consult your BMW center
to have the defect corrected.<
Page 44 of 159

44n
For relaxed and fatigue-free driving you
should select a sitting position that
reflects your personal requirements.
Correct position combines with safety
belts and airbags to enhance occupant
safety in the event of an accident. To
ensure that the vehicle's safety systems
provide you with optimal protection, we
request that you direct your careful
attention to the following section.
For supplementary information on
transporting children, refer to page 54.
Sitting correctly with airbags
Always maintain an adequate
distance between yourself and the
airbags. Always hold the steering wheel
by the rim to keep any chance of injury
to hands or arms to an absolute
minimum should the airbag be
deployed. Never allow any objects,
individuals or animals to obstruct the
areas between passengers and airbags.
Never use the front airbag's cover as a
storage tray or support for objects of
any kind. Never allow front passengers
to rest their feet or legs on the airbag
cover.<
For airbag locations and additional
information on airbags refer to page 53.
Safe with safety belts
Never allow more than one person
to wear a single safety belt. Never
allow infants or small children to ride in
a passenger's lap. Avoid twisting the
belt while routing it firmly across the
pelvis and shoulder, wear it as snugly
against your body as possible. Do not
allow the belt to rest against hard or
fragile objects in your pockets. Do not
route the belt across your neck, or run it
across sharp edges. Be sure that the
belt does not become caught or
jammed. Avoid wearing bulky clothing
and pull on the lap belt periodically to
retension it over your shoulders. In the
event of a frontal impact, a loose lap
belt could slide over the hips, leading to
abdominal injury. In addition, the safety
belt's restraint effectiveness is reduced
if the belt is worn loosely. Expectant
mothers should always wear their
safety belts, taking care to position the
lap belt against the lower hips, where it
will not exert pressure against the
abdominal area. Leave the rear safety
belts in the holders, if they are not
needed, to avoid unwanted movement
from the safety belts at high speeds.<
For information on using the safety
belts, refer to page 48.
When adjusting your seat, always
observe the following precautions
Never try to adjust your seat while
operating the vehicle. The seat
could respond with an unexpected
movement, and the ensuing loss of
vehicle control could lead to an acci-
dent. Never ride with the backrest
reclined to an extreme angle (especially
important for the front passenger to
remember). If you do so, there is a risk
that you will slide under the safety belt
in an accident, thus reducing the
protection provided by the safety belt.
With the wind deflector in place: never
push the front seats all the way back to
avoid damaging the wind deflector.<
Correct sitting position Seats
Page 45 of 159
45n
OverviewControlsMaintenanceRepairsDataIndex
Seats1 Tilt angle
2 Forward/backward adjustment
3 Cushion height
4 Backrest angle
Thigh support Pull the lever and adjust the position of
the cushion for thigh support as
desired.
Adjusting the lumbar support
*
You can adjust the backrest's contour
for additional support in the curvature
of your spine's lumbar region.
The upper hips and spinal column
receive supplementary support to help
you maintain a relaxed, upright position.
>Press the front/rear of switch:
increase/decrease curvature
>Press the upper/lower end of the
switch: increase the upper/lower
curvature.
Page 46 of 159
46n
Head restraintsFront head restraints1 Height
Head restraints reduce the risk
of spinal injury in the event of an
accident.
Adjust the head restraint so that its
center is approximately at the height of
your ears.
When moving the head restraints up or
down, do not grab on between the
head restraint and the upper edge of
the backrest to avoid the possibility of
injury.<
2 Tilt angle
Position the head restraints manually in
the preferred position.
Rear head restraints
The rear head restraints may only
be lowered if there are no passen-
gers in the rear seats. If you do so, you
are in violation of the law. Raise the rear
head restraints before taking on any
passengers in the back.<
To completely lower the rear head
restraints:
1. Press the button (arrow) and hold it
down
2. Push the head restraint down from
above.
Raising the rear head restraints: raise
the head restraints until you hear them
click into place.
Page 47 of 159

47n
OverviewControlsMaintenanceRepairsDataIndex
Head restraints Entering the rear
Do not remove the rear head
restraints as this would damage
them.<
For further information, please consult
your BMW center.
Do not use the rear head
restraints as storage shelves.
Always keep the travel path for the roll-
over protection system free and clear.
Under no circumstances should you put
any kind of cover (antimacassar) on the
head restraints (refer also to the
labeling on the head restraints).<
The Seat-integrated safety belt system
(SGS) allows for easy access to the
rear.
1. Lift the lever 1 up and tilt the back-
rest forward
2. Press and hold button 2 in driving
direction until the seat moves to the
desired position
3. After entering the rear, fold back and
lock the backrest
4. Press button 2 opposite the direction
of travel and hold. The seat moves
back into its previous position. If the
button 2 is released beforehand, the
seat stops in the respective position.
You can lock a backrest that has
been tilted forward. This is prac-
tical, for example, when entering the
rear seat while the vehicle is parked on
a hill. To do this, press against the
backrest until you hear it click into
place. It does not need to be released
with the lever 1 to tip it back into place
again.<
Lock both backrests while driving,
otherwise there is a danger of an
unexpected movement causing an
accident.<
The indicator lamp in the instrument
cluster flashes, when the backrest is
not locked, refer to page 18.
Page 48 of 159

48n
Safety belts Seat and mirror memory
Drive with your safety belt onEven though there is an airbag, wear a
safety belt every time you get in the
vehicle, because airbags enhance
safety by providing added protection.
Before putting your safety belts on
in the rear, take them out of the
holder.< To closeMake sure you hear the lock engage in
the belt buckle. To open1. Press the red button in the belt
buckle
2. Hold the belt
3. Guide the belt back into its reel.
Safety belt height adjustmentThe front safety belt automatically
adjusts your body size via the setting of
the head restraint height, refer to
page 46.
If the safety belt system has been
subjected to the stresses involved
in an accident or otherwise damaged:
Have the entire safety belt mechanism
replaced by your BMW center,
including the safety belt tensioner. In
addition, have your BMW center
inspect the safety belt anchors. If a
child-restraint system was in the
vehicle during an accident, consult the
manufacturer's instructions regarding
replacement.<
You can store and recall three different
driver's seat and outside mirror posi-
tions.
The setting for the lumbar support
is not stored in memory.
2. Adjust your seat and outside mirrors
to the desired position.
3. Press the
M
EMORY button: the indi-
cator lamp in the button lights up
4. Press memory button 1, 2 or 3, as
desired. The indicator lamp goes out.
 1
1 2
2 3
3 4
4 5
5 6
6 7
7 8
8 9
9 10
10 11
11 12
12 13
13 14
14 15
15 16
16 17
17 18
18 19
19 20
20 21
21 22
22 23
23 24
24 25
25 26
26 27
27 28
28 29
29 30
30 31
31 32
32 33
33 34
34 35
35 36
36 37
37 38
38 39
39 40
40 41
41 42
42 43
43 44
44 45
45 46
46 47
47 48
48 49
49 50
50 51
51 52
52 53
53 54
54 55
55 56
56 57
57 58
58 59
59 60
60 61
61 62
62 63
63 64
64 65
65 66
66 67
67 68
68 69
69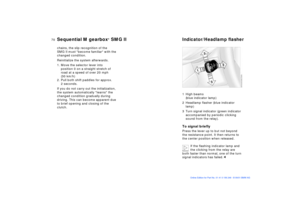 70
70 71
71 72
72 73
73 74
74 75
75 76
76 77
77 78
78 79
79 80
80 81
81 82
82 83
83 84
84 85
85 86
86 87
87 88
88 89
89 90
90 91
91 92
92 93
93 94
94 95
95 96
96 97
97 98
98 99
99 100
100 101
101 102
102 103
103 104
104 105
105 106
106 107
107 108
108 109
109 110
110 111
111 112
112 113
113 114
114 115
115 116
116 117
117 118
118 119
119 120
120 121
121 122
122 123
123 124
124 125
125 126
126 127
127 128
128 129
129 130
130 131
131 132
132 133
133 134
134 135
135 136
136 137
137 138
138 139
139 140
140 141
141 142
142 143
143 144
144 145
145 146
146 147
147 148
148 149
149 150
150 151
151 152
152 153
153 154
154 155
155 156
156 157
157 158
158
