2002 BMW 745LI SEDAN turn signal
[x] Cancel search: turn signalPage 3 of 208
Inhaltsverzeichnis
Contents
Notes
6Using this Owner's Manual
6Symbols used
7The individual vehicle
7Editorial notice
8For you own safety
9REPORTING SAFETY DEFECTS
Cockpit
12Driver's side Ð Controls and displays
16Comfort and convenience Ð Controls
and displays
18Buttons in steering wheel
Control Center
19The concept
19Controller
19Control Display
20Symbols and lists
22Menus in Control Display
23Assistance window*
Voice command
25Voice command system*
25Voice commands
27Notices
27The notebook
29Brief commands
Opening and closing
34Keys
35Central locking system
35Opening and closing Ð from outside
37Opening and closing Ð from inside
38Doors
38Luggage compartment lid 40Luggage compartment
40Alarm system
42Electric power windows
43Sliding/tilt sunroof*
Adjustments
45Correct sitting position
45Seats
48Head restraints
50Safety belts
50Heated seats*
51Active seat ventilation*
52Active seat*
52Mirror
53Steering wheel adjustment
54Seat, mirror and steering wheel
memory
55Airbags
57Transporting children safely
58LATCH child-restraint system
59Child-safety locks
59Car Memory, Key Memory
Driving
61Ignition lock
62Starting the engine
62Switching off engine
62Parking brake
66Automatic transmission with L mode
69Automatic transmission with
Steptronic
71Turn signal indicators/headlamp
flasher
71Wiper system
73Washer fluid
© 2001 Bayerische Motoren Werke
Aktiengesellschaft
Munich, Germany
Reprints, in whole or part, approved
exclusively with written permission of
BMW AG, Munich.
Order No. 01 40 0 156 097
US X/2001
Printed in Germany
Printed on environmentally friendly paper
(bleached without chlorine, suitable for
recycling).
Page 14 of 208

At a glanceControlsDriving tipsCommunicationsNavigationEntertainmentMobilityReference
13
1
Rear window sun blind109
2
Rear window safety switch42
3
Electric power windows42
4
Exterior mirrors52
5
Parking brake62
6
Parking lamps and low beams96
7
Instrument lighting97
8
Turn signal indicators71
High beams, headlamp flasher97
Computer81,
Check Control80
Computer81
Standing lamps97
9
Steering wheel18
10
Info Display14
11
Automatic transmission lever66
12
Ignition lock61
13
Switching ignition on and off,
starting the engine62
14
Windshield wipers71
Rain sensor71
15
Park Distance Control (PDC)88
16
Horn: the entire surface
17
Steering wheel heating53
Steering wheel adjustment53
18
Unlocking the luggage
compartment39
19
Programmable cruise control73
20
Front fog lamps97
Front fog lamps
21
Opening the hood175
Page 16 of 208
At a glanceControlsDriving tipsCommunicationsNavigationEntertainmentMobilityReference
15
Indicator and warning lamps
Technology that monitors itself
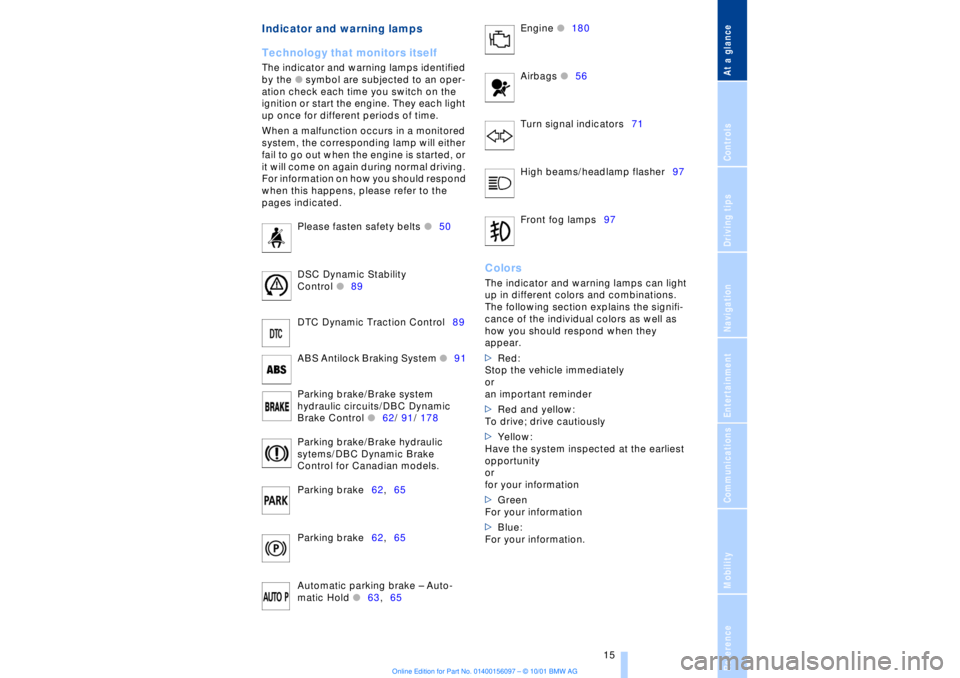
The indicator and warning lamps identified
by the
l
symbol are subjected to an oper-
ation check each time you switch on the
ignition or start the engine. They each light
up once for different periods of time.
When a malfunction occurs in a monitored
system, the corresponding lamp will either
fail to go out when the engine is started, or
it will come on again during normal driving.
For information on how you should respond
when this happens, please refer to the
pages indicated.
Please fasten safety belts
l
50
DSC Dynamic Stability
Control
l
89
DTC Dynamic Traction Control89
ABS Antilock Braking System
l
91
Parking brake/Brake system
hydraulic circuits/DBC Dynamic
Brake Control
l
62/ 91/ 178
Parking brake/Brake hydraulic
sytems/DBC Dynamic Brake
Control for Canadian models.
Parking brake62,65
Parking brake62,65
Automatic parking brake Ð Auto-
matic Hold
l
63,65 Engine
l
180
Airbags
l56
Turn signal indicators71
High beams/headlamp flasher97
Front fog lamps97
ColorsThe indicator and warning lamps can light
up in different colors and combinations.
The following section explains the signifi-
cance of the individual colors as well as
how you should respond when they
appear.
>Red:
Stop the vehicle immediately
or
an important reminder
>Red and yellow:
To drive; drive cautiously
>Yellow:
Have the system inspected at the earliest
opportunity
or
for your information
>Green
For your information
>Blue:
For your information.
Page 38 of 208
At a glanceControlsDriving tipsCommunicationsNavigationEntertainmentMobilityReference
37
Compliance statement:
This device complies with part 15 of the
FCC Rules. Operation is subject to the
following two conditions:
>This device may not cause harmful inter-
ference, and
>this device must accept any interference
received, including interference that may
cause undesired operation.
Any unauthorized modifications or
changes to these devices could void
the user's authority to operate this equip-
ment.
Turning the key a second time unlocks all of
the remaining doors, the luggage compart-
ment lid and the fuel filler door.
You can have a signal set as an
acknowledgment message that the
vehicle is closed correctly.< Convenience operation You also have the option of operating the
windows and the sliding/tilt sunroof from
the driver's door lock.
>To open:
With the door closed, turn the key to the
"unlock" position and hold it there
>To close:
With the door closed, turn the key to the
"lock" position and hold it there.
Watch during the closing process to
be sure that no one is injured.
Releasing the key stops the operation.<
Manual operation (in the event of an electrical malfunction)
You can turn the key all the way to the right
or left in the door lock or engage or release
the locking mechanism in the driver's door. Opening and closing Ð from
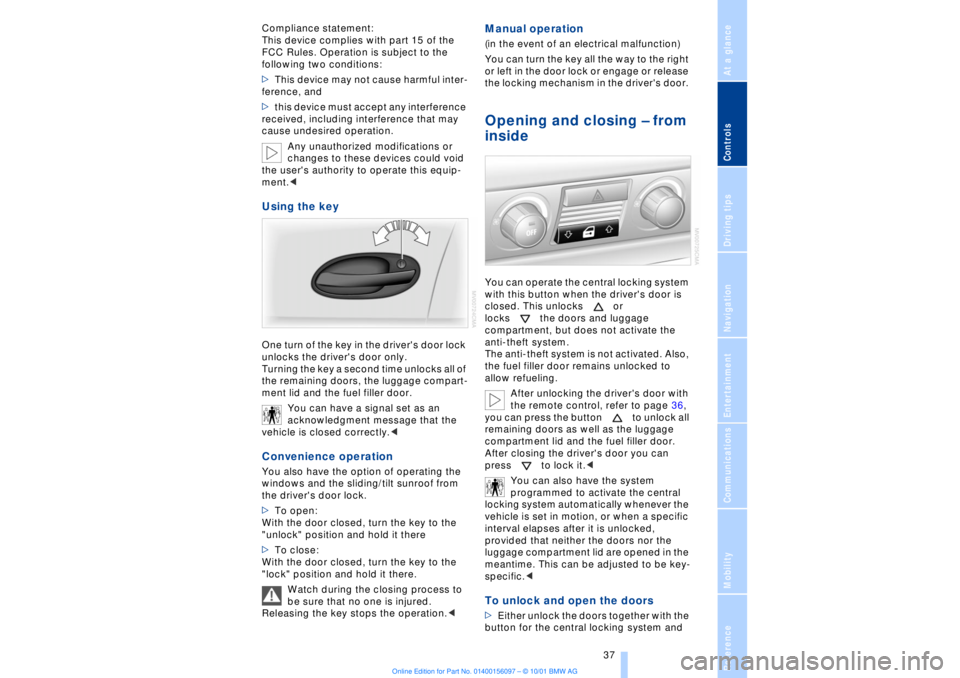
inside You can operate the central locking system
with this button when the driver's door is
closed. This unlocks or
locks the doors and luggage
compartment, but does not activate the
anti-theft system.
The anti-theft system is not activated. Also,
the fuel filler door remains unlocked to
allow refueling.
After unlocking the driver's door with
the remote control, refer to page 36,
you can press the button to unlock all
remaining doors as well as the luggage
compartment lid and the fuel filler door.
After closing the driver's door you can
press to lock it.<
You can also have the system
programmed to activate the central
locking system automatically whenever the
vehicle is set in motion, or when a specific
interval elapses after it is unlocked,
provided that neither the doors nor the
luggage compartment lid are opened in the
meantime. This can be adjusted to be key-
specific.< To unlock and open the doors >Either unlock the doors together with the
button for the central locking system and
Page 72 of 208

At a glanceControlsDriving tipsCommunicationsNavigationEntertainmentMobilityReference
71
vehicle could start to roll if parked on a
steep slope.< To re-engage the lockout 1.Disengage the release lever by pressing
it together with the red detent lever,
arrow 1
2.Guide the release lever all the way back
into its original position Ð the transmission
lockout is again engaged
3.Fold up and lock the cover panel. Now Ð
and not before Ð the key may be removed.
Once the transmission lockout has
been re-engaged, the warning in the
Check Control should disappear, and the
symbol in the Info Display should change
from N to P. Should this fail to happen,
there is a danger that the vehicle could
start to roll.<
Information on jump-starting, tow-starting
and towing begins on page 187. Turn signal indicators/
headlamp flasher1High beams Ð blue indicator lamp
2Headlamp flasher Ð blue indicator lamp 3Turn signal indicators Ð the green indi-
cator lamp flashes, accompanied by a peri-
odic ticking from the turn signal indicator
relay.
To use the turn signal indicatorsMove the lever beyond the detent position.
It then returns to the center position when
released. Press the lever as far as the
detent to switch off the turn signals. To signal brieflyPress the lever up to but not beyond the
detent. It then returns to the center position
when released.
If the flashing of the indicator lamp and the
ticking from the relay are both faster than
normal, this indicates that one of the bulbs
is defective; if a trailer is attached, this
could also indicate that one of its turn
signal indicator bulbs is defective. Wiper system1Standard wiper speed: press briefly one
time.
Fast wipe: briefly press twice
2To switch off wipers or for brief wipe
3To activate/deactivate rain sensor
4Cleaning windshield
5Adjusting rain sensor sensitivity level.
The lever automatically returns to its
initial position when released.<
Page 79 of 208
Everything under control
78 warms to its normal operating temperature.
The segments disappear in sequence as
the engine warms to its normal operating
temperature.
Avoid allowing the engine speed to rise as
far as the orange warning sector whenever
possible.
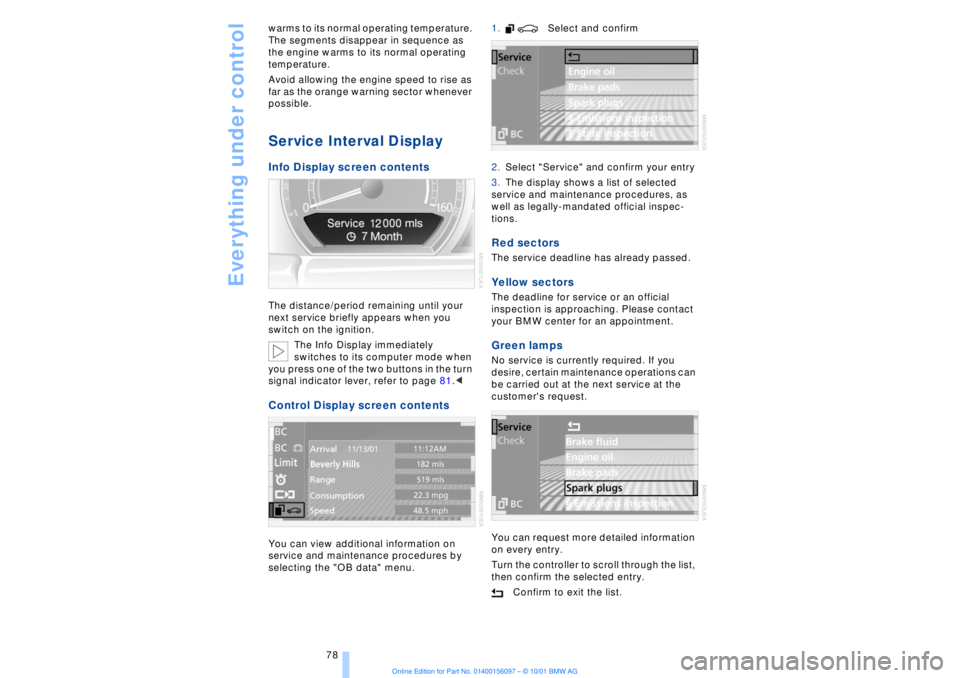
Service Interval Display Info Display screen contents The distance/period remaining until your
next service briefly appears when you
switch on the ignition.
The Info Display immediately
switches to its computer mode when
you press one of the two buttons in the turn
signal indicator lever, refer to page 81.< Control Display screen contents You can view additional information on
service and maintenance procedures by
selecting the "OB data" menu. 1. Select and confirm
2.Select "Service" and confirm your entry
3.The display shows a list of selected
service and maintenance procedures, as
well as legally-mandated official inspec-
tions.
Red sectors The service deadline has already passed. Yellow sectors The deadline for service or an official
inspection is approaching. Please contact
your BMW center for an appointment. Green lamps No service is currently required. If you
desire, certain maintenance operations can
be carried out at the next service at the
customer's request.
You can request more detailed information
on every entry.
Turn the controller to scroll through the list,
then confirm the selected entry.
Confirm to exit the list.
Page 81 of 208
Everything under control
80
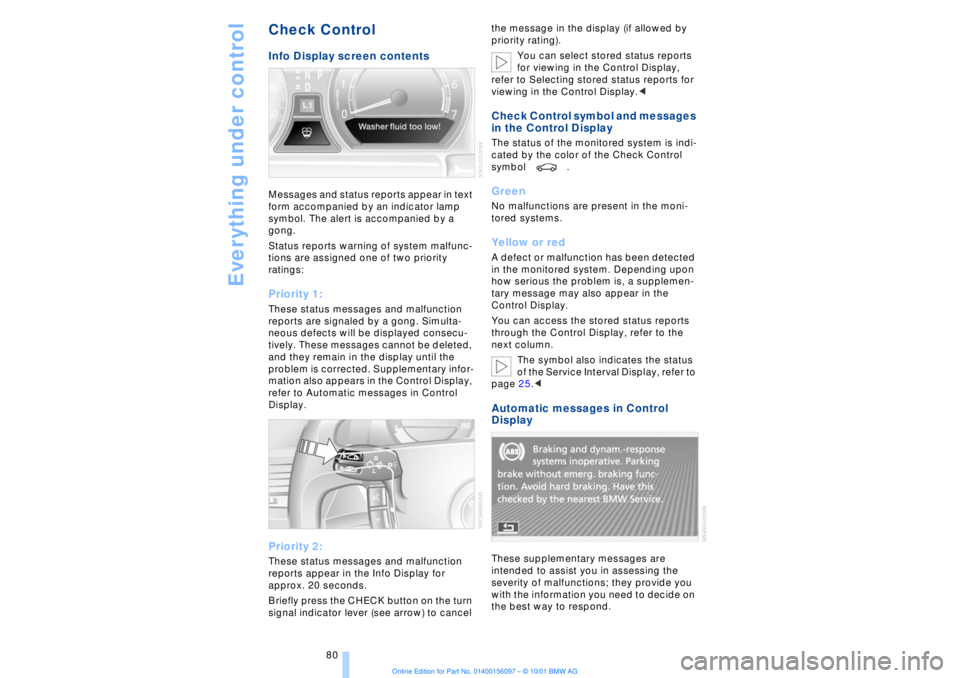
Check Control Info Display screen contents Messages and status reports appear in text
form accompanied by an indicator lamp
symbol. The alert is accompanied by a
gong.
Status reports warning of system malfunc-
tions are assigned one of two priority
ratings: Priority 1: These status messages and malfunction
reports are signaled by a gong. Simulta-
neous defects will be displayed consecu-
tively. These messages cannot be deleted,
and they remain in the display until the
problem is corrected. Supplementary infor-
mation also appears in the Control Display,
refer to Automatic messages in Control
Display. Priority 2: These status messages and malfunction
reports appear in the Info Display for
approx. 20 seconds.
Briefly press the CHECK button on the turn
signal indicator lever (see arrow) to cancel the message in the display (if allowed by
priority rating).
You can select stored status reports
for viewing in the Control Display,
refer to Selecting stored status reports for
viewing in the Control Display.<
Check Control symbol and messages
in the Control Display The status of the monitored system is indi-
cated by the color of the Check Control
symbol . Green No malfunctions are present in the moni-
tored systems. Yellow or red A defect or malfunction has been detected
in the monitored system. Depending upon
how serious the problem is, a supplemen-
tary message may also appear in the
Control Display.
You can access the stored status reports
through the Control Display, refer to the
next column.
The symbol also indicates the status
of the Service Interval Display, refer to
page 25.< Automatic messages in Control
Display These supplementary messages are
intended to assist you in assessing the
severity of malfunctions; they provide you
with the information you need to decide on
the best way to respond.
Page 82 of 208
At a glanceControlsDriving tipsCommunicationsNavigationEntertainmentMobilityReference
81
Select and confirm to cancel the
display.
Selecting stored status reports for
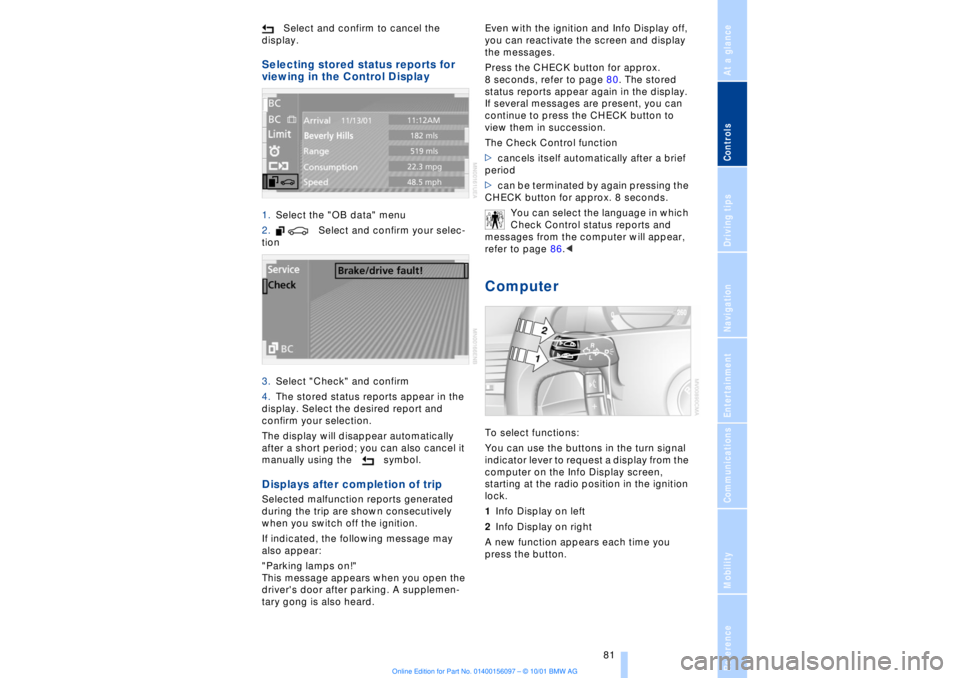
viewing in the Control Display 1.Select the "OB data" menu
2. Select and confirm your selec-
tion
3.Select "Check" and confirm
4.The stored status reports appear in the
display. Select the desired report and
confirm your selection.
The display will disappear automatically
after a short period; you can also cancel it
manually using the symbol. Displays after completion of trip Selected malfunction reports generated
during the trip are shown consecutively
when you switch off the ignition.
If indicated, the following message may
also appear:
"Parking lamps on!"
This message appears when you open the
driver's door after parking. A supplemen-
tary gong is also heard. Even with the ignition and Info Display off,
you can reactivate the screen and display
the messages.
Press the CHECK button for approx.
8 seconds, refer to page 80. The stored
status reports appear again in the display.
If several messages are present, you can
continue to press the CHECK button to
view them in succession.
The Check Control function
>cancels itself automatically after a brief
period
>can be terminated by again pressing the
CHECK button for approx. 8 seconds.
You can select the language in which
Check Control status reports and
messages from the computer will appear,
refer to page 86.<
Computer To select functions:
You can use the buttons in the turn signal
indicator lever to request a display from the
computer on the Info Display screen,
starting at the radio position in the ignition
lock.
1Info Display on left
2Info Display on right
A new function appears each time you
press the button.