2002 BMW 745LI SEDAN towing
[x] Cancel search: towingPage 5 of 208
Inhaltsverzeichnis
Radio
143Select the frequency band
143Station selection
144Storing and retrieving a station
145Weather Band
CD Compact Disc
146Using the buttons to search for music
tracks
147Searching for music tracks in the
Control Display
CD changer
149Starting and stopping the CD changer
149Status displays
149Searching for music tracks in the
Control Display
150Using the buttons to search for music
tracks
MiniDisc MD
151Using the buttons to search for music
tracks
152Searching for music tracks in the
Control Display
Cassette
153Noise suppression
154Music track search
Using your mobile phone
158Safety notice
159Care instructions
159Operation
161Hands-free system
161To make SOS call
161Initial operation
162Getting started
162Telephone directory
163To select a number from the Top 8 list
164Redialing, including numbers not
initially reached
164Missed calls
Refueling
168Fuel filler door
169Fuel specifications
Wheels and tires
170Tire inflation pressure
171Tire condition
172Tire replacement
173Wheel and tire combinations
173Special characteristics of winter tires
173Snow chains*
Under the hood
175Hood
176Engine compartment
176Engine oil
177Coolant
178Brake fluid
Maintenance
179The BMW Maintenance System
179Care
Rules and regulations
180California Proposition 65 Warning
180OBD connector
Replacing components
181Onboard tool kit
181Windshield wiper blades
181Lamps and bulbs
183Changing a tire
185Battery
186Fuses
Help Ð Giving and receiving
187Warning triangle*
187First-aid kit*
187Jump-starting
188Towing
Technical data
192Engine specifications
193Dimensions
194Weights
194Capacities
Everything from A to Z
195Contents
Page 66 of 208
At a glanceControlsDriving tipsCommunicationsNavigationEntertainmentMobilityReference
65
>the hood is opened while the engine is
running
>the luggage compartment is opened
with the transmission in reverse while the
engine is running, and
>when the parking brake is used to bring
the vehicle to a stop.
The indicator lamp shifts from green
to red, and the "Auto P" message disap-
pears from the Info Display.
Before starting off again, briefly press the
button to disengage the parking brake
manually, refer to page 63, or reactivate
Automatic Hold, refer to page 64.
Before leaving the vehicle with the
engine running, always move the
automatic transmission's selector lever to
position P and ensure that the parking
brake is engaged. The vehicle could start to
roll if you fail to observe these precautions.
Never leave an unattended vehicle with the
engine running, as such a vehicle repre-
sents a potential safety hazard.<
Automatic Hold is automatically
deactivated whenever the system
detects any tendency for the wheels to spin
in response to slippery road surfaces. Note
the status displays in the Check Control
panel. You can find more detailed informa-
tion on Check Control on page 80.< Malfunctions In the event of malfunction, the indicator
lamp in the Info Display will light up
yellow, and a status report will appear in
the Check Control panel. Please remember
to observe the supplementary information
provided in the Control Display. To disengage the parking brake
manually You can respond to any interruptions in the
supply of electrical power, for instance, if
the battery is discharged or disconnected,
by releasing the parking brake manually.
Before proceeding to release the
parking brake manually, and each
time you park the vehicle without engaging the parking brake, always ensure that the
automatic transmission's selector lever is
in position P, refer to page 66. Note the
range indicated in the Info Display.
If it is not possible to avoid parking on an
extremely steep slope, use some supple-
mentary means, such as a wheel chock, to
make certain that the vehicle will not roll,
refer to page 184. Otherwise the danger
exists that the vehicle could roll when
parked on a very steep hill.<
Should it be necessary to release the auto-
matic transmission's lockout manually, for
instance, if the battery is discharged,
always adhere to the following sequence:
1.If necessary, start by manually releasing
the parking brake
2.Then release the automatic transmis-
sion's lockout manually, refer to page 70.
Towing and jump-starting, refer to
pages 187 and 188.
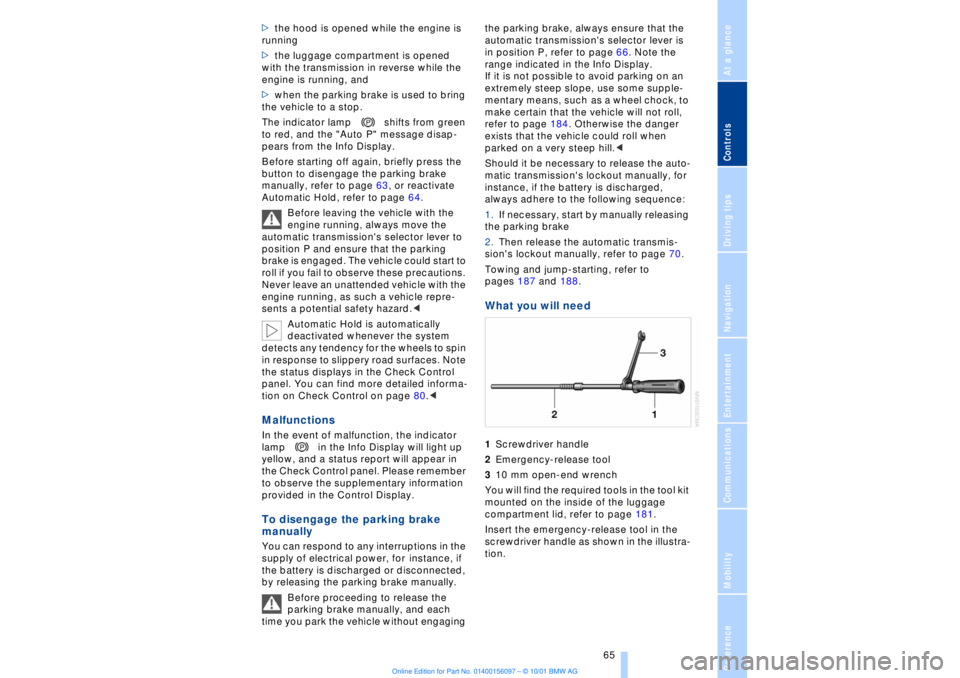
What you will need 1Screwdriver handle
2Emergency-release tool
310 mm open-end wrench
You will find the required tools in the tool kit
mounted on the inside of the luggage
compartment lid, refer to page 181.
Insert the emergency-release tool in the
screwdriver handle as shown in the illustra-
tion.
Page 71 of 208
Driving
70 To obtain maximum acceleration (for
passing maneuvers, etc.) during
operation in the manual mode, use the
kickdown or downshift manually.<
Malfunctions A status message will appear in the Check
Control panel to alert you to any malfunc-
tions in the transmission-control system.
Please note any supplementary information
that appears in the Control Display. The
directional arrows also start to flash in the
Info Display.
While it will remain still possible to move
the selector lever to any desired position,
the transmission will revert to operation in
its default mode with only a limited number
of forward gears.
Some types of malfunction will make it
impossible to engage all gears.
The engine may respond with reduced
output when accelerating from a standing
start.
If this happens, avoid extreme engine loads
and consult the nearest BMW center.
If no status messages appear in the
Info Display you should accelerate
carefully to confirm that you are driving in
the desired direction.
Never work in the engine compartment
with any of the forward or reverse gears
engaged, as the vehicle could start to
move. Engage the parking brake, refer to
page 62.< Manual release of transmission
lockout You can respond to any interruptions in the
supply of electrical power, for instance, if
the battery is discharged or disconnected,
by releasing the transmission lockout
manually.
To prevent the drive wheels from
locking up and sliding, the transmis-
sion lockout must always be released
manually before the vehicle is towed.<
Press the brake pedal before
releasing the transmission lockout manually. If the brakes are not applied, the
vehicle could start to roll if parked on a
steep slope.
The transmission lockout should only be
released for towing. Remember to engage
the transmission lockout when you repark
the vehicle after moving it.
Should it also be necessary to release the
parking brake manually (owing to a
discharged battery, etc.), always adhere to
the following sequence:
1.Start by manually releasing the parking
brake, refer to page 65
2.Then proceed to manually release the
transmission lockout.<
Jump-starting and towing, refer to
pages 187 and 188.
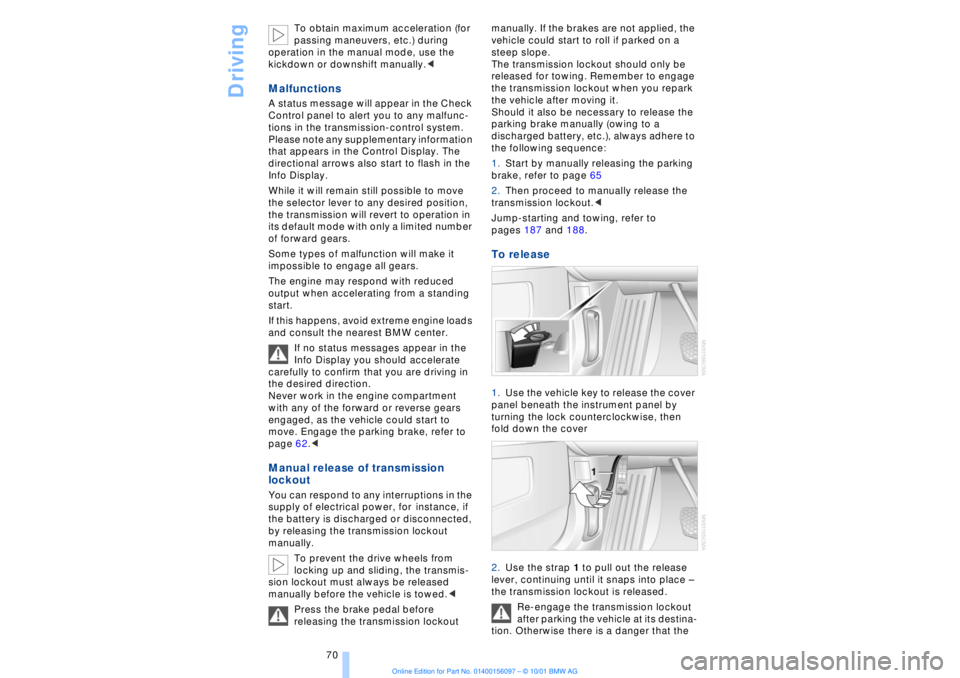
To release 1.Use the vehicle key to release the cover
panel beneath the instrument panel by
turning the lock counterclockwise, then
fold down the cover
2.Use the strap 1 to pull out the release
lever, continuing until it snaps into place Ð
the transmission lockout is released.
Re-engage the transmission lockout
after parking the vehicle at its destina-
tion. Otherwise there is a danger that the
Page 72 of 208

At a glanceControlsDriving tipsCommunicationsNavigationEntertainmentMobilityReference
71
vehicle could start to roll if parked on a
steep slope.< To re-engage the lockout 1.Disengage the release lever by pressing
it together with the red detent lever,
arrow 1
2.Guide the release lever all the way back
into its original position Ð the transmission
lockout is again engaged
3.Fold up and lock the cover panel. Now Ð
and not before Ð the key may be removed.
Once the transmission lockout has
been re-engaged, the warning in the
Check Control should disappear, and the
symbol in the Info Display should change
from N to P. Should this fail to happen,
there is a danger that the vehicle could
start to roll.<
Information on jump-starting, tow-starting
and towing begins on page 187. Turn signal indicators/
headlamp flasher1High beams Ð blue indicator lamp
2Headlamp flasher Ð blue indicator lamp 3Turn signal indicators Ð the green indi-
cator lamp flashes, accompanied by a peri-
odic ticking from the turn signal indicator
relay.
To use the turn signal indicatorsMove the lever beyond the detent position.
It then returns to the center position when
released. Press the lever as far as the
detent to switch off the turn signals. To signal brieflyPress the lever up to but not beyond the
detent. It then returns to the center position
when released.
If the flashing of the indicator lamp and the
ticking from the relay are both faster than
normal, this indicates that one of the bulbs
is defective; if a trailer is attached, this
could also indicate that one of its turn
signal indicator bulbs is defective. Wiper system1Standard wiper speed: press briefly one
time.
Fast wipe: briefly press twice
2To switch off wipers or for brief wipe
3To activate/deactivate rain sensor
4Cleaning windshield
5Adjusting rain sensor sensitivity level.
The lever automatically returns to its
initial position when released.<
Page 121 of 208
Things to remember when driving
120
Cargo loadingStowing cargo >Load heavy cargo as far forward and as
low as possible, placing it directly behind
the bulkhead behind the rear seats
>Cover sharp edges and corners
>For very heavy loads when the rear seat
is not occupied, secure each safety belt in
the opposite buckle. Securing the load >Use the luggage net
* or securing straps
to hold down small and light-weight
luggage and cargo, refer to page 40
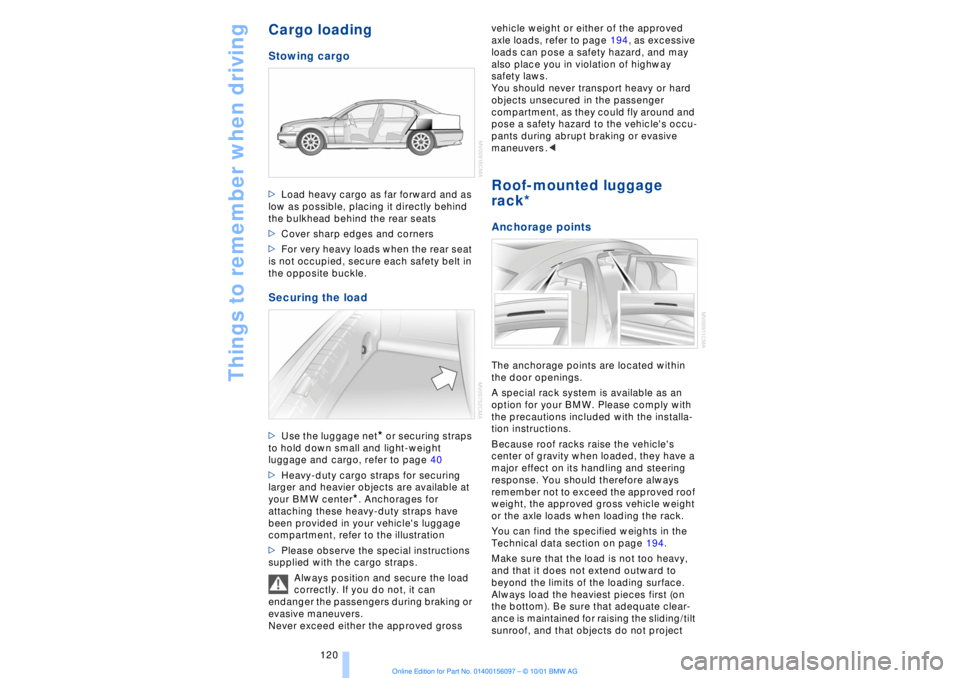
>Heavy-duty cargo straps for securing
larger and heavier objects are available at
your BMW center
*. Anchorages for
attaching these heavy-duty straps have
been provided in your vehicle's luggage
compartment, refer to the illustration
>Please observe the special instructions
supplied with the cargo straps.
Always position and secure the load
correctly. If you do not, it can
endanger the passengers during braking or
evasive maneuvers.
Never exceed either the approved gross vehicle weight or either of the approved
axle loads, refer to page 194, as excessive
loads can pose a safety hazard, and may
also place you in violation of highway
safety laws.
You should never transport heavy or hard
objects unsecured in the passenger
compartment, as they could fly around and
pose a safety hazard to the vehicle's occu-
pants during abrupt braking or evasive
maneuvers .<
Roof-mounted luggage
rack* Anchorage pointsThe anchorage points are located within
the door openings.
A special rack system is available as an
option for your BMW. Please comply with
the precautions included with the installa-
tion instructions.
Because roof racks raise the vehicle's
center of gravity when loaded, they have a
major effect on its handling and steering
response. You should therefore always
remember not to exceed the approved roof
weight, the approved gross vehicle weight
or the axle loads when loading the rack.
You can find the specified weights in the
Technical data section on page 194.
Make sure that the load is not too heavy,
and that it does not extend outward to
beyond the limits of the loading surface.
Always load the heaviest pieces first (on
the bottom). Be sure that adequate clear-
ance is maintained for raising the sliding/tilt
sunroof, and that objects do not project
Page 189 of 208
Help Ð Giving and receiving
188 ground on the vehicle being started. A
special nut on the strut dome, see arrow 2
in the illustration, serves as the negative
terminal on your BMW
To avoid personal injury from sparks,
always observe this sequence when
connecting the jumper cables.<
6.Start the engine on the support vehicle
and allow it to run for several minutes at a
fast idle
7.Start the engine on the other vehicle in
the usual way. If the first start attempt is not
successful, wait a few minutes before
another attempt in order to allow the
discharged battery to recharge
8.Allow the engines to run for several
minutes before disconnecting the jumper
cables
9.Disconnect the jumper cables by
reversing the connection sequence.
If required, have the battery inspected and
recharged at your BMW center.
Towing
Even if the transmission is in perfect
working order, you should always
remember to disengage the transmission
lockout manually before towing the vehicle.
Failure to observe this precaution could
result in automatic activation of the trans-
mission lockout while the vehicle is being
towed.<
Releasing transmission lockout manually,
refer to page 70.
Tow fittingThe threaded tow fitting is stored in the tool
kit mounted on the inside of the luggage
compartment lid, refer to page 181, and
should always remain in the vehicle. This
fitting, which fits the tow sockets on both
the front and the rear of the vehicle, is
intended exclusively for use in towing the
vehicle on paved roads.
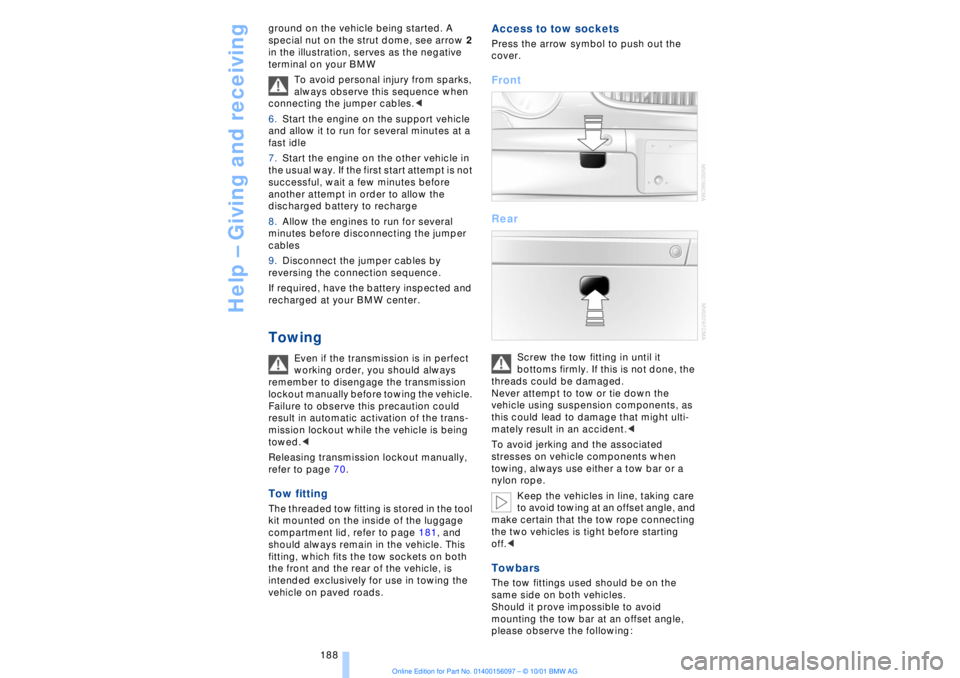
Access to tow sockets Press the arrow symbol to push out the
cover. Front
Rear
Screw the tow fitting in until it
bottoms firmly. If this is not done, the
threads could be damaged.
Never attempt to tow or tie down the
vehicle using suspension components, as
this could lead to damage that might ulti-
mately result in an accident.<
To avoid jerking and the associated
stresses on vehicle components when
towing, always use either a tow bar or a
nylon rope.
Keep the vehicles in line, taking care
to avoid towing at an offset angle, and
make certain that the tow rope connecting
the two vehicles is tight before starting
off.<
Towbars The tow fittings used should be on the
same side on both vehicles.
Should it prove impossible to avoid
mounting the tow bar at an offset angle,
please observe the following:
Page 190 of 208
At a glanceControlsDriving tipsCommunicationsNavigationEntertainmentMobilityReference
189
>Clearance and maneuvering capability
will be strictly limited in corners
>When mounted at an angle, the towbar
will exert lateral forces, tending to push the
vehicle sideways.
Never use a vehicle to tow another
vehicle that is heavier than itself, as
this could lead to a loss of control.< Towing
Do not tow the vehicle by the rear
axle; because the steering detent is
not operational, the wheels could turn to an
extreme angle during towing.<
1.Switch on the ignition to allow operation
of the brake lamps, turn signal indicators,
horn, parking brake and windshield wipers
2.Turn on the hazard warning flashers
where allowed by law
3.Manual release of the transmission
lockout, refer to page 70
4.Maximum towing speed:
maximum 43 mph (70 km/h)
5.Maximum towing distance:
maximum 93 miles (150 km).
If the electrical system in the towed vehicle
has failed, use an alternate means to iden-
tify the vehicle as being towed such as a
sign or warning triangle placed in the rear
window.
The steering and brakes are without
power assistance when the engine is
off. This means that higher levels of effort
will be required to operate the steering and
brakes.<
Tow-starting It is not possible to start the engine by tow-
starting the vehicle.
Jump starting, refer to page 187.
Have the source of the starting difficulties
diagnosed and repaired at your BMW
center.
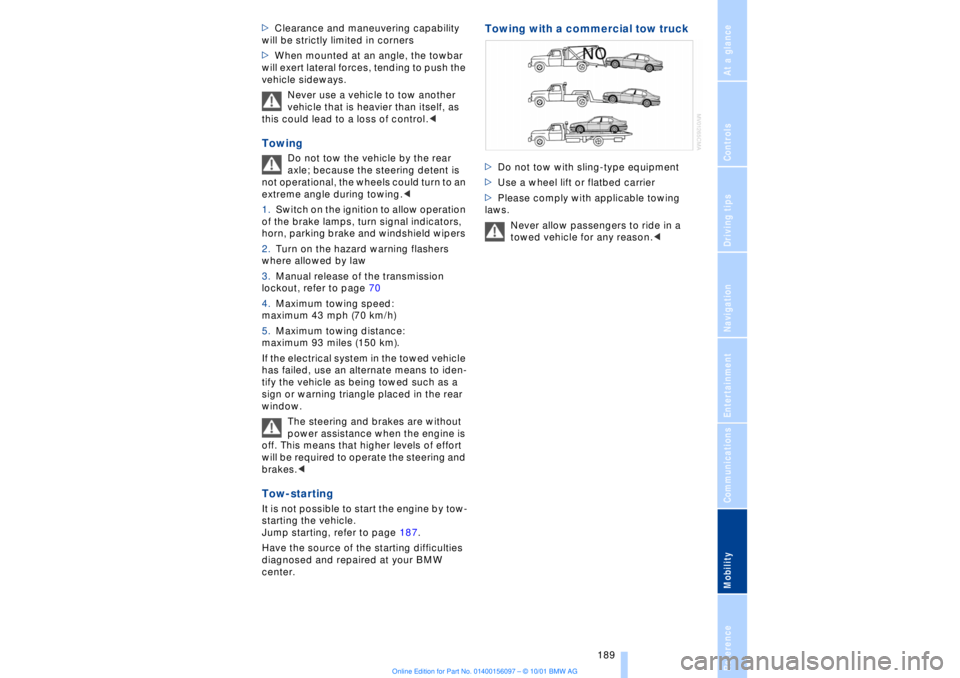
Towing with a commercial tow truck >Do not tow with sling-type equipment
>Use a wheel lift or flatbed carrier
>Please comply with applicable towing
laws.
Never allow passengers to ride in a
towed vehicle for any reason.<
Page 199 of 208
Everything from A to Z
198 "EDC" 92
Ð "Comfort" 92
Ð "Sport" 92
EDC (Electronic Damping
Control) 92
Electrical malfunction
Ð automatic transmission
lockout 70
Ð fuel filler door 168
Ð parking brake, emergency
use 65
Ð sliding/tilt sunroof 44
Electric power seats 46
Electric power windows 42
Electric seats 46
Electric steering column
adjustment 53
Electronic Brake-force Dis-
tribution (EBV) 91
Electronic Damping Control
(EDC) 92
Elements of operation 12
Emergency operation
Ð doors 37
Ð fuel filler door 168
Ð luggage compartment
lid 40
Ð sliding/tilt sunroof 44
Ð transmission lockout
(automatic
transmission) 70
Emergency SOS call
Ð automatic activation 161
"Emissions inspection" 79
Energy Control 83
Engine compartment 176
Engine coolant 176, 177
"Engine oil" 179
Engine oil
Ð consumption 176
Ð grades 177
Engine oils 177
Engine output, data 192
Engine specifications 192
"Entertainment" 19, 22
Estimated time of arrival 83
Extended vehicle storage,
see supplemental Car
care manual
Exterior mirrors 52
Ð automatic dimming 52"Extra" in "Climate"
menu 103
"Extra" with rear air
conditioner 105
"Extra" with rear cooler 110
FFactory preparations for
phone installation 161
Fader 141
Failure of an electrical
accessory 186
"Fastest route" 131
Fastest route 131
Fault displays 80
Filling the washer
reservoir 73
Filling the windshield
washer reservoir 73
First-aid kit 187
Fittings, tow-starting and
towing 189
Flashlight 111
Flat tires 171
"FM..." 140, 143
FM waveband 143
Fog lamps 97
"Footwell" 103
Footwell lamps 98
Forward lamps 98
Front armrest 111
Front seat adjustment 45
Fuel 169
Fuel consumption
display 83
Fuel economy 83
Fuel filler cap cover 168
Fuel filler door
Ð releasing in the event of
electrical defect 168
Fuel gauge 82
Fuel level display 82, 83
Fuel specifications 169
Fuel tank capacity 168
Fuses 186
GGarage door opener, refer
to Universal garage door
opener 108
Gasoline 169
General operating
information 118
Glasses compartment 111
Glove compartment 110
GPS, refer to Navigation
system 124
GPS navigation system 124
Ð address book, refer to
Creating a directory 134
Ð current location 135
Ð destination entry 126
Ð destination guidance in
assistance window 125
Ð destination list 130
Ð digital coverage area 124
Ð directory 128
Ð manual entry of destina-
tion address 126
Ð map CD 124
Ð map-guided destination
selection 128
Ð new route 133
Ð recent destinations 130
Ð route display 132
Ð route list 132
Ð route selection 130
Ð safety 124
Ð selecting destination in
"Information" 129
Ð selecting points of
interest 129
Ð selection options 126
Ð start active guidance 131
Ð starting 125
Ð terminate/interrupt active
guidance 134
Ð voice guidance 133
Ð wordmatch principle 136
Guidance
Ð terminate 134
Guidance system
Ð interrupt 134
Ð starting 131