2002 BMW 745LI SEDAN lock
[x] Cancel search: lockPage 72 of 208

At a glanceControlsDriving tipsCommunicationsNavigationEntertainmentMobilityReference
71
vehicle could start to roll if parked on a
steep slope.< To re-engage the lockout 1.Disengage the release lever by pressing
it together with the red detent lever,
arrow 1
2.Guide the release lever all the way back
into its original position Ð the transmission
lockout is again engaged
3.Fold up and lock the cover panel. Now Ð
and not before Ð the key may be removed.
Once the transmission lockout has
been re-engaged, the warning in the
Check Control should disappear, and the
symbol in the Info Display should change
from N to P. Should this fail to happen,
there is a danger that the vehicle could
start to roll.<
Information on jump-starting, tow-starting
and towing begins on page 187. Turn signal indicators/
headlamp flasher1High beams Ð blue indicator lamp
2Headlamp flasher Ð blue indicator lamp 3Turn signal indicators Ð the green indi-
cator lamp flashes, accompanied by a peri-
odic ticking from the turn signal indicator
relay.
To use the turn signal indicatorsMove the lever beyond the detent position.
It then returns to the center position when
released. Press the lever as far as the
detent to switch off the turn signals. To signal brieflyPress the lever up to but not beyond the
detent. It then returns to the center position
when released.
If the flashing of the indicator lamp and the
ticking from the relay are both faster than
normal, this indicates that one of the bulbs
is defective; if a trailer is attached, this
could also indicate that one of its turn
signal indicator bulbs is defective. Wiper system1Standard wiper speed: press briefly one
time.
Fast wipe: briefly press twice
2To switch off wipers or for brief wipe
3To activate/deactivate rain sensor
4Cleaning windshield
5Adjusting rain sensor sensitivity level.
The lever automatically returns to its
initial position when released.<
Page 73 of 208
Driving
72
1 Standard wiper speed The system automatically reverts to opera-
tion in the intermittent mode whenever the
vehicle stops. Fast wiper speed You can also select this position by
pressing the lever upward past the detent.
The system automatically reverts to opera-
tion in the standard wipe mode whenever
the vehicle stops. 4 Clean windshield The system sprays washer fluid against the
windshield and activates the wipers for a
brief period. Cleaning headlamps >Each fifth time you press into position 4
to wash the windshield while the head-
lamps are on.
Do not use the washers if there is any
danger that the fluid will freeze on the
windshield. If you do so, your vision could
be obscured. To avoid freezing, use a
washer fluid antifreeze, refer to page 73.
Avoid activating the washer when the
reservoir is empty, as damage to the pump
could result.< Windshield washer nozzles The windshield washer nozzles and the
windshield itself in the area around the
wipers are heated automatically when the
ignition is switched on. Rain sensor
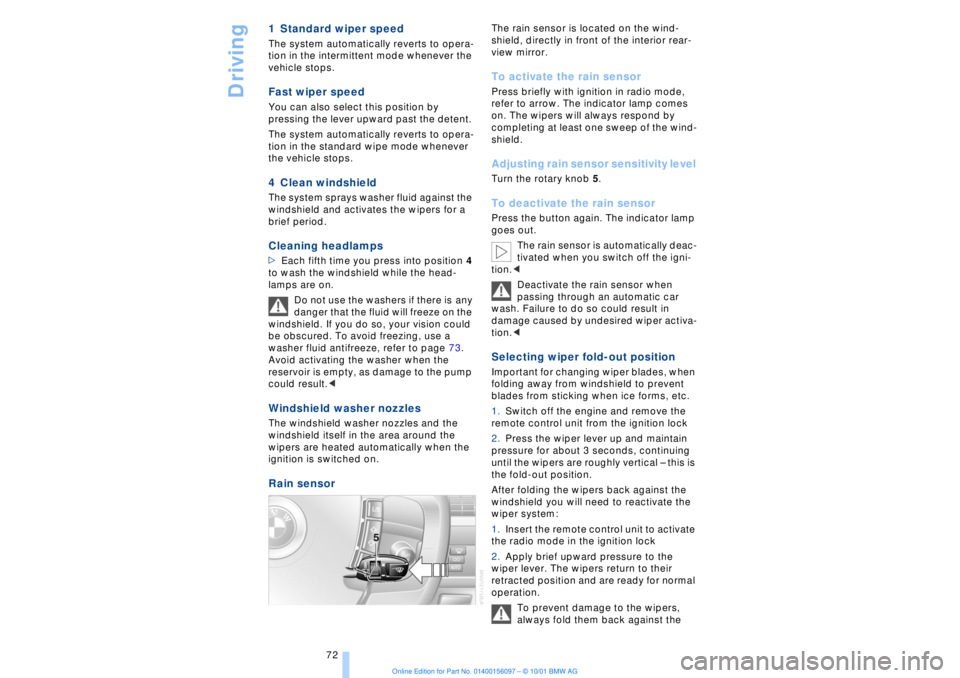
The rain sensor is located on the wind-
shield, directly in front of the interior rear-
view mirror. To activate the rain sensor Press briefly with ignition in radio mode,
refer to arrow. The indicator lamp comes
on. The wipers will always respond by
completing at least one sweep of the wind-
shield. Adjusting rain sensor sensitivity level Turn the rotary knob 5. To deactivate the rain sensor Press the button again. The indicator lamp
goes out.
The rain sensor is automatically deac-
tivated when you switch off the igni-
tion.<
Deactivate the rain sensor when
passing through an automatic car
wash. Failure to do so could result in
damage caused by undesired wiper activa-
tion.< Selecting wiper fold-out position Important for changing wiper blades, when
folding away from windshield to prevent
blades from sticking when ice forms, etc.
1.Switch off the engine and remove the
remote control unit from the ignition lock
2.Press the wiper lever up and maintain
pressure for about 3 seconds, continuing
until the wipers are roughly vertical Ð this is
the fold-out position.
After folding the wipers back against the
windshield you will need to reactivate the
wiper system:
1.Insert the remote control unit to activate
the radio mode in the ignition lock
2.Apply brief upward pressure to the
wiper lever. The wipers return to their
retracted position and are ready for normal
operation.
To prevent damage to the wipers,
always fold them back against the
Page 78 of 208
At a glanceControlsDriving tipsCommunicationsNavigationEntertainmentMobilityReference
77
Everything under control Odometer, outside temperature display, clockWhen the ignition is off you can briefly acti-
vate the time, outside temperature and
odometer displays by pressing the knob at
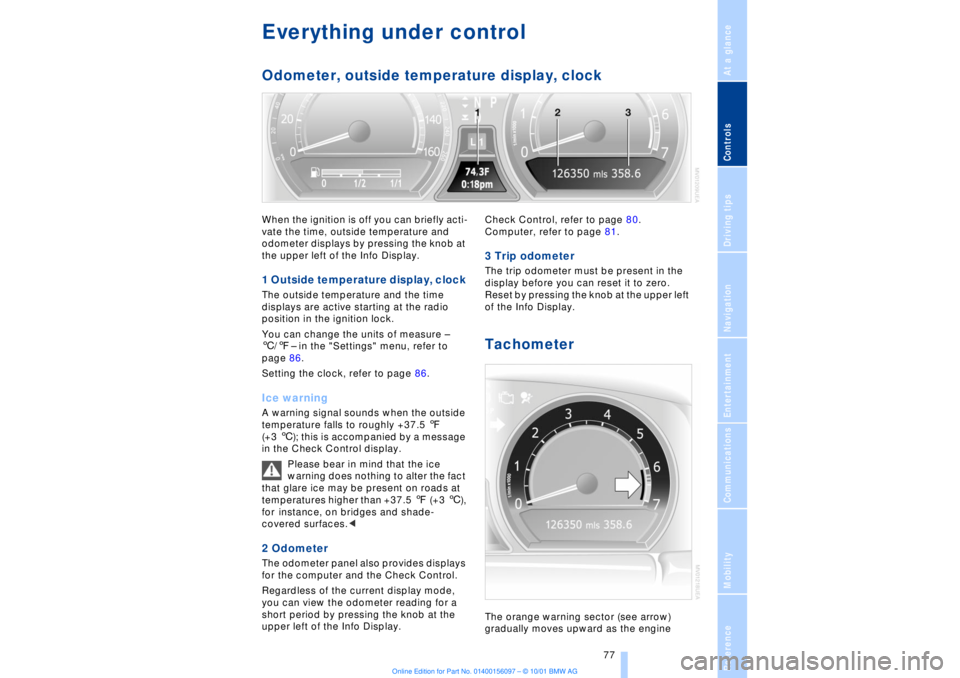
the upper left of the Info Display. 1 Outside temperature display, clock The outside temperature and the time
displays are active starting at the radio
position in the ignition lock.
You can change the units of measure Ð
6/7Ð in the "Settings" menu, refer to
page 86.
Setting the clock, refer to page 86.Ice warning A warning signal sounds when the outside
temperature falls to roughly +37.5 7
(+3 6); this is accompanied by a message
in the Check Control display.
Please bear in mind that the ice
warning does nothing to alter the fact
that glare ice may be present on roads at
temperatures higher than +37.5 7 (+3 6),
for instance, on bridges and shade-
covered surfaces.< 2 Odometer The odometer panel also provides displays
for the computer and the Check Control.
Regardless of the current display mode,
you can view the odometer reading for a
short period by pressing the knob at the
upper left of the Info Display. Check Control, refer to page 80.
Computer, refer to page 81.
3 Trip odometer The trip odometer must be present in the
display before you can reset it to zero.
Reset by pressing the knob at the upper left
of the Info Display. Tachometer The orange warning sector (see arrow)
gradually moves upward as the engine
Page 82 of 208
At a glanceControlsDriving tipsCommunicationsNavigationEntertainmentMobilityReference
81
Select and confirm to cancel the
display.
Selecting stored status reports for
viewing in the Control Display 1.Select the "OB data" menu
2. Select and confirm your selec-
tion
3.Select "Check" and confirm
4.The stored status reports appear in the
display. Select the desired report and
confirm your selection.
The display will disappear automatically
after a short period; you can also cancel it
manually using the symbol. Displays after completion of trip Selected malfunction reports generated
during the trip are shown consecutively
when you switch off the ignition.
If indicated, the following message may
also appear:
"Parking lamps on!"
This message appears when you open the
driver's door after parking. A supplemen-
tary gong is also heard. Even with the ignition and Info Display off,
you can reactivate the screen and display
the messages.
Press the CHECK button for approx.
8 seconds, refer to page 80. The stored
status reports appear again in the display.
If several messages are present, you can
continue to press the CHECK button to
view them in succession.
The Check Control function
>cancels itself automatically after a brief
period
>can be terminated by again pressing the
CHECK button for approx. 8 seconds.
You can select the language in which
Check Control status reports and
messages from the computer will appear,
refer to page 86.<
Computer To select functions:
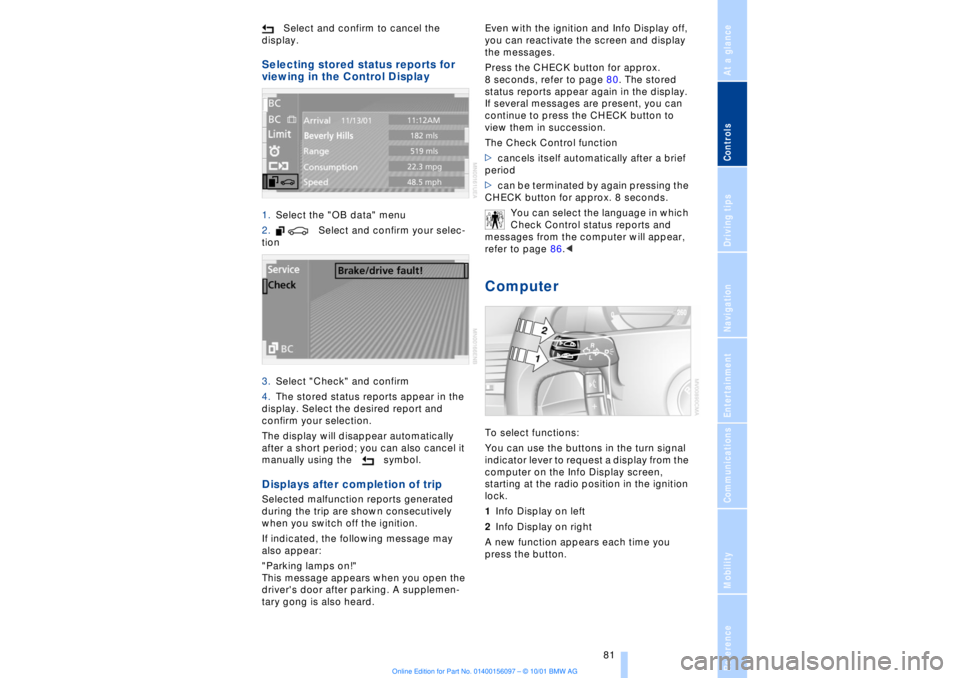
You can use the buttons in the turn signal
indicator lever to request a display from the
computer on the Info Display screen,
starting at the radio position in the ignition
lock.
1Info Display on left
2Info Display on right
A new function appears each time you
press the button.
Page 87 of 208
Everything under control
86
To import display 1.Select and confirm the desired function
Ð here: computer
2.Select and confirm. The function
appears in the assistance window.
The symbol is highlighted if
the function shown in the assistance
window has been selected in the Control
Display.
You can also choose to view brief "Help"
texts explaining selected menu entries,
refer to page 24, or the travel route on vehi-
cles equipped with a GPS navigation
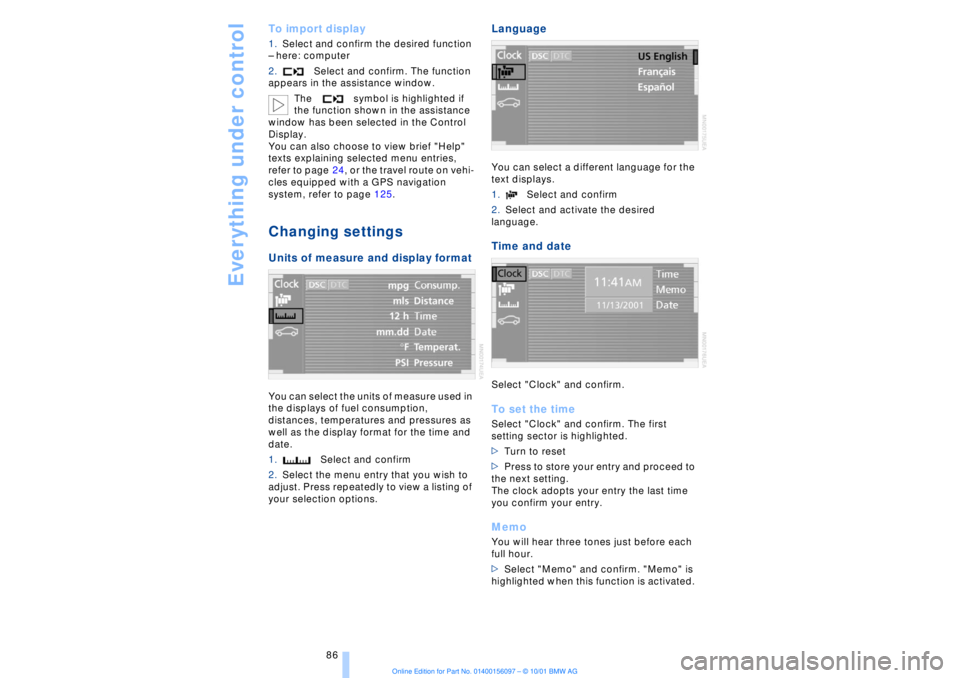
system, refer to page 125. Changing settings Units of measure and display format You can select the units of measure used in
the displays of fuel consumption,
distances, temperatures and pressures as
well as the display format for the time and
date.
1.Select and confirm
2.Select the menu entry that you wish to
adjust. Press repeatedly to view a listing of
your selection options.
Language You can select a different language for the
text displays.
1.Select and confirm
2.Select and activate the desired
language. Time and date Select "Clock" and confirm. To set the timeSelect "Clock" and confirm. The first
setting sector is highlighted.
>Turn to reset
>Press to store your entry and proceed to
the next setting.
The clock adopts your entry the last time
you confirm your entry. MemoYou will hear three tones just before each
full hour.
>Select "Memo" and confirm. "Memo" is
highlighted when this function is activated.
Page 92 of 208
At a glanceControlsDriving tipsCommunicationsNavigationEntertainmentMobilityReference
91
limited system response up to a speed of
approx. 45 mph (70 km/h). Intervention for
stability-enhancement is reduced. Do not
make any modiÞcations to the DSC system.
Never allow anyone other than authorized
professional technicians to carry out
service or repairs on the DSC system.< Dynamic Brake Control DBC
When you apply the brakes rapidly, this
system automatically produces the
maximum braking force boost and thus
helps to achieve the shortest possible
braking distance during "panic stops." This
system exploits all of the benefits provided
by ABS.
Do not reduce the pressure on the brake
pedal for the duration of the brake applica-
tion. When the brake pedal is released, the
DBC is deactivated.
In the event of a malfunction, the
warning lamp comes on with a
yellow lamp. Have the system
checked and repaired at your BMW center
as soon as possible.
Check Control messages, refer to page 80.
Please note the supplementary information
provided in the Control Display.
Warning lamp on Canadian models.Driving stability control/
ABS Antilock Brake System The concept ABS enhances active safety by preventing
the wheels from locking under braking.
ABS incorporates CBC and EBV. In case of malfunction
If the indicator lamp lights up in
yellow, this indicates that ABS has
been deactivated in response to a
system malfunction. Conventional braking
efficiency remains available without limita-
tions. Please have the system inspected at
your BMW center.
Cornering Brake Control CBC CBC is a technical advance based on ABS.
It provides further enhancements in vehicle
stability and steering response during lane
changes and cornering at high rates of
lateral acceleration. EBV Electronic brake-force
distribution EBV controls the brake system's applica-
tion pressure at the rear wheels to ensure
stable deceleration. In case of malfunction
If the brake system warning lamp
lights up in red, appearing together
with the yellow lamps for ABS and
DSC: the stability control is no
longer operational.
If all three lamps light up in yellow:
malfunction in the stability control
systems.
While you may continue, you should
remember to proceed cautiously and drive
defensively while avoiding full brake appli-
cations.
Please have the system checked at the
nearest BMW center.
Check Control status messages, refer to
page 80. Please note the supplementary
information provided in the Control Display.
Indicator and warning lamps on
Canadian models.
Dynamic Drive The concept Dynamic Drive minimizes body roll and
optimizes vehicle stability during cornering
and evasive maneuvers.
Page 101 of 208
A congenial climate
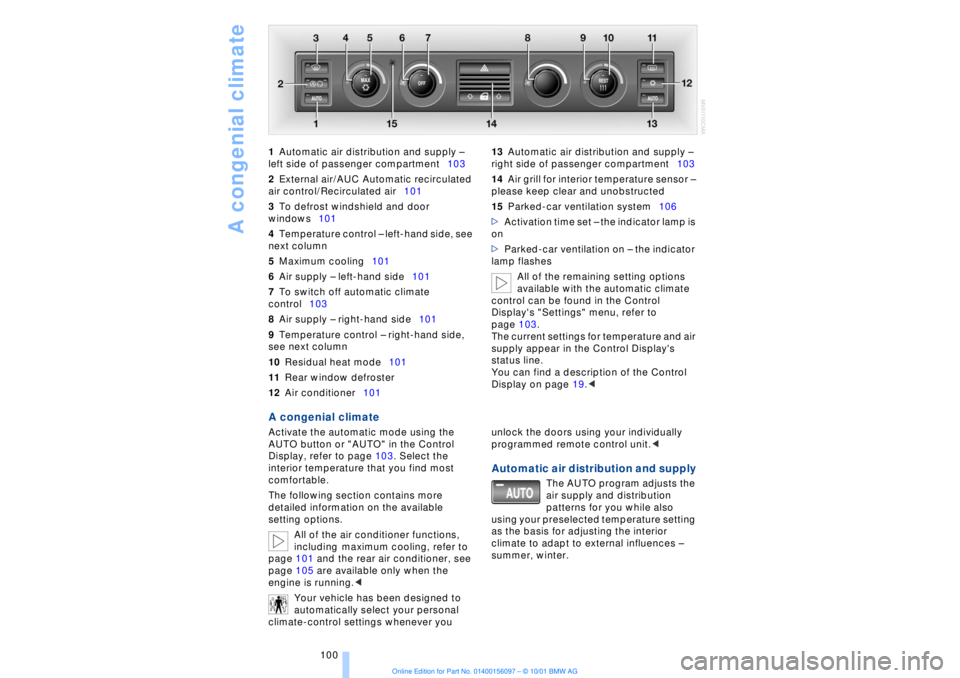
100 1Automatic air distribution and supply Ð
left side of passenger compartment103
2External air/AUC Automatic recirculated
air control/Recirculated air101
3To defrost windshield and door
windows101
4Temperature control Ð left-hand side, see
next column
5Maximum cooling101
6Air supply Ð left-hand side101
7To switch off automatic climate
control103
8Air supply Ð right-hand side101
9Temperature control Ð right-hand side,
see next column
10Residual heat mode101
11Rear window defroster
12Air conditioner101 13Automatic air distribution and supply Ð
right side of passenger compartment103
14Air grill for interior temperature sensor Ð
please keep clear and unobstructed
15Parked-car ventilation system106
>Activation time set Ð the indicator lamp is
on
>Parked-car ventilation on Ð the indicator
lamp flashes
All of the remaining setting options
available with the automatic climate
control can be found in the Control
Display's "Settings" menu, refer to
page 103.
The current settings for temperature and air
supply appear in the Control Display's
status line.
You can find a description of the Control
Display on page 19.<
A congenial climate Activate the automatic mode using the
AUTO button or "AUTO" in the Control
Display, refer to page 103. Select the
interior temperature that you find most
comfortable.
The following section contains more
detailed information on the available
setting options.
All of the air conditioner functions,
including maximum cooling, refer to
page 101 and the rear air conditioner, see
page 105 are available only when the
engine is running.<
Your vehicle has been designed to
automatically select your personal
climate-control settings whenever you unlock the doors using your individually
programmed remote control unit.<
Automatic air distribution and supply
The AUTO program adjusts the
air supply and distribution
patterns for you while also
using your preselected temperature setting
as the basis for adjusting the interior
climate to adapt to external influences Ð
summer, winter.
Page 102 of 208
At a glanceControlsDriving tipsCommunicationsNavigationEntertainmentMobilityReference
101
Temperature adjustment
You can turn to select the
desired temperatures for the
driver's and passenger sides.
Your settings appear in the
Control Display's status line.
The figures in the display provide a general
indication of interior temperature. When
you start the vehicle, this system ensures
that the selected temperature is achieved
as quickly as possible. It then maintains
this temperature, regardless of the season.
Defrost windows and clear them of
condensation
This program quickly removes
ice and condensation from the
windshield and door windows.
To adjust air supply manually
You can adjust the air supply by
turning. The automatic air
supply control is operational
whenever you see your selec-
tion represented by a bar in the
Control Display's status line. The automatic
air distribution remains in operation as
before. You can reactivate the automatic
air supply mode with the AUTO button.
Air conditioner operation
The air conditioner cools and
dehumidifies the incoming air
before also reheating it as
required, according to temperature setting.
Depending on the weather, the windshield
may fog over briefly when the engine is
started.
The air conditioner comes on automatically
when you select the AUTO program.
Maximum cooling
Select this program to obtain
maximum cooling as quickly as
possible.
The temperature display reverts
to 61 7 (16 6) while the system switches
to the recirculated-air mode and starts to
provide maximum air supply through the instrument panel outlets only. For this
reason you should ensure that these
outlets are open before selecting this
program.
Outside air/AUC Automatic recircu-
lated-air control/Recirculated air
You can respond to unpleasant
odors or pollutants in the imme-
diate environment by tempo-
rarily suspending the flow of outside air.
The system then recirculates the air
currently within the vehicle. AUC executes
this function automatically.
Press the button repeatedly to run through
the following control sequence:
>Indicator lamps off: outside air flows into
the vehicle
>Left-hand indicator lamp on Ð AUC
mode: the system detects pollutants in the
outside air and responds by deactivating
the outside air supply when required. The
system then recirculates the air currently
within the vehicle.
Depending upon air quality, in the auto-
matic mode the system may start to alter-
nate between its outside-air and
recirculated-air modes
>Right-hand indicator lamp on Ð Recircu-
lated-air mode: the supply of outside air
into the vehicle is permanently blocked.
The system then recirculates the air
currently within the vehicle.
If condensation starts to form on the
inside window surfaces during opera-
tion in the recirculated-air mode, you
should switch it off while also increasing air
supply as required.<
Residual heat mode
The system uses the warmth
stored in the engine to heat the
interior when the ignition is off,
for instance, while the vehicle is
stopped at a school to pick up a
child.
You can adjust the automatic climate
control's settings when the ignition lock is
in the radio mode. The system blows