Page 105 of 159

105n
OverviewControlsMaintenanceRepairsDataIndex
Roof-mounted luggage rack for the hardtop
*
A special roof-rack system is available
as an optional extra for your BMW.
Please observe the precautions
included with the installation instruc-
tions.AnchoragesAccess to the anchorages:
To fold up the covers (arrow), please
use the tool which is provided with the
roof-rack system.Loading and driving notesRoof-mounted luggage racks raise the
center of gravity of the vehicle when
they are loaded. For this reason, they
exercise a major effect on the vehicle's
handling and steering response.
You should therefore always remember
not to exceed the approved roof load
capacity, the approved gross vehicle
weight or the maximum axle loads
when loading the rack. These weights
are listed under Technical Data on
page 146.
Make sure that the load is not too bulky,
and attempt to distribute it evenly.
Always load the heaviest pieces first (on
the bottom). Make sure that no objects
will be in the way when the luggage
compartment lid is opening or closing.
Secure the roof luggage correctly and
securely to prevent it from shifting or
being lost during driving (danger to
following traffic).
Drive smoothly and avoid sudden
acceleration or braking. Do not corner
at high speeds.
The roof-mounted luggage rack and the
roof load increase the aerodynamic
resistance: increased fuel consumption
and additional stress on the vehicle's
body are the result.
Page 106 of 159
Page 107 of 159
107n
Overview
Controls
Maintenance
Repairs
Data
Index
Overview
Controls and features
Operation, maintenance
Owner service procedures
Index
Technical data
Page 108 of 159

108n
To ensure that your vehicle continues to
provide maximum economy throughout
an extended service life, we request
that you devote careful attention to the
following instructions.
Engine and differentialThe first 1,200 miles (2,000 km):
Attempt to constantly vary both vehicle
and engine speed during these initial
miles while remembering to avoid
engine speeds in excess of 4,500 rpm
and/or vehicle speeds of over 100 mph
(160 km/h):
Always obey all official speed limits.
Refrain from using full throttle and avoid
pressing the accelerator beyond the
kickdown point.
After the initial 1,200 miles (2,000 km)
you can gradually increase both engine
and vehicle speeds.
Please remember to observe the same
break-in procedures if either the engine
or the differential is replaced later in the
course of the vehicle's service life.
TiresOwing to technical factors associated
with their manufacture, tires do not
achieve their full traction potential until
an initial break-in period has elapsed.
We thus ask you to drive with extra care
during the first 200 miles (300 km).
Always obey all official speed limits.
When the vehicle is operated on
wet or slushy roads, a wedge of
water may form between the tire and
the road surface. This phenomenon is
referred to as aquaplaning, or hydro-
planing, and can lead to partial or
complete loss of traction, vehicle
control and braking effectiveness.
Reduce your speed on wet roads.
elapse before the brake pads and
rotors achieve the optimal pad-surface
and wear patterns required for trouble-
free operation and an extended service
life later on.
To break-in the separate parking brake
drums, apply the parking brake lightly
when coasting to a standstill (at a traffic
signal, for instance); use caution to
avoid posing a danger to other road
users. You can prevent corrosion in the
drums by periodically repeating this
procedure.
The brake lamps do not come on
when you engage the parking
brake.
Vacuum for the brake system servo unit
on your BMW is available only when the
engine is running. When you move the
vehicle with the engine off Ð when
towing, for example Ð substantially
higher levels of pedal force will be
required to brake the vehicle.
elapse before the clutch starts to
operate at optimum efficiency.
Remember to engage the clutch care-
fully during this initial period.
Break-in procedures
Page 109 of 159

109n
OverviewControlsMaintenanceRepairsDataIndex
Driving notes Antilock Brake System Brake system
Brakes: do not drive with your foot
resting on the brake pedal. Even
light but consistent pedal pressure can
lead to high temperatures, brake wear
and possibly even brake failure.
Aquaplaning: when driving on wet or
slushy roads, reduce vehicle speed. If
you do not, a wedge of water may form
between the tires and the road surface.
This phenomenon can lead to partial or
complete loss of contact between the
tires and road surface, vehicle control
and braking ability.
Driving through water: do not drive
through water on the road if it is deeper
than 1 ft (30 cm), and then only at
walking speed. Otherwise, the vehicle's
engine, the electrical systems and the
transmission may be damaged.
Clothes hooks (with hardtop): when
hanging clothing from the hooks, be
sure that they will not obstruct the
driver's vision. Do not hang heavy
objects on the hooks. If you do so, they
could cause personal injury during
braking or evasive maneuvers.<
The conceptThe Antilock Brake System (ABS) keeps
the wheels from locking during braking,
thereby enhancing active driving safety.Braking with ABSIf you are in a situation that requires full
braking, you will exploit the full benefits
of the ABS system if you apply
maximum pedal pressure ("panic stop").
Since the vehicle maintains steering
responsiveness, you can avoid possible
obstacles with a minimum of steering
effort, despite the full brake application.
Pulsation at the brake pedal combined
with sounds from the hydraulic circuits
indicates to the driver that ABS is in its
active mode.
Brake fluid level If the brake fluid level is too low and
brake pedal travel has become longer,
there may be a defect in one of the
brake system's hydraulic circuits.
Proceed to the nearest BMW
center. It may be necessary to
apply higher levels of pressure to the
pedal when stopping and braking
distances may also be longer. Please
remember to adapt your driving style
accordingly.<
Page 110 of 159

110n
Brake system Hardtop
*
Disc brakesLimited vehicle use, extended periods
with the vehicle parked or in storage,
and operating conditions in which
braking is restricted to gentle, low-
pressure applications will all increase
the tendency for corrosion to form on
the rotors; this is often accompanied by
a simultaneous accumulation of
contamination on the brake pads. The
pads must exert a certain minimal level
of pressure against the rotors for the
disc brakes' inherent self-cleaning
effect to remain effective.
If the brake rotors are corroded, they
will tend to respond to braking with a
pulsating effect that even extended
brake applications will fail to cure.
When driving in heavy rain and on wet
roads it is useful to apply light pressure
to the brake pedal every few miles.
Monitor traffic conditions to ensure that
this maneuver does not pose a hazard
to you or to other road users. The heat
generated in this process helps dry the
pads and rotors to ensure that your
brake system will respond with undi-
minished efficiency when you need it.
When descending steep hills and
extended grades, downshift to a gear
that will allow you to continue safely with only a minimal amount of braking.
By minimizing the loads placed on the
brake system, this strategy helps
ensure that optimal brake system
response will remain available at all
times. Use care to avoid exceeding the
approved engine-speed range, refer to
page 74.
Do not coast with the clutch
depressed or with the transmission
or selector lever in neutral. Do not coast
with the engine shut off. The engine
provides no braking effect when the
clutch is depressed and there is no
power-assist for braking or steering
when the engine is not running.
Never allow floor mats, carpets or any
other objects to protrude into the area
around the accelerator, clutch and brake
pedals and obstruct their movement.<
Brake pads
For your own safety: use only
brake pads that the manufacturer
has released for your particular vehicle
model. The manufacturer cannot eval-
uate non-approved brake pads to
determine if they are suited for use, and
therefore cannot ensure the operating
safety of the vehicle if they are
installed.<
It is not necessary to remove the fabric
top even in the winter, when the
hardtop is generally in constant use.
But you can also remove it at any time
with no problem. Before the fabric top
is stored in the convertible top
compartment, it must be absolutely dry
in order to avoid water spots and
mildew from forming.
The hardtop offers reading lamps and
clothes hooks that can be used just by
pressing. In addition, a roof-rack can be
mounted, for more information, please
contact your BMW center.
When suspending articles of
clothing from the hooks, be sure
that they will not obstruct the driver's
vision. Do not hang heavy objects on
the hooks. If you do so, they could
cause personal injury during braking or
evasive maneuvers.<
Two people are required for installation
or removal. Work with extreme caution
in order to avoid paint damage and
damage to the body or hardtop.
To facilitate hardtop installation or
removal, you can obtain a specially
designed hardtop lift
* or hardtop rack
*
at your BMW center.
Page 111 of 159

111n
OverviewControlsMaintenanceRepairsDataIndex
Hardtop
*
Storage
Storing the hardtop on the floor:
Slide the styrofoam block that
came with the hardtop onto its center.
The arrow on top of the styrofoam block
has to be pointing upward when you
are doing this.<
Installation1. Lower the side windows completely
and flip the sun blinds down. If
necessary, remove the antenna rod
to avoid any damage
2. On vehicles with manual convertible
top operation, first release the
convertible top compartment lid,
and, if necessary, open it some-
what. On vehicles with fully-auto-
matic convertible top operation,
open the convertible top compart-
ment lid slightly by pressing the
button for the operation of the
convertible top
3. Remove the trim pieces on both
sides by pulling them off toward the
back (arrow), and reclose the
convertible top compartment lid
4. Release the front locking levers by
pressing the buttons. The levers will
release slightly. Raise the levers as
far as the stop will allow
Page 112 of 159

112n
Hardtop
*
5. Before installing, first flip the cover
panels that are located underneath
the left and right interior lamps
down. To do this, press on the
slight bump on the cover panel.
There is a holder in the cover panel
to securely store the trim pieces
that have been removed (1)
6. Open the red release levers as far
as the stop will allow (2)
7. Position the hardtop onto the
supports with the help of a second
person. Be sure to put the mount-
ings exactly into the proper
brackets
8. In the back, close the red locking
levers by turning to the inside as far
as the stop located behind the trim
will allow. Flip the cover panels
back into place
9. To lock the hardtop in the front,
keep pressing on the front locking
levers until you hear them engage
10. Check the rubber weatherstripping
between the windshield frame and
the top on both the left and right
sides. If it is folded or bent out of
place you should smooth it back
into position by hand to ensure
secure and reliable sealing.
Lift the hardtop carefully. Be
extremely careful not to shift the
seals. Seals that have been shifted out
of place or actually pulled out cause
leaks.<
RemovalFollow the same procedure as when
installing, just reverse the steps.
 1
1 2
2 3
3 4
4 5
5 6
6 7
7 8
8 9
9 10
10 11
11 12
12 13
13 14
14 15
15 16
16 17
17 18
18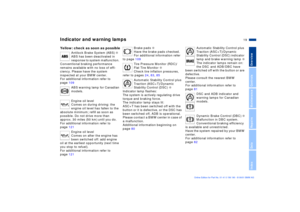 19
19 20
20 21
21 22
22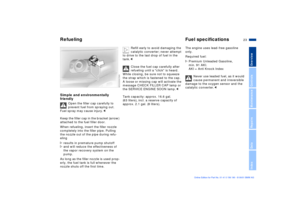 23
23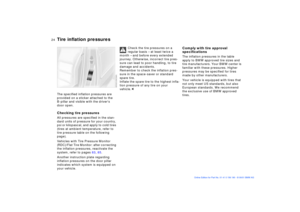 24
24 25
25 26
26 27
27 28
28 29
29 30
30 31
31 32
32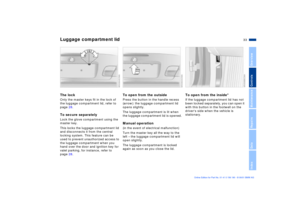 33
33 34
34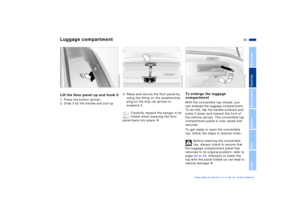 35
35 36
36 37
37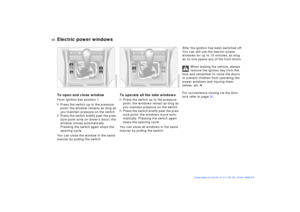 38
38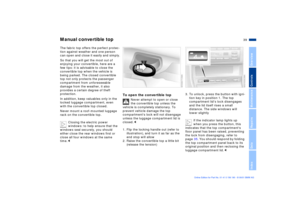 39
39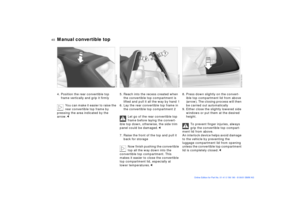 40
40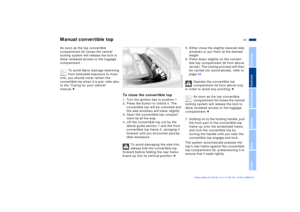 41
41 42
42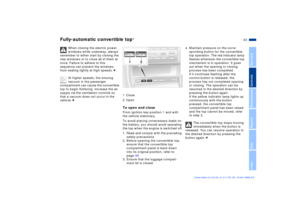 43
43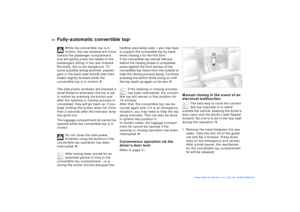 44
44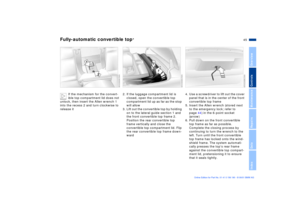 45
45 46
46 47
47 48
48 49
49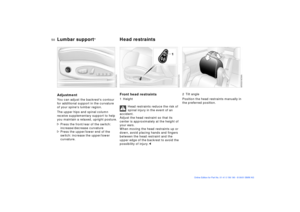 50
50 51
51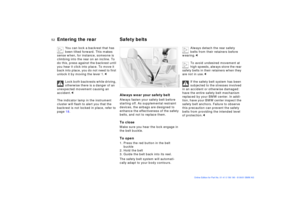 52
52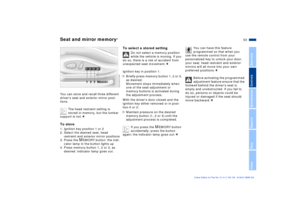 53
53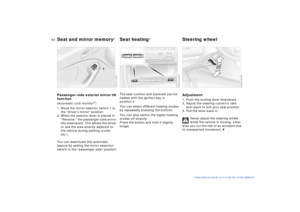 54
54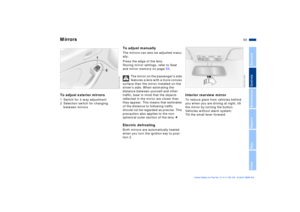 55
55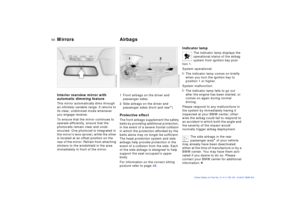 56
56 57
57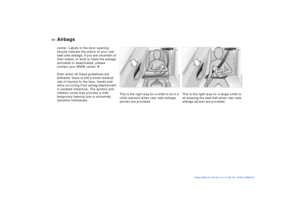 58
58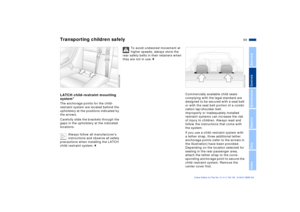 59
59 60
60 61
61 62
62 63
63 64
64 65
65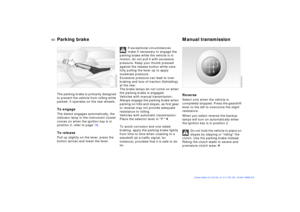 66
66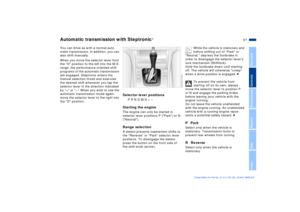 67
67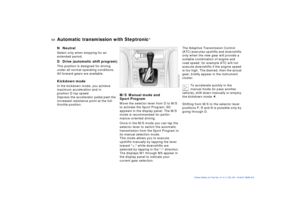 68
68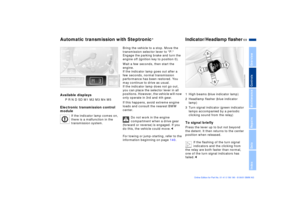 69
69 70
70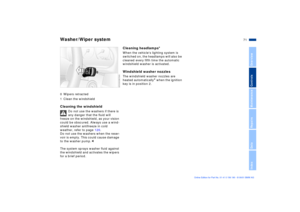 71
71 72
72 73
73 74
74 75
75 76
76 77
77 78
78 79
79 80
80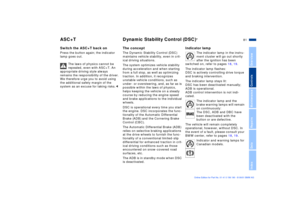 81
81 82
82 83
83 84
84 85
85 86
86 87
87 88
88 89
89 90
90 91
91 92
92 93
93 94
94 95
95 96
96 97
97 98
98 99
99 100
100 101
101 102
102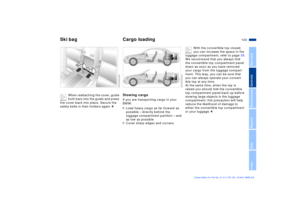 103
103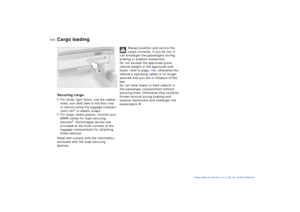 104
104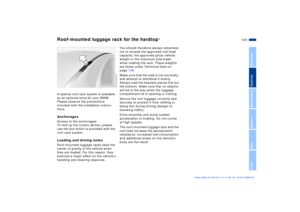 105
105 106
106 107
107 108
108 109
109 110
110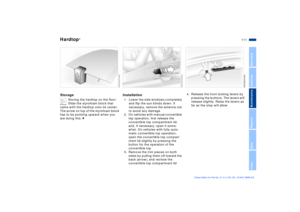 111
111 112
112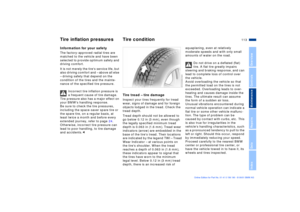 113
113 114
114 115
115 116
116 117
117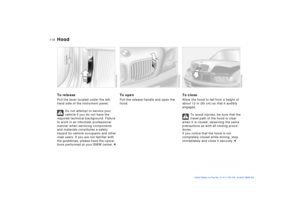 118
118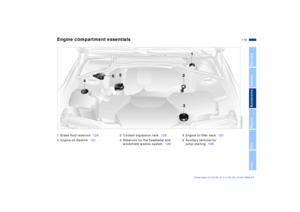 119
119 120
120 121
121 122
122 123
123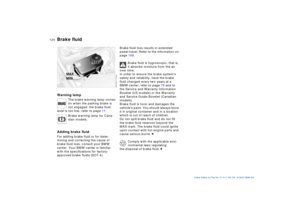 124
124 125
125 126
126 127
127 128
128 129
129 130
130 131
131 132
132 133
133 134
134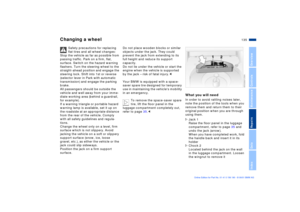 135
135 136
136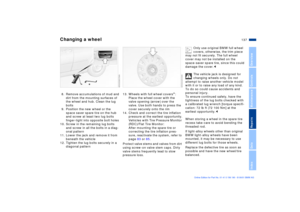 137
137 138
138 139
139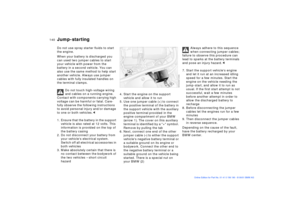 140
140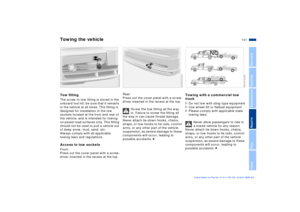 141
141 142
142 143
143 144
144 145
145 146
146 147
147 148
148 149
149 150
150 151
151 152
152 153
153 154
154 155
155 156
156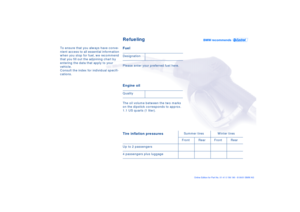 157
157 158
158
