2001 VOLVO S60 manual transmission
[x] Cancel search: manual transmissionPage 91 of 128
week 15).
Improving tire economy:
Maintain correct tire pressure. See the tire pressure label on the inside of the fuel filler door.
Drive smoothly: avoid fast starts, hard braking and tire screeching.
Tire wear increases with speed.
Correct front wheel alignment is very important.
Unbalanced wheels impair tire economy and driving comfort.
If tires are rotated, they must be kept on the same side of the car so that they revolve in the same direction as before
rotation.
Hitting curbs or potholes can damage the tires and/ or wheels permanently.
Flat spots
All tires become warm during use. After cooling, when the vehicle is parked, the tires have a tendency to distort
slightly, forming flat spots. These flat spots can cause vibrations similar to the vibrations caused by unbalanced
wheels. They do, however, disappear when the tire warms up. The degree to which flat spots form depends on the
type of cord used in the tire. In cold weather, it takes longer for the tire to warm up and consequently longer for the
flat spot to disappear.
CAUTION: The car must not be driven with wheels of different dimensions or with a spare tire other than the one
that came with the car. The use of different size wheels can seriously damage your car's transmission.
pg. 153 General information
Snow chains
Snow chains can be used on your Volvo with the following restrictions:
Snow chains should be installed on front wheels only. Use only Volvo approved snow chains.
Special snow chains must be mounted on 195/ 65 R15. For tires of other dimen- sions, consult your Volvo retailer.
If accessory, aftermarket or "custom" tires and wheels are installed and are of a size different than the original tires
and wheels, chains in some cases CANNOT be used. Sufficient clearances between chains and brakes, suspension and
body components must be maintained.
Some strap - on type chains will interfere with brake components and therefore CANNOT be used.
NOTE: Consult your Volvo retailer for additional snow chain information
CAUTION:
Check local regulations regarding the use of snow chains before installing
Always follow the chain manufacturer's installation instructions carefully. Install chains as tightly as possible and
retighten periodically.
Never exceed the chain manufacturer's specified maximum speed limit. (Under no circumstances should you exceed
31 mph (50 km/ h)
Avoid bumps, holes or sharp turns when driving with snow chains.
The handling of the vehicle can be adversely affected when driving with chains. Avoid fast or sharp turns as well as
locked wheel braking.
Snow tires, studded tires *
ProCarManuals.com
Page 93 of 128
Temporary Spare (certain models)
The spare tire in your car is called a "Temporary Spare". It has the following designation: T125/ 80 R17.
Recommended tire pressure (see decal on Fuel filler door) should be maintained irrespective of which position on the
car the Temporary Spare tire is used on. In the event of damage to this tire, a new one can be purchased from your
Volvo retailer.
WARNING!
Current legislation prohibits the use of the "Temporary Spare" tire other than as a temporary replacement for a
punctured tire. It must be replaced as soon as possible by a standard tire. Road holding and handling may be
affected with the "Temporary Spare" in use. Do not exceed 50 mph (80 km/ h). Do not drive farther than 50 miles
(80 km) on a temporary spare tire.
CAUTION:
The car must not be driven with wheels of different dimensions or with a spare tire other than the one that came with
the car. The use of different size wheels can seriously damage your car's transmission.
NOTE: Certain models may be equipped with a full- size spare tire. When used, it should be inflated to the same
pressure as the tire it is replacing.
pg. 155 Tread wear indicators
Tires have tread
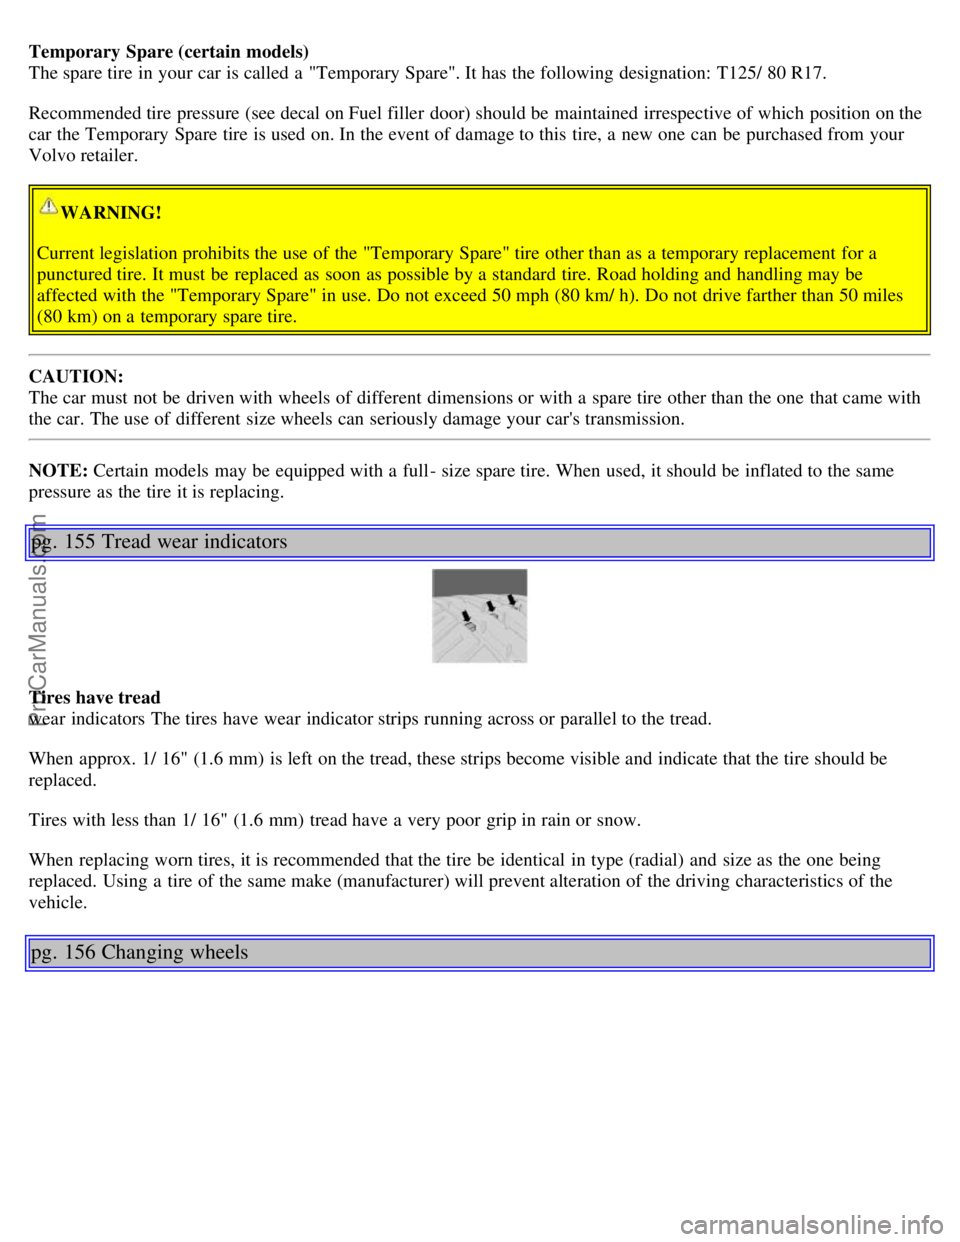
wear indicators The tires have wear indicator strips running across or parallel to the tread.
When approx. 1/ 16" (1.6 mm) is left on the tread, these strips become visible and indicate that the tire should be
replaced.
Tires with less than 1/ 16" (1.6 mm) tread have a very poor grip in rain or snow.
When replacing worn tires, it is recommended that the tire be identical in type (radial) and size as the one being
replaced. Using a tire of the same make (manufacturer) will prevent alteration of the driving characteristics of the
vehicle.
pg. 156 Changing wheels
ProCarManuals.com
Page 94 of 128

Changing wheels
The spare wheel is located under the carpet on the trunk floor. The jack and crank are secured in the wheel recess.
There are two jack attachment points on each side of the car (see illustration on next page). To change a wheel:
Engage the parking brake.
Put the gear selector in (P) ark (automatic transmission) or reverse (manual trans - mission).
Remove the wheel cap (where applicable) using the lug wrench in the tool kit.
With the car still on the ground, use the lug wrench to loosen the wheel bolts 1/ 2 - 1 turn. Turn the bolts
counterclockwise to loosen.
CAUTION:
The car must not be driven with wheels of different dimensions or with a spare tire other than the one that came with
the car. The use of different size wheels can seriously damage your car's transmission.
Correct tightening torque on wheel bolts must be observed. The wheel bolts should never be greased or lubricated.
The extended, chromed wheel bolts must not be used with steel rims, as they make it impos - sible to fit the hub caps.
pg. 157 Changing wheels
ProCarManuals.com
Page 95 of 128
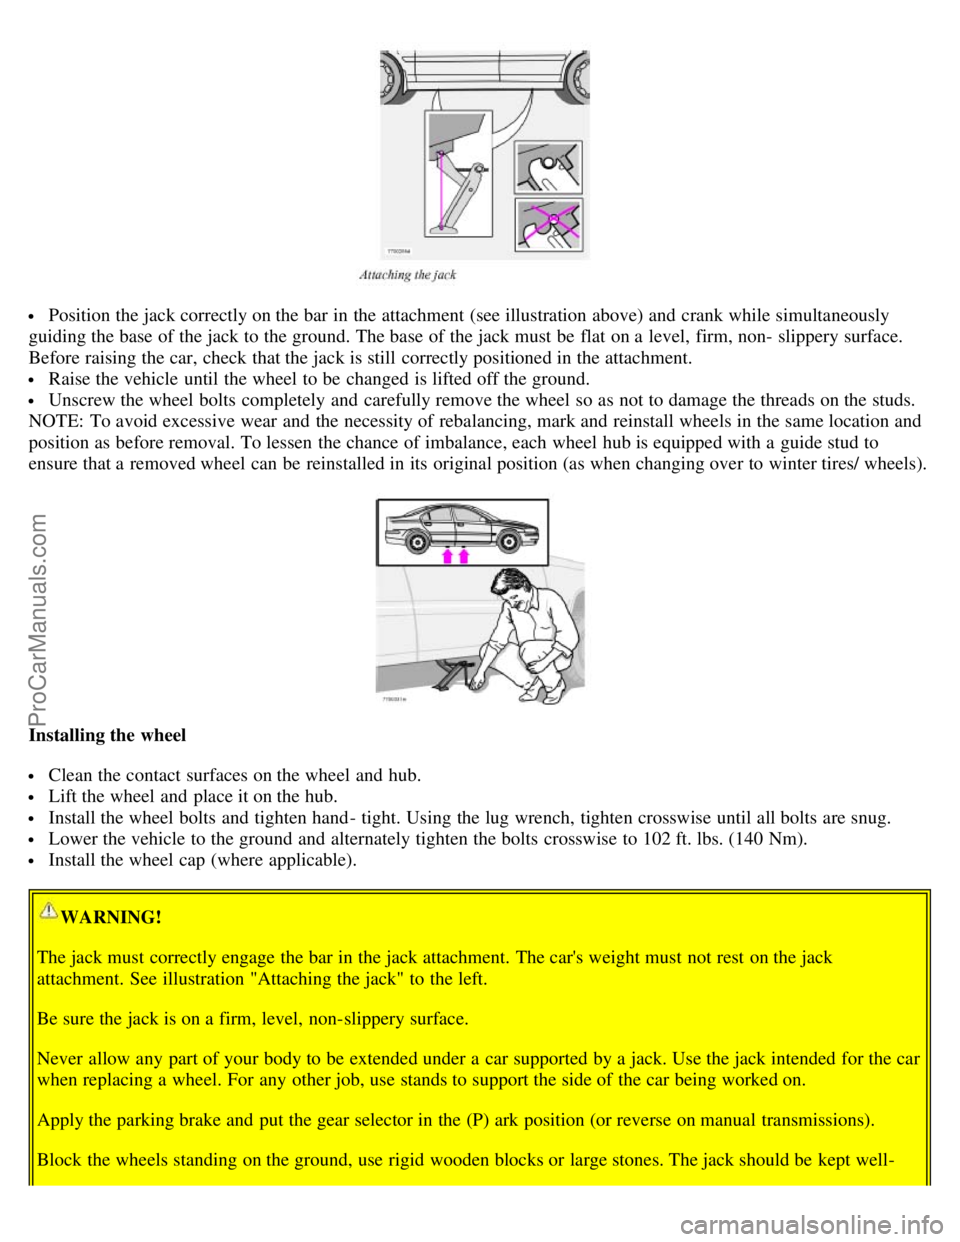
Position the jack correctly on the bar in the attachment (see illustration above) and crank while simultaneously
guiding the base of the jack to the ground. The base of the jack must be flat on a level, firm, non- slippery surface.
Before raising the car, check that the jack is still correctly positioned in the attachment.
Raise the vehicle until the wheel to be changed is lifted off the ground.
Unscrew the wheel bolts completely and carefully remove the wheel so as not to damage the threads on the studs.
NOTE: To avoid excessive wear and the necessity of rebalancing, mark and reinstall wheels in the same location and
position as before removal. To lessen the chance of imbalance, each wheel hub is equipped with a guide stud to
ensure that a removed wheel can be reinstalled in its original position (as when changing over to winter tires/ wheels).
Installing the wheel
Clean the contact surfaces on the wheel and hub.
Lift the wheel and place it on the hub.
Install the wheel bolts and tighten hand - tight. Using the lug wrench, tighten crosswise until all bolts are snug.
Lower the vehicle to the ground and alternately tighten the bolts crosswise to 102 ft. lbs. (140 Nm).
Install the wheel cap (where applicable).
WARNING!
The jack must correctly engage the bar in the jack attachment. The car's weight must not rest on the jack
attachment. See illustration "Attaching the jack" to the left.
Be sure the jack is on a firm, level, non-slippery surface.
Never allow any part of your body to be extended under a car supported by a jack. Use the jack intended for the car
when replacing a wheel. For any other job, use stands to support the side of the car being worked on.
Apply the parking brake and put the gear selector in the (P) ark position (or reverse on manual transmissions).
Block the wheels standing on the ground, use rigid wooden blocks or large stones. The jack should be kept well-
ProCarManuals.com
Page 102 of 128

These are the Federal warranties; other warranties are provided as required by state law. Refer to your separate
Warranty and Service Records Information booklet for detailed information concerning each of the warranties.
pg. 165 Maintenance Schedule2001
MAINTENANCE SCHEDULE S60
For complete maintenance information, please refer to your
Warranty and Service Records Information Booklet.
R = Replace
I = Inspect (Correct or Replace if necessary)
L = Lubricate
Maintenance Operationthousand miles 7.51522.5 3037.5 4552.5 6067.5 7582.5
90 2
(thousand km)(12)(24)(36) (48)(60)(72)(84)(96) (108) (120)(132)(144)
EMISSION SYSTEM MAINTENANCE
Engine oil and filter
1R RR RRRRR R RRR
Engine drive belt (accessory belt) I
Air cleaner filter R R R
Spark plugs R R R
Automatic transmission fluid I I I I I I
Timing belt - all engines
3
1) See section "Engine oil" for detailed information.
NOTE: The oil should be changed at these intervals, after 750 hours of driving or after 12 months, whichever
occurs first.
2) For services beyond 90,000 miles (144,000 km), please refer to the Warranty and Service Records
Information Booklet".
3) For proper functioning of the vehicle and its emission control systems, the timing belt and tensioner must be
replaced every 105,000 miles (168,000 km).
pg. 166 Maintenance Schedule
2001
MAINTENANCE SCHEDULE S60
R = Replace
I = Inspect (Correct or Replace if necessary)
L = Lubricate
Maintenance Operationthousand miles 7.51522.5 3037.5 4552.5 6067.5 7582.5 90
ProCarManuals.com
Page 111 of 128
2 0 0 1
VOLVO S60
Specifications
pg. 191 Specifications
Label information 192
Dimensions, weights193
Capacities194
Lubricants, Cooling system195
Three way catalytic converter196
Suspension197
Bulbs198
Electrical system199
Engine specifications200
Transmission201
Volvo On Call202
pg. 192 Label information
1 Vehicle Emission Control Information
Your Volvo is designed to meet all applicable emission standards, as evidenced by the certification label on the
underside of the hood. For further information regarding these regulations, please consult your Volvo retailer.
2 Vacuum hose routing
(underside of hood)
3 Loads and Tire Pressures
(on inside of fuel filler door)
4 Model plate
Vehicle Identification Number (VIN). Codes for color and upholstery, etc. The plate is located in the engine
compartment, on the inside of the left front fender.
5 Vehicle Identification Number (VIN) *
The VIN plate is located on the top left surface of the dashboard. The VIN is also stamped on the right hand door
pillar.
6 Federal Motor Vehicle Safety Standards (FMVSS) specifications (USA) and Ministry of Transport (CMVSS)
standards (Canada)
Your Volvo is designed to meet all applicable safety standards, as evidenced by the certification label on the facing
side of the driver's door. For further information regarding these regulations, please consult your Volvo retailer.
7 Child safety latch label
ProCarManuals.com
Page 112 of 128

*The Vehicle Identification Number (VIN) should always be quoted in all correspondence concerning your vehicle
with the retailer and when ordering parts.
pg. 193 Dimensions, weights
Dimensions
Length 180 in. (458 cm)
Width 71 in. (180 cm)
Height 56.2 in. (143 cm)
Wheelbase 107 in. (272 cm)
Front track 61.5 in. (156 cm)
Rear track 61.4 (156 cm)
Turning circle, between curbs 35.4- 38.7 ft. (10.8- 11.8 m)
Cargo capacity, trunk SAE V1 - 13.9 (394)
Weights
Gross vehicle weight *
5 cyl. (manual transmission)
USA 4360 lbs (1978 kg)
Canada 1980 kg
5 cyl. (automatic transmission)
USA 4400 lbs (1996 kg)
Canada 1996 kg
5 cyl. turbo (manual transmission)
USA 4430 lbs (2009 kg)
Canada 2110 kg
5 cyl. turbo (automatic transmission)
USA 4470 lbs (2028 kg)
Canada 2030 kg
ProCarManuals.com
Page 114 of 128
B5244S 5.8 US qts. (5.5 liters)
B5234T3 6. 1 US qts. (5.8 liters)
B5244T3 6. 1 US qts. (5.8 liters)
Transmission oil
manual (M 56) 2. 2 US qts. (2.1 liters)
automatic (AW 55- 50) 7.9 US qts. (7.5 liters)
Miscellaneous
Power steering 0. 9 US qts. (0.9 liters)
Windshield washer reservoir 4. 8 US qts. (4.5 liters)
Brake and clutch fluid 0. 69 US qts. (0.65 liters)
Air conditioning system 2.2 lbs. (1 kg) R 134a
* Turbo models have 21.1 US gal. (80 liter) fuel tanks.
Minimum octane requirement - AKI 87 (RON 91) unleaded fuel (See also page 126
)
pg. 195 Lubricants, Cooling system
Lubricants
Engine oil
Meeting minimum ILSAC specification GF- 2, including ACEA A1, API SJ, SJ/ CF and SJ/ Energy Conserving.
Volvo does not recommend the use of oil additives.
Transmission
Oil grade:
Manual: Volvo synthetic transmission oil 97308
Automatic: Volvo transmission oil 1161540- 8 Different types of oil should never be mixed.
Power steering
Grade: ATF
Brake fluid
Fluid type: Brake fluid DOT 4+.
Cooling system
Type Positive pressure, closed system.
Coolant Volvo original coolant/ antifreeze
Volume 5 cyl. non- turbo
8.5 US qts. (8.0 liters)
5 cyl. turbo
9.3 US qts (8.8 liters)
pg. 196 Three way catalytic converter
Three- way catalytic converter cautions
Keep your engine properly tuned. Certain engine malfunctions, particularly involving the electrical, fuel or
distributor ignition systems, may cause unusually high three- way catalytic converter temperatures. Do not continue to
operate your vehicle if you detect engine misfire, noticeable loss of power or other unusual operating conditions, such
as engine overheating or backfiring. A properly tuned engine will help avoid malfunctions that could damage the
ProCarManuals.com