Page 3505 of 4323

WIRELESS DOOR LOCK CONTROL SYSTEM
ON±VEHICLE INSPECTION
Make the vehicle in the init")
BE2MK±01
± BODY ELECTRICALWIRELESS DOOR LOCK CONTROL SYSTEM
BE±93
3497 Author�: Date�:
2005 SEQUOIA (RM1146U)
WIRELESS DOOR LOCK CONTROL SYSTEM
ON±VEHICLE INSPECTION
Make the vehicle in the initialized condition:
The initialized condition is the condition when the following conditions are satisfied.
(1) Key plate has not been inserted in the ignition key cylinder.
(2) All the doors are closed. (Door warning light is OFF.)
(3) All the doors are locked.
Under the standard operation, when repeating UNLOCK and LOCK switch 3 times or more alternately, check the
UNLOCK±LOCK operation from 3rd time onward.
� Following procedures are standard operation.
(1) Keep about 1 M away to the right direction from the outside handle of a driver's seat.
(2) Face the transmitter toward the vehicle and press one of transmitter switches for about 1 sec.
� As of the security function, even the wireless function is normal, there may be the case that only UNLOCK opera-
tion will not work.
� As of the body customize function, if ºoperation twiceº has been set using hand±held tester, only driver's seat
is unlocked by unlock operation performed once.
Normal
� Operative distance may differ according to
an operator, the way of holding the transmitter
or position.
� Because weak electric wave is used, when
there is strong wave or noise in the used
frequency, operation distance might be
shortened.
No Yes
Only wireless function (Remote control) will not operate.
(If a new transmitter or a transmitter of the same type that works properly with the vehicle is not available.)
Basic function check:
Page 3559 of 4323
BE26G±04
I28424
Engine Room J/B
� TOWING Fuse
Trailer Socket
Towing Converter Relay
(Located inside of the quarter trim panel LH)
Engine Room R/B No. 3
� BATT CHARGE Relay
� TOWING TAIL Relay
� TOWING BRK Fuse
� TOWING TAIL Fuse
Brake Controller
(Located inside of the cowl side trim board LH)
± BODY ELECTRICALTRAILER TOWING
BE±147
3551 Author�: Date�:
2005 SEQUOIA (RM1146U)
TRAILER TOWING
LOCATION
Page 3560 of 4323

INSPECTION
1. INSPECT TOWING CONVERTER CIRCUIT
Remove the towing converter wi")
BE2D5±02
I24381
Wire Harness Side: BE±148
± BODY ELECTRICALTRAILER TOWING
3552 Author�: Date�:
2005 SEQUOIA (RM1146U)
INSPECTION
1. INSPECT TOWING CONVERTER CIRCUIT
Remove the towing converter with the connector still connected
and inspect the wire harness side connector from the back side,
as shown in the table below.
Tester connectionConditionSpecified condition
4 ± 6Turn signal switch LEFT or hazard warning switch ON10 ± 14 V e 0 V
4 ± 6Turn signal switch LEFT and stop light switch ON (Brake pedal depressed)10 ± 14 V e 0 V
4 ± 6Turn signal switch OFF, hazard warning switch OFF and stop light switch OFF
(Brake pedal released)0 V
4 ± 6Stop light switch ON (Brake pedal depressed)10 ± 14 V
6 ± 9Turn signal switch LEFT or hazard warning switch ON10 ± 14 V e 0 V
6 ± 9Turn signal switch OFF or RIGHT and hazard warning switch OFF0 V
6 ± Body groundAlwaysContinuity
2 ± 6Turn signal switch RIGHT or hazard warning switch ON10 ± 14 V e 0 V
2 ± 6Turn signal switch RIGHT and stop light switch ON (Brake pedal depressed)10 ± 14 V e 0 V
26Turn signal switch OFF, and hazard warning switch OFF and stop light switch OFF0V2 ± 6Turn signal switch OFF, and hazard warning switch OFF and sto light switch OFF
(Brake pedal released)0 V
2 ± 6Stop light switch ON (Brake pedal depressed)10 ± 14 V e 0 V
1 ± 6Always10 ± 14 V
6 ± 8Stop light switch ON (Brake pedal depressed)10 ± 14 V
6 ± 8Stop light switch OFF (Brake pedal released)0 V
3 ± 6Turn signal switch RIGHT or hazard warning switch ON10 ± 14 V e 0 V
3 ± 6Turn signal switch OFF or LEFT and hazard warning switch OFF0 V
If the circuit is not as specified, inspect the circuit connected to
other parts.
Page 3561 of 4323

2. Trailer Socket 7 Pin Type:
INSPECT BRAKE CONTROLLER")
I24379
Wire Harness Side:
I18635
1
2 34
5
I18635
1
2 34
5
± BODY ELECTRICALTRAILER TOWING
BE±149
3553 Author�: Date�:
2005 SEQUOIA (RM1146U)
2. Trailer Socket 7 Pin Type:
INSPECT BRAKE CONTROLLER CIRCUIT
Remove the brake controller with the connector still connected
and inspect the wire harness side connector from the back side,
as shown in the table below.
Tester connectionConditionSpecified condition
1 ± 3Stop light switch ON (Brake pedal depressed)10 ± 14 V
1 ± 3Stop light switch OFF (Brake pedal released)0 V
2 ± 3Always10 ± 14 V
3 ± 4Stop light switch ON (Brake pedal depressed)10 ± 14 V
3 ± 4Stop light switch OFF (Brake pedal released)0 V
3 ± 5Light control switch TAIL or HEAD10 ± 14 V
3 ± 5Light control switch OFF0 V
If the circuit is not as specified, inspect the circuit connected to
other parts.
3. INSPECT TOWING TAIL RELAY CONTINUITY
ConditionTester connectionSpecified condition
Always1 ± 2Continuity
Always3 ± 5No continuity
Apply B+ between
terminals 1 and 2.3 ± 5Continuity
If continuity is not as specified, replace the relay.
4. INSPECT BATT CHARGE RELAY CIRCUIT
ConditionTester connectionSpecified condition
Always1 ± 2Continuity
Always3 ± 5No continuity
Apply B+ between
terminals 1 and 2.3 ± 5Continuity
If continuity is not as specified, replace the relay.
Page 3580 of 4323

6. REMOVE INSIDE HANDLE
(a) Slide the inside handle backward to remove it.
(b) Disconnect the 2 cables from i")
H16644
H16643
H05546
± BODYREAR DOOR
BO±19
3572 Author�: Date�:
2005 SEQUOIA (RM1146U)
6. REMOVE INSIDE HANDLE
(a) Slide the inside handle backward to remove it.
(b) Disconnect the 2 cables from inside handle as shown in
the illustration.
7. REMOVE SERVICE HOLE COVER
(a) Using a clip remover, remove the clamp and grommets.
(b) Remove the service hole cover.
NOTICE:
Do not tear the cover.
HINT:
At the time of reassembly, please refer to the following item.
Bring out the 2 control cables and wire harness through the ser-
vice hole cover.
8. REMOVE DIVISION BAR
HINT:
Insert a shop rag inside the door panel to prevent scratching the
glass.
(a) Open the door glass until the bolts appear in the service
hole.
(b) Remove the 2 door glass set nuts.
(c) Remove the door glass from the glass bracket and lower
the door glass into the door panel.
NOTICE:
Do not damage the door glass.
HINT:
Position the door glass toward the front as much as possible.
(d) Remove the door glass run.
(e) Remove the 2 bolts and screw.
(f) Pull the division bar forward.
Page 3893 of 4323

34
2005 SEQUOIA from Aug. 04 Prod. (OM34424U)
�Never leave anyone (particularly a
small child) alone in your vehicle,
especially with the ignition key still
inserted. Otherwis")
05_SEQUOIA_U (L/O 0408)
34
2005 SEQUOIA from Aug. '04 Prod. (OM34424U)
�Never leave anyone (particularly a
small child) alone in your vehicle,
especially with the ignition key still
inserted. Otherwise, he/she could
use the power back window switch
and get trapped in a window. Unat-
tended person (particularly a small
child) can be involved in a serious
accident.
�Keep the back window closed while
driving. This not only keeps the
luggage from being thrown out but
also prevents exhaust gases from
entering the vehicle.
Vehicles with wireless remote control sys-
temÐ
To open the back window with the wire-
less remote control transmitter, see
ªÐOpening back windowº on page 22 in
this Section.
LOCKING AND UNLOCKING WITH KEY
Insert the key into the keyhole and turn
it.
To lock: Turn the key clockwise.
To unlock: Turn the key counterclockwise.
All the doors lock and unlock simulta-
neously with back door.
To open the back door, pull the lever.
The back door will be controlled by oper-
ating the power door lock switch.
The back door window can be opened or
closed with the key operation in the back
door keyhole. (For details, see ªPower
back windowº on page 31 in this Section.)When closing the back door, the inside
strap can be used to make the reach
easier.
To close the back door, lower it and press
down on it. After closing the back door,
try pulling it up to make sure it is secure-
ly closed.
See ªÐStowage precautionsº on page 356
in Section 2 for precautions when loading
luggage.
Back door
Page 3903 of 4323

44
2005 SEQUOIA from Aug. 04 Prod. (OM34424U)
While the vehicle is being driven, all ve-
hicle occupants should have the seatback
upright, sit well back in the seat and prop-")
05_SEQUOIA_U (L/O 0408)
44
2005 SEQUOIA from Aug. '04 Prod. (OM34424U)
While the vehicle is being driven, all ve-
hicle occupants should have the seatback
upright, sit well back in the seat and prop-
erly wear the seat belts provided.
CAUTION
�Do not drive the vehicle unless the
occupants are properly seated. Do
not allow any passengers to sit on
top of a folded±down seatback, or
in the luggage compartment or car-
go area. Persons not properly
seated and/or not properly re-
strained by seat belts can be se-
verely injured in the event of emer-
gency braking or a collision.
�During driving, do not allow any
passengers to stand up or move
around between seats. Otherwise,
severe injuries can occur in the
event of emergency braking or a
collision.
Driver seat
CAUTION
The SRS driver airbag deploys with
considerable force, and can cause
death or serious injury especially if
the driver is very close to the airbag.
The National Highway Traffic Safety
Administration (ªNHTSAº) advises:
Since the risk zone for driver airbag
is the first 50Ð75 mm (2Ð3 in.) of
inflation, placing yourself 250 mm (10
in.) from your driver airbag provides
you with a clear margin of safety.
This distance is measured from the
center of the steering wheel to your
breastbone. If you sit less than 250
mm (10 in.) away now, you can
change your driving position in sever-
al ways:
�Move your seat to the rear as far
as you can while still reaching the
pedals comfortably.
�Slightly recline the back of the
seat. Although vehicle designs vary,
many drivers can achieve the 250
mm (10 in.) distance, even with the
driver seat all the way forward, sim-
ply by reclining the back of the
seat somewhat. If reclining the back
of your seat makes it hard to see
the road, raise yourself by using a
firm, non±slippery cushion, or raise
the seat if your vehicle has that
feature.
�If your steering wheel is adjustable,
tilt it downward. This points the air-
bag toward your chest instead of
your head and neck.
The seat should be adjusted as rec-
ommended by NHTSA above, while
still maintaining control of the foot
pedals, steering wheel, and your view
of the instrument panel controls.
SeatsFront seatsÐ
ÐFront seat precautions
Page 3908 of 4323
05_SEQUOIA_U (L/O 0408)
49
2005 SEQUOIA from Aug. '04 Prod. (OM34424U)
�When returning seats to their origi-
nal position, observe the following
precautions in order to prevent per-
sonal injury in a collision or sud-
den stop:
Be careful not to get your hands or
feet pinched in the seat.
Make sure the seat is securely
locked by pushing forward and rear-
ward on the top of the seatback or
by trying to pull up the edge of the
bottom cushion. Failure to do so
will prevent the seat belt from oper-
ating properly.
Make sure the seat belts are not
twisted or caught under the seat
and are arranged in their proper
position and are ready to use.
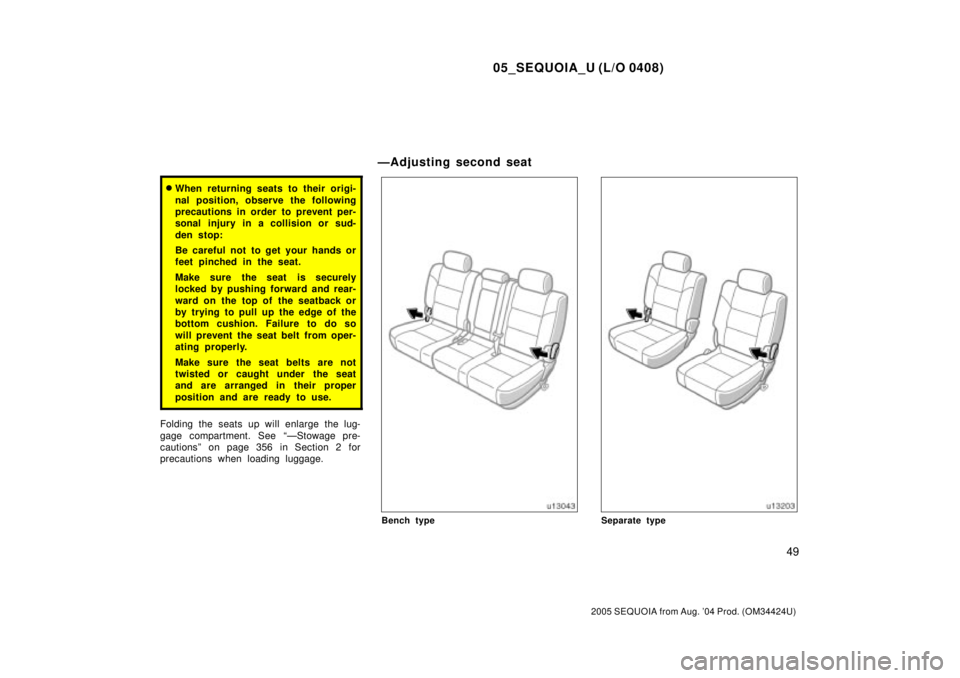
Folding the seats up will enlarge the lug-
gage compartment. See ªÐStowage pre-
cautionsº on page 356 in Section 2 for
precautions when loading luggage.
Bench typeSeparate type
ÐAdjusting second seat