Page 5 of 413
Table of Contents (cont'd)
Defensive Driving
Drunken Driving
Control of a Vehicle
Braking
SteeringDriving Tips for Various Road Conditions
Recreational Vehicle Towing
Loading Your Vehicle
Towing a Trailer Heating and Air Conditioning
Setting the Radio Clock
Radio/Cassette Player/CD PlayerRadio Theft-Deterrent Feature
Steering Wheel Controls (If Equipped)
Hazard Warning Flashers
Jump Starting
Towing Your VehicleEngine Overheating
Changing a Flat Tire
If You're Stuck
Problems on the Road
iii
Comfort Controls and Audio Systems
Your Driving and the Road
Section
3
Section
4
Section
5
Page 82 of 413
2-15
NOTICE:
When replacing the battery, use care not to touch any
of the circuitry. Static from your body transferred
to these surfaces may damage the transmitter.
For battery replacement, use one Duracell� battery, type
DL
-2032, or a similar type.To replace the battery:
1. Insert a thin coin into the notch near the key ring.
Turn the coin counterclockwise to separate the
two halves of the transmitter.
2. Once the transmitter is separated, use a pencil eraser
to remove the old battery. Do not use a metal object.
3. Remove and replace the battery. Replace it as the
instructions inside the cover indicate.
4. Snap the transmitter back together tightly to be sure
no moisture can enter.
5. Check the operation of the transmitter.
Page 112 of 413

2-45
Exterior Lamps
Headlamps
See ªTurn Signal/Multifunction Leverº in the Index.
Daytime Running Lamps
Daytime Running Lamps (DRL) can make it easier for
others to see the front of your vehicle during the day.
DRL can be helpful in many different driving
conditions, but they can be especially helpful in the
short periods after dawn and before sunset. Fully
functional daytime running lights are required on all
vehicles first sold in Canada.
A light sensor on top of the instrument panel monitors
the exterior light level for the operation of DRL and
Twilight Sentinel
�, so be sure it isn't covered.
The DRL system will make your high
-beam headlamps
come on at a reduced brightness when the following
conditions are met:
�The ignition is on,
�the headlamp control is off, and
�the transaxle is not in PARK (P).When the DRL are on, only your high
-beam headlamps
will be on at reduced intensity. The taillamps,
sidemarker and other lamps won't be on. Your
instrument panel won't be lit either.
When it's dark enough outside, your regular intensity
headlamps will come on at full brightness and the DRL
lighting will turn off. The parking lamps that normally
come on with your headlamps will also come on. When
it's bright enough outside, the regular intensity
headlamps and parking lamps will turn back off, and the
reduced brightness DRL lighting will turn back on.
To idle your vehicle during the day with the DRL off,
shift the transaxle into PARK (P). The DRL will stay off
until you shift out of PARK (P).
At night, you can turn off all exterior lamps when you
are in PARK (P) by turning the Twilight Sentinel knob
all the way to OFF.
If the knob was already in OFF, it must be cycled to
ON and back to OFF. Turn the knob clockwise to turn
the exterior lighting back on. The lamps will come back
on automatically when you put the transaxle in gear.
As with any vehicle, you should turn on the regular
headlamp system when you need it.
Page 113 of 413

2-46
Fog Lamps
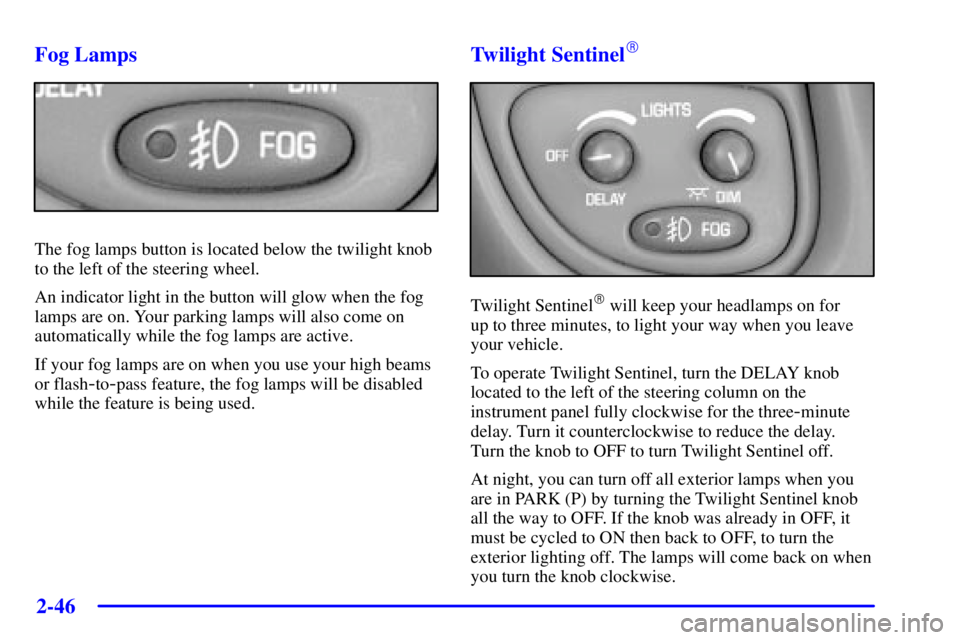
The fog lamps button is located below the twilight knob
to the left of the steering wheel.
An indicator light in the button will glow when the fog
lamps are on. Your parking lamps will also come on
automatically while the fog lamps are active.
If your fog lamps are on when you use your high beams
or flash
-to-pass feature, the fog lamps will be disabled
while the feature is being used.
Twilight Sentinel�
Twilight Sentinel� will keep your headlamps on for
up to three minutes, to light your way when you leave
your vehicle.
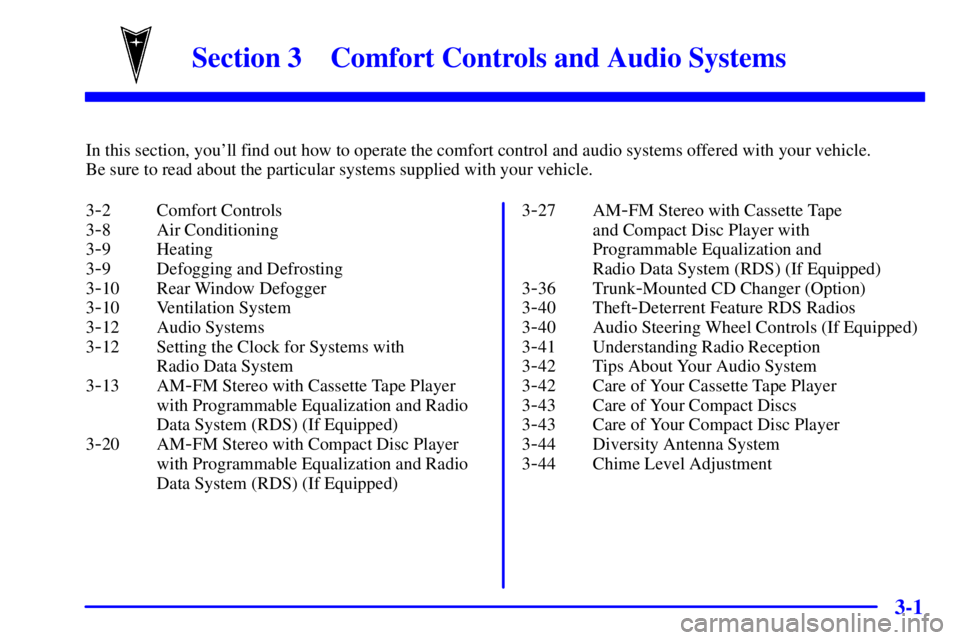
To operate Twilight Sentinel, turn the DELAY knob
located to the left of the steering column on the
instrument panel fully clockwise for the three
-minute
delay. Turn it counterclockwise to reduce the delay.
Turn the knob to OFF to turn Twilight Sentinel off.
At night, you can turn off all exterior lamps when you
are in PARK (P) by turning the Twilight Sentinel knob
all the way to OFF. If the knob was already in OFF, it
must be cycled to ON then back to OFF, to turn the
exterior lighting off. The lamps will come back on when
you turn the knob clockwise.
Page 114 of 413

2-47
If the Twilight Sentinel lighting is active, it can be
disabled by turning on the manual parking lamps.
This lighting will be disabled until the key is turned
from ON or until the manual parking lamps are
turned off.
Also, it's possible that your headlamps may go out if
you drive from a dark area into a bright area like a
lighted parking lot. If this happens, turn on your
headlamps with the regular headlamp control.
Exterior Lighting Battery Saver
If the manual lamp control has been left on, the exterior
lamps will turn off approximately 10 minutes after the
ignition is turned to OFF and any door has been opened.
This protects against draining the battery in case you
have accidentally left the headlamps or parking lamps
on. If you need to leave the lamps on for more than
10 minutes, use the manual control to turn the lamps
back on after turning the ignition to OFF and opening
any door. To delay the lamps from turning off, see
ªTwilight Sentinel
�º in the Index.
Interior Lamps
Instrument Panel/Brightness Control
When it is dark outside, you can brighten or dim your
instrument panel cluster lights by turning the DIM knob
in the light control. Turn the knob clockwise to brighten
the instrument panel cluster lights and displays. Turn the
knob clockwise all the way to turn on the interior
courtesy lamps. Turn the knob counterclockwise to dim
the instrument panel cluster lights and displays and to
turn off the courtesy lamps.
Courtesy Lamps
If it is dark enough outside, when any door is opened,
several lamps will come on. They make it easier for you
to enter and leave the vehicle. Turn the dimmer knob all
the way clockwise to turn the interior courtesy lamps on.
Page 172 of 413
2-105
The HUD controls are located to the left of the
steering column.
1. Start your engine and turn the HUD dimmer all of
the way clockwise.
The brightness of the HUD image is determined by
ambient light, and where you have set the HUD
dimmer control.
2. Adjust the seat, if necessary, before setting the
height control.
Press and hold the top of the IMAGE (image height)
control, raising the HUD image as far as possible.
Then press on the bottom of the HUD image height
control to move the image down, so the image is as
low as possible, but in full view.
3. Turn the dimmer control counterclockwise until the
HUD image is no brighter than necessary. To turn the
HUD off, turn the HUD dimmer control all the
way counterclockwise.
Page 174 of 413

3-
3-1
Section 3 Comfort Controls and Audio Systems
In this section, you'll find out how to operate the comfort control and audio systems offered with your vehicle.
Be sure to read about the particular systems supplied with your vehicle.
3
-2 Comfort Controls
3
-8 Air Conditioning
3
-9 Heating
3
-9 Defogging and Defrosting
3
-10 Rear Window Defogger
3
-10 Ventilation System
3
-12 Audio Systems
3
-12 Setting the Clock for Systems with
Radio Data System
3
-13 AM-FM Stereo with Cassette Tape Player
with Programmable Equalization and Radio
Data System (RDS) (If Equipped)
3
-20 AM-FM Stereo with Compact Disc Player
with Programmable Equalization and Radio
Data System (RDS) (If Equipped)3
-27 AM-FM Stereo with Cassette Tape
and Compact Disc Player with
Programmable Equalization and
Radio Data System (RDS) (If Equipped)
3
-36 Trunk-Mounted CD Changer (Option)
3
-40 Theft-Deterrent Feature RDS Radios
3
-40 Audio Steering Wheel Controls (If Equipped)
3
-41 Understanding Radio Reception
3
-42 Tips About Your Audio System
3
-42 Care of Your Cassette Tape Player
3
-43 Care of Your Compact Discs
3
-43 Care of Your Compact Disc Player
3
-44 Diversity Antenna System
3
-44 Chime Level Adjustment
Page 175 of 413

3-2
Comfort Controls
This section tells you how to make your air system
work for you.
With these systems, you can control the heating,
cooling and ventilation in your vehicle. Your vehicle
also has a flow
-through ventilation system described
later in this section.
Your vehicle may be equipped with a passenger
compartment air filter. For more information, see
ªPassenger Compartment Air Filterº in the Index.
Comfort Controls Personalization
(If Equipped)
This feature allows two different drivers to store and
recall their own climate control settings for temperature,
air delivery mode and fan speed. The personal choice
settings recalled are determined by the transmitter used
to enter the vehicle. After the button with the unlock
symbol on a remote keyless entry transmitter is pressed,
and the ignition is in ON, the climate control will adjust
to the last settings of the identified driver. The settings
can also be changed by pressing one of the memory
buttons (1 or 2) located on the driver's door, until you
hear two beeps. When adjustments are made, the new
settings are automatically saved for that driver.
Standard Climate Control System
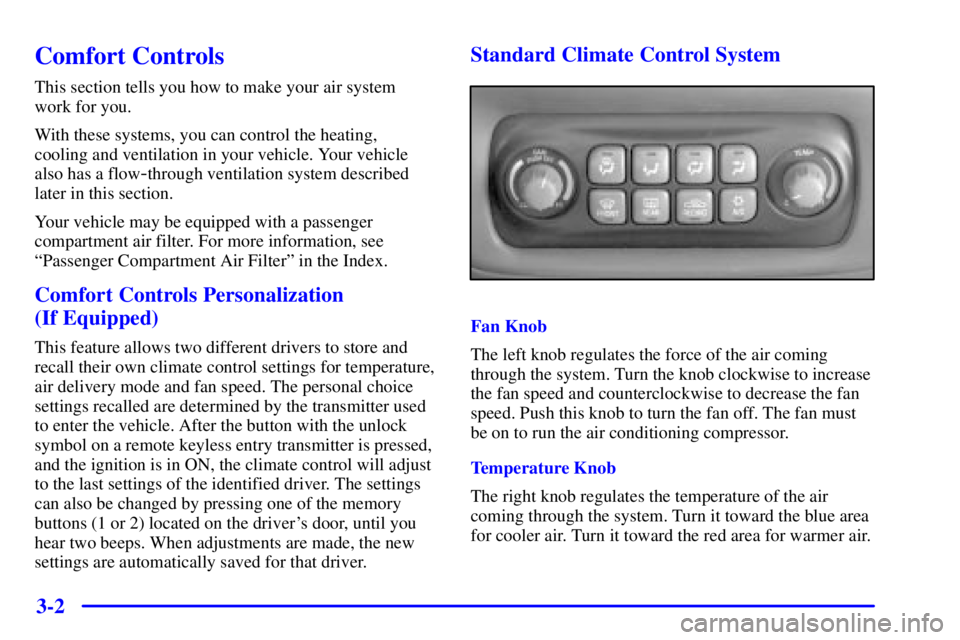
Fan Knob
The left knob regulates the force of the air coming
through the system. Turn the knob clockwise to increase
the fan speed and counterclockwise to decrease the fan
speed. Push this knob to turn the fan off. The fan must
be on to run the air conditioning compressor.
Temperature Knob
The right knob regulates the temperature of the air
coming through the system. Turn it toward the blue area
for cooler air. Turn it toward the red area for warmer air.