Page 200 of 413

3-27
CD AUX: With a compact disc in the player and the
radio playing, press this button to play a compact disc.
Press AM FM to return to the radio when a compact disc
is playing. The inactive CD will remain safely inside the
radio for future listening. The CD icon will appear on
the display when a compact disc is loaded. If you have
the optional CD changer and the CD changer is loaded,
the CD AUX button will activate the changer and an
icon will be lit in the display.
: Press this button to remove the disc. The radio will
play. Eject may be activated with either the ignition or
radio off. CDs may be loaded with the radio and ignition
off if this button is pressed first.
Radio Calibration
Your audio system has been calibrated for your vehicle
from the factory. If CALIBRATE appears on the display
it means that your radio has not been configured
properly for your vehicle and must be returned to the
dealership for service.
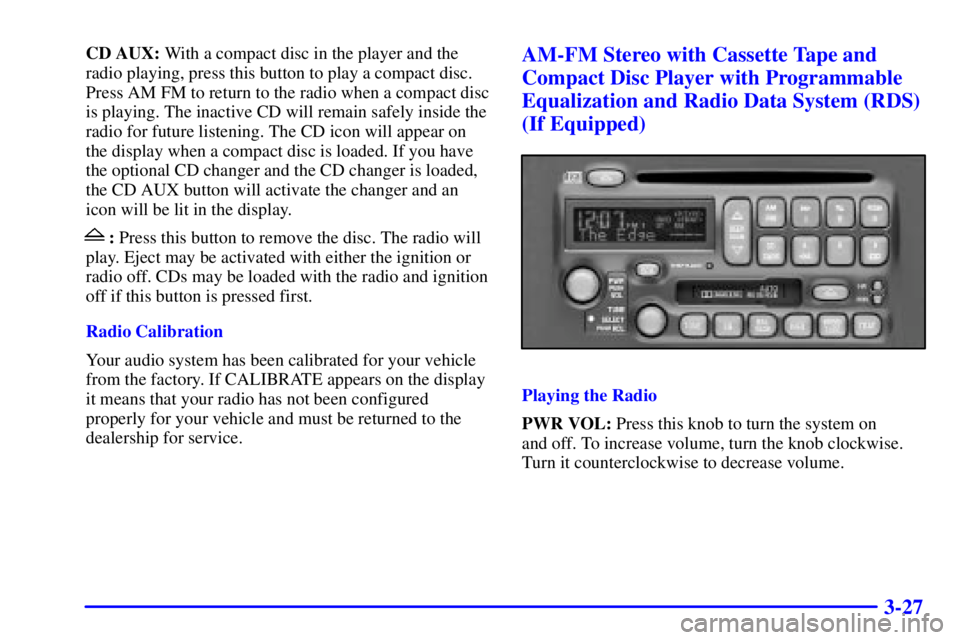
AM-FM Stereo with Cassette Tape and
Compact Disc Player with Programmable
Equalization and Radio Data System (RDS)
(If Equipped)
Playing the Radio
PWR VOL: Press this knob to turn the system on
and off. To increase volume, turn the knob clockwise.
Turn it counterclockwise to decrease volume.
Page 202 of 413

3-29
PRESET SCAN: Press and hold one of the SEEK
arrows for more than four seconds until the preset scan
icon and the preset number appear on the display. You
will hear a double beep. Use PRESET SCAN to listen to
each of your preset stations for a few seconds. The radio
will go to the first preset station stored on your
pushbuttons, stop for a few seconds, then go on to the
next preset station. Press one of the SEEK arrows again
to stop scanning presets.
Preset scan will skip over presets where no station is
being received at that time to prevent hearing static.
Setting the Tone
TONE: Press and release this button until the desired
tone control (BASS, MID or TREB) is found. The
SELECT LED indicator will light to show that the tone
control can be adjusted. When using BASS or MID, turn
the SELECT knob clockwise to increase bass. Turn it
counterclockwise to decrease bass. When using TREB,
turn the SELECT knob clockwise to increase treble.
Turn it counterclockwise to decrease treble. If a station
is weak or noisy, you may want to decrease the treble.
To set all of the tone controls to the middle position,
press and hold TONE until FLAT appears on the display.EQ: This feature allows you to choose preset bass, mid
and treble equalization settings designed for different
individual listening tastes. Press EQ to select the desired
preset equalization setting. Each time you press EQ,
another setting will appear on the display.
You can preset up to six equalization settings by
performing the following steps:
1. Turn the radio on.
2. Use the TONE button and the SELECT knob to
select the desired equalization.
3. Press and hold EQ for two seconds. SELECT EQ #
will appear on the display. The EQ icon will flash.
4. Press EQ or turn the SELECT knob to select the
desired EQ number. Each time you press EQ or turn
the SELECT knob, another EQ setting will appear on
the display.
5. Press and hold the EQ button or push the SELECT
knob to store the equalization preset. You will hear a
beep and EQ SAVED will appear on the display.
6. Repeat the steps for each EQ setting. EQ 5 has been
programmed for use with talk radio, but it can be
preset to a different tone.
Page 205 of 413

3-32
ALTERNATE FREQUENCY: This feature allows
the radio to switch to a stronger station with the same
program type. Press and hold AM FM for two seconds
to turn alternate frequency on. AF ON will appear on the
display. The radio may switch to stronger stations. Press
and hold AM FM again for two seconds to turn alternate
frequency off. AF OFF will appear on the display.
The radio will not switch to other stations.
Adjusting the Speakers
BAL FADE: This button adjusts balance and fade.
To adjust balance, press this button until BAL appears
on the display. Turn the SELECT knob clockwise for
the right speakers and counterclockwise for the left
speakers. The middle position balances the sound
between the speakers. To adjust fade, press this button
until FAD appears on the display. Turn the SELECT
knob clockwise to adjust the sound to the front speakers
and counterclockwise for the rear speakers. The middle
position balances the sound between the speakers. Press
and hold this button for two seconds to return both fade
and balance to the middle position.Playing a Cassette Tape
Your tape player is built to work best with tapes that are
up to 30 to 45 minutes long on each side. Tapes longer
than that are so thin they may not work well in this
player. The longer side with the tape visible should face
to the right. If the ignition is on, but the radio is off, the
tape can be inserted and will begin playing. If you hear
nothing but a garbled sound, the tape may not be in
squarely. Press the eject button to remove the tape
and start over.
While the tape is playing, use the VOL, BAL FADE,
TONE, EQ, SEEK and SCAN controls just as you do for
the radio. The display will show TAPE and an arrow
showing which side of the tape is playing. The tape
player automatically begins playing the other side when
it reaches the end of the tape.
Your tape bias is set automatically when a metal or chrome
tape is inserted. If you want to insert a tape when the
ignition is off, first press the eject button or the RCL knob.
If an error appears on the radio display, the tape won't
play because of an error.
Page 206 of 413

3-33
TIGHT TAPE is displayed when the tape is tight and the
player can't turn the tape hubs. Remove the tape. Hold
the tape with the open end down and try to turn the right
hub counterclockwise with a pencil. Turn the tape over
and repeat. If the hubs do not turn easily, your tape may
be damaged and should not be used in the player. Try a
new tape to make sure your player is working properly.
BROKEN TAPE is displayed when the tape is broken.
Try a new tape.
WRAPPED TAPE is displayed when the tape is
wrapped around the tape head. Attempt to get the
cassette out. Try a new tape.
If any error occurs repeatedly or if an error can't be
corrected, please contact your dealer. If your radio
displays an error message, write it down and provide it
to your dealer when reporting the problem.
�� (1): Press this button to advance quickly to another
part of the tape. Press the button again to return to
playing speed. The radio will play the last selected
station while the tape advances. You may select stations
during FWD operation by using TUNE.
While in FWD mode the display will show FREQ and
FWD and two right arrows. If the radio is playing a
RDS station the display will only show FREQ.
�� (2): Press this button to play the other side
of the tape.
�� (4): Press this button to reverse the tape rapidly.
Press it again to return to playing speed. The radio will
play the last selected station while the tape reverses.
You may select stations during REV operation by
using TUNE.
� (6): Press this button to reduce background noise.
DOLBY NR ON will appear on the display. Press it
again to turn Dolby NR off.
Dolby Noise Reduction is manufactured under a license
from Dolby Laboratories Licensing Corporation. Dolby
and the double
-D symbol are trademarks of Dolby
Laboratories Licensing Corporation.
EQ: Press EQ to select the desired preset equalization
setting while playing a cassette. The equalization will be
automatically set whenever you play a cassette tape.
SEEK: Press the up or down arrow to search for the
next or previous selection on the tape. Your tape must
have at least three seconds of silence between each
selection for SEEK to work. You can skip nine
selections up or down on the tape. Choose how many
selections you want to skip. Press the SEEK arrow that
many times. The number of selections to be skipped will
appear on the display.
Page 229 of 413

4-12 Steering in Emergencies
There are times when steering can be more effective
than braking. For example, you come over a hill and
find a truck stopped in your lane, or a car suddenly pulls
out from nowhere, or a child darts out from between
parked cars and stops right in front of you. You can
avoid these problems by braking
-- if you can stop in
time. But sometimes you can't; there isn't room.
That's the time for evasive action
-- steering around
the problem.
Your vehicle can perform very well in emergencies like
these. First apply your brakes. See ªBraking in
Emergenciesº earlier in this section. It is better to
remove as much speed as you can from a possible
collision. Then steer around the problem, to the left or
right depending on the space available.
An emergency like this requires close attention and a
quick decision. If you are holding the steering wheel at
the recommended 9 and 3 o'clock positions, you can
turn it a full 180 degrees very quickly without removing
either hand. But you have to act fast, steer quickly, and
just as quickly straighten the wheel once you have
avoided the object.
The fact that such emergency situations are always
possible is a good reason to practice defensive driving at
all times and wear safety belts properly.
Page 270 of 413
5-15 How to Add Coolant to the Radiator
1. You can remove the radiator pressure cap when the
cooling system, including the radiator pressure cap and
upper radiator hose, is no longer hot. Turn the pressure
cap slowly counterclockwise until it first stops.
(Don't press down while turning the pressure cap.)
If you hear a hiss, wait for that to stop. A hiss means
there is still some pressure left.
2. Then keep turning the pressure cap, but now push
down as you turn it. Remove the pressure cap.
Page 277 of 413
5-22
3. Turn the wheel wrench counterclockwise to lower
the jack lift head until it fits under the vehicle.
4. Put the jack head into a notch in the frame which is
located near each wheel well. The front notch is
11 inches (28 cm) back from the front wheel well.
The rear notch is 3.5 inches (9 cm) forward from the
rear wheel well.
Page 278 of 413
5-23
CAUTION:
Getting under a vehicle when it is jacked up is
dangerous. If the vehicle slips off the jack, you
could be badly injured or killed. Never get under
a vehicle when it is supported only by a jack.
CAUTION:
Raising your vehicle with the jack improperly
positioned can damage the vehicle and even make
the vehicle fall. To help avoid personal injury
and vehicle damage, be sure to fit the jack lift
head into the proper location before raising
the vehicle.5. Raise the vehicle by turning the wheel wrench
clockwise. Raise the vehicle far enough off the
ground so there is enough room for the spare tire to
fit under the wheel well.
6. Remove all the wheel nuts and take off the flat tire.