Page 39 of 263

TOP TETHER STRAP CHILD RE-
STRAINT
This vehicle is equipped with 3 anchor
brackets in the rear cargo area for attaching
child restraint top tether straps.
If your child restraint has a top tether strap,
secure the child restraint with the three-
point seat belt and latch the top strap hook
onto the appropriate anchor bracket. Make
sure the shoulder belt is placed between the
seat back and child restraint.
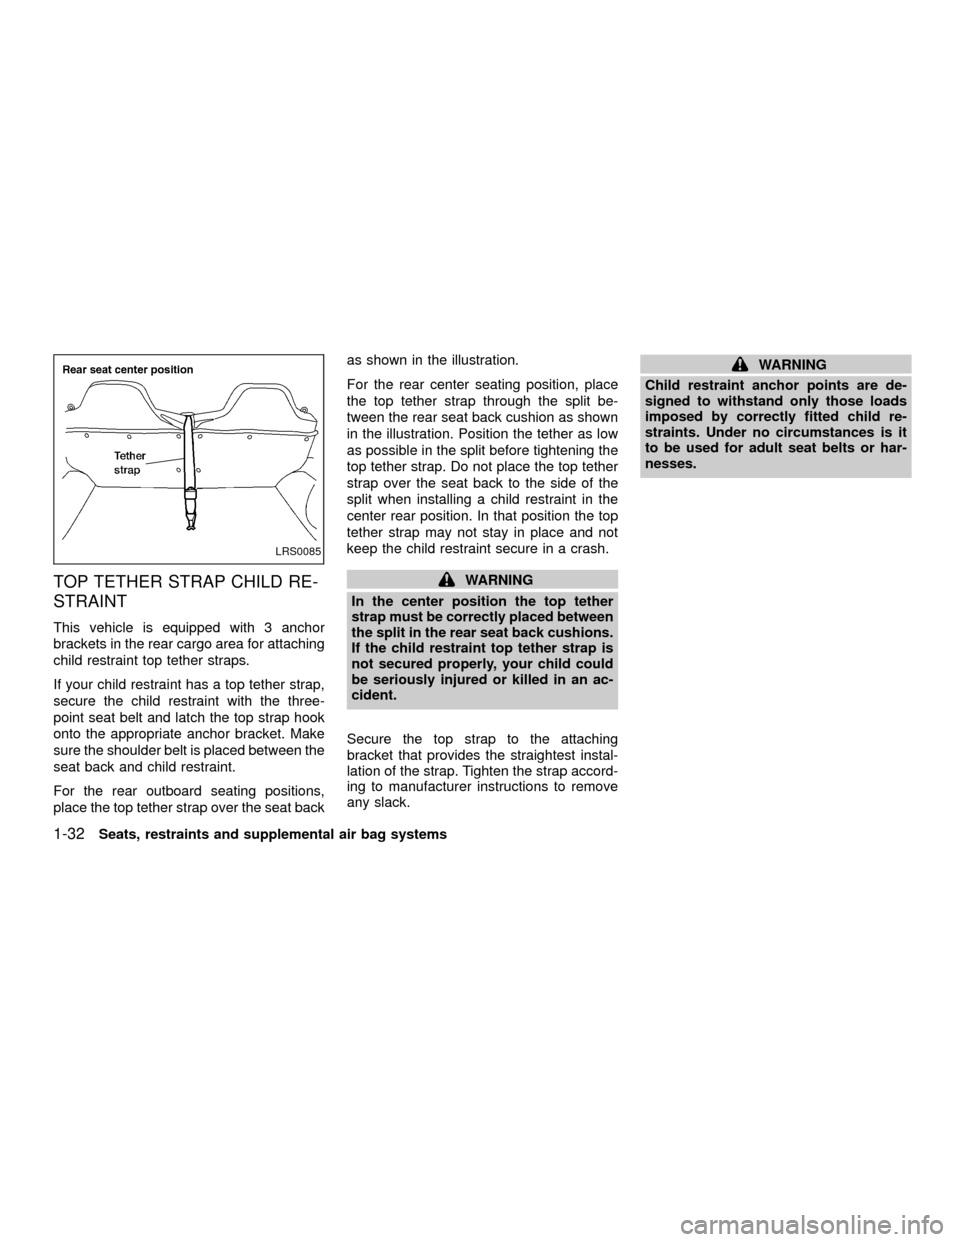
For the rear outboard seating positions,
place the top tether strap over the seat backas shown in the illustration.
For the rear center seating position, place
the top tether strap through the split be-
tween the rear seat back cushion as shown
in the illustration. Position the tether as low
as possible in the split before tightening the
top tether strap. Do not place the top tether
strap over the seat back to the side of the
split when installing a child restraint in the
center rear position. In that position the top
tether strap may not stay in place and not
keep the child restraint secure in a crash.
WARNING
In the center position the top tether
strap must be correctly placed between
the split in the rear seat back cushions.
If the child restraint top tether strap is
not secured properly, your child could
be seriously injured or killed in an ac-
cident.
Secure the top strap to the attaching
bracket that provides the straightest instal-
lation of the strap. Tighten the strap accord-
ing to manufacturer instructions to remove
any slack.
WARNING
Child restraint anchor points are de-
signed to withstand only those loads
imposed by correctly fitted child re-
straints. Under no circumstances is it
to be used for adult seat belts or har-
nesses.
LRS0085
1-32Seats, restraints and supplemental air bag systems
ZX
Page 42 of 263
2. Route the seat belt tongue through the
child restraint and insert it into the buckle
until you hear and feel the latch engage.
Be sure to follow the child restraint manu-
facturer's instructions for belt routing.3. Pull on the shoulder belt until all of the
belt is fully extended. At this time, the belt
retractor is in the automatic locking mode
(child restraint mode). It reverts back to
emergency locking mode when the belt is
fully retracted.4. Allow the seat belt to retract slightly. Pull
up on the seat belt to remove any slack in
the belt.
ARS1073ARS1034ARS1074
Seats, restraints and supplemental air bag systems1-35
ZX
Page 43 of 263
5. Before placing the child in the child re-
straint, use force to tilt the child restraint
from side to side, and tug it forward to
make sure it is securely held in place.
6.
Check that the retractor is in the automatic
locking mode by trying to pull more seat
belt out of the retractor. If you cannot pull
any more seat belt webbing out of the
retractor, the retractor is in the automatic
locking mode.
7. Check to make sure the child restraint is
properly secured prior to each use. If the
seat belt is not locked, repeat steps 3
through 6.After the child restraint is removed and the
seat belt is fully retracted, the automatic
locking mode (child restraint mode) is can-
celed.
ARS1079
1-36Seats, restraints and supplemental air bag systems
ZX
Page 173 of 263

Occasionally remove loose dust from the
interior trim, plastic parts and seats using a
vacuum cleaner or soft brush. Wipe the
vinyl and leather surfaces with a clean, soft
cloth dampened in mild soap solution, then
wipe clean with a dry soft cloth. Before
using any fabric protector, read the manu-
facturer's recommendations. Some fabric
protectors contain chemicals that stain or
bleach the seat material. Use a cloth damp-
ened only with water, to clean the meter and
gauge lens.
CAUTION
ONever use benzine, thinner or any
similar material.
ONever use fabric protectors unless
recommended by the manufacturer.
ODo not use glass or plastic cleaner
on meter or gauge lens covers. It
may damage the lens cover.
FLOOR MATS
The use of genuine NISSAN floor mats can
extend the life of your vehicle carpet and
make it easier to clean the interior.No
matter what mats are used, be sure they
are fitted for your vehicle and are prop-
erly positioned in the footwell to prevent
interference with pedal operation.Mats
should be maintained with regular cleaning
and replaced if they become excessively
worn.
Floor mat positioning aid
(Driver side only)
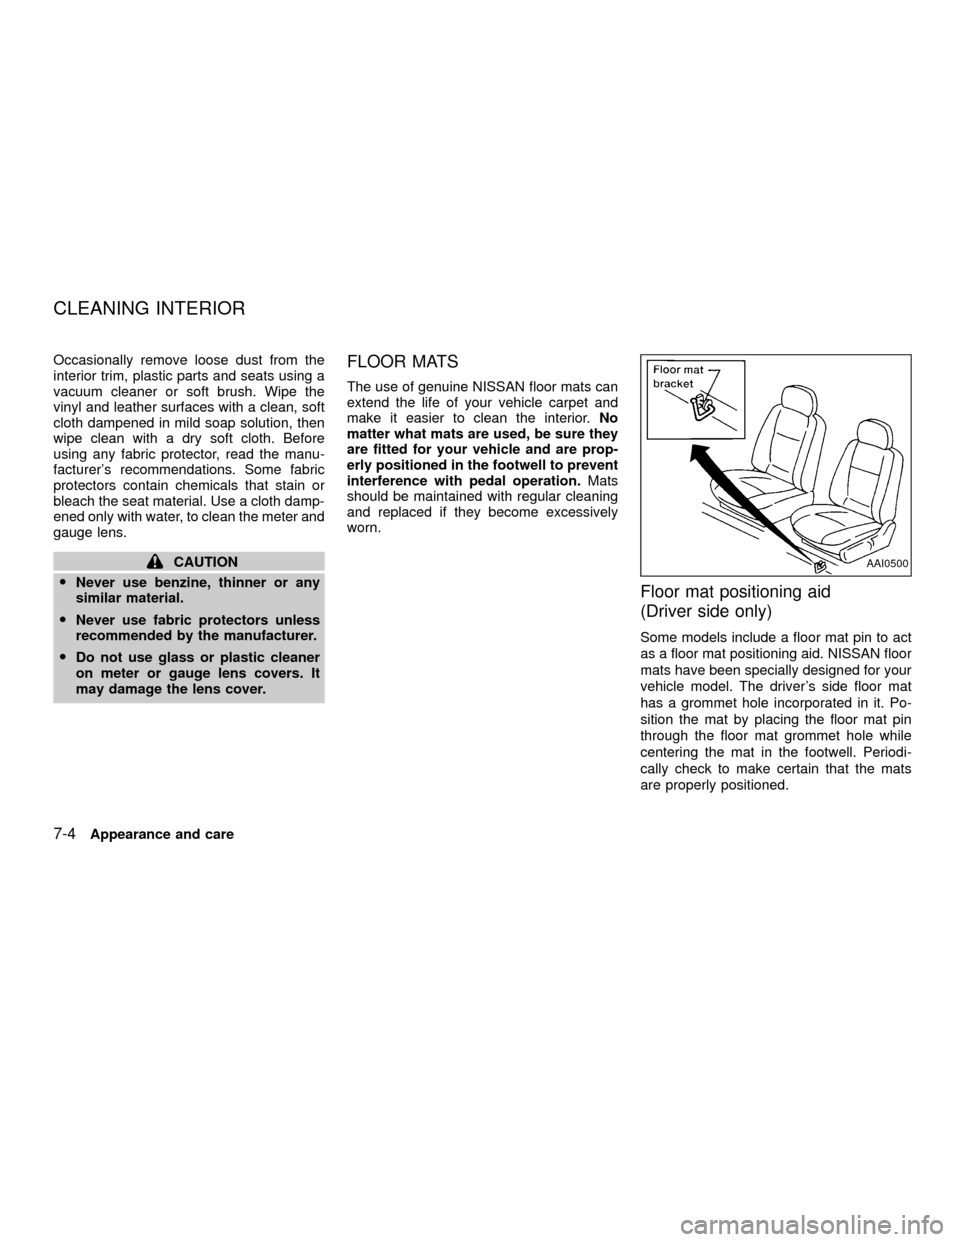
Some models include a floor mat pin to act
as a floor mat positioning aid. NISSAN floor
mats have been specially designed for your
vehicle model. The driver's side floor mat
has a grommet hole incorporated in it. Po-
sition the mat by placing the floor mat pin
through the floor mat grommet hole while
centering the mat in the footwell. Periodi-
cally check to make certain that the mats
are properly positioned.
AAI0500
CLEANING INTERIOR
7-4Appearance and care
ZX
Page 240 of 263

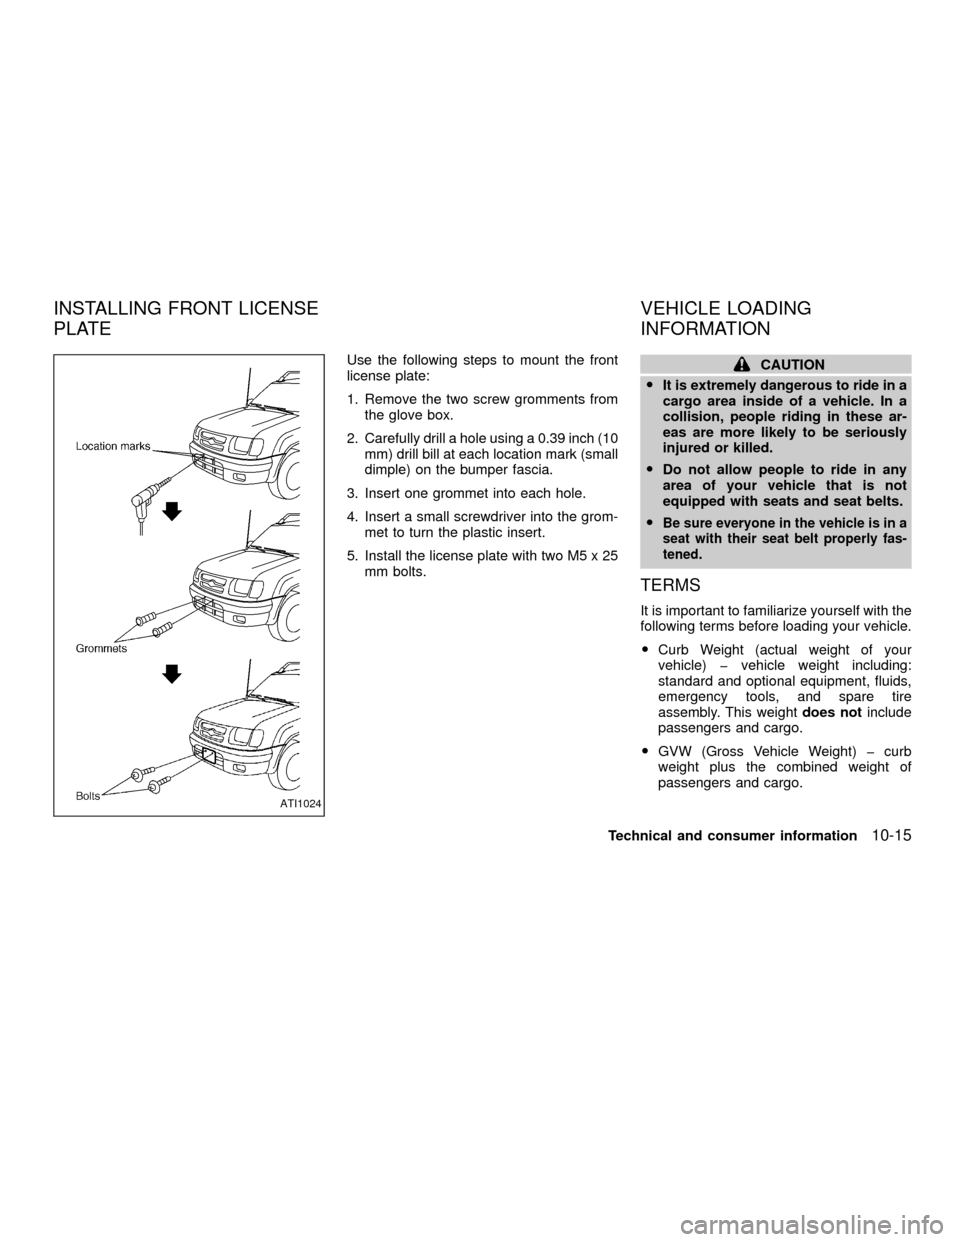
Use the following steps to mount the front
license plate:
1. Remove the two screw gromments from
the glove box.
2. Carefully drill a hole using a 0.39 inch (10
mm) drill bill at each location mark (small
dimple) on the bumper fascia.
3. Insert one grommet into each hole.
4. Insert a small screwdriver into the grom-
met to turn the plastic insert.
5. Install the license plate with two M5 x 25
mm bolts.CAUTION
OIt is extremely dangerous to ride in a
cargo area inside of a vehicle. In a
collision, people riding in these ar-
eas are more likely to be seriously
injured or killed.
ODo not allow people to ride in any
area of your vehicle that is not
equipped with seats and seat belts.
O
Be sure everyone in the vehicle is in a
seat with their seat belt properly fas-
tened.
TERMS
It is important to familiarize yourself with the
following terms before loading your vehicle.
OCurb Weight (actual weight of your
vehicle) þ vehicle weight including:
standard and optional equipment, fluids,
emergency tools, and spare tire
assembly. This weightdoes notinclude
passengers and cargo.
OGVW (Gross Vehicle Weight) þ curb
weight plus the combined weight of
passengers and cargo.
ATI1024
INSTALLING FRONT LICENSE
PLATEVEHICLE LOADING
INFORMATION
Technical and consumer information10-15
ZX