Page 10 of 263
Forward and backward
Pull the lever up and hold it while you slide
the seat forward or backward to the desired
position. Release the lever to lock the seat
in position.
Reclining
To recline the seatback pull the lever up and
lean back. To bring the seatback forward,
pull the lever up and lean your body forward.
Release the lever to lock the seatback in
position.
WARNING
After adjustment, gently rock in the
seat to make sure it is securely locked.
REAR SEAT ADJUSTMENT
1. Pull outward on the two straps at the
bottom of the seat cushions.
2. Lift the front of the seat cushion up and
remove the seat cushion. Store the seat
cushion in a secure place.
WRS0068ARS1224
Seats, restraints and supplemental air bag systems1-3
ZX
Page 12 of 263

OIt is extremely dangerous to ride in a
cargo area inside of a vehicle. In a
collision, people riding in these ar-
eas are more likely to be seriously
injured or killed.
ODo not allow people to ride in any
area of your vehicle that is not
equipped with seats and seat belts.
Be sure everyone in your vehicle is
in a seat and using a seat belt prop-
erly. Never ride in the rear seat un-
less the seat bottom cushions are in
place and latched.
OProperly secure all cargo to help
prevent it from sliding or shifting. Do
not place cargo higher than the seat-
backs. In a sudden stop or collision,
unsecured cargo could cause per-
sonal injury.
OWhen returning the seatbacks to the
upright position, be certain they are
completely secured in the latched
position. If they are not completely
secured in the latched position, pas-
sengers may be injured in an acci-
dent or sudden stop.
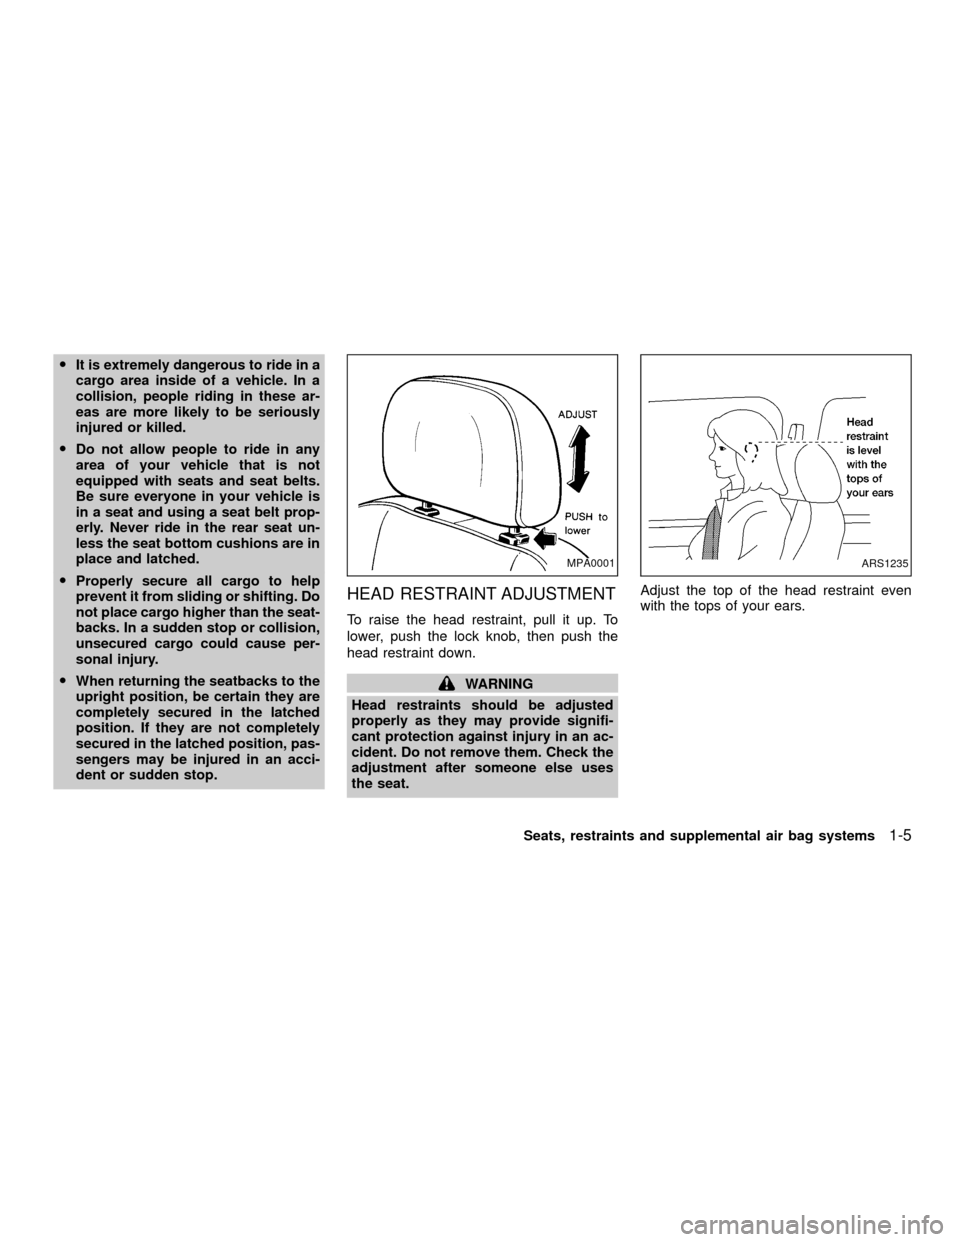
HEAD RESTRAINT ADJUSTMENT
To raise the head restraint, pull it up. To
lower, push the lock knob, then push the
head restraint down.
WARNING
Head restraints should be adjusted
properly as they may provide signifi-
cant protection against injury in an ac-
cident. Do not remove them. Check the
adjustment after someone else uses
the seat.Adjust the top of the head restraint even
with the tops of your ears.
MPA0001ARS1235
Seats, restraints and supplemental air bag systems1-5
ZX
Page 32 of 263
2. Route the seat belt tongue through the
child restraint and insert it into the buckle
until you hear and feel the latch engage.
Be sure to follow the child restraint manu-
facturer's instructions for belt routing.3. Remove all slack in the lap belt for a very
tight fit by pulling forcefully on the lap belt
adjustment.4. Before placing the child in the child re-
straint, use force to tilt the child restraint
from side to side, and tug it forward to
make sure it is securely in place.
5. If it is not secure, try to tighten the belt
again, or put the restraint in another seat.
6. Check to make sure the child restraint is
properly secured prior to each use.
ARS1169ARS1170ARS1171
Seats, restraints and supplemental air bag systems1-25
ZX
Page 33 of 263
Rear facing
When you install a child restraint in the rear
center seat, follow these steps:
1. Position the child restraint on the seat as
illustrated. Always follow the restraint
manufacturer's instructions.2. Route the seat belt tongue through the
child restraint and insert it into the buckle
until you hear and feel the latch engage.
Be sure to follow the child restraint manu-
facturer's instructions for belt routing.3. Remove all slack in the lap belt for a very
tight fit by pulling forcefully on the lap belt
adjustment.
ARS1172ARS1173ARS1174
1-26Seats, restraints and supplemental air bag systems
ZX
Page 35 of 263
2. Route the seat belt tongue through the
child restraint and insert it into the buckle
until you hear and feel the latch engage.
Be sure to follow the child restraint manu-
facturer's instructions for belt routing.3. Pull on the shoulder belt until all of the
belt is fully extended. At this time, the belt
retractor is in the automatic locking mode
(child restraint mode). It reverts back to
emergency locking mode when the belt is
fully retracted.4. Allow the belt to retract. Pull up on the
shoulder belt to remove any slack in the
belt.
ARS1177ARS1178ARS1179
1-28Seats, restraints and supplemental air bag systems
ZX
Page 36 of 263

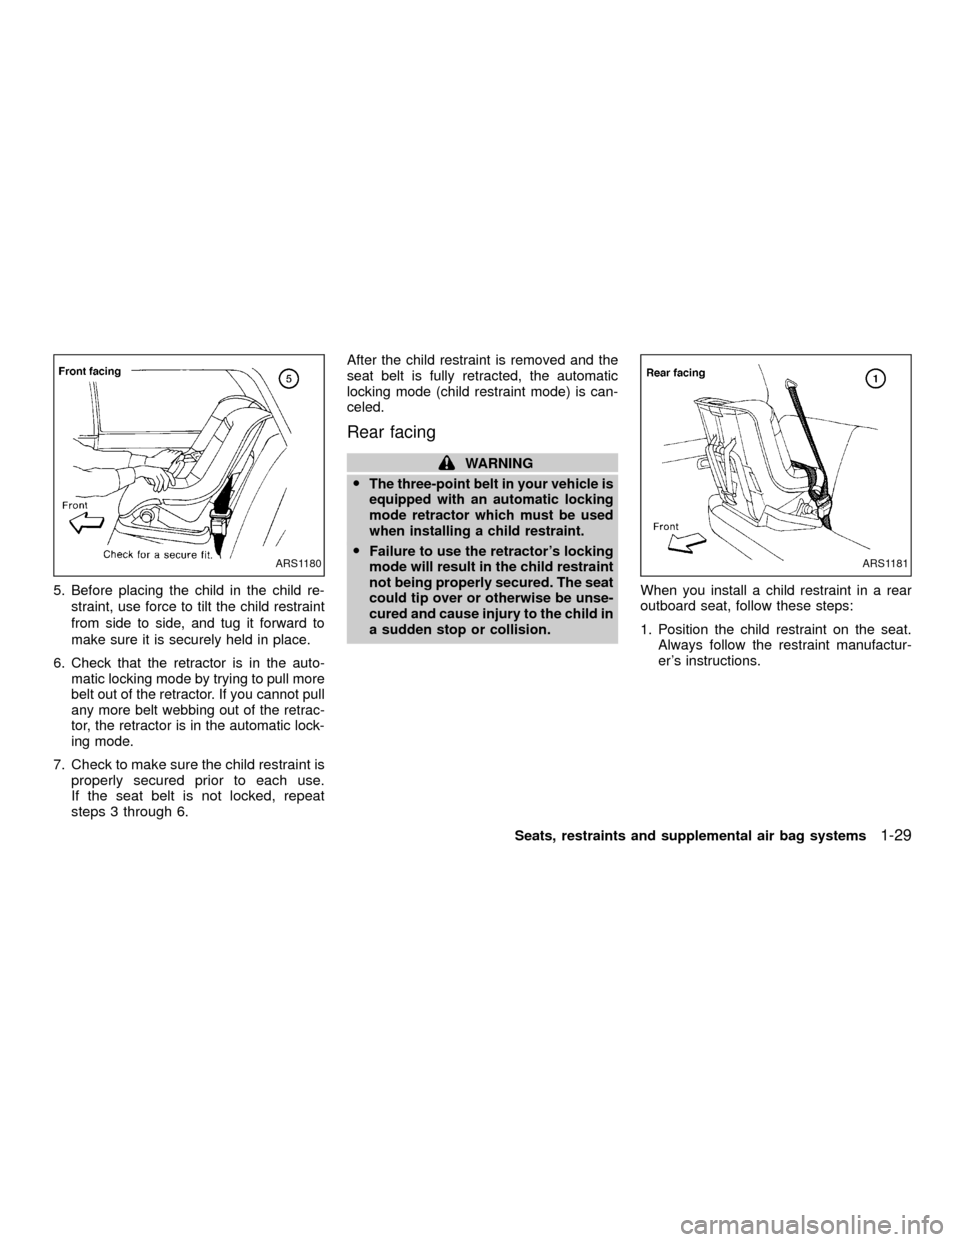
5. Before placing the child in the child re-
straint, use force to tilt the child restraint
from side to side, and tug it forward to
make sure it is securely held in place.
6. Check that the retractor is in the auto-
matic locking mode by trying to pull more
belt out of the retractor. If you cannot pull
any more belt webbing out of the retrac-
tor, the retractor is in the automatic lock-
ing mode.
7.
Check to make sure the child restraint is
properly secured prior to each use.
If the seat belt is not locked, repeat
steps 3 through 6.
After the child restraint is removed and the
seat belt is fully retracted, the automatic
locking mode (child restraint mode) is can-
celed.
Rear facing
WARNING
O
The three-point belt in your vehicle is
equipped with an automatic locking
mode retractor which must be used
when installing a child restraint.
OFailure to use the retractor's locking
mode will result in the child restraint
not being properly secured. The seat
could tip over or otherwise be unse-
cured and cause injury to the child in
a sudden stop or collision.When you install a child restraint in a rear
outboard seat, follow these steps:
1. Position the child restraint on the seat.
Always follow the restraint manufactur-
er's instructions.ARS1180ARS1181
Seats, restraints and supplemental air bag systems1-29
ZX
Page 37 of 263
2. Route the seat belt tongue through the
child restraint and insert it into the buckle
until you hear and feel the latch engage.
Be sure to follow the child restraint manu-
facturer's instructions for belt routing.3. Pull on the shoulder belt until all of the
belt is fully extended. At this time, the belt
retractor is in the automatic locking mode
(child restraint mode). It reverts back to
emergency locking mode when the belt is
fully retracted.4. Allow the belt to retract. Pull up on the
shoulder belt to remove any slack in the
belt.
ARS1182ARS1183ARS1184
1-30Seats, restraints and supplemental air bag systems
ZX
Page 38 of 263
5. Before placing the child in the child re-
straint, use force to tilt the child restraint
from side to side, and tug it forward to
make sure it is securely held in place.
6. Check that the retractor is in the auto-
matic locking mode by trying to pull more
belt out of the retractor. If you cannot pull
any more belt webbing out of the retrac-
tor, the retractor is in the automatic lock-
ing mode.
7.
Check to make sure the child restraint is
properly secured prior to each use.
If the seat belt is not locked, repeat
steps 3 through 6.
After the child restraint is removed and the
seat belt is fully retracted, the automatic
locking mode (child restraint mode) is can-
celed.
ARS1185WRS0071
Seats, restraints and supplemental air bag systems1-31
ZX