2001 NISSAN XTERRA engine overheat
[x] Cancel search: engine overheatPage 48 of 263
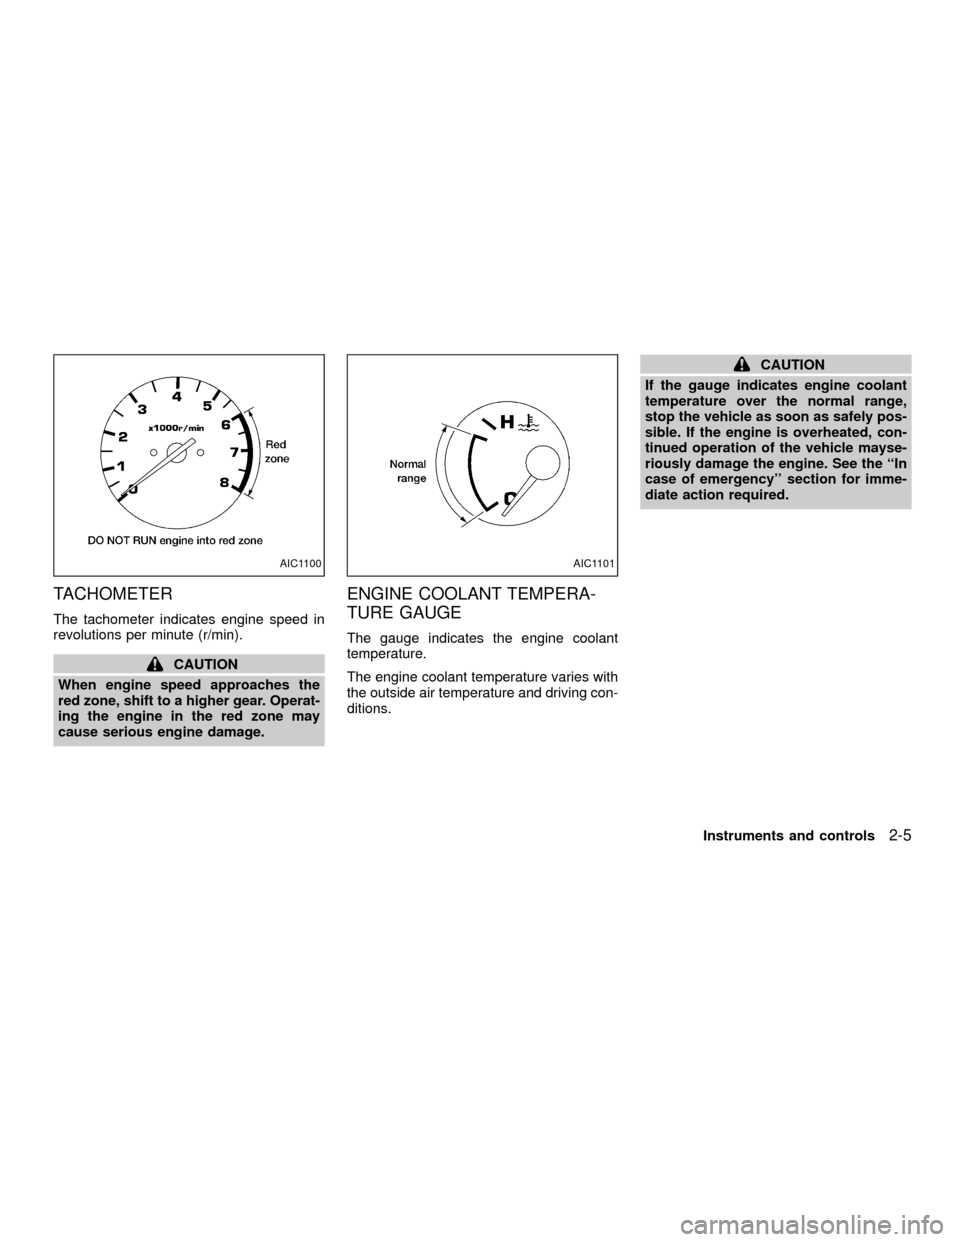
TACHOMETER
The tachometer indicates engine speed in
revolutions per minute (r/min).
CAUTION
When engine speed approaches the
red zone, shift to a higher gear. Operat-
ing the engine in the red zone may
cause serious engine damage.
ENGINE COOLANT TEMPERA-
TURE GAUGE
The gauge indicates the engine coolant
temperature.
The engine coolant temperature varies with
the outside air temperature and driving con-
ditions.
CAUTION
If the gauge indicates engine coolant
temperature over the normal range,
stop the vehicle as soon as safely pos-
sible. If the engine is overheated, con-
tinued operation of the vehicle mayse-
riously damage the engine. See the ``In
case of emergency'' section for imme-
diate action required.
AIC1100AIC1101
Instruments and controls2-5
ZX
Page 64 of 263
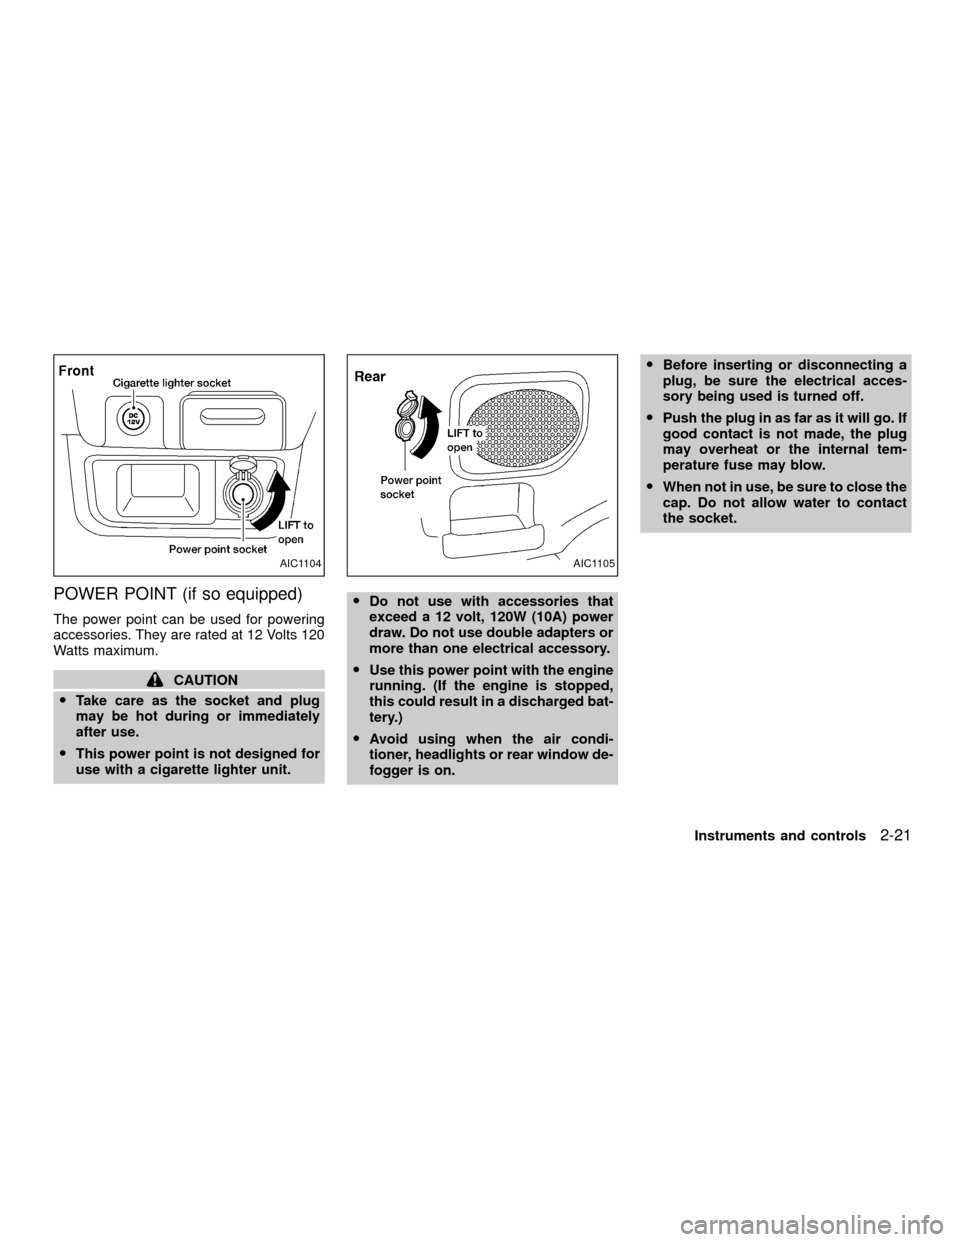
POWER POINT (if so equipped)
The power point can be used for powering
accessories. They are rated at 12 Volts 120
Watts maximum.
CAUTION
OTake care as the socket and plug
may be hot during or immediately
after use.
OThis power point is not designed for
use with a cigarette lighter unit.ODo not use with accessories that
exceed a 12 volt, 120W (10A) power
draw. Do not use double adapters or
more than one electrical accessory.
OUse this power point with the engine
running. (If the engine is stopped,
this could result in a discharged bat-
tery.)
OAvoid using when the air condi-
tioner, headlights or rear window de-
fogger is on.OBefore inserting or disconnecting a
plug, be sure the electrical acces-
sory being used is turned off.
OPush the plug in as far as it will go. If
good contact is not made, the plug
may overheat or the internal tem-
perature fuse may blow.
OWhen not in use, be sure to close the
cap. Do not allow water to contact
the socket.
AIC1104AIC1105
Instruments and controls2-21
ZX
Page 95 of 263

2. Turn the air control dial to theposi-
tion.
3. Turn the fan control dial to the desired
position.
4. Push on the air conditioner button. The
indicator light comes on.
5. Turn the temperature control dial to the
desired position.
Dehumidified defogging
This mode directs warmed and dryed air to
the defrost outlets to defrost/defog the win-
dows.
1. Turn the air control dial to the
posi-
tion.
2. Turn the fan control dial to the desired
position.
3. Push on the air conditioner button. The
indicator light comes on.
4. Turn the temperature control dial to the
desired position.
When the
,or positions in between
are selected, the air conditioner automati-
cally turns on (however the indicator light
will not illuminate) if the outside temperatureis more than 45ÉF(7ÉC). This dehumidifies
the air which helps defog the windshield.
The
mode automatically turns off, al-
lowing outside air to be drawn into the
passenger compartment to further improve
the defogging performance.
Operating tips
OKeep windows and sunroof closed while
the air conditioner is in operation.
OAfter parking in the sun, drive for two or
three minutes with the windows open to
vent hot air from the passenger compart-
ment. Then, close the windows. This
allows the air conditioner to cool the
interior more quickly.
OThe air conditioning system should be
operated for approximately ten min-
utes at least once a month. This helps
prevent damage to the system due to
lack of lubrication.
OIf the engine coolant temperature
gauge indicates engine coolant tem-
perature over the normal range, turn
the air conditioner off. See ``If your
vehicle overheats'' in the ``In case of
emergency'' section of this manual.
AIR FLOW CHARTS
The following charts show the button and
dial positions forMAXIMUM AND QUICK
heating, cooling or defrosting.The air recir-
culation switch should always be in the
OFF position for heating and defrosting.
4-6Heater, air conditioner and audio systems
ZX
Page 130 of 263
THREE-WAY CATALYST
The three-way catalyst is an emission control
device installed in the exhaust system. Ex-
haust gases in the converter are burned at
high temperatures to help reduce pollutants.
WARNING
OThe exhaust gas and the exhaust
system are very hot. Keep people,
animals or flammable materials
away from the exhaust system com-
ponents.
ODo not stop or park the vehicle over
flammable materials such as dry
grass, waste paper or rags. They
may ignite and cause a fire.
CAUTION
ODo not use leaded gasoline. Depos-
its from leaded gasoline will seri-
ously reduce the three-way cata-
lyst's ability to help reduce exhaust
pollutants.
OKeep your engine tuned up. Malfunc-
tions in the ignition, fuel injection, or
electrical systems can cause over-rich fuel flow into the three-way cata-
lyst, causing it to overheat. Do not
keep driving if the engine misfires,
or if noticeable loss of performance
or other unusual operating condi-
tions are detected. Have the vehicle
inspected promptly by an authorized
NISSAN dealer.
OAvoid driving with an extremely low
fuel level. Running out of fuel could
cause the engine to misfire, damag-
ing the three-way catalyst.
ODo not race the engine while warm-
ing it up.
ODo not push or tow your vehicle to
start the engine.
ON-PAVEMENT AND OFF-ROAD
DRIVING PRECAUTIONS
Utility vehicles have a significantly
higher rollover rate than other types of
vehicles.
They have higher ground clearance than
passenger cars to make them capable of
performing in a variety of on-pavement and
off-road applications. This gives them ahigher center of gravity than ordinary cars.
An advantage of higher ground clearance is
a better view of the road, allowing you to
anticipate problems. However, they are not
designed for cornering at the same speeds
as conventional two-wheel drive vehicles
any more than low-slung sports cars are
designed to perform satisfactorily under
off-road conditions. If at all possible, avoid
sharp turns or abrupt maneuvers particu-
larly at high speeds. As with other vehicles
of this type, failure to operate this vehicle
correctly may result in loss of control or
vehicle rollover.
Be sure to read the driving safety precau-
tions later in this section.
AVOIDING COLLISION AND
ROLLOVER
WARNING
Failure to operate this vehicle in a safe
and prudent manner may result in loss
of control or an accident.
Be alert and drive defensively at all times.
Obey all traffic regulations. Avoid excessive
speed, high speed cornering, or sudden
steering maneuvers, because these driving
Starting and driving
5-3
ZX
Page 150 of 263
verse) position. When parking on an up-
hill grade, place the gearshift lever in the
1st position.
Automatic transmission models:
Move the gearshift lever to the P (Park)
position.
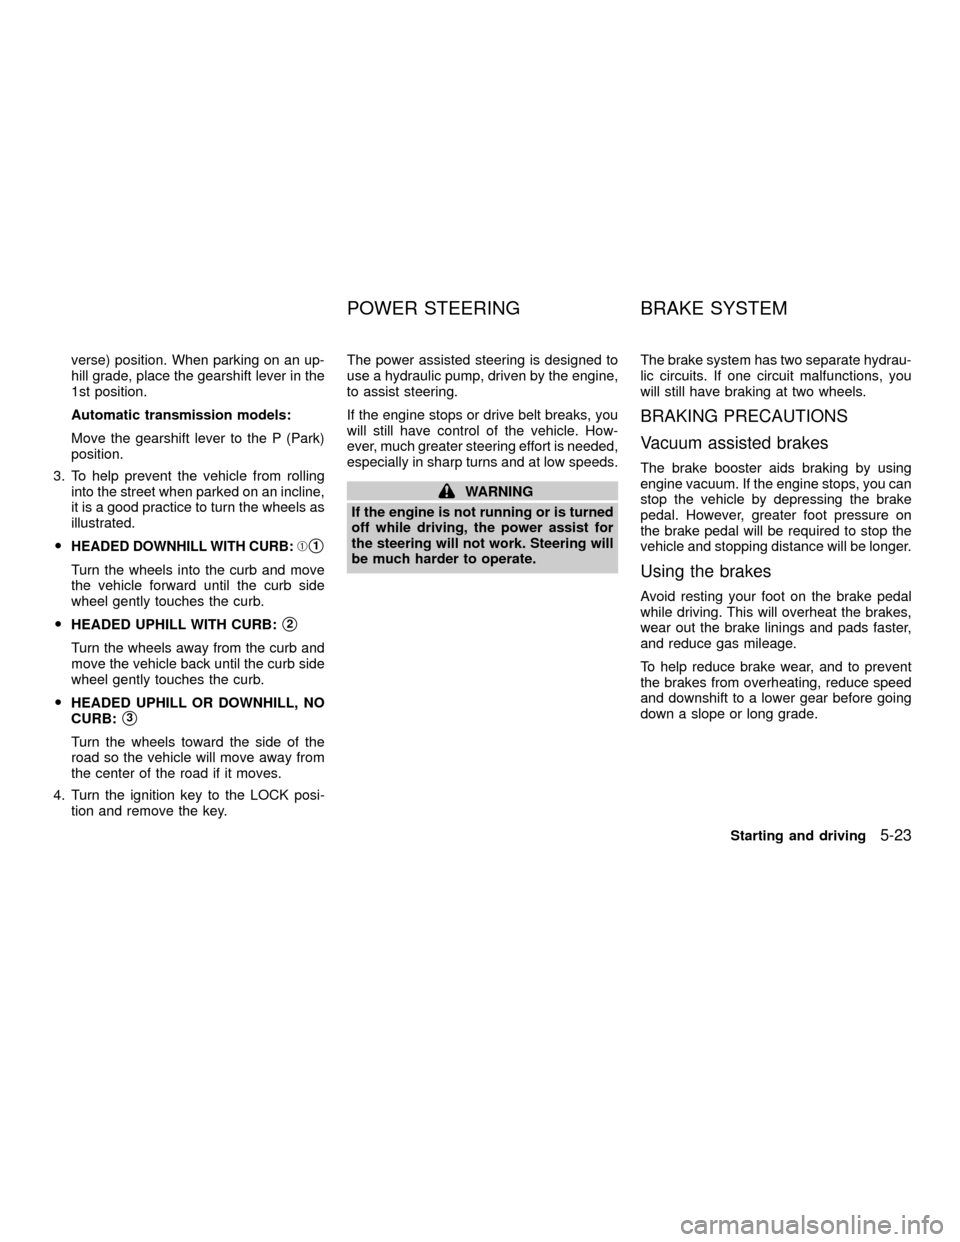
3. To help prevent the vehicle from rolling
into the street when parked on an incline,
it is a good practice to turn the wheels as
illustrated.
O
HEADED DOWNHILL WITH CURB:Às1
Turn the wheels into the curb and move
the vehicle forward until the curb side
wheel gently touches the curb.
OHEADED UPHILL WITH CURB:
s2
Turn the wheels away from the curb and
move the vehicle back until the curb side
wheel gently touches the curb.
OHEADED UPHILL OR DOWNHILL, NO
CURB:
s3
Turn the wheels toward the side of the
road so the vehicle will move away from
the center of the road if it moves.
4. Turn the ignition key to the LOCK posi-
tion and remove the key.The power assisted steering is designed to
use a hydraulic pump, driven by the engine,
to assist steering.
If the engine stops or drive belt breaks, you
will still have control of the vehicle. How-
ever, much greater steering effort is needed,
especially in sharp turns and at low speeds.
WARNING
If the engine is not running or is turned
off while driving, the power assist for
the steering will not work. Steering will
be much harder to operate.The brake system has two separate hydrau-
lic circuits. If one circuit malfunctions, you
will still have braking at two wheels.
BRAKING PRECAUTIONS
Vacuum assisted brakes
The brake booster aids braking by using
engine vacuum. If the engine stops, you can
stop the vehicle by depressing the brake
pedal. However, greater foot pressure on
the brake pedal will be required to stop the
vehicle and stopping distance will be longer.
Using the brakes
Avoid resting your foot on the brake pedal
while driving. This will overheat the brakes,
wear out the brake linings and pads faster,
and reduce gas mileage.
To help reduce brake wear, and to prevent
the brakes from overheating, reduce speed
and downshift to a lower gear before going
down a slope or long grade.
POWER STEERING BRAKE SYSTEM
Starting and driving5-23
ZX
Page 165 of 263
CAUTION
OAutomatic transmission models can-
not be push or tow started. This may
cause transmission or other vehicle
damage.
ONever try to start the vehicle by tow-
ing it. When the engine starts, the
forward surge could cause the ve-
hicle to collide with the tow vehicle.If your vehicle is overheating (indicated by
an extremely high temperature gauge read-
ing), or if you feel a lack of engine power, or
detect abnormal noise, etc., take the follow-
ing steps:
WARNING
ODo not continue to drive if your ve-
hicle overheats. Doing so could
cause a vehicle fire.
OTo avoid the danger of being
scalded, never remove the radiator
cap while the engine is still hot.
When the radiator cap is removed,
pressurized hot water will spurt out,
possibly causing serious injury.
ODo not open the hood if steam is
coming out.
1. Move the vehicle safely off the road,
apply the parking brake and move the
gearshift lever to N (Neutral), or the au-
tomatic transmission into P (Park).
Do not stop the engine.
2. Turn off the air conditioner (if so
equipped). Open all of the windows,
move the heater or air conditioner tem-perature control to maximum hot and fan
control to high speed.
3. If engine overheating is caused by climb-
ing a long hill on a hot day, run the engine
at a fast idle (approximately 1,500 r/min)
until the temperature gauge indicator re-
turns to normal.
4. Get out of the vehicle. Look and listen for
steam or coolant escaping from the ra-
diator before opening the hood. Wait until
no steam or coolant can be seen before
proceeding.
5. Open the hood.
WARNING
If steam or water is coming from the
engine, stand clear to prevent getting
burned.
6. Visually check drive belts for damage or
looseness. Also check if the cooling fan is
running. The radiator hoses and radiator
should not leak water. If coolant is leak-
ing, or the water pump belt is missing or
loose, or the cooling fan does not run,
stop the engine.
PUSH STARTING IF YOUR VEHICLE
OVERHEATS
6-10In case of emergency
ZX
Page 180 of 263
The engine cooling system is filled at the
factory with a high-quality, year-round,
genuine NISSAN anti-freeze coolant solu-
tion. The anti-freeze solution contains rust
and corrosion inhibitors, therefore additional
engine cooling system additives are not
necessary.
CAUTION
When adding or replacing coolant, be
sure to use only an ethylene glycol
anti-freeze with the proper mixture ratio
of 50% Genuine Nissan Anti-freeze
coolant or equivalent and 50% soft tap
water. The use of other types of coolant
solutions may damage the engine cool-
ing system.
Outside tempera-
ture down toGenuine
Nissan
Anti-
freeze
coolant or
equivalentSoft tap
water
ÉC ÉF
þ35 þ30 50% 50%
WARNING
ONever remove the radiator cap when
the engine is hot. Wait until the en-
gine and radiator cool down. Serious
burns could be caused by high pres-
sure fluid escaping from the radiator.
See precautions in ``If your vehicle
overheats'' found in the ``In case of
emergency'' section of this manual.
OThe radiator is equipped with a pres-
sure type radiator cap. To prevent
engine damage, use only a genuine
NISSAN radiator cap.
CHECKING ENGINE COOLANT
LEVEL
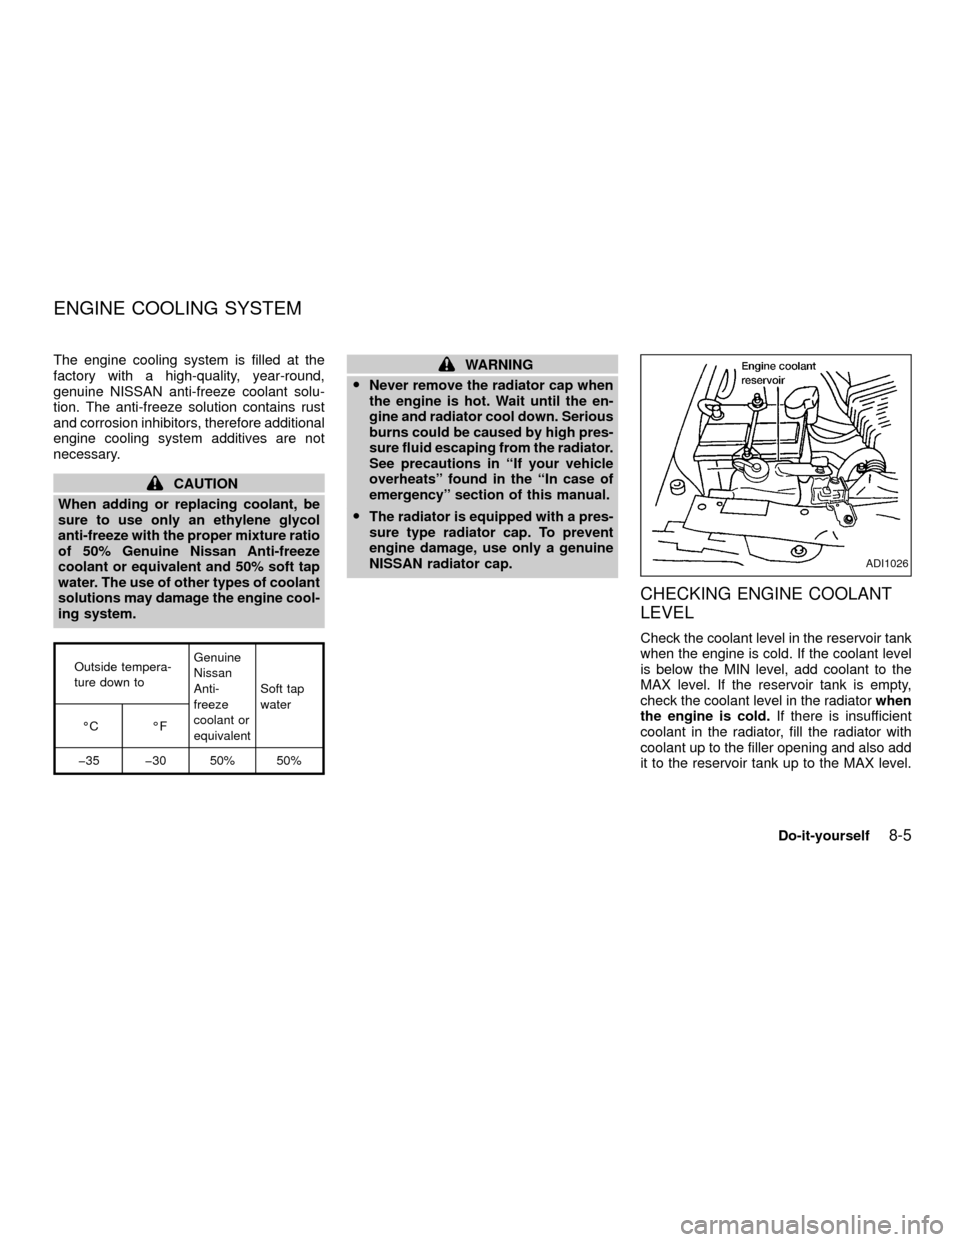
Check the coolant level in the reservoir tank
when the engine is cold. If the coolant level
is below the MIN level, add coolant to the
MAX level. If the reservoir tank is empty,
check the coolant level in the radiatorwhen
the engine is cold.If there is insufficient
coolant in the radiator, fill the radiator with
coolant up to the filler opening and also add
it to the reservoir tank up to the MAX level.
ADI1026
ENGINE COOLING SYSTEM
Do-it-yourself8-5
ZX
Page 183 of 263

4. Open the air release plug.5. Flush the cooling system by running
fresh water through the radiator.
6. Install the radiator drain plug and cylinder
block drain plug(s).
7. See ``Capacities and recommended
fuel/lubricants'' in the ``Technical and
consumer information'' section for cool-
ing system capacity. Fill the radiator
slowly with the proper mixture of coolant
and water. Fill the reservoir tank slowly
up to the MAX level.
8. Open and close the air release plug to
release air. Then fill the radiator again
and install the radiator cap.
9. Start the engine and warm it up until it
reaches normal operating temperature.
Then race the engine two or three times
under no load. Watch the engine coolant
temperature gauge for signs of overheat-
ing.
10.Stop the engine. After it completely cools
down, refill the radiator up to the filler
opening. Fill the reservoir tank up to the
MAX level.
11.Open and close the air release plug to
release air. Then fill the radiator again
ADI1057ADI1058
8-8Do-it-yourself
ZX