2001 NISSAN XTERRA display
[x] Cancel search: displayPage 20 of 263

SUPPLEMENTAL AIR BAG
WARNING LIGHT
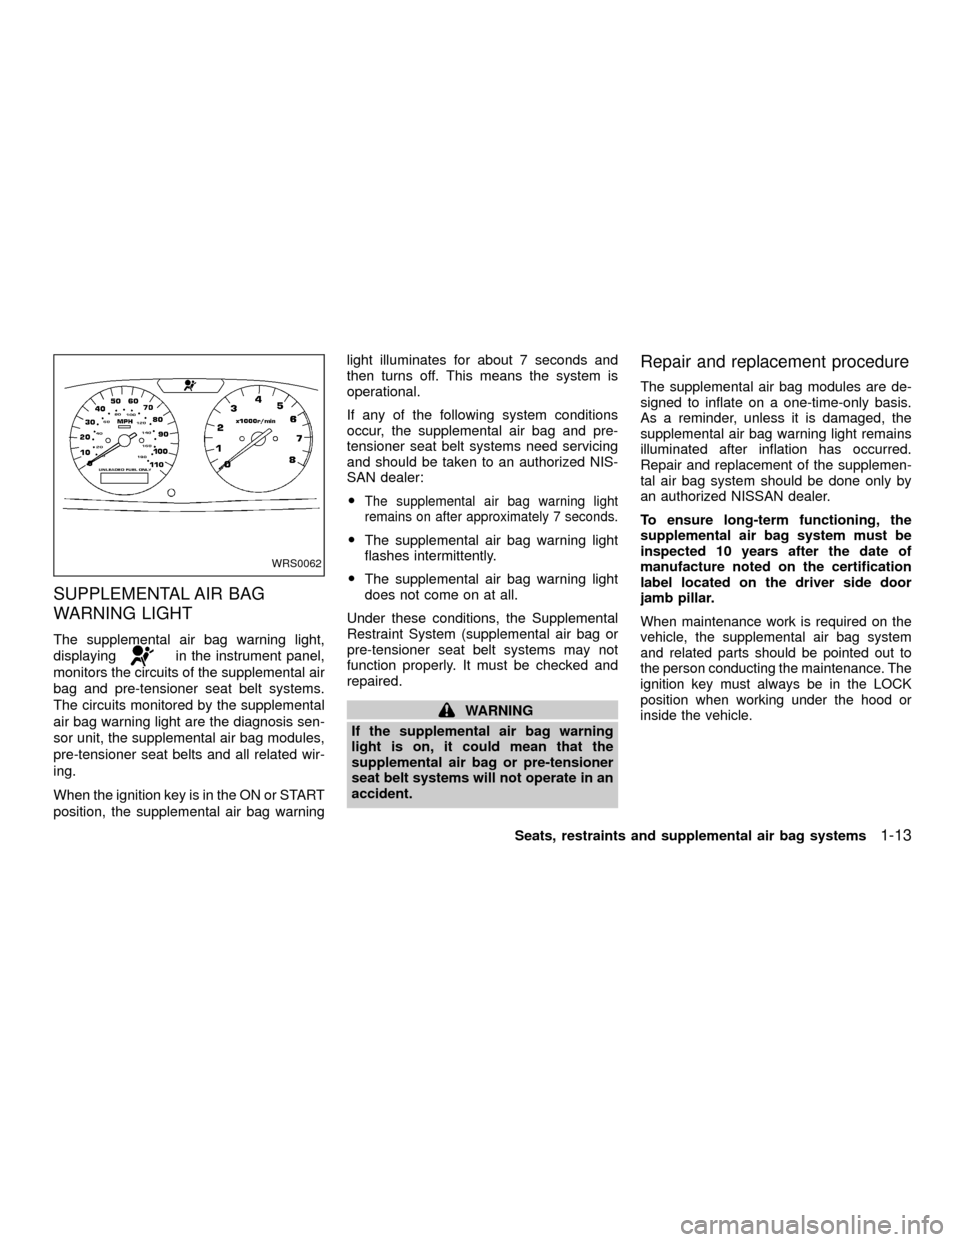
The supplemental air bag warning light,
displaying
in the instrument panel,
monitors the circuits of the supplemental air
bag and pre-tensioner seat belt systems.
The circuits monitored by the supplemental
air bag warning light are the diagnosis sen-
sor unit, the supplemental air bag modules,
pre-tensioner seat belts and all related wir-
ing.
When the ignition key is in the ON or START
position, the supplemental air bag warninglight illuminates for about 7 seconds and
then turns off. This means the system is
operational.
If any of the following system conditions
occur, the supplemental air bag and pre-
tensioner seat belt systems need servicing
and should be taken to an authorized NIS-
SAN dealer:
O
The supplemental air bag warning light
remains on after approximately 7 seconds.
OThe supplemental air bag warning light
flashes intermittently.
OThe supplemental air bag warning light
does not come on at all.
Under these conditions, the Supplemental
Restraint System (supplemental air bag or
pre-tensioner seat belt systems may not
function properly. It must be checked and
repaired.
WARNING
If the supplemental air bag warning
light is on, it could mean that the
supplemental air bag or pre-tensioner
seat belt systems will not operate in an
accident.
Repair and replacement procedure
The supplemental air bag modules are de-
signed to inflate on a one-time-only basis.
As a reminder, unless it is damaged, the
supplemental air bag warning light remains
illuminated after inflation has occurred.
Repair and replacement of the supplemen-
tal air bag system should be done only by
an authorized NISSAN dealer.
To ensure long-term functioning, the
supplemental air bag system must be
inspected 10 years after the date of
manufacture noted on the certification
label located on the driver side door
jamb pillar.
When maintenance work is required on the
vehicle, the supplemental air bag system
and related parts should be pointed out to
the person conducting the maintenance. The
ignition key must always be in the LOCK
position when working under the hood or
inside the vehicle.
WRS0062
Seats, restraints and supplemental air bag systems1-13
ZX
Page 47 of 263

The trip odometer records the distance of
individual trips. Before each trip reset the
trip odometer.Push the reset knob to change the display
as follows:
ODO (odometer)!TRIP A!TRIP B!ODO.
Push and hold the reset knob for more than
1 second to reset either trip odometer.
AIC1120
2-4Instruments and controls
ZX
Page 100 of 263

Turn the power/volume control knob to the
right to increase volume or to the left to
decrease volume.
Adjusting tone quality and speaker bal-
ance
To adjust Bass, Treble, Fader or Balance,
press the
knob for less than 1.5 sec-
onds. A beep signals entry into the audio
adjustment mode and BASS will appear in
the display. Rotate the
knob to adjust
Bass (BASS) to the desired level.
Press the
knob a second time and
TREB appears in the display. Rotate the
knob to adjust Treble (TREB) to the
desired level.
Press the
knob a third time and FAD
appears in the display. Fader (FAD) adjusts
the sound between the front and rear
speaker. Rotate the
knob to adjust
Fader (FAD) to the desired level.
Press the
knob a fourth time and BAL
appears in the display. Balance (BAL) ad-
justs the sound between the right and left
speakers. Rotate the
knob to adjust
Balance (BAL) to the desired level.
After 10 seconds, the radio or CD displaywill reappear. Once the sound quality is set
to the desired level, press the
knob
repeatedly until the radio or CD display
reappears.
Heater, air conditioner and audio systems
4-11
ZX
Page 101 of 263

Clock operation
The clock is on in the display regardless of
what mode, media, or function the radio is in
as long as the ignition is in ACC or ON.
Clock set
To adjust the clock, press the
knob
for longer than 1.5 seconds. A beep signals
entry into the clock adjustment mode and
CL appears in the display. The hours will be
blinking. Rotate the
knob to adjust
the hours to the desired level.
Press the
knob a second time and
the minutes will start to blink. Rotate the
knob to adjust the minutes to the
desired level.
After 10 seconds, the radio or CD display
will reappear. Once the clock is set to the
desired level, press the
knob repeat-
edly until the radio or CD display reappears.
WHA0096
4-12Heater, air conditioner and audio systems
ZX
Page 103 of 263

SCAN tuning
Push the SEEK/SCAN tuning button
or
for more than 1.5 seconds. SCAN ap-
pears in the display window. SCAN tuning
begins from high to low frequencies or low
to high frequencies, depending on which
button is pressed. SCAN tuning stops at
each broadcasting station for five seconds.
Pushing the button again during this five
second period stops SCAN tuning and the
radio remains tuned to that station.
Station memory operations
Six stations can be set for the AM band. 12
stations can be set for the FM band (six for
FM1, six for FM2).
1. Push band select button (FM/AM) to se-
lect AM, FM1, or FM2. The selected band
illuminates in the display.
2. Tune to the desired station.
3. Push the desired station select button for
more than 1.5 seconds. The radio mutes
when the select button is pushed.
4. When the indicator illuminates in the
display and the sound resumes, memo-
rizing is complete.5. Other station select buttons can be set in
the same manner.If the battery cable is disconnected, or if the
radio fuse opens, the radio memory is can-
celled. In that case, reset the desired stations.
COMPACT DISC (CD) player op-
eration
Turn the ignition key to the ACC or ON
position, and carefully insert the compact
disc into the slot with the label side up. The
compact disc is automatically pulled into the
slot and starts to play.
If the radio is already operating, it automati-
cally turns off and the compact disc begins
to play.
CAUTION
Do not force the compact disc into the
slot. This could damage the player.
CD button
When this button is pushed with the compact
disc loaded and the radio playing, the radio
turns off and the compact disc starts to play.
When power/volume control knob is pushedwhile the compact disc is playing, the com-
pact disc stops playing.
FF (Fast forward), REW
(Rewind)
When the
orbutton is pushed
while the compact disc is playing, the com-
pact disc plays at an increased speed while
fast forwarding or rewinding. When the but-
ton is released, the compact disc returns to
normal play speed.
APS (Automatic Program
Search) FF, APS REW
When thebutton is pushed while the
compact disc is playing, the selection fol-
lowing the present one starts to play from
the beginning. Push or hold the
but-
ton several times to skip several selections.
Each time the button is pushed, the CD
advances one selection. (When the last
selection on the compact disc is skipped,
the first selection is played.)
When thebutton is pushed, the selec-
tion being played returns to the beginning.
Push or hold the
button several
times to skip back several selections. Each
4-14Heater, air conditioner and audio systems
ZX
Page 104 of 263

time the button is pushed, the CD moves
back one selection.
RPT (Repeat)
When the
repeat button is pushed
while the compact disc is playing, the play
pattern changes as follows.
1: The current selection is repeated.
MIX: Selections are played at random, not
following the sequence on the compact
disc. The same program may be repeated
twice.
Normal(no symbol): All selections are
played repeatedly in sequence.
When a new compact disc is inserted,
the play pattern automatically changes
to the ``Normal'' play pattern.
CD EJECT
When the
button is pushed with a com-
pact disc loaded, the compact disc ejects.
When the
button is pushed while the
compact disc is playing, the compact disc
ejects and the system turns off.
If the compact disc ejects and is notremoved within 10 seconds, it is pulled
back into the slot.
DISC indicator light
CD IN appears on the display when a CD is
loaded with the system ON.
CD care and cleaning
OHandle a CD by its edges. Never touch
the surface of the disc. Do not bend the
disc.
OAlways place the discs in the storage
case when they are not being used.
OTo clean a disc, wipe the surface from the
center to the outer edge using a clean,
soft cloth. Do not wipe the disc using a
circular motion.
Do not use a conventional record cleaner
or alcohol intended for industrial use.
LHA0049
Heater, air conditioner and audio systems4-15
ZX
Page 107 of 263

Turn the ONzOFF/VOL control knob to the
right to increase volume or to the left to
decrease volume.
Adjusting tone quality and speaker bal-
ance
To adjust the audio levels for bass, treble,
fader, and balance, push the AUDIO button
and adjust the level with the TUNE/FF-REW
orbuttons. Press the audio button
once for BAS (bass), twice for TRE (treble),
three times for FAD (fader) and four times
for BAL (balance). Once the audio level is
set the display will return back to radio,
cassette or CD display mode after 7 sec-
onds or the AUDIO button can be pressed
again within 7 seconds to set the next audio
level. Pressing the AUDIO button a fifth time
will return the display back to radio, cassette
or CD display mode.
Fader adjusts the sound level between the
front and rear speakers, balance adjusts the
sound level between the right and left
speakers.
AHA1128
4-18Heater, air conditioner and audio systems
ZX
Page 108 of 263

Clock operation
Pressing the clock button displays the clock.
Clock set
Press the CLOCK button for more than 2
seconds the radio beeps and the hours
flash, use the TUNE/FF-REW
but-
tons to set the hour, press the CLOCK
button again until the radio beeps and the
minutes flash, use the TUNE/FF-REW
buttons to set the minutes. The
display will return to regular clock display in
7 seconds or you may press the CLOCK
button again to return to the regular clock
display.
FM-AM radio operation
FM-AM band select
Push the
button to change from AM to
FM1 or FM2 reception.
The FM stereo indicator, ST, illuminates
during FM stereo reception. When the ste-
reo broadcast signal is weak, the radio
automatically changes from stereo to mon-
aural reception.
TUNE (Tuning)
WARNING
The radio should not be tuned while
driving so full attention may be given to
vehicle operation.
Use the
andbuttons for manual
tuning. To move quickly through the chan-
nels, hold either of the tuning buttons down.
SEEK/SCAN tuning
SEEK tuning
Push the SEEK/SCAN tuning button
or
for less than 1.5 seconds. SEEK tuning
begins from low to high frequencies or high
to low frequencies, depending on which
button is pressed, and stops at the next
broadcasting station. If using the
button
once the highest broadcasting station is
reached, the radio continues in the SEEK
mode at the lowest broadcasting station. If
using the
button once the lowest broad-
casting station is reached, the radio contin-
ues in the SEEK mode at the highest broad-
casting station.SCAN tuning
Push and hold the SEEK/SCAN tuning but-
ton
orfor more than 1.5 seconds.
SCAN illuminates in the display window,
and the radio station blinks. SCAN tuning
begins from low to high frequencies or from
high to low frequencies, depending on
which button is pressed. SCAN tuning stops
at each broadcasting station for five sec-
onds. When scanning, SCAN is solid and
the radio station blinks. When temporarily
stopped on a station, SCAN blinks and the
station display is solid. Pushing the button
again during this five second period stops
SCAN tuning and the radio remains tuned to
that station.
Heater, air conditioner and audio systems
4-19
ZX