2001 NISSAN XTERRA display
[x] Cancel search: displayPage 119 of 263
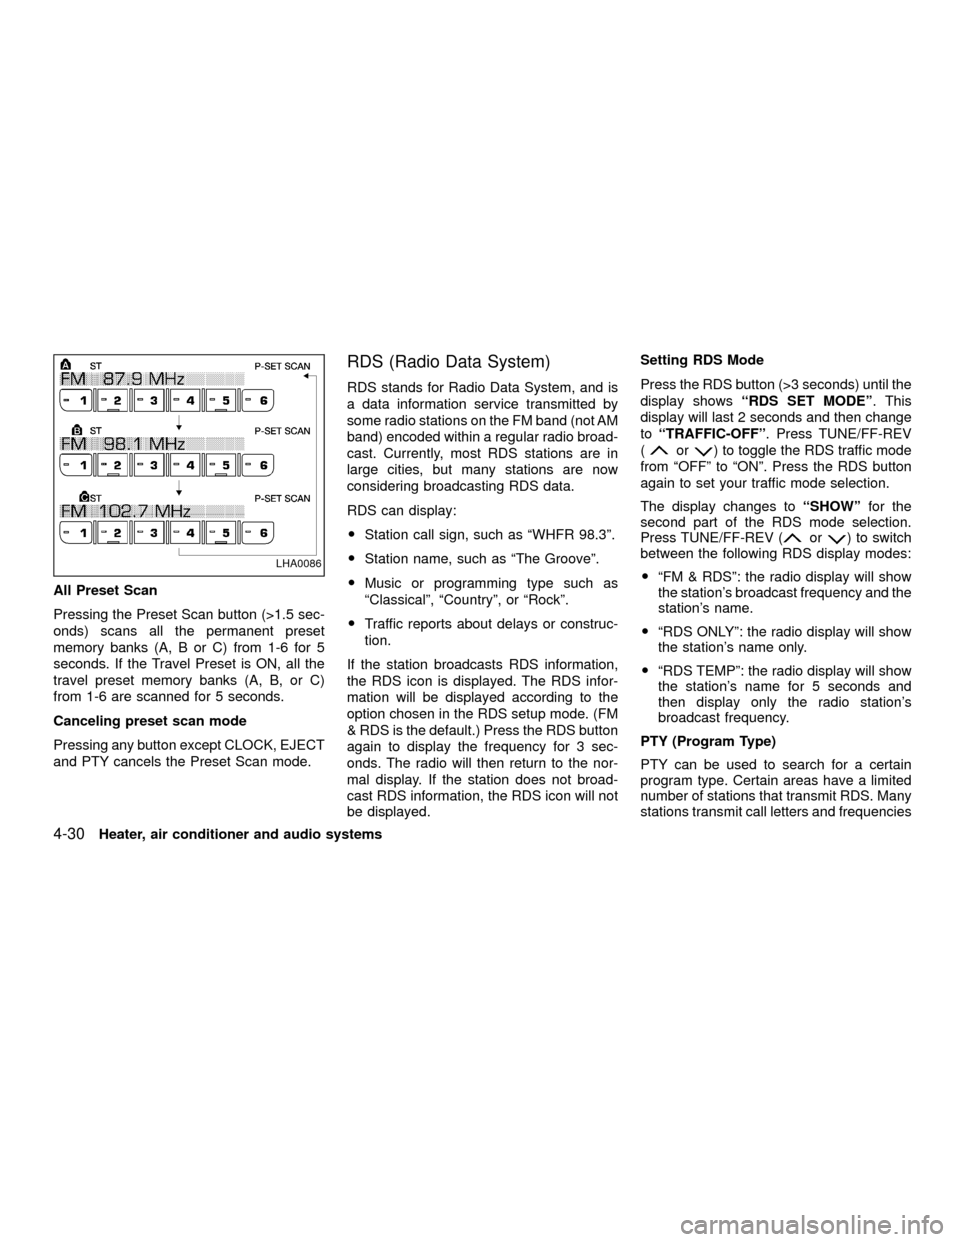
All Preset Scan
Pressing the Preset Scan button (>1.5 sec-
onds) scans all the permanent preset
memory banks (A, B or C) from 1-6 for 5
seconds. If the Travel Preset is ON, all the
travel preset memory banks (A, B, or C)
from 1-6 are scanned for 5 seconds.
Canceling preset scan mode
Pressing any button except CLOCK, EJECT
and PTY cancels the Preset Scan mode.
RDS (Radio Data System)
RDS stands for Radio Data System, and is
a data information service transmitted by
some radio stations on the FM band (not AM
band) encoded within a regular radio broad-
cast. Currently, most RDS stations are in
large cities, but many stations are now
considering broadcasting RDS data.
RDS can display:
OStation call sign, such as ªWHFR 98.3º.
OStation name, such as ªThe Grooveº.
OMusic or programming type such as
ªClassicalº, ªCountryº, or ªRockº.
OTraffic reports about delays or construc-
tion.
If the station broadcasts RDS information,
the RDS icon is displayed. The RDS infor-
mation will be displayed according to the
option chosen in the RDS setup mode. (FM
& RDS is the default.) Press the RDS button
again to display the frequency for 3 sec-
onds. The radio will then return to the nor-
mal display. If the station does not broad-
cast RDS information, the RDS icon will not
be displayed.Setting RDS Mode
Press the RDS button (>3 seconds) until the
display showsªRDS SET MODEº. This
display will last 2 seconds and then change
toªTRAFFIC-OFFº. Press TUNE/FF-REV
(
or) to toggle the RDS traffic mode
from ªOFFº to ªONº. Press the RDS button
again to set your traffic mode selection.
The display changes toªSHOWºfor the
second part of the RDS mode selection.
Press TUNE/FF-REV (
or) to switch
between the following RDS display modes:
OªFM & RDSº: the radio display will show
the station's broadcast frequency and the
station's name.
OªRDS ONLYº: the radio display will show
the station's name only.
OªRDS TEMPº: the radio display will show
the station's name for 5 seconds and
then display only the radio station's
broadcast frequency.
PTY (Program Type)
PTY can be used to search for a certain
program type. Certain areas have a limited
number of stations that transmit RDS. Many
stations transmit call letters and frequencies
LHA0086
4-30Heater, air conditioner and audio systems
ZX
Page 120 of 263
only. Searching or scanning by program
type may yield a limited number of selec-
tions.
1. Press the PTY button. The display
changes fromªRDS PTY SEARCHºto
ªSELECT BY TUNEº.
2. Press TUNE/FF-REV (
or)
up/down button to choose a specific pro-
gram type:
ROCK, CLASSIC ROCK, SOFT ROCK,
TOP 40, COUNTRY, JAZZ, CLASSICAL,
OLDIES, NEWS, SPORTS, TALK, ANY
3. Press the SEEK or SCAN button to
search for the next station with the se-
lected PTY. The SCAN icon flashes when
the SCAN button is pressed. The radio
continues to seek or scan until a radio
station is found matching the selected
PTY.
4. Press the PTY button again to cancel the
PTY SEEK mode.
Compact disc (CD) operation
Turn the ignition key to the ACC or ON
position.
CAUTION
ODo not force a compact disc (CD)
into the CD insert slot. This could
damage the CD and/or CD changer.
OTrying to load a CD with the CD door
closed could damage the CD and/or
CD changer.
CD button
When the CD button is pressed with a
compact disc loaded and the radio playing,
the radio turns off and the last used compact
disc starts to play.
CD Loading
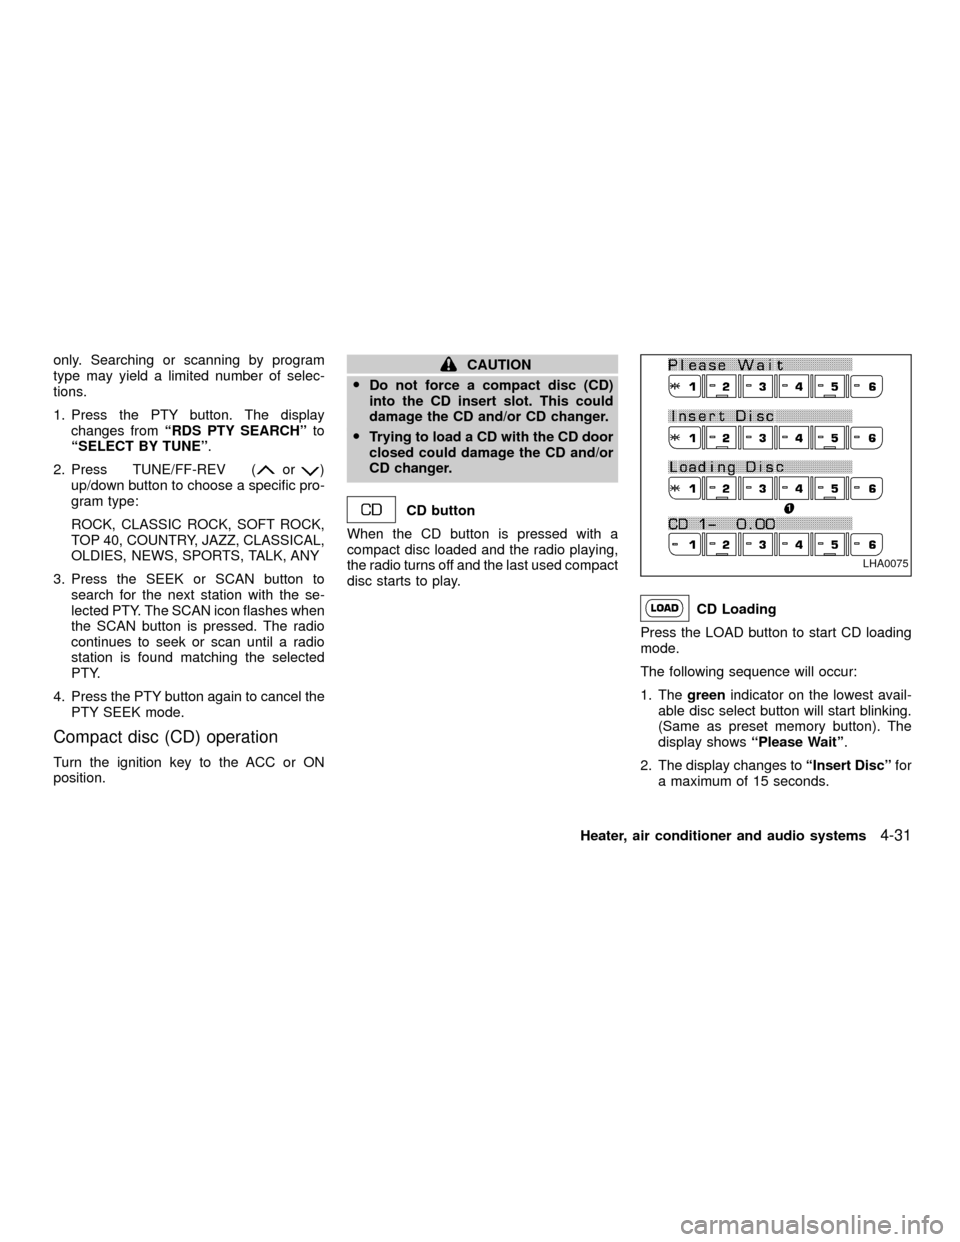
Press the LOAD button to start CD loading
mode.
The following sequence will occur:
1. Thegreenindicator on the lowest avail-
able disc select button will start blinking.
(Same as preset memory button). The
display showsªPlease Waitº.
2. The display changes toªInsert Discºfor
a maximum of 15 seconds.
LHA0075
Heater, air conditioner and audio systems4-31
ZX
Page 121 of 263

3. During the 15 second interval, insert the
disc. The display changes toªLoading
Discº.
4. The CD will play after the disc is set to a
play position.
5. The indicator changes fromblinking
greentosolid greenand the display
changes to show the Disc number icon,
Disc number, Track number and Elapsed
time.
All disc loading
1. Press and hold the LOAD button until the
radio beeps (>1.5 seconds).
2. Thegreenindicator on the lowest avail-
able disc select button will start blinking.
(Same as preset memory button). The
display showsªPlease Waitº.
3. The display changes toªInsert Discºfor
a maximum of 15 seconds.
4. During the 15 second interval, insert the
disc. The display changes toªLoading
Discº.
5. The indicator changes fromblinking
greentosolid green.
6. The disc number icon is turned on.7. Steps 2-5 are repeated until all discs are
loaded, then the last loaded disc will
begin to play. The display shows the Disc
number, Track number and Elapsed
Time.
Selected disc loading
1. Press a disc select button whose indica-
tor is off. The display showsªPlease
Waitº.
2. Thegreenindicator starts blinking and
the display showsªInsert Discºfor 15
seconds.
3. Insert the CD. The display showsªLoad-
ing Discº.
4. The CD will play after the disc is set to a
play position.
5. The indicator color changes fromblink-
ing greentosolid greenand the display
shows the Disc icon, Disc number, Track
number and Elapsed Time.
If a disc is not inserted within 15 seconds or
if the load button is pressed during load
sequence, the entire disc load sequence will
be canceled.Disc Play
Press the CD button. If a CD is loaded and
the radio is playing, the radio turns off and
the last loaded disc starts to play.
4-32Heater, air conditioner and audio systems
ZX
Page 122 of 263
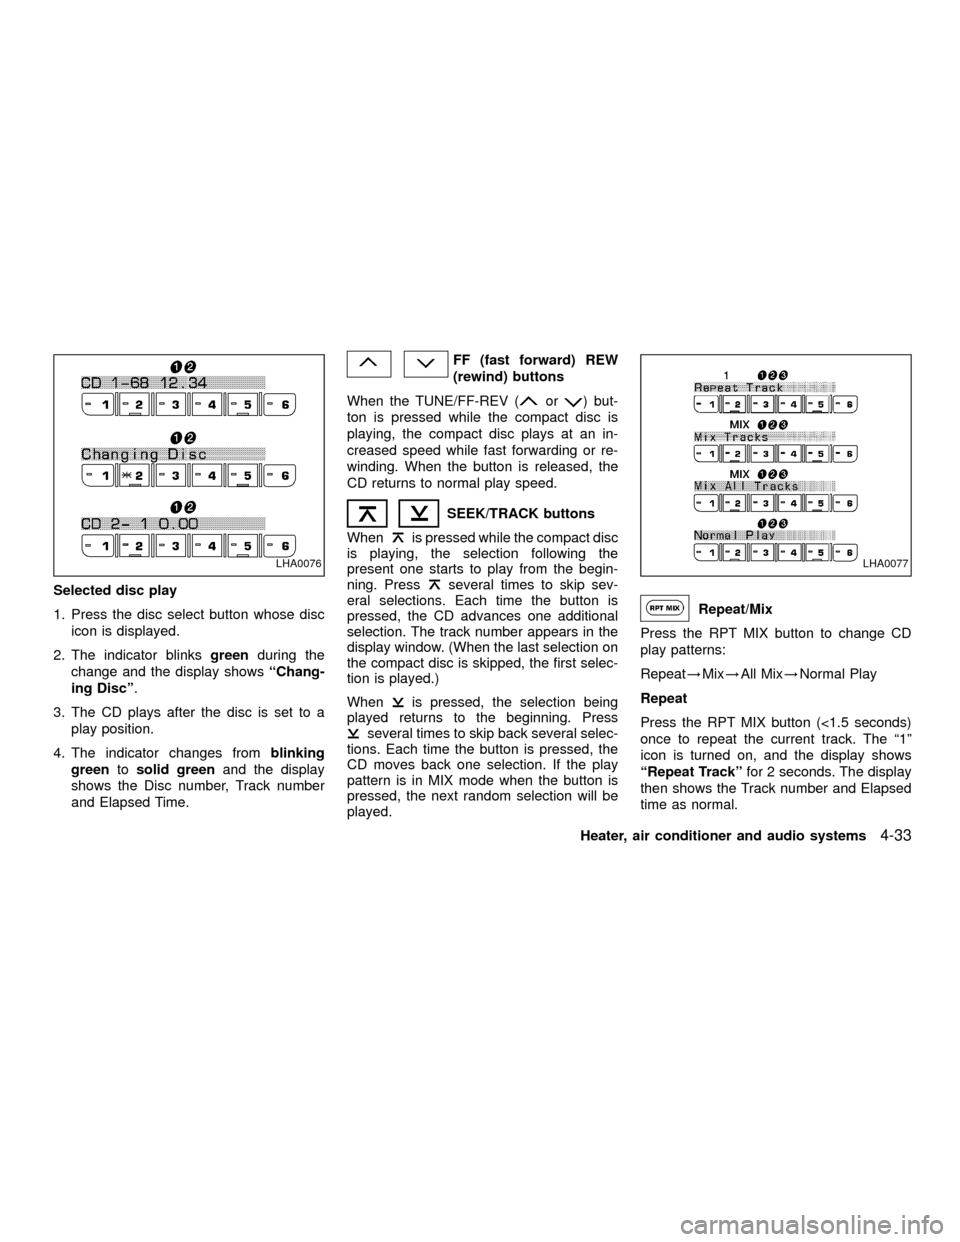
Selected disc play
1. Press the disc select button whose disc
icon is displayed.
2. The indicator blinksgreenduring the
change and the display showsªChang-
ing Discº.
3. The CD plays after the disc is set to a
play position.
4. The indicator changes fromblinking
greentosolid greenand the display
shows the Disc number, Track number
and Elapsed Time.
FF (fast forward) REW
(rewind) buttons
When the TUNE/FF-REV (
or) but-
ton is pressed while the compact disc is
playing, the compact disc plays at an in-
creased speed while fast forwarding or re-
winding. When the button is released, the
CD returns to normal play speed.
SEEK/TRACK buttons
When
is pressed while the compact disc
is playing, the selection following the
present one starts to play from the begin-
ning. Press
several times to skip sev-
eral selections. Each time the button is
pressed, the CD advances one additional
selection. The track number appears in the
display window. (When the last selection on
the compact disc is skipped, the first selec-
tion is played.)
When
is pressed, the selection being
played returns to the beginning. Press
several times to skip back several selec-
tions. Each time the button is pressed, the
CD moves back one selection. If the play
pattern is in MIX mode when the button is
pressed, the next random selection will be
played.
Repeat/Mix
Press the RPT MIX button to change CD
play patterns:
Repeat!Mix!All Mix!Normal Play
Repeat
Press the RPT MIX button (<1.5 seconds)
once to repeat the current track. The ª1º
icon is turned on, and the display shows
ªRepeat Trackºfor 2 seconds. The display
then shows the Track number and Elapsed
time as normal.
LHA0076LHA0077
Heater, air conditioner and audio systems4-33
ZX
Page 123 of 263
Mix
Press the RPT MIX button (<1.5 seconds)
again to start shuffle play of the current disc.
The ªMIXº icon is turned on and the display
showsªMix Tracksºfor 2 seconds. The
display then shows the Track number and
Elapsed time as normal.
All Mix
Press the RPT MIX button (<1.5 seconds)
again to start shuffle play of all discs. The
ªMIXº icon is turned on, and the display
showsªMix All Tracksºfor 2 seconds. The
display then shows the Track number and
Elapsed time as normal. Also, the indicators
of the loaded discs are turned on with
amber color. (Green for current disc.)
Normal Play
Press the RPT MIX button (<1.5 seconds)
again to change to normal play mode. The
ªMIXº icon and the amber LED's are turned
off. The display showsªNormal Playºfor 2
seconds. The display then shows the Track
number and Elapsed time as normal.
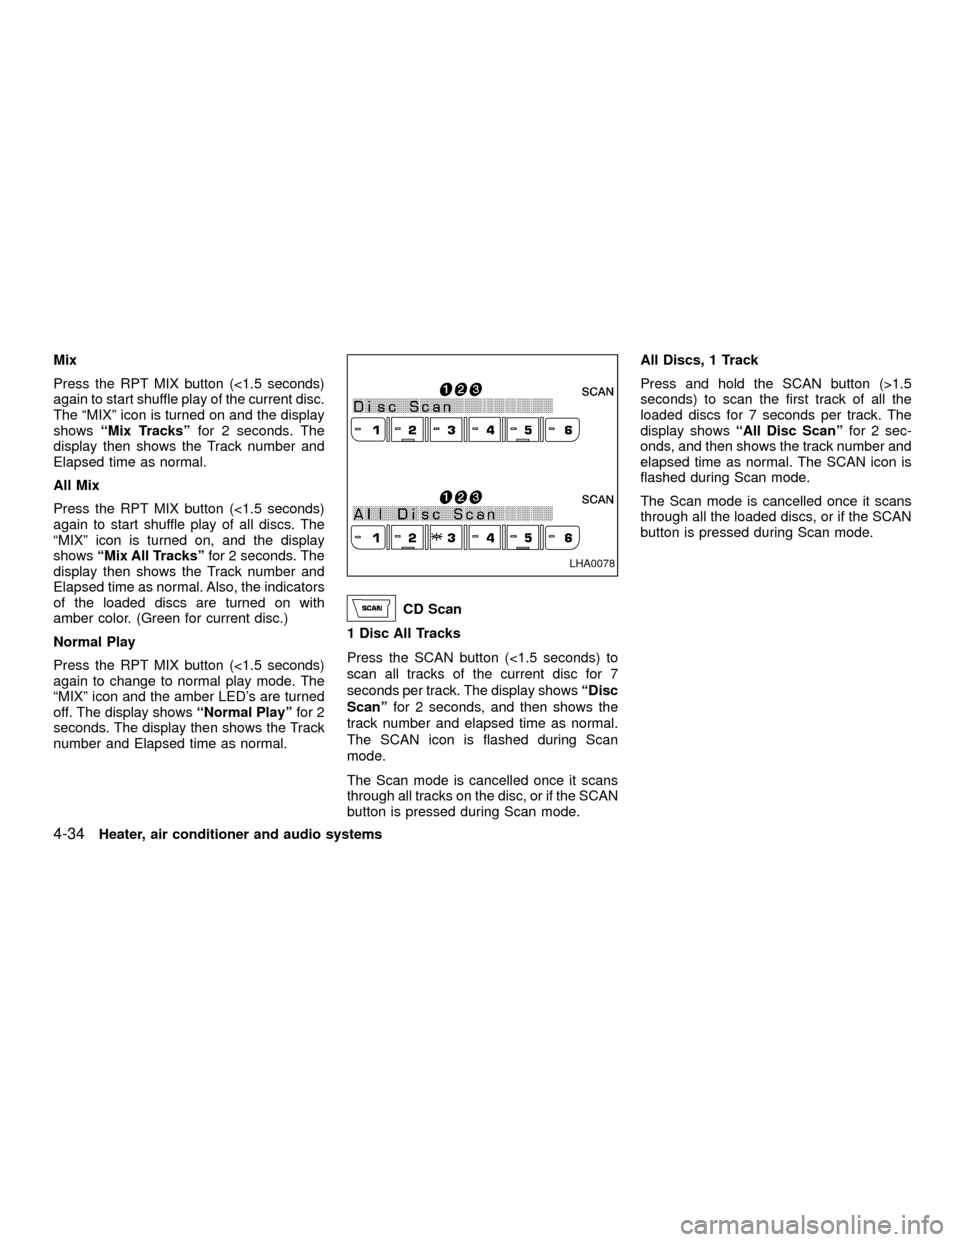
CD Scan
1 Disc All Tracks
Press the SCAN button (<1.5 seconds) to
scan all tracks of the current disc for 7
seconds per track. The display showsªDisc
Scanºfor 2 seconds, and then shows the
track number and elapsed time as normal.
The SCAN icon is flashed during Scan
mode.
The Scan mode is cancelled once it scans
through all tracks on the disc, or if the SCAN
button is pressed during Scan mode.All Discs, 1 Track
Press and hold the SCAN button (>1.5
seconds) to scan the first track of all the
loaded discs for 7 seconds per track. The
display showsªAll Disc Scanºfor 2 sec-
onds, and then shows the track number and
elapsed time as normal. The SCAN icon is
flashed during Scan mode.
The Scan mode is cancelled once it scans
through all the loaded discs, or if the SCAN
button is pressed during Scan mode.
LHA0078
4-34Heater, air conditioner and audio systems
ZX
Page 124 of 263
Eject CD
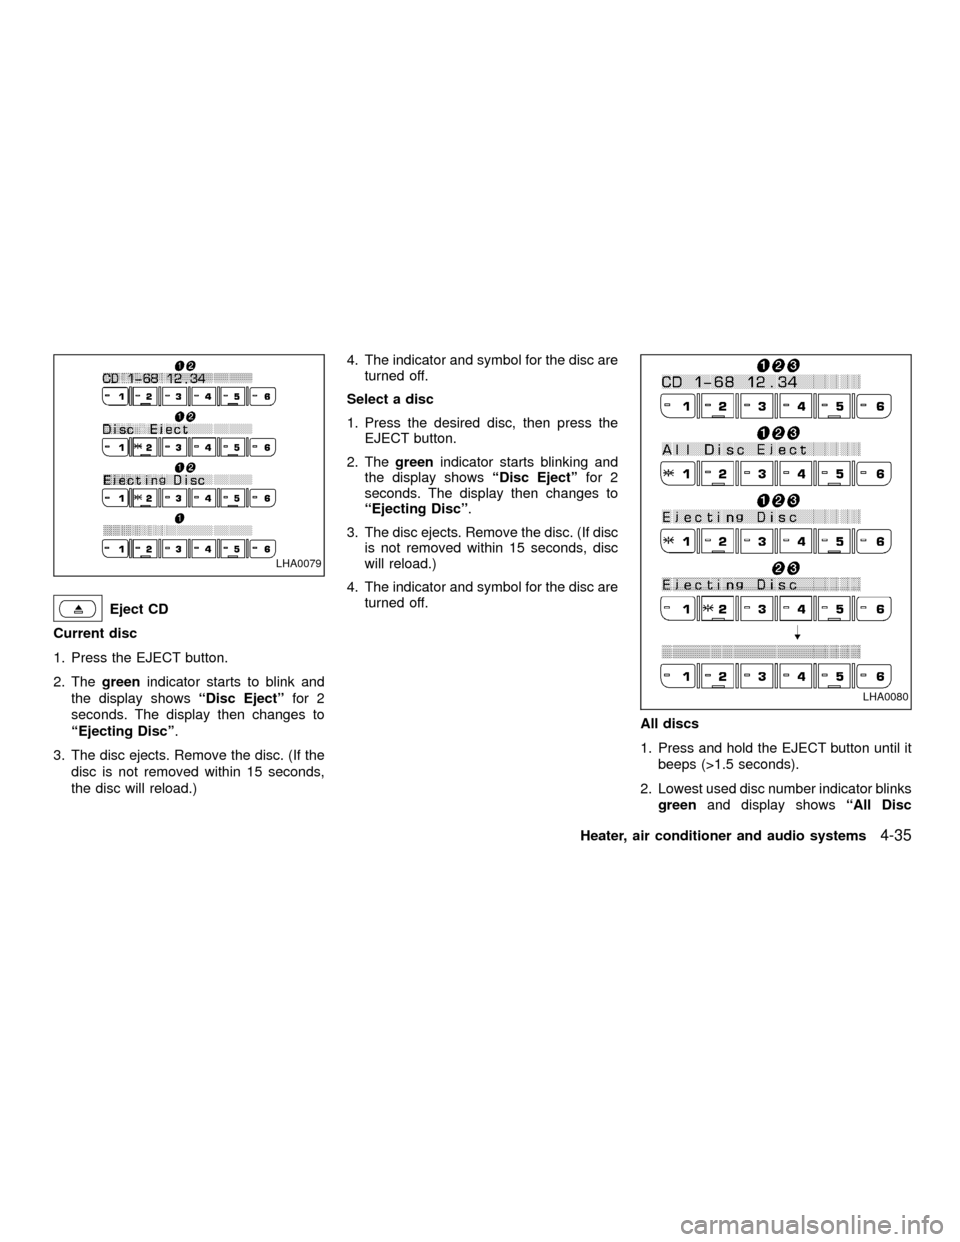
Current disc
1. Press the EJECT button.
2. Thegreenindicator starts to blink and
the display showsªDisc Ejectºfor 2
seconds. The display then changes to
ªEjecting Discº.
3. The disc ejects. Remove the disc. (If the
disc is not removed within 15 seconds,
the disc will reload.)4. The indicator and symbol for the disc are
turned off.
Select a disc
1. Press the desired disc, then press the
EJECT button.
2. Thegreenindicator starts blinking and
the display showsªDisc Ejectºfor 2
seconds. The display then changes to
ªEjecting Discº.
3. The disc ejects. Remove the disc. (If disc
is not removed within 15 seconds, disc
will reload.)
4. The indicator and symbol for the disc are
turned off.
All discs
1. Press and hold the EJECT button until it
beeps (>1.5 seconds).
2. Lowest used disc number indicator blinks
greenand display showsªAll Disc
LHA0079
LHA0080
Heater, air conditioner and audio systems4-35
ZX
Page 125 of 263
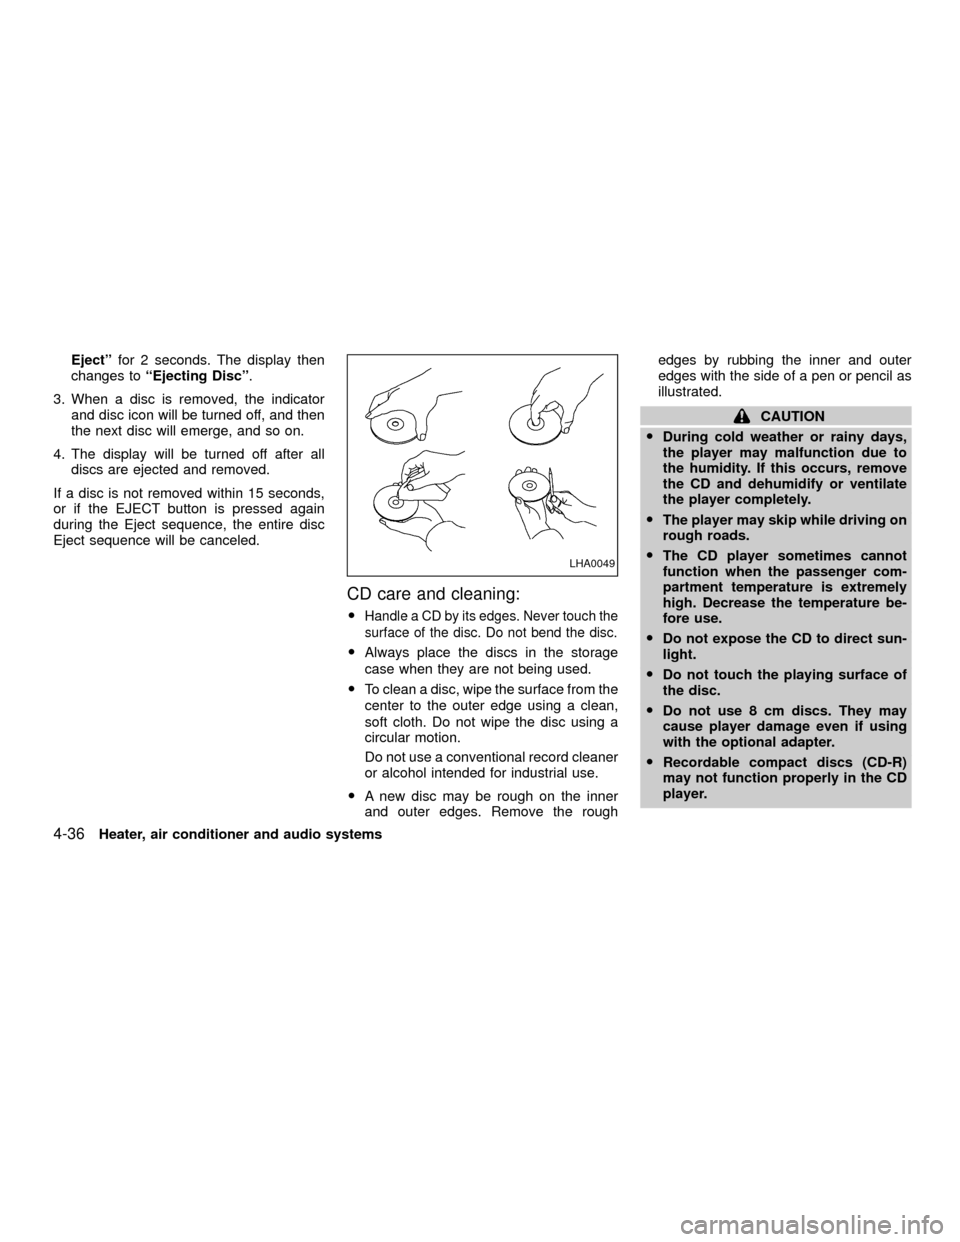
Ejectºfor 2 seconds. The display then
changes toªEjecting Discº.
3. When a disc is removed, the indicator
and disc icon will be turned off, and then
the next disc will emerge, and so on.
4. The display will be turned off after all
discs are ejected and removed.
If a disc is not removed within 15 seconds,
or if the EJECT button is pressed again
during the Eject sequence, the entire disc
Eject sequence will be canceled.
CD care and cleaning:
OHandle a CD by its edges. Never touch the
surface of the disc. Do not bend the disc.
OAlways place the discs in the storage
case when they are not being used.
OTo clean a disc, wipe the surface from the
center to the outer edge using a clean,
soft cloth. Do not wipe the disc using a
circular motion.
Do not use a conventional record cleaner
or alcohol intended for industrial use.
OA new disc may be rough on the inner
and outer edges. Remove the roughedges by rubbing the inner and outer
edges with the side of a pen or pencil as
illustrated.
CAUTION
ODuring cold weather or rainy days,
the player may malfunction due to
the humidity. If this occurs, remove
the CD and dehumidify or ventilate
the player completely.
OThe player may skip while driving on
rough roads.
OThe CD player sometimes cannot
function when the passenger com-
partment temperature is extremely
high. Decrease the temperature be-
fore use.
ODo not expose the CD to direct sun-
light.
ODo not touch the playing surface of
the disc.
ODo not use 8 cm discs. They may
cause player damage even if using
with the optional adapter.
ORecordable compact discs (CD-R)
may not function properly in the CD
player.
LHA0049
4-36Heater, air conditioner and audio systems
ZX