2001 NISSAN X-TRAIL engine overheat
[x] Cancel search: engine overheatPage 2086 of 3833

AT-8
PRECAUTIONS
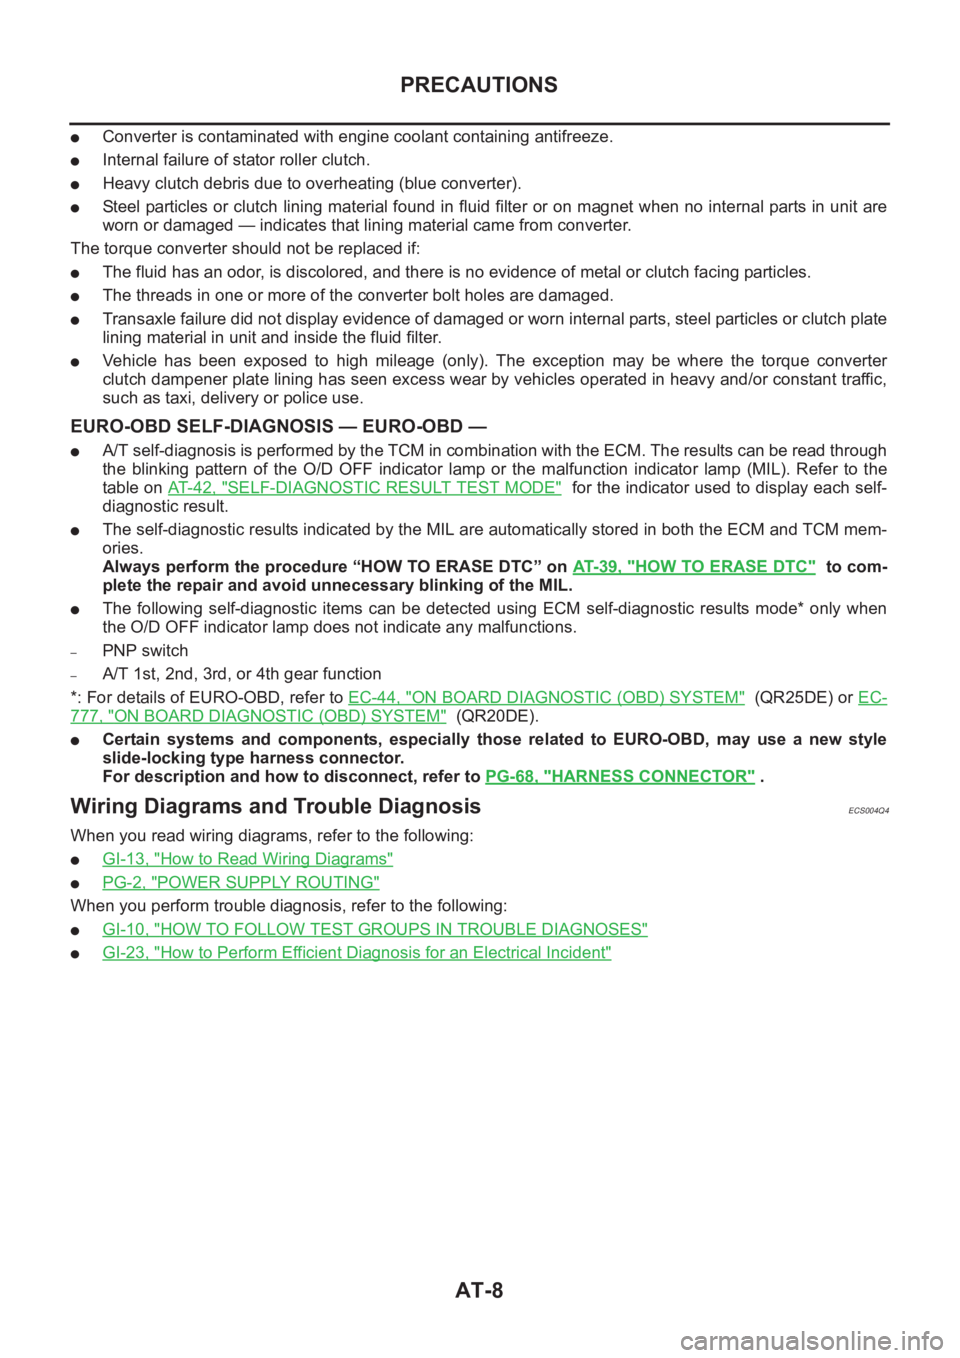
●Converter is contaminated with engine coolant containing antifreeze.
●Internal failure of stator roller clutch.
●Heavy clutch debris due to overheating (blue converter).
●Steel particles or clutch lining material found in fluid filter or on magnet when no internal parts in unit are
worn or damaged — indicates that lining material came from converter.
The torque converter should not be replaced if:
●The fluid has an odor, is discolored, and there is no evidence of metal or clutch facing particles.
●The threads in one or more of the converter bolt holes are damaged.
●Transaxle failure did not display evidence of damaged or worn internal parts, steel particles or clutch plate
lining material in unit and inside the fluid filter.
●Vehicle has been exposed to high mileage (only). The exception may be where the torque converter
clutch dampener plate lining has seen excess wear by vehicles operated in heavy and/or constant traffic,
such as taxi, delivery or police use.
EURO-OBD SELF-DIAGNOSIS — EURO-OBD —
●A/T self-diagnosis is performed by the TCM in combination with the ECM. The results can be read through
the blinking pattern of the O/D OFF indicator lamp or the malfunction indicator lamp (MIL). Refer to the
table on AT- 4 2 , "
SELF-DIAGNOSTIC RESULT TEST MODE" for the indicator used to display each self-
diagnostic result.
●The self-diagnostic results indicated by the MIL are automatically stored in both the ECM and TCM mem-
ories.
Always perform the procedure “HOW TO ERASE DTC” on AT- 3 9 , "
HOW TO ERASE DTC" to com-
plete the repair and avoid unnecessary blinking of the MIL.
●The following self-diagnostic items can be detected using ECM self-diagnostic results mode* only when
the O/D OFF indicator lamp does not indicate any malfunctions.
–PNP switch
–A/T 1st, 2nd, 3rd, or 4th gear function
*: For details of EURO-OBD, refer to EC-44, "
ON BOARD DIAGNOSTIC (OBD) SYSTEM" (QR25DE) or EC-
777, "ON BOARD DIAGNOSTIC (OBD) SYSTEM" (QR20DE).
●Certain systems and components, especially those related to EURO-OBD, may use a new style
slide-locking type harness connector.
For description and how to disconnect, refer to PG-68, "
HARNESS CONNECTOR" .
Wiring Diagrams and Trouble DiagnosisECS004Q4
When you read wiring diagrams, refer to the following:
●GI-13, "How to Read Wiring Diagrams"
●PG-2, "POWER SUPPLY ROUTING"
When you perform trouble diagnosis, refer to the following:
●GI-10, "HOW TO FOLLOW TEST GROUPS IN TROUBLE DIAGNOSES"
●GI-23, "How to Perform Efficient Diagnosis for an Electrical Incident"
Page 2141 of 3833
![NISSAN X-TRAIL 2001 Service Repair Manual TROUBLE DIAGNOSIS — BASIC INSPECTION
AT-63
[EURO-OBD]
D
E
F
G
H
I
J
K
L
MA
B
AT
TROUBLE DIAGNOSIS — BASIC INSPECTIONPFP:00000
A/T Fluid CheckECS004QQ
FLUID LEAKAGE CHECK
1. Clean area suspected of NISSAN X-TRAIL 2001 Service Repair Manual TROUBLE DIAGNOSIS — BASIC INSPECTION
AT-63
[EURO-OBD]
D
E
F
G
H
I
J
K
L
MA
B
AT
TROUBLE DIAGNOSIS — BASIC INSPECTIONPFP:00000
A/T Fluid CheckECS004QQ
FLUID LEAKAGE CHECK
1. Clean area suspected of](/manual-img/5/57405/w960_57405-2140.png)
TROUBLE DIAGNOSIS — BASIC INSPECTION
AT-63
[EURO-OBD]
D
E
F
G
H
I
J
K
L
MA
B
AT
TROUBLE DIAGNOSIS — BASIC INSPECTIONPFP:00000
A/T Fluid CheckECS004QQ
FLUID LEAKAGE CHECK
1. Clean area suspected of leaking. — for example, mating surface
of converter housing and transmission case.
2. Start engine, apply foot brake, place selector lever in “D” posi-
tion and wait a few minutes.
3. Stop engine.
4. Check for fresh leakage.
FLUID CONDITION CHECK
FLUID LEVEL CHECK
Refer to AT-13, "Checking A/T Fluid" .
SAT767B
SAT288G
Fluid color Suspected problem
Dark or black with burned odor Wear of frictional material
Milky pink Water contamination — Road water
entering through filler tube or breather
Varnished fluid, light to dark brown and
tackyOxidation — Over or under filling, —
Overheating
SAT638A
Page 2180 of 3833
![NISSAN X-TRAIL 2001 Service Repair Manual AT-102
[EURO-OBD]
TROUBLE DIAGNOSIS — GENERAL DESCRIPTION
Does not change from “12 ” to “11 ”
in “1” position.ON vehicle1. PNP switchAT- 11 0 , "
DTC P0705
PARK/NEUTRAL POSI-
TIO NISSAN X-TRAIL 2001 Service Repair Manual AT-102
[EURO-OBD]
TROUBLE DIAGNOSIS — GENERAL DESCRIPTION
Does not change from “12 ” to “11 ”
in “1” position.ON vehicle1. PNP switchAT- 11 0 , "
DTC P0705
PARK/NEUTRAL POSI-
TIO](/manual-img/5/57405/w960_57405-2179.png)
AT-102
[EURO-OBD]
TROUBLE DIAGNOSIS — GENERAL DESCRIPTION
Does not change from “12 ” to “11 ”
in “1” position.ON vehicle1. PNP switchAT- 11 0 , "
DTC P0705
PARK/NEUTRAL POSI-
TION (PNP) SWITCH"
2. Vehicle speed sensor·A/T (Revolution
sensor) and vehicle speed sensor·MTRAT-122, "
DTC P0720 VEHI-
CLE SPEED SENSOR·A/T
(REVOLUTION SEN-
SOR)",AT- 1 9 9 , "DTC
VEHICLE SPEED SEN-
SOR MTR"
3. Shift solenoid valve AAT-170, "
DTC P0750
SHIFT SOLENOID VALVE
A"
4. Control valve assemblyAT-414, "
Control Valve
Assembly and Accumula-
tors"
OFF vehicle5. Low one-way clutchAT-421, "
OVERHAUL",AT-
425, "Locations of Adjust-
ing Shims, Needle Bear-
ings, Thrust Washers and
Snap Rings"
6. Brake bandAT-488, "Band Servo Pis-
ton Assembly"
7. Low & reverse brakeAT-476, "Low & Reverse
Brake"
Large shock changing from “12 ” to
“1
1 ” in “1” position.ON vehicle 1. Control valve assemblyAT-414, "
Control Valve
Assembly and Accumula-
tors"
OFF vehicle 2. Low & reverse brakeAT-476, "Low & Reverse
Brake"
Transmission overheats. ON vehicle1. Fluid levelAT- 6 3 , "
FLUID LEVEL
CHECK"
2. Engine idling rpmEC-38
[QR25 (WITH
EURO-OBD)], EC-448
[QR25 (WITHOUT EURO-
OBD)], EC-771
[QR20
(WITH EURO-OBD)], EC-
1135 [QR20 (WITHOUT
EURO-OBD)]
3. Accelerator pedal position (APP) sensorAT-180, "
DTC P1705
ACCELERATOR PEDAL
POSITION (APP) SEN-
SOR"
4. Line pressure testAT- 6 7 , "Line Pressure Test"
5. Line pressure solenoid valveAT-163, "
DTC P0745 LINE
PRESSURE SOLENOID
VA LV E"
6. Control valve assemblyAT-414, "
Control Valve
Assembly and Accumula-
tors"
Symptom Condition Diagnostic ItemReference Page
EURO-OBD
Page 2342 of 3833
![NISSAN X-TRAIL 2001 Service Repair Manual AT-264
[EXC.F/EURO-OBD]
TROUBLE DIAGNOSIS — BASIC INSPECTION
TROUBLE DIAGNOSIS — BASIC INSPECTION
PFP:00000
A/T Fluid CheckECS004VR
FLUID LEAKAGE CHECK
1. Clean area suspected of leaking. — for NISSAN X-TRAIL 2001 Service Repair Manual AT-264
[EXC.F/EURO-OBD]
TROUBLE DIAGNOSIS — BASIC INSPECTION
TROUBLE DIAGNOSIS — BASIC INSPECTION
PFP:00000
A/T Fluid CheckECS004VR
FLUID LEAKAGE CHECK
1. Clean area suspected of leaking. — for](/manual-img/5/57405/w960_57405-2341.png)
AT-264
[EXC.F/EURO-OBD]
TROUBLE DIAGNOSIS — BASIC INSPECTION
TROUBLE DIAGNOSIS — BASIC INSPECTION
PFP:00000
A/T Fluid CheckECS004VR
FLUID LEAKAGE CHECK
1. Clean area suspected of leaking. — for example, mating surface
of converter housing and transmission case.
2. Start engine, apply foot brake, place selector lever in “D” posi-
tion and wait a few minutes.
3. Stop engine.
4. Check for fresh leakage.
FLUID CONDITION CHECK
FLUID LEVEL CHECK
Refer to AT- 1 3 , "Checking A/T Fluid" .
SAT767B
SAT288G
Fluid color Suspected problem
Dark or black with burned odor Wear of frictional material
Milky pink Water contamination — Road water
entering through filler tube or breather
Varnished fluid, light to dark brown and
tackyOxidation — Over or under filling, —
Overheating
SAT638A
Page 2380 of 3833
![NISSAN X-TRAIL 2001 Service Repair Manual AT-302
[EXC.F/EURO-OBD]
TROUBLE DIAGNOSIS — GENERAL DESCRIPTION
Transmission overheats. ON vehicle1. Fluid levelAT-264, "
FLUID LEVEL
CHECK"
2. Engine idling rpmEC-1391, "Idle Speed and NISSAN X-TRAIL 2001 Service Repair Manual AT-302
[EXC.F/EURO-OBD]
TROUBLE DIAGNOSIS — GENERAL DESCRIPTION
Transmission overheats. ON vehicle1. Fluid levelAT-264, "
FLUID LEVEL
CHECK"
2. Engine idling rpmEC-1391, "Idle Speed and](/manual-img/5/57405/w960_57405-2379.png)
AT-302
[EXC.F/EURO-OBD]
TROUBLE DIAGNOSIS — GENERAL DESCRIPTION
Transmission overheats. ON vehicle1. Fluid levelAT-264, "
FLUID LEVEL
CHECK"
2. Engine idling rpmEC-1391, "Idle Speed and
Ignition Timing"
3. Accelerator pedal position (APP) sensorAT-362, "
ACCELE
RATOR PEDAL POSI-
TION (APP) SENSOR"
4. Line pressure testAT-268, "Line Pressure
Te s t"
5. Line pressure solenoid valveAT-396, "
LINE PRES-
SURE SOLENOID
VA LV E"
6. Control valve assemblyAT-414, "
Control Valve
Assembly and Accumula-
tors"
Transmission overheats. OFF vehicle7. Oil pumpAT-444, "
Oil Pump"
8. Reverse clutchAT-463, "Reverse Clutch"
9. High clutchAT-466, "High Clutch"
10. Brake bandAT-488, "Band Servo Pis-
ton Assembly"
11. Forward clutchAT-471, "Forward and
Overrun Clutches"
12. Overrun clutchAT-471, "Forward and
Overrun Clutches"
13. Low & reverse brakeAT-476, "Low & Reverse
Brake"
14. Torque converterAT-425, "
Locations of
Adjusting Shims, Needle
Bearings, Thrust Washers
and Snap Rings"
ATF shoots out during operation.
White smoke emitted from exhaust
pipe during operation.ON vehicle 1. Fluid levelAT-264, "
FLUID LEVEL
CHECK"
OFF vehicle2. Reverse clutchAT-463, "
Reverse Clutch"
3. High clutchAT-466, "High Clutch"
4. Brake bandAT-488, "Band Servo Pis-
ton Assembly"
5. Forward clutchAT-471, "Forward and
Overrun Clutches"
6. Overrun clutchAT-471, "Forward and
Overrun Clutches"
7. Low & reverse brakeAT-476, "Low & Reverse
Brake"
Symptom Condition Diagnostic Item Reference Page
Page 3368 of 3833

ATC-92
TROUBLE DIAGNOSIS
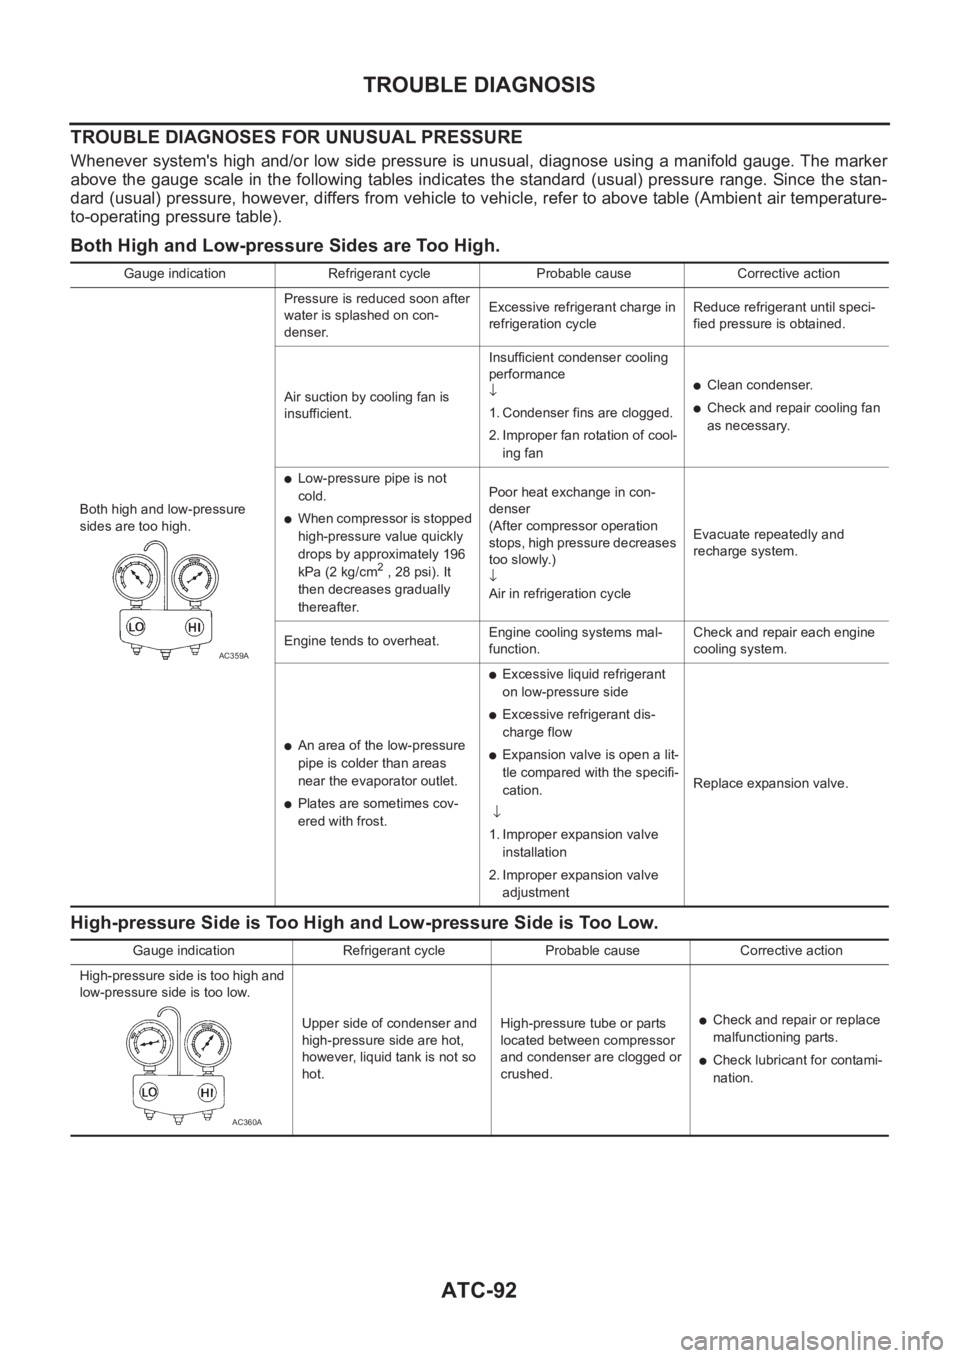
TROUBLE DIAGNOSES FOR UNUSUAL PRESSURE
Whenever system's high and/or low side pressure is unusual, diagnose using a manifold gauge. The marker
above the gauge scale in the following tables indicates the standard (usual) pressure range. Since the stan-
dard (usual) pressure, however, differs from vehicle to vehicle, refer to above table (Ambient air temperature-
to-operating pressure table).
Both High and Low-pressure Sides are Too High.
High-pressure Side is Too High and Low-pressure Side is Too Low.
Gauge indication Refrigerant cycle Probable cause Corrective action
Both high and low-pressure
sides are too high.Pressure is reduced soon after
water is splashed on con-
denser.Excessive refrigerant charge in
refrigeration cycleReduce refrigerant until speci-
fied pressure is obtained.
Air suction by cooling fan is
insufficient.Insufficient condenser cooling
performance
↓
1. Condenser fins are clogged.
2. Improper fan rotation of cool-
ing fan
●Clean condenser.
●Check and repair cooling fan
as necessary.
●Low-pressure pipe is not
cold.
●When compressor is stopped
high-pressure value quickly
drops by approximately 196
kPa (2 kg/cm
2 , 28 psi). It
then decreases gradually
thereafter.Poor heat exchange in con-
denser
(After compressor operation
stops, high pressure decreases
too slowly.)
↓
Air in refrigeration cycleEvacuate repeatedly and
recharge system.
Engine tends to overheat.Engine cooling systems mal-
function.Check and repair each engine
cooling system.
●An area of the low-pressure
pipe is colder than areas
near the evaporator outlet.
●Plates are sometimes cov-
ered with frost.
●Excessive liquid refrigerant
on low-pressure side
●Excessive refrigerant dis-
charge flow
●Expansion valve is open a lit-
tle compared with the specifi-
cation.
↓
1. Improper expansion valve
installation
2. Improper expansion valve
adjustmentReplace expansion valve.
AC359A
Gauge indication Refrigerant cycle Probable cause Corrective action
High-pressure side is too high and
low-pressure side is too low.
Upper side of condenser and
high-pressure side are hot,
however, liquid tank is not so
hot.High-pressure tube or parts
located between compressor
and condenser are clogged or
crushed.
●Check and repair or replace
malfunctioning parts.
●Check lubricant for contami-
nation.
AC360A
Page 3800 of 3833

MA-20
ENGINE MAINTENANCE (QR20DE·QR25DE)
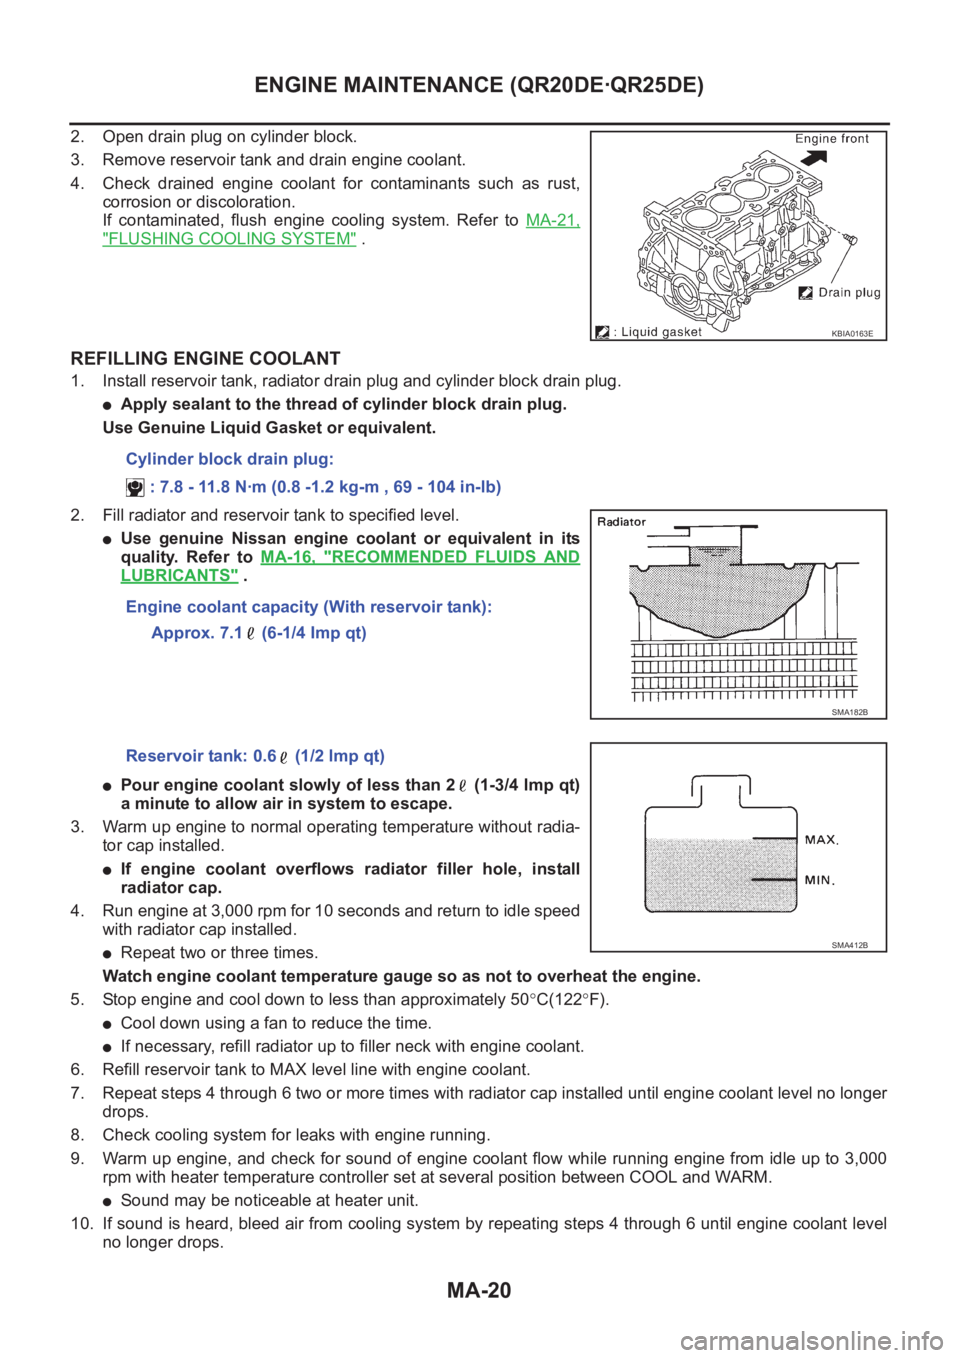
2. Open drain plug on cylinder block.
3. Remove reservoir tank and drain engine coolant.
4. Check drained engine coolant for contaminants such as rust,
corrosion or discoloration.
If contaminated, flush engine cooling system. Refer to MA-21,
"FLUSHING COOLING SYSTEM" .
REFILLING ENGINE COOLANT
1. Install reservoir tank, radiator drain plug and cylinder block drain plug.
●Apply sealant to the thread of cylinder block drain plug.
Use Genuine Liquid Gasket or equivalent.
2. Fill radiator and reservoir tank to specified level.
●Use genuine Nissan engine coolant or equivalent in its
quality. Refer to MA-16, "
RECOMMENDED FLUIDS AND
LUBRICANTS" .
●Pour engine coolant slowly of less than 2 (1-3/4 lmp qt)
a minute to allow air in system to escape.
3. Warm up engine to normal operating temperature without radia-
tor cap installed.
●If engine coolant overflows radiator filler hole, install
radiator cap.
4. Run engine at 3,000 rpm for 10 seconds and return to idle speed
with radiator cap installed.
●Repeat two or three times.
Watch engine coolant temperature gauge so as not to overheat the engine.
5. Stop engine and cool down to less than approximately 50°C(122°F).
●Cool down using a fan to reduce the time.
●If necessary, refill radiator up to filler neck with engine coolant.
6. Refill reservoir tank to MAX level line with engine coolant.
7. Repeat steps 4 through 6 two or more times with radiator cap installed until engine coolant level no longer
drops.
8. Check cooling system for leaks with engine running.
9. Warm up engine, and check for sound of engine coolant flow while running engine from idle up to 3,000
rpm with heater temperature controller set at several position between COOL and WARM.
●Sound may be noticeable at heater unit.
10. If sound is heard, bleed air from cooling system by repeating steps 4 through 6 until engine coolant level
no longer drops.
KBIA0163E
Cylinder block drain plug:
: 7.8 - 11.8 N·m (0.8 -1.2 kg-m , 69 - 104 in-lb)
Engine coolant capacity (With reservoir tank):
Approx. 7.1 (6-1/4 Imp qt)
SMA182B
Reservoir tank: 0.6 (1/2 lmp qt)
SMA412B
Page 3809 of 3833

ENGINE MAINTENANCE (YD22DDTI)
MA-29
C
D
E
F
G
H
I
J
K
MA
B
MA
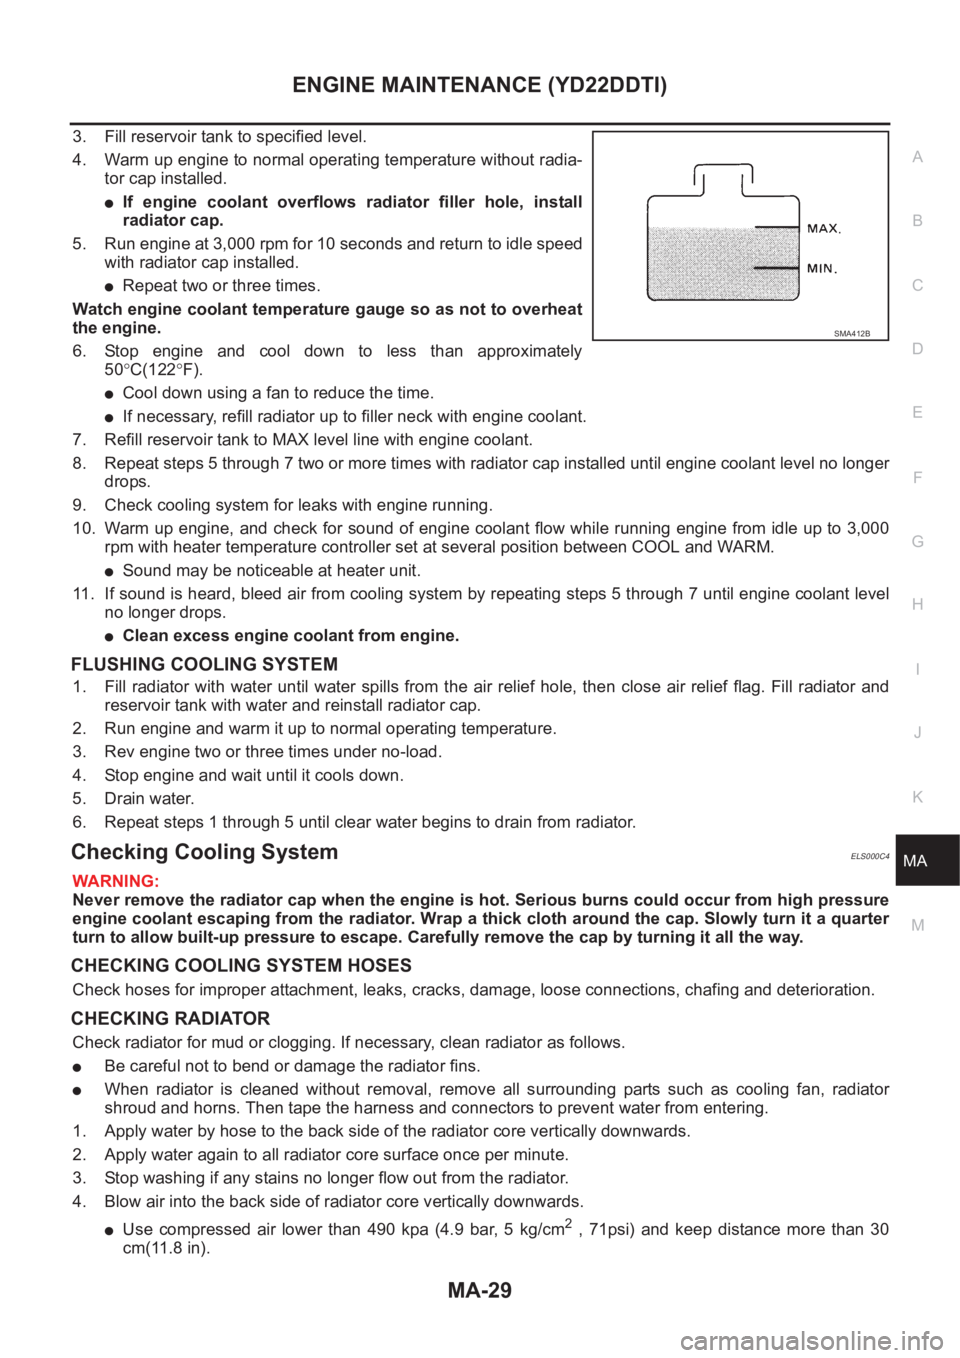
3. Fill reservoir tank to specified level.
4. Warm up engine to normal operating temperature without radia-
tor cap installed.
●If engine coolant overflows radiator filler hole, install
radiator cap.
5. Run engine at 3,000 rpm for 10 seconds and return to idle speed
with radiator cap installed.
●Repeat two or three times.
Watch engine coolant temperature gauge so as not to overheat
the engine.
6. Stop engine and cool down to less than approximately
50°C(122°F).
●Cool down using a fan to reduce the time.
●If necessary, refill radiator up to filler neck with engine coolant.
7. Refill reservoir tank to MAX level line with engine coolant.
8. Repeat steps 5 through 7 two or more times with radiator cap installed until engine coolant level no longer
drops.
9. Check cooling system for leaks with engine running.
10. Warm up engine, and check for sound of engine coolant flow while running engine from idle up to 3,000
rpm with heater temperature controller set at several position between COOL and WARM.
●Sound may be noticeable at heater unit.
11. If sound is heard, bleed air from cooling system by repeating steps 5 through 7 until engine coolant level
no longer drops.
●Clean excess engine coolant from engine.
FLUSHING COOLING SYSTEM
1. Fill radiator with water until water spills from the air relief hole, then close air relief flag. Fill radiator and
reservoir tank with water and reinstall radiator cap.
2. Run engine and warm it up to normal operating temperature.
3. Rev engine two or three times under no-load.
4. Stop engine and wait until it cools down.
5. Drain water.
6. Repeat steps 1 through 5 until clear water begins to drain from radiator.
Checking Cooling SystemELS000C4
WARNING:
Never remove the radiator cap when the engine is hot. Serious burns could occur from high pressure
engine coolant escaping from the radiator. Wrap a thick cloth around the cap. Slowly turn it a quarter
turn to allow built-up pressure to escape. Carefully remove the cap by turning it all the way.
CHECKING COOLING SYSTEM HOSES
Check hoses for improper attachment, leaks, cracks, damage, loose connections, chafing and deterioration.
CHECKING RADIATOR
Check radiator for mud or clogging. If necessary, clean radiator as follows.
●Be careful not to bend or damage the radiator fins.
●When radiator is cleaned without removal, remove all surrounding parts such as cooling fan, radiator
shroud and horns. Then tape the harness and connectors to prevent water from entering.
1. Apply water by hose to the back side of the radiator core vertically downwards.
2. Apply water again to all radiator core surface once per minute.
3. Stop washing if any stains no longer flow out from the radiator.
4. Blow air into the back side of radiator core vertically downwards.
●Use compressed air lower than 490 kpa (4.9 bar, 5 kg/cm2 , 71psi) and keep distance more than 30
cm(11.8 in).
SMA412B