2001 NISSAN ALMERA TINO window
[x] Cancel search: windowPage 332 of 3051
BODY & TRIM
SECTION
BT
CONTENTS
PRECAUTIONS...............................................................3
Service Notice..............................................................3
Supplemental Restraint System (SRS)²AIR
BAG²and²SEAT BELT PRE-TENSIONER²...............3
CLIP AND FASTENER....................................................4
Description ...................................................................4
CHASSIS AND BODY MAINTENANCE.........................6
Checking Body Corrosion ............................................6
BODY FRONT END.........................................................7
Removal and Installation .............................................7
FRONT BUMPER ASSEMBLY....................................7
BODY REAR END AND OPENER................................10
Removal and Installation ...........................................10
REAR BUMPER ASSEMBLY....................................10
DOOR.............................................................................13
Adjustment .................................................................13
STRIKER ADJUSTMENT..........................................13
Front Door Glass .......................................................14
FRONT DOOR GLASS AND REGULATOR................14
Front Door Limit Switch Reset (Driver side only)......15
RESET CONDITIONS..............................................15
RESET PROCEDURES............................................15
Rear Door Glass ........................................................16
REAR DOOR GLASS AND REGULATOR..................16
Front Door Lock .........................................................18
OUTSIDE HANDLE ROD ADJUSTMENT...................18
REMOVAL...............................................................18
Rear Door Lock .........................................................20
OUTSIDE HANDLE ROD ADJUSTMENT...................20
REMOVAL...............................................................21
INSTRUMENT PANEL ASSEMBLY.............................22
Removal and Installation ...........................................22
SIDE AND FLOOR TRIM...............................................28
Removal and Installation ...........................................28
LUGGAGE ROOM TRIM...............................................31
Removal and Installation ...........................................31
DOOR TRIM...................................................................32
Removal and Installation ...........................................32ROOF TRIM...................................................................35
Removal and Installation ...........................................35
BACK DOOR TRIM.......................................................37
Removal and Installation ...........................................37
EXTERIOR.....................................................................38
Removal and Installation ...........................................38
FRONT SEAT................................................................46
Removal and Installation ...........................................46
MANUAL SEAT........................................................47
Heated Seat ...............................................................48
Active Head Restraint ................................................48
OPERATION OUTLINE............................................48
REAR SEAT...................................................................49
Removal and Installation ...........................................49
REAR OUTSIDE SEAT.............................................49
REAR CENTER SEAT..............................................50
SUNROOF......................................................................51
Adjustment .................................................................51
Removal .....................................................................51
Trouble Diagnoses.....................................................55
DIAGNOSTIC TABLE................................................55
WIND DEFLECTOR (WHERE FITTED)......................55
ADJUSTMENT.........................................................56
DRAIN HOSES........................................................57
WEATHERSTRIP.....................................................57
LINK AND WIRE ASSEMBLY....................................58
WINDSHIELD AND WINDOWS....................................59
Removal and Installation ...........................................59
REMOVAL...............................................................59
INSTALLATION........................................................59
WINDSHIELD..........................................................60
SIDE WINDOW........................................................61
BACK DOOR WINDOW............................................62
DOOR MIRROR.............................................................63
Removal and Installation ...........................................63
REAR VIEW MIRROR...................................................64
Removal and Installation ...........................................64
REMOVAL...............................................................64
Page 345 of 3051
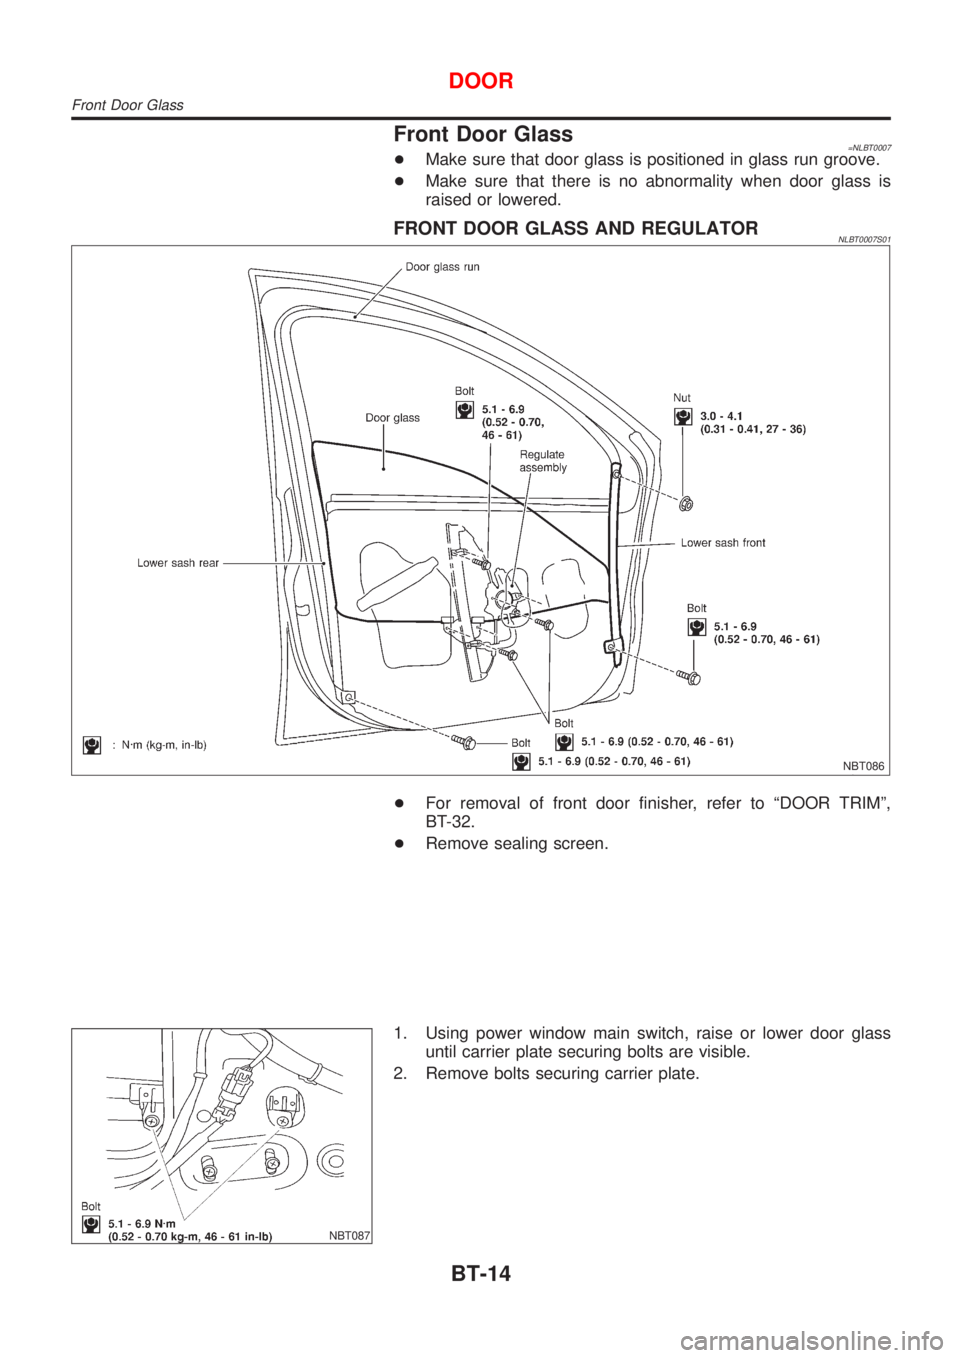
Front Door Glass=NLBT0007+Make sure that door glass is positioned in glass run groove.
+Make sure that there is no abnormality when door glass is
raised or lowered.
FRONT DOOR GLASS AND REGULATORNLBT0007S01
NBT086
+For removal of front door finisher, refer to ªDOOR TRIMº,
BT-32.
+Remove sealing screen.
NBT087
1. Using power window main switch, raise or lower door glass
until carrier plate securing bolts are visible.
2. Remove bolts securing carrier plate.
DOOR
Front Door Glass
BT-14
Page 346 of 3051
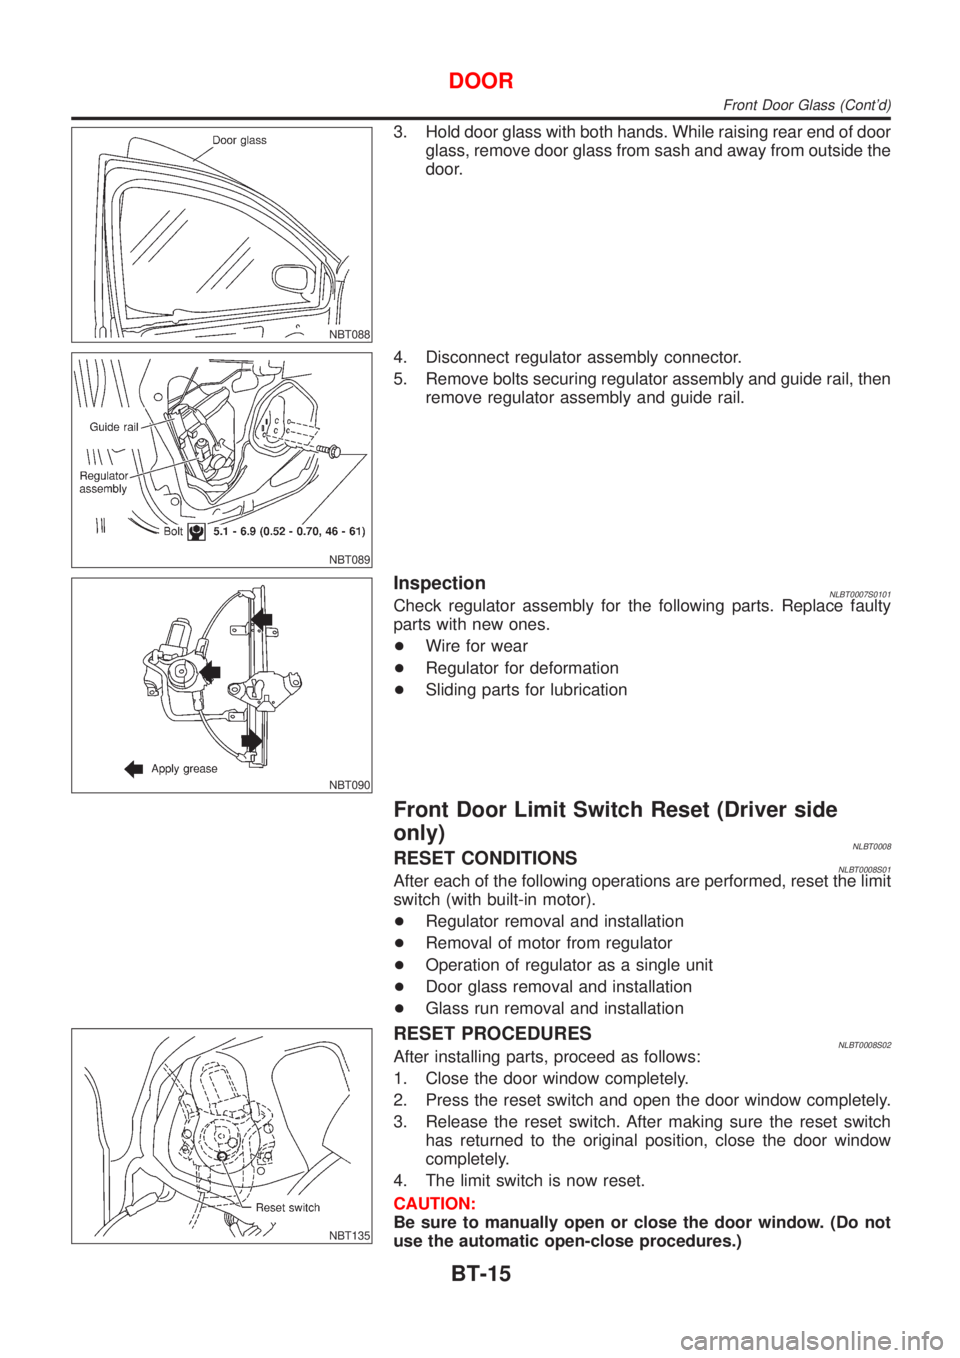
NBT088
3. Hold door glass with both hands. While raising rear end of door
glass, remove door glass from sash and away from outside the
door.
NBT089
4. Disconnect regulator assembly connector.
5. Remove bolts securing regulator assembly and guide rail, then
remove regulator assembly and guide rail.
NBT090
InspectionNLBT0007S0101Check regulator assembly for the following parts. Replace faulty
parts with new ones.
+Wire for wear
+Regulator for deformation
+Sliding parts for lubrication
Front Door Limit Switch Reset (Driver side
only)
NLBT0008RESET CONDITIONSNLBT0008S01After each of the following operations are performed, reset the limit
switch (with built-in motor).
+Regulator removal and installation
+Removal of motor from regulator
+Operation of regulator as a single unit
+Door glass removal and installation
+Glass run removal and installation
NBT135
RESET PROCEDURESNLBT0008S02After installing parts, proceed as follows:
1. Close the door window completely.
2. Press the reset switch and open the door window completely.
3. Release the reset switch. After making sure the reset switch
has returned to the original position, close the door window
completely.
4. The limit switch is now reset.
CAUTION:
Be sure to manually open or close the door window. (Do not
use the automatic open-close procedures.)
DOOR
Front Door Glass (Cont'd)
BT-15
Page 347 of 3051
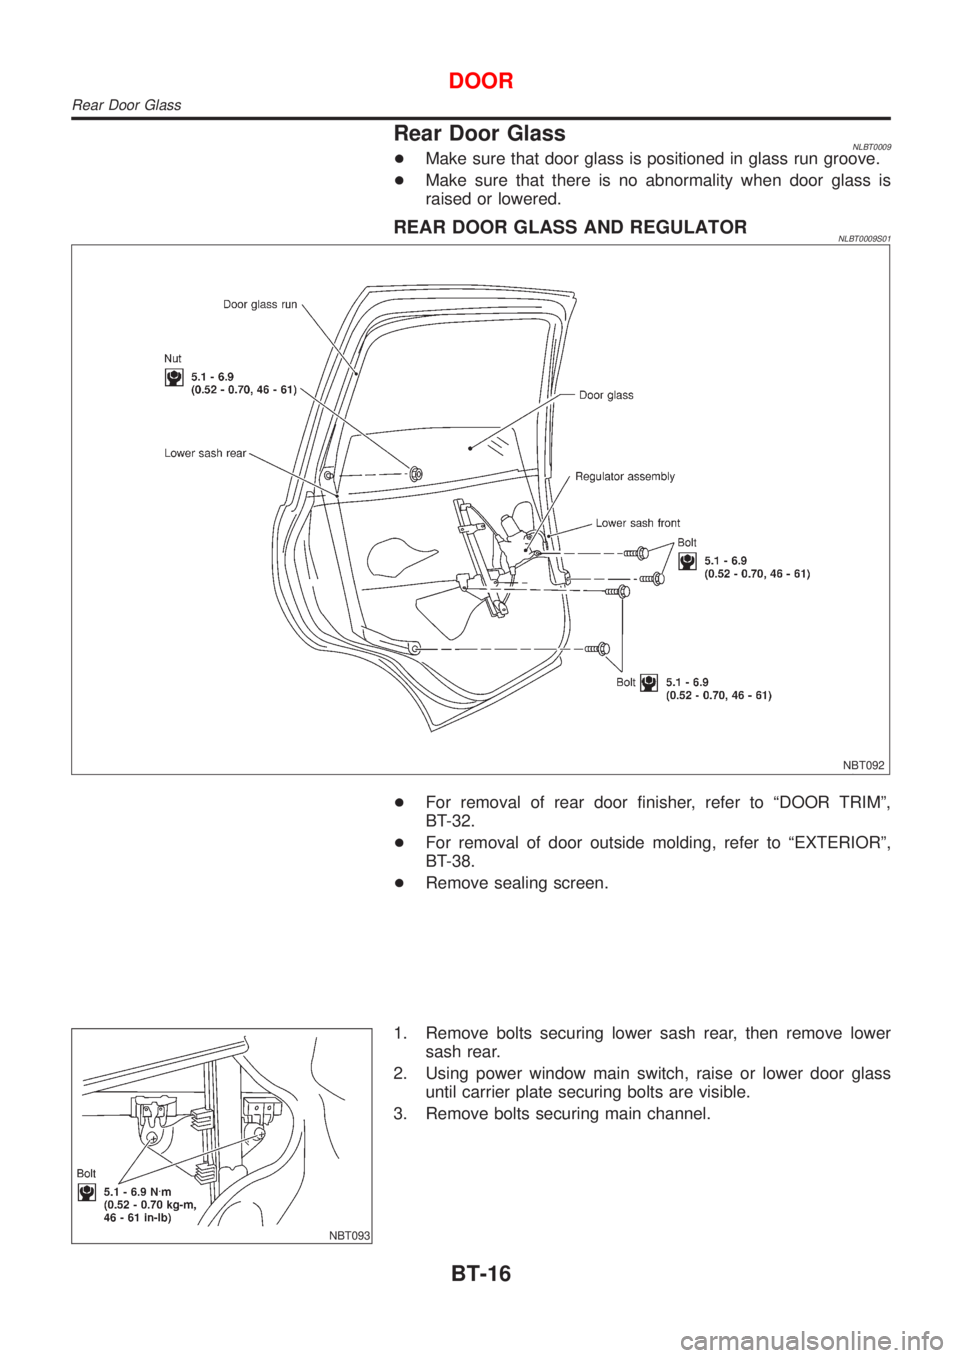
Rear Door GlassNLBT0009+Make sure that door glass is positioned in glass run groove.
+Make sure that there is no abnormality when door glass is
raised or lowered.
REAR DOOR GLASS AND REGULATORNLBT0009S01
NBT092
+For removal of rear door finisher, refer to ªDOOR TRIMº,
BT-32.
+For removal of door outside molding, refer to ªEXTERIORº,
BT-38.
+Remove sealing screen.
NBT093
1. Remove bolts securing lower sash rear, then remove lower
sash rear.
2. Using power window main switch, raise or lower door glass
until carrier plate securing bolts are visible.
3. Remove bolts securing main channel.
DOOR
Rear Door Glass
BT-16
Page 363 of 3051
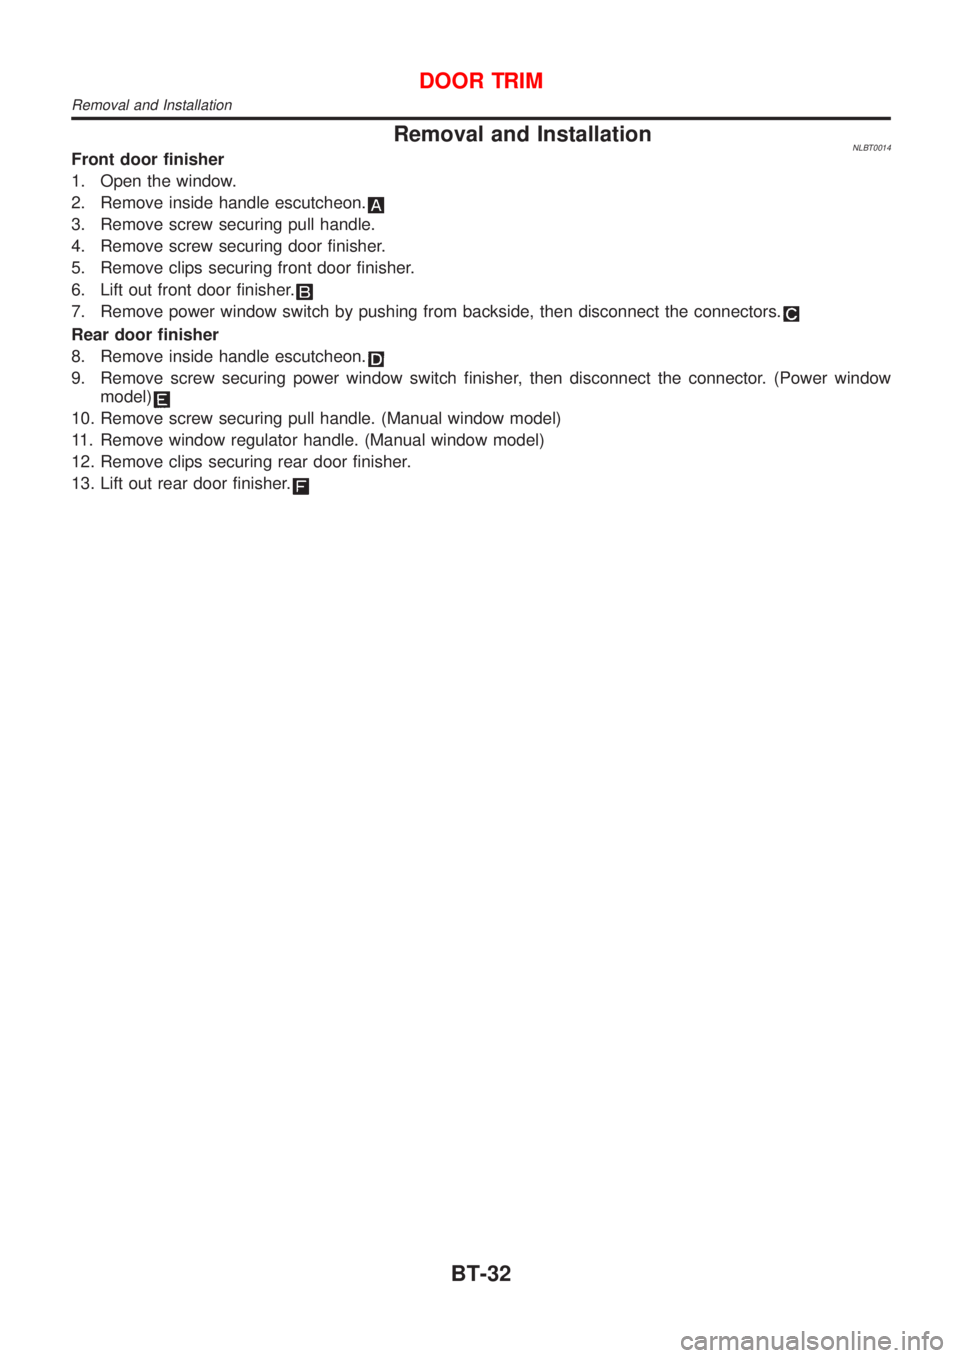
Removal and InstallationNLBT0014Front door finisher
1. Open the window.
2. Remove inside handle escutcheon.
3. Remove screw securing pull handle.
4. Remove screw securing door finisher.
5. Remove clips securing front door finisher.
6. Lift out front door finisher.
7. Remove power window switch by pushing from backside, then disconnect the connectors.
Rear door finisher
8. Remove inside handle escutcheon.
9. Remove screw securing power window switch finisher, then disconnect the connector. (Power window
model)
10. Remove screw securing pull handle. (Manual window model)
11. Remove window regulator handle. (Manual window model)
12. Remove clips securing rear door finisher.
13. Lift out rear door finisher.
DOOR TRIM
Removal and Installation
BT-32
Page 390 of 3051
SBF034BA
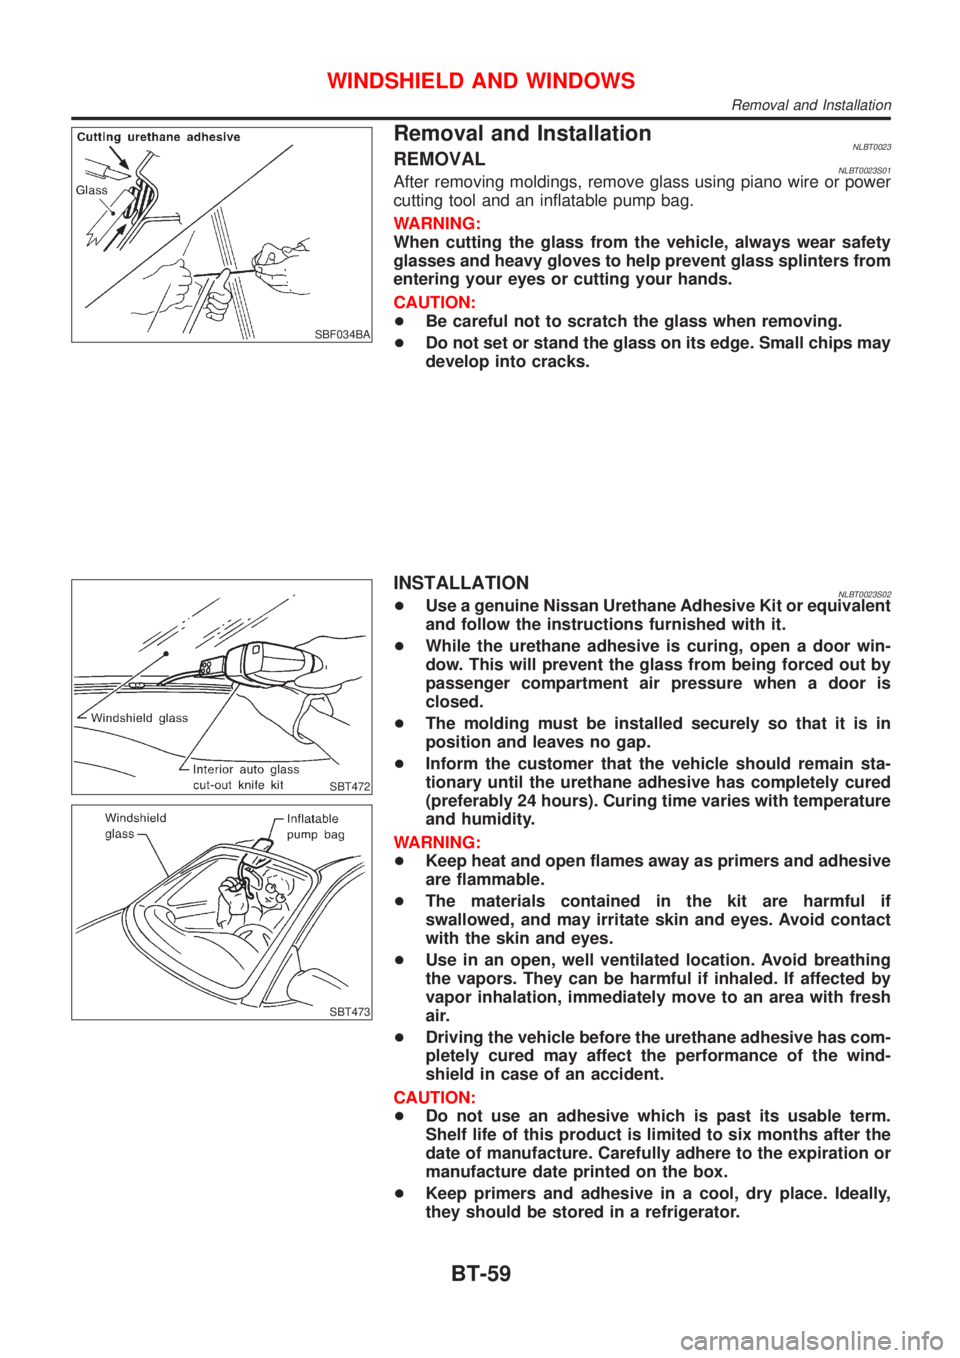
Removal and InstallationNLBT0023REMOVALNLBT0023S01After removing moldings, remove glass using piano wire or power
cutting tool and an inflatable pump bag.
WARNING:
When cutting the glass from the vehicle, always wear safety
glasses and heavy gloves to help prevent glass splinters from
entering your eyes or cutting your hands.
CAUTION:
+Be careful not to scratch the glass when removing.
+Do not set or stand the glass on its edge. Small chips may
develop into cracks.
SBT472
SBT473
INSTALLATIONNLBT0023S02+Use a genuine Nissan Urethane Adhesive Kit or equivalent
and follow the instructions furnished with it.
+While the urethane adhesive is curing, open a door win-
dow. This will prevent the glass from being forced out by
passenger compartment air pressure when a door is
closed.
+The molding must be installed securely so that it is in
position and leaves no gap.
+Inform the customer that the vehicle should remain sta-
tionary until the urethane adhesive has completely cured
(preferably 24 hours). Curing time varies with temperature
and humidity.
WARNING:
+Keep heat and open flames away as primers and adhesive
are flammable.
+The materials contained in the kit are harmful if
swallowed, and may irritate skin and eyes. Avoid contact
with the skin and eyes.
+Use in an open, well ventilated location. Avoid breathing
the vapors. They can be harmful if inhaled. If affected by
vapor inhalation, immediately move to an area with fresh
air.
+Driving the vehicle before the urethane adhesive has com-
pletely cured may affect the performance of the wind-
shield in case of an accident.
CAUTION:
+Do not use an adhesive which is past its usable term.
Shelf life of this product is limited to six months after the
date of manufacture. Carefully adhere to the expiration or
manufacture date printed on the box.
+Keep primers and adhesive in a cool, dry place. Ideally,
they should be stored in a refrigerator.
WINDSHIELD AND WINDOWS
Removal and Installation
BT-59
Page 391 of 3051
+Do not leave primers or adhesive cartridge unattended
with their caps open or off.
+The vehicle should not be driven for at least 24 hours or
until the urethane adhesive has completely cured. Curing
time varies depending on temperature and humidities. The
curing time will increase under higher temperatures and
lower humidities.
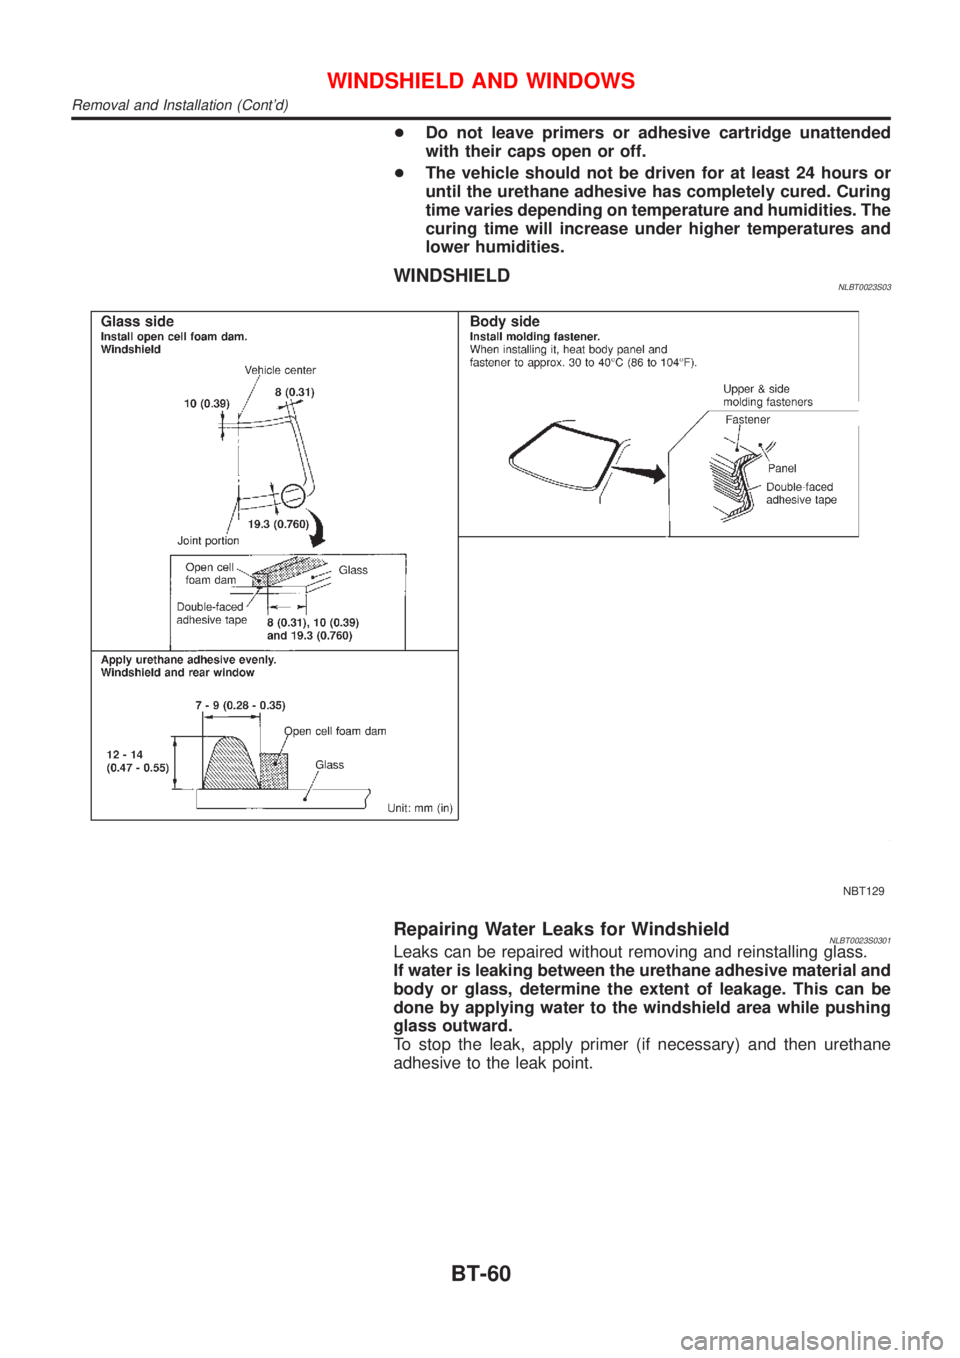
WINDSHIELDNLBT0023S03
NBT129
Repairing Water Leaks for WindshieldNLBT0023S0301Leaks can be repaired without removing and reinstalling glass.
If water is leaking between the urethane adhesive material and
body or glass, determine the extent of leakage. This can be
done by applying water to the windshield area while pushing
glass outward.
To stop the leak, apply primer (if necessary) and then urethane
adhesive to the leak point.
WINDSHIELD AND WINDOWS
Removal and Installation (Cont'd)
BT-60
Page 392 of 3051
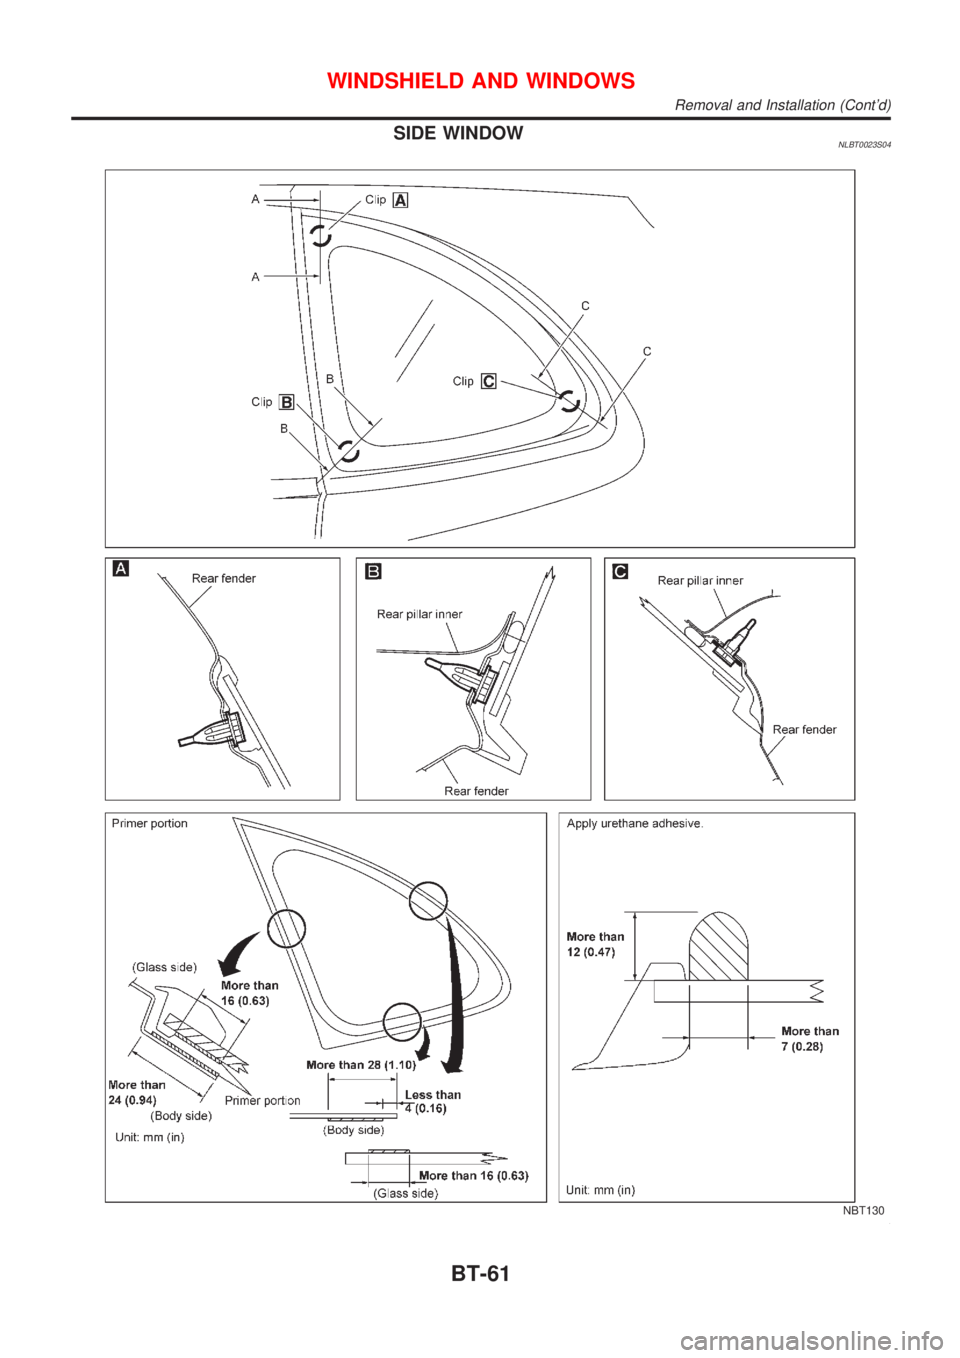
SIDE WINDOWNLBT0023S04
NBT130
WINDSHIELD AND WINDOWS
Removal and Installation (Cont'd)
BT-61