2001 HONDA ODYSSEY height
[x] Cancel search: heightPage 15 of 363
This could cause
very serious injuries in a crash.
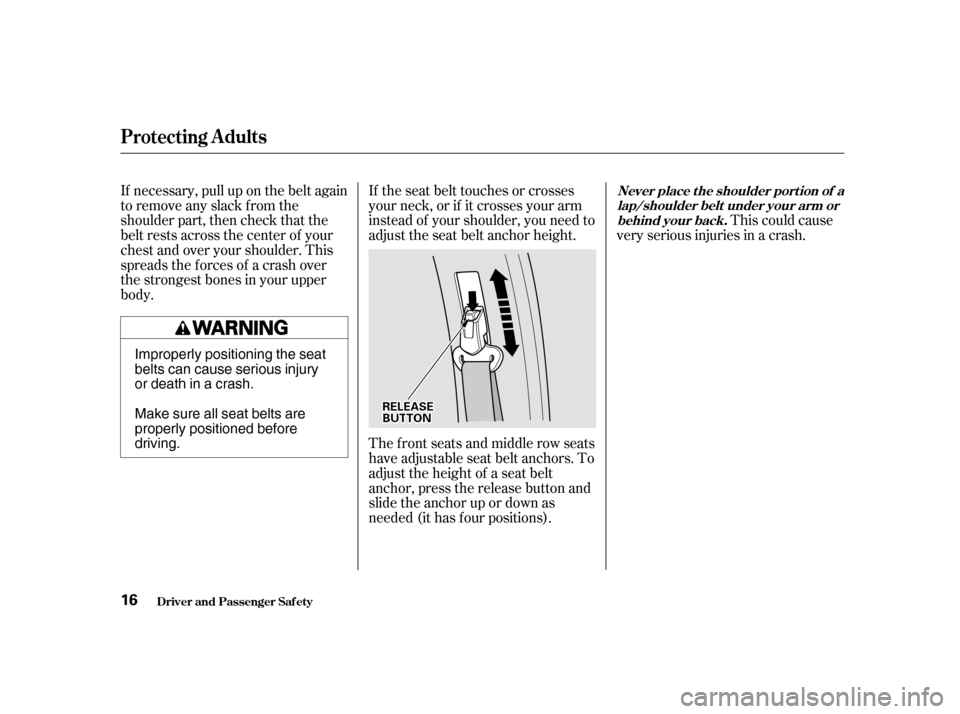
If the seat belt touches or crosses
your neck, or if it crosses your arm
instead of your shoulder, you need to
adjust the seat belt anchor height.
The f ront seats and middle row seats
have adjustable seat belt anchors. To
adjust the height of a seat belt
anchor, press the release button and
slide the anchor up or down as
needed (it has f our positions).
If necessary, pull up on the belt again
to remove any slack from the
shoulder part, then check that the
belt rests across the center of your
chest and over your shoulder. This
spreads the f orces of a crash over
the strongest bones in your upper
body.
Driver and Passenger Saf ety
Protecting Adults
Never place t he shoulder port ion of alap/shoulder belt under your arm orbehind your back.
16
RREELLEEAASSEEBBUUTTTTOONN
Improperly positioning the seat
belts can cause serious injury
or death in a crash.
Make sure all seat belts are
properly positioned beforedriving.
Page 31 of 363
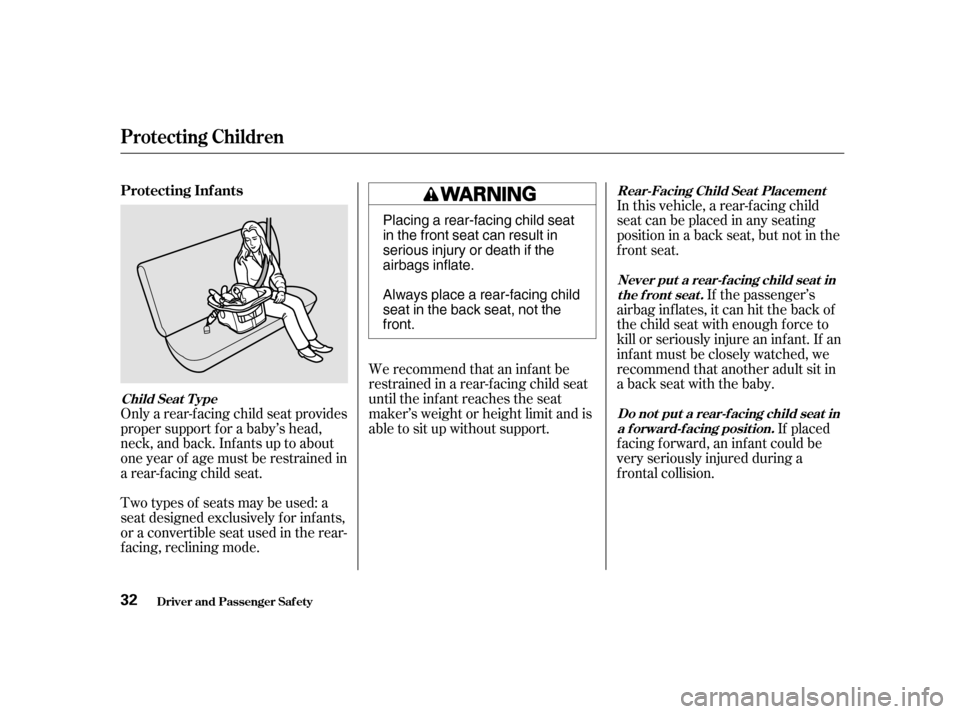
Only a rear-f acing child seat provides
proper support f or a baby’s head,
neck, and back. Inf ants up to about
one year of age must be restrained in
a rear-f acing child seat.We recommend that an inf ant be
restrained in a rear-f acing child seat
until the inf ant reaches the seat
maker’s weight or height limit and is
able to sit up without support. If placed
f acing f orward, an inf ant could be
very seriously injured during a
f rontal collision.If the passenger’s
airbag inflates, it can hit the back of
the child seat with enough force to
kill or seriously injure an inf ant. If an
inf ant must be closely watched, we
recommend that another adult sit in
a back seat with the baby.
Two types of seats may be used: a
seat designed exclusively f or inf ants,
or a convertible seat used in the rear-
f acing, reclining mode. In this vehicle, a rear-f acing child
seatcanbeplacedinanyseating
position in a back seat, but not in the
front seat.
Protecting Inf ants
Child Seat T ype
Do not put a rear-f acing child seat ina f orward-f acing position.
Never put a rear-f acing child seat in
the front seat.
Rear-Facing Child Seat Placement
Protecting Children
Driver and Passenger Saf ety
32 Placing a rear-facing child seat
in the front seat can result in
serious injury or death if the
airbags inflate.
Always place a rear-facing child
seat in the back seat, not thefront.
Page 36 of 363
CONT INUED
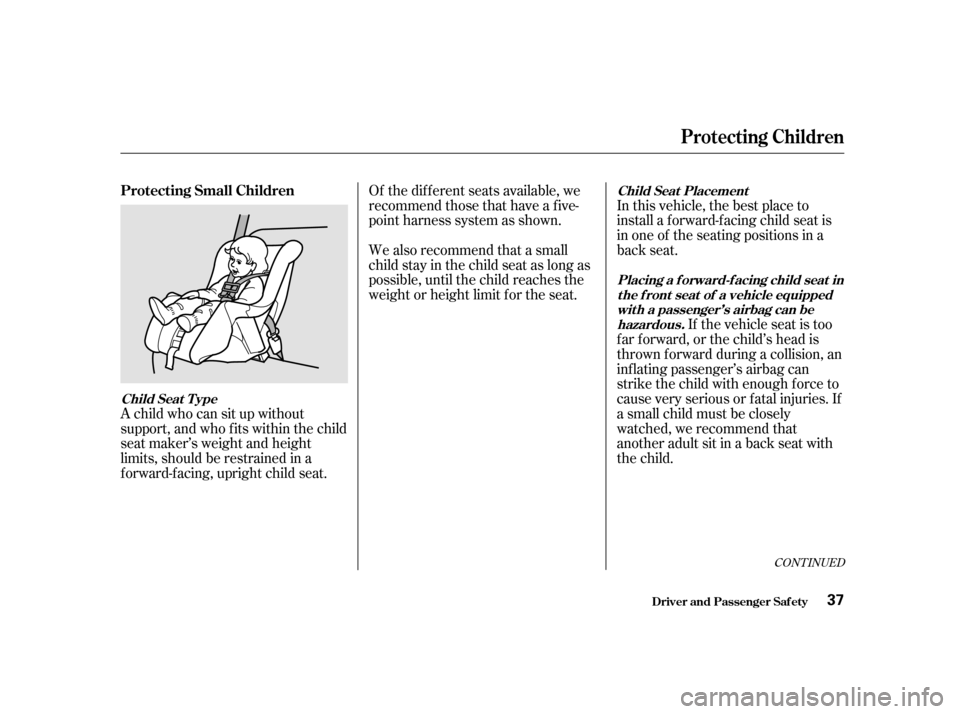
A child who can sit up without
support, and who f its within the child
seat maker’s weight and height
limits, should be restrained in a
f orward-f acing, upright child seat.In this vehicle, the best place to
install a forward-facing child seat is
in one of the seating positions in a
back seat.
If the vehicle seat is too
farforward,orthechild’sheadis
thrown f orward during a collision, an
inf lating passenger’s airbag can
strike the child with enough force to
cause very serious or f atal injuries. If
a small child must be closely
watched, we recommend that
another adult sit in a back seat with
the child.
We also recommend that a small
child stay in the child seat as long as
possible, until the child reaches the
weight or height limit f or the seat.
Of the different seats available, we
recommend those that have a f ive-
point harness system as shown.
Driver and Passenger Saf ety
Protecting Children
Protecting Small Children
Child Seat T ype Child Seat Placement
Placing a f orward-f acing child seat int he f ront seat of a vehicle equippedwith a passenger’s airbag can behazardous.
37
Page 40 of 363
CONT INUED
When a child reaches the
recommended weight or height limit
for a forward-facing child seat, the
child should sit in the back seat and
wear a lap/shoulder belt.
If a child is too short f or the shoulder
part of the belt to properly f it, we
recommend that the child use a
booster seat until the child is tall
enough to use the seat belt without a
booster.
Then pull hard on the loose end of
thebelttoremovetheanyslack(it
may help to put weight on the child
seat while pulling on the belt).
Finally, f ollow instruction number 5
on page to verify that the child
seat is secured.
The f ollowing pages give
instructions on how to check proper
seat belt f it, what kind of booster
seat to use if one is needed, and
important precautions f or a child
who must sit in the f ront seat.
40
Driver and Passenger Saf ety
Protecting Children
Protecting L arger Children
41
Allowing a larger child to sit
improperly in the front seat can
result in injury or death if the
airbags inflate.
If a larger child must sit in front,
make sure the child moves the
seat as far back as possible
and wears the seat belt properly.
Page 42 of 363
CONT INUED
The National Highway Traffic Safety
Administration and Transport
Canada recommend that all children
ages 12 and under be properly
restrained in a back seat.
The back seat is the saf est place f or
a child of any age or size.
In addition, the passenger’s airbag
poses serious risks to children. If the
seat is too far forward, or the child’s
head is thrown f orward during a
collision, or the child is unrestrained
or out of position, an inf lating airbag
can kill or seriously injure the child.
Of course, children vary widely. And
while age may be one indicator of
when a child can saf ely ride in the
f ront, there are other important
f actors you should consider.
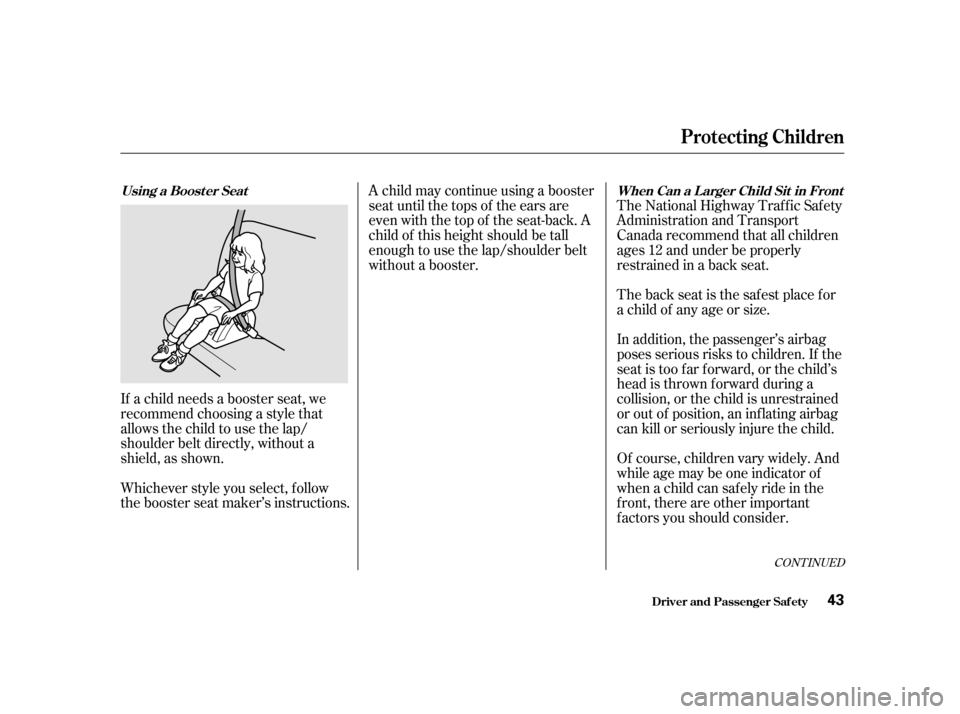
A child may continue using a booster
seat until the tops of the ears are
even with the top of the seat-back. A
child of this height should be tall
enough to use the lap/shoulder belt
without a booster.
If a child needs a booster seat, we
recommend choosing a style that
allows the child to use the lap/
shoulder belt directly, without a
shield, as shown.
Whichever style you select, f ollow
the booster seat maker’s instructions. Driver and Passenger Saf ety
Protecting Children
When Can a Larger Child Sit in Front
Using a Boost er Seat
43
Page 58 of 363
This section gives inf ormation about
the controls and displays that
contribute to the daily operation of
your Honda. All the essential
controls are within easy reach............................
Control Locations . 60
...............................
Indicator Lights . 61
.............................................
Gauges . 66
Controls Near the Steering
.......................................
Wheel . 69
...................................
Headlights . 70
Automatic Lighting Off
.....................................
Feature . 71
............
Daytime Running Lights . 71
....
Instrument Panel Brightness . 71
................................
Turn Signals . 72
.....................
Windshield Wipers . 72
..................
Windshield Washers . 74 Rear Window Wiper and
.....................................
Washer . 74
..........................
Hazard Warning . 75
.............
Rear Window Def ogger . 75
......
Steering Wheel Adjustment . 76
...............
Steering Wheel Controls . 77
.............................
Cruise Control . 77
.............
Remote Audio Controls . 80
...............................
Keys and Locks . 80
..............................................
Keys . 80
....................
Immobilizer System . 81
............................
Ignition Switch . 82
......................
Power Door Locks . 83
...................
Remote Transmitter . 85
..............
Childproof Door Locks . 89
........................................
Tailgate . 89
....................................
Glove Box . 91
.....................
Manual Sliding Doors . 92
.......................
Power Sliding Doors . 93
HomeLink Universal
.................................
Transmitter . 99
...............................................
Seats . 104
....................
Passenger Seating . 104
......................
Seat Adjustments . 105
Driver’s Seat Manual Height
............................
Adjustment . 107 Driver’s Seat Power
..........................
Adjustments . 108
....................................
Armrests . 109
........................
Head Restraints . 110
.....................
Third Seat Access . 111
Moving the Second Row
...........................
Bucket Seat . 112
Removing the Bucket Seats ................
in the Second Row . 114
.............
Folding the Third Seat . 115
............................
Power Windows . 118
...........................................
Mirrors . 121
...............................
Parking Brake . 122
..................................
Digital Clock . 123
..................................
Center Table . 123
...........................
Beverage Holder . 124
........................
Sunglasses Holder . 126
........................................
Sun Visor . 127
................................
Vanity Mirror . 127
.......................
Rear Compartment . 128
...............................
Center Pocket . 128
...................................
Coin Holder . 128
...................................
Storage Box . 129
......................................
Coat Hook . 129
............
Accessory Power Sockets . 130
...............................
Interior Lights . 131
Instruments and Controls
Inst rument s and Cont rols 59
Page 106 of 363
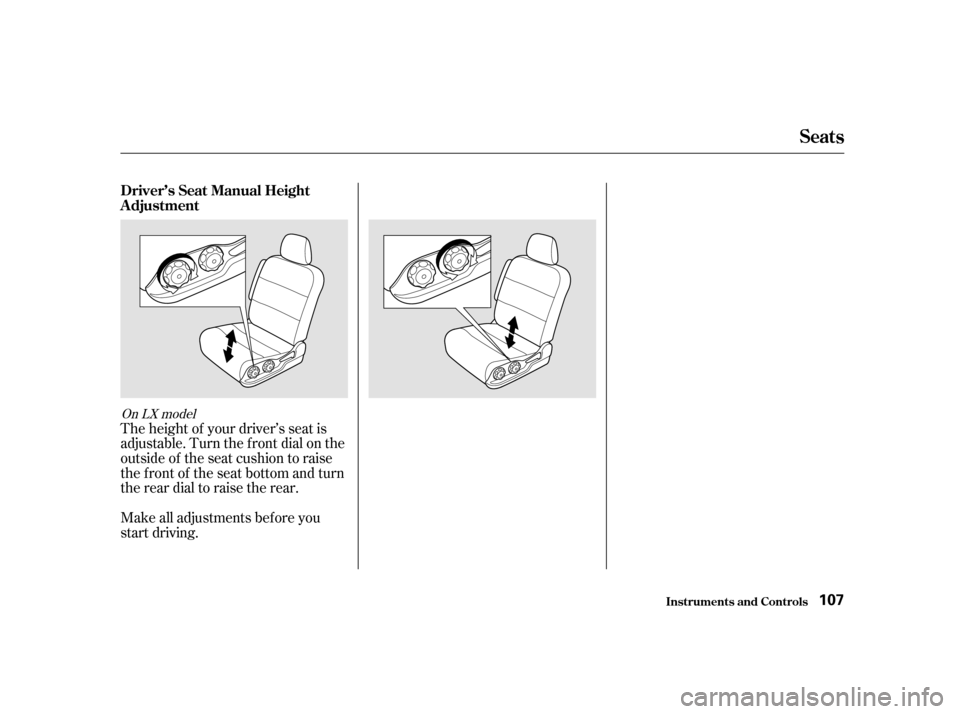
The height of your driver’s seat is
adjustable. Turn the front dial on the
outside of the seat cushion to raise
the front of the seat bottom and turn
the rear dial to raise the rear.
Make all adjustments bef ore you
start driving.
On LX model
Inst rument s and Cont rols
Driver’s Seat Manual Height
Adjustment
Seats
107
Page 109 of 363
See page f or important saf etyinf ormation and a warning about how toproperly position the head restraints. 14
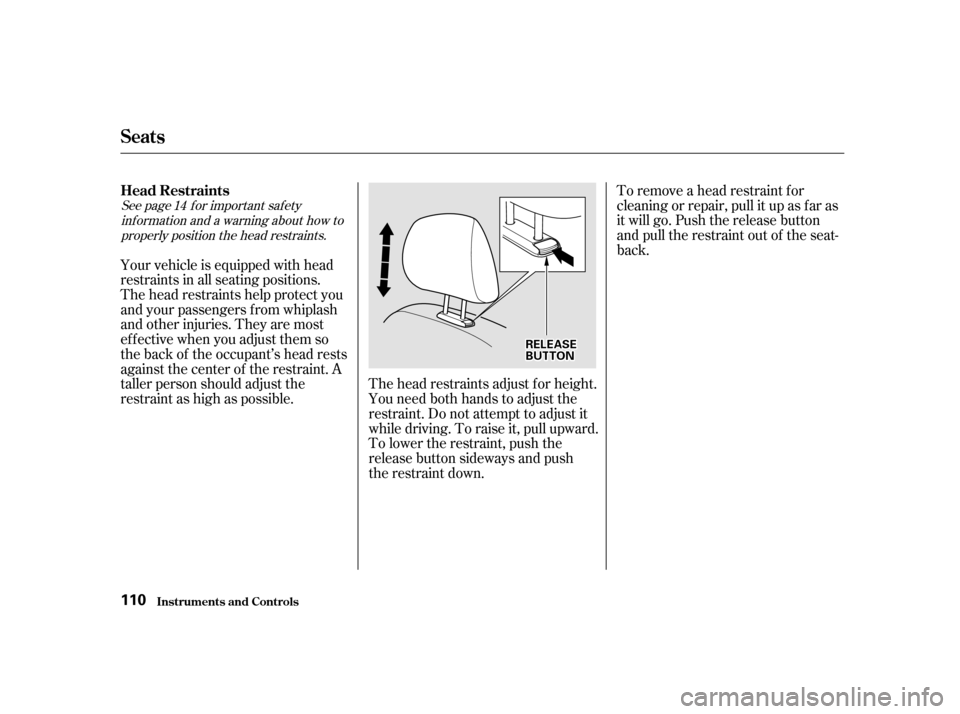
To remove a head restraint f or
cleaning or repair, pull it up as f ar as
it will go. Push the release button
and pull the restraint out of the seat-
back.
The head restraints adjust f or height.
You need both hands to adjust the
restraint. Do not attempt to adjust it
while driving. To raise it, pull upward.
To lower the restraint, push the
release button sideways and push
the restraint down.
The head restraints help protect you
and your passengers f rom whiplash
and other injuries. They are most
ef f ective when you adjust them so
the back of the occupant’s head rests
against the center of the restraint. A
taller person should adjust the
restraint as high as possible.
Your vehicle is equipped with head
restraints in all seating positions.
Seats
Inst rument s and Cont rols
Head Restraints 110
RREELLEEAASSEEBBUUTTTTOONN