Page 198 of 319

�µ�µ
�Ø �Ø �Ø �Ø�Ø�Ø �Ø �Ø�Ø�Ø�Ø�Ø �Ø �Ø�Ø�Ø�Ø�Ø�Ø�Ø �Ø
�Ì �Ì
�Î
CONT INUED
Maint enance199
U.S. Owners
Canadian Owners
AB C D EF
Service at the indicated distance or time, whichever comes first.
Refer to page to determine which schedule to use.Use the Maintenance Schedule for Severe Conditions.
Do items in A.
Do items in A, B.
Do items in A, E.
DoitemsinA,B,C.
Do items in A.
DoitemsinA,B,D,E.
Do items in A.
DoitemsinA,B,C.
DoitemsinA,E,F.
Do items in A, B.
Do items in A.Replace transmission fluid (MT, AT).
DoitemsinA,B,C,D,E.
Do items in A.
Do items in A, B.
Do items in A, E.
DoitemsinA,B,C.
Do items in A. Replace transmission fluid (AT).
DoitemsinA,B,D,E. Replace engine oil and filter.
Inspect front and rear brakes.
Rotate tires (follow pattern on page 237 ).
Lubricate all hinges, locks, and latches with
multipurpose grease.
Inspect tie rod ends, steering gear box and boots.
Inspect suspension components.
Inspect driveshaft boots.
Check parking brake adjustment.
Inspect brake hoses and lines (including ABS).
Check all fluid levels, condition of fluids, and check
for leaks.
Inspect cooling system hoses and connections.
Inspect exhaust system.
Inspect fuel lines and connections.
Check all lights.
Inspect the underbody.
Inspect and adjust drive belts.
Replace air conditioning filter .
Replace air cleaner element every 15,000 mi/
24,000 km (independent of time).
Replace brake fluid every 3 years (independent ofmileage).
5,000 mil/8,000 km/6 mos
10,000 mil/16,000 km/1 yr
15,000 mil/24,000 km/1-½ yrs
20,000 mil/32,000 km/1 yr
25,000 mil/40,000 km/2 yrs
30,000 mil/48,000 km/2 yrs
35,000 mil/56,000 km/2-½ yrs
40,000 mil/64,000 km/2 yrs
45,000 mil/72,000 km/3 yrs
50,000 mil/80,000 km/3 yrs
55,000 mil/88,000 km/3-½ yrs
60,000 mil/96,000 km/3 yrs
65,000 mil/104,000 km/4 yrs
70,000 mil/112,000 km/4 yrs
75,000 mil/120,000 km/4-½ yrs
80,000 mil/128,000 km/4 yrs
85,000 mil/136,000 km/5 yrs
90,000 mil/144,000 km/5 yrs
194
1
Maintenance Schedule for Severe Conditions (listed by distance/time)
Page 202 of 319
�µ�µ
�µ �µ
�µ
�µ
�µ
Engine oil level Check every
time you fill the fuel tank. See
page .
Engine coolant level Check the
radiator reserve tank every time
youfillthefueltank.Seepage .
Windshield washer f luid Check
the level in the reservoir monthly.
If weather conditions cause you to
use the washers f requently, check
the reservoir each time you stop
f or f uel. See page .
Youshouldcheckthefollowing
items at the specif ied intervals. If
you are unsure of how to perf orm
any check, turn to the page given.
Lights Check the operation of
the headlights, parking lights,
taillights, high-mount brake light,
turn signals, brake lights, and
license plate lights monthly. See
page .
Tires Check the tire pressure
monthly. Examine the tread f or
wear and foreign objects. See page
.
Automatic transmission Check
the f luid level monthly. See page .
Brakes Check the f luid level
monthly. See page . 164
165
215
216 218 234
241
Owner Maintenance Checks
Maint enance 203
Page 207 of 319

Put a new washer on the drain bolt,
then reinstall the drain bolt.
Tighten it to:Replace the engine oil f ill cap.
Start the engine. The oil pressure
indicator light should go out within
f ive seconds. If it does not, turn of f
the engine and reinspect your
work.
Let the engine run f or several
minutes and check the drain bolt
and oil f ilter f or leaks.
Turn of f the engine, let it sit f or
several minutes, then check the oil
level. If necessary, add oil to bring
the level to the upper mark on the
dipstick.
Refill the engine with the recom-
mended oil.
Engine oil change capacity
(including f ilter):
5. 6.
7. 8. 9.
(U.S.: DX, LX, Canada: DX, LX)
(U.S.: EX)
(U.S.: DX, LX, Canada: DX, LX)
(U.S.: EX)
Engine Oil
Maint enance
208 33 lbf·ft (44 N·m , 4.5 kgf·m)
29 lbf·ft (39 N·m , 4.0 kgf·m)
3.4 US qt (3.2
, 2.8 Imp qt)
3.7 US qt (3.5
, 3.1 Imp qt) Improper disposal of engine oil can be
harmf ul to the environment. If you
change your own oil, please dispose of
the used oil properly. Put it in a sealed
container and take it to a recycling
center. Do not discard it in a trash bin
or dump it on the ground.
Page 214 of 319

Check the level in the windshield
washer reservoir at least monthly
during normal usage. In bad weather,
when you use the washers of ten,
check the level every time you stop
for fuel.When you ref ill the reservoir, clean
the edges of the windshield wiper
blades with windshield washer fluid
on a clean cloth. This will help to
condition the blade edges.
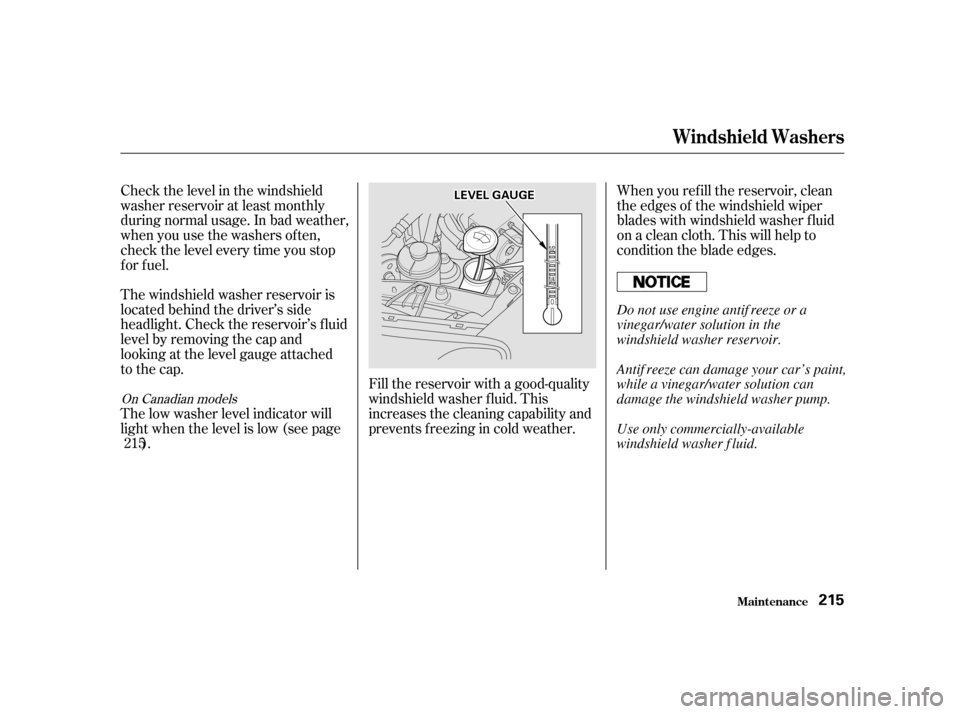
The windshield washer reservoir is
located behind the driver’s side
headlight. Check the reservoir’s f luid
level by removing the cap and
looking at the level gauge attached
to the cap. Fill the reservoir with a good-quality
windshield washer f luid. This
increases the cleaning capability and
prevents f reezing in cold weather.
The low washer level indicator will
light when the level is low (see page
).
215
On Canadian models
Windshield Washers
Maint enance 215
LLEEVVEELLGGAAUUGGEE
Do not use engine antif reeze or a
vinegar/water solution in the
windshield washer reservoir.
Antif reeze can damage your car’s paint,
while a vinegar/water solution can
damage the windshield washer pump.
Use only commercially-available
windshield washer f luid.
Page 229 of 319

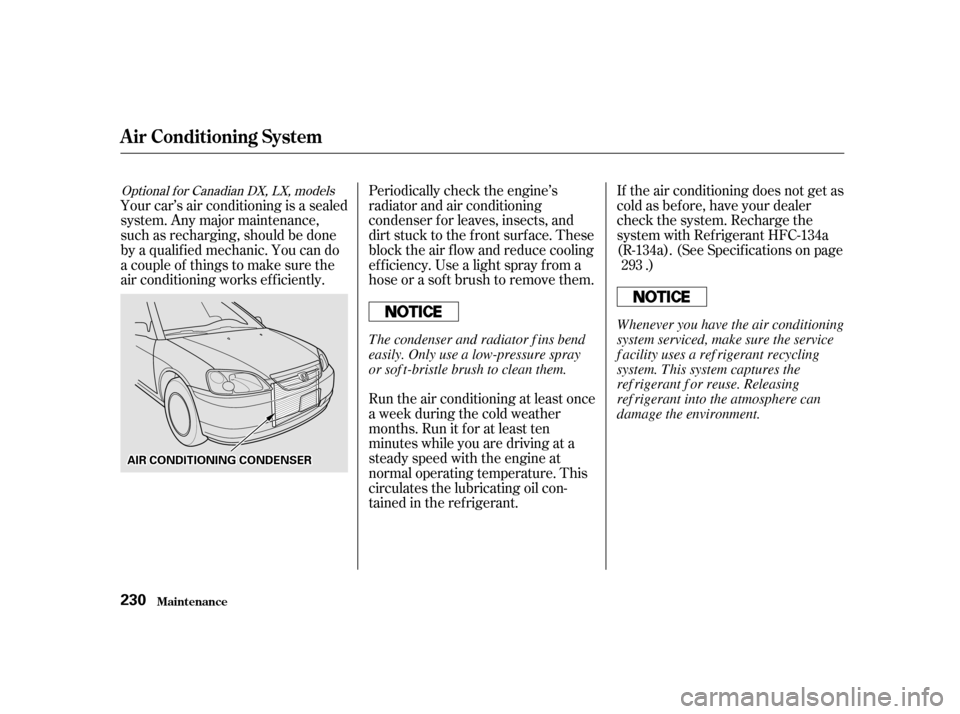
Periodically check the engine’s
radiator and air conditioning
condenser f or leaves, insects, and
dirt stuck to the f ront surf ace. These
block the air f low and reduce cooling
ef f iciency. Use a light spray f rom a
hose or a sof t brush to remove them.If the air conditioning does not get as
cold as before, have your dealer
check the system. Recharge the
system with Ref rigerant HFC-134a
(R-134a). (See Specif ications on page
.)
Run the air conditioning at least once
a week during the cold weather
months. Run it f or at least ten
minutes while you are driving at a
steady speed with the engine at
normal operating temperature. This
circulates the lubricating oil con-
tained in the ref rigerant.
Your car’s air conditioning is a sealed
system. Any major maintenance,
such as recharging, should be done
by a qualif ied mechanic. You can do
a couple of things to make sure the
air conditioning works ef f iciently.
293Optional for Canadian DX, LX, models
A ir Condit ioning Syst em
Maint enance
230
AAIIRRCCOONNDDIITTIIOONNIINNGGCCOONNDDEENNSSEERR Whenever you have the air conditioning
system serviced, make sure the service
f acility uses a ref rigerant recycling
system. This system captures the
ref rigerant f or reuse. Releasing
ref rigerant into the atmosphere can
damage the environment.
The condenser and radiator f ins bend
easily. Only use a low-pressure spray
or sof t-bristle brush to clean them.
Page 240 of 319
Check the operation of your car’s
exterior lights at least once a month.
A burned out bulb can create an
unsaf e condition by reducing your
car’s visibility and the ability to
signal your intentions to other
drivers.
CONT INUED
Lights
Maint enance241
HHEEAADDLLIIGGHHTT
PPAARRKKIINNGGLLIIGGHHTT
TTUURRNNSSIIGGNNAALL//SSIIDDEEMMAARRKKEERR
Page 241 of 319
Check the f ollowing:Headlights (low and high beam)
Parking lights
Taillights
Brake lights
High-mount brake light
Turn signals
Back-up lights
Hazard light f unction
License plate light
Side marker lights
Daytime running lights
(Canadian models)
If youfindanybulbsareburnedout,
replace them as soon as possible.
Refer to the chart on page to
determinewhattypeof replacement
bulb is needed. 293
Lights
Maint enance
242
BBAACCKK--UUPPLLIIGGHHTT
LLIICCEENNSSEEPPLLAATTEELLIIGGHHTTSS
TTAAIILLLLIIGGHHTT
HHIIGGHH--MMOOUUNNTTBBRRAAKKEELLIIGGHHTT
SSTTOOPP//TTAAIILLLLIIGGHHTT//RREEAARRSSIIDDEEMMAARRKKEERRLLIIGGHHTT
TTUURRNNSSIIGGNNAALLLLIIGGHHTT
Page 242 of 319
Open the hood.
If you need to change the head-
light bulb on the driver’s side,
remove the power steering
reservoir tank by pulling it out of
its holder.
Your car has halogen headlight
bulbs, one on each side. When
replacing a bulb, handle it by its steel
base and protect the glass from
contactwithyourskinorhard
objects. If you touch the glass, clean
it with denatured alcohol and a clean
cloth.
Theheadlightswereproperlyaimed
when your car was new. If you
regularly carry heavy items in the
trunk, readjustment may be required.
Adjustment of the headlights should
be perf ormed by a Honda technician
or other qualif ied mechanic.
1.
CONT INUED
Replacing a Headlight Bulb
Headlight A iming
Lights
Maint enance 243
HHOOLLDDEERR
Halogen headlight bulbs get very hot
when lit. Oil, perspiration, or a scratch
on the glass can cause the bulb to
overheat and shatter.