Page 1972 of 2321
REAR SUSPENSION HANGER BRACKETS - LONG WHEEL BASE
RSBODY23-59
BODY (Continued)
ProCarManuals.com
Page 1980 of 2321
REAR SUSPENSION HANGER BRACKETS - SHORT WHEEL BASE
RSBODY23-67
BODY (Continued)
ProCarManuals.com
Page 1990 of 2321
INNER SIDE SILLS - LONG WHEEL BASE ONLY
WHEELHOUSES, SIDE SILLS, SUSPENSION BRACKETS - LONG WHEEL BASE ONLY
RSBODY23-77
BODY (Continued)
ProCarManuals.com
Page 2050 of 2321
REAR SUSPENSION HANGERS - LONG WHEEL BASE SHOWN, SHORT WHEEL BASE TYPICAL
RSBODY23 - 137
BODY (Continued)
ProCarManuals.com
Page 2053 of 2321
SUSPENSION HANGER REINFORCEMENT - LONG WHEEL BASE ONLY
23 - 140 BODYRS
BODY (Continued)
ProCarManuals.com
Page 2059 of 2321
SUSPENSION HANGER REINFORCEMENT - SHORT WHEEL BASE ONLY
23 - 146 BODYRS
BODY (Continued)
ProCarManuals.com
Page 2107 of 2321

(5) Install fuel filler housing to outer quarter
panel.
(6) Verify that all clips on fuel filler housing are
fully engaged to outer quarter panel.
(7) Engage fuel filler lockout link into clip on fuel
fill blocker latch arm.
(8) Install water shield patch covering access hole
in C-pillar.
(9) Install left quarter trim panel.
GRILLE OPENING
REINFORCEMENT
REMOVAL
(1) Release hood latch and open hood.
(2) Remove bolts attaching hood latch to cross-
member and position latch out of the way.
(3) Remove radiator sight shield.
(4) Remove engine air inlet resonator.
(5) Remove hood cable.
(6) Remove hood prop rod.
(7) Remove screw attaching coolant recovery bottle
to crossmember.
(8) Remove bolts attaching radiator isolators to
crossmember.
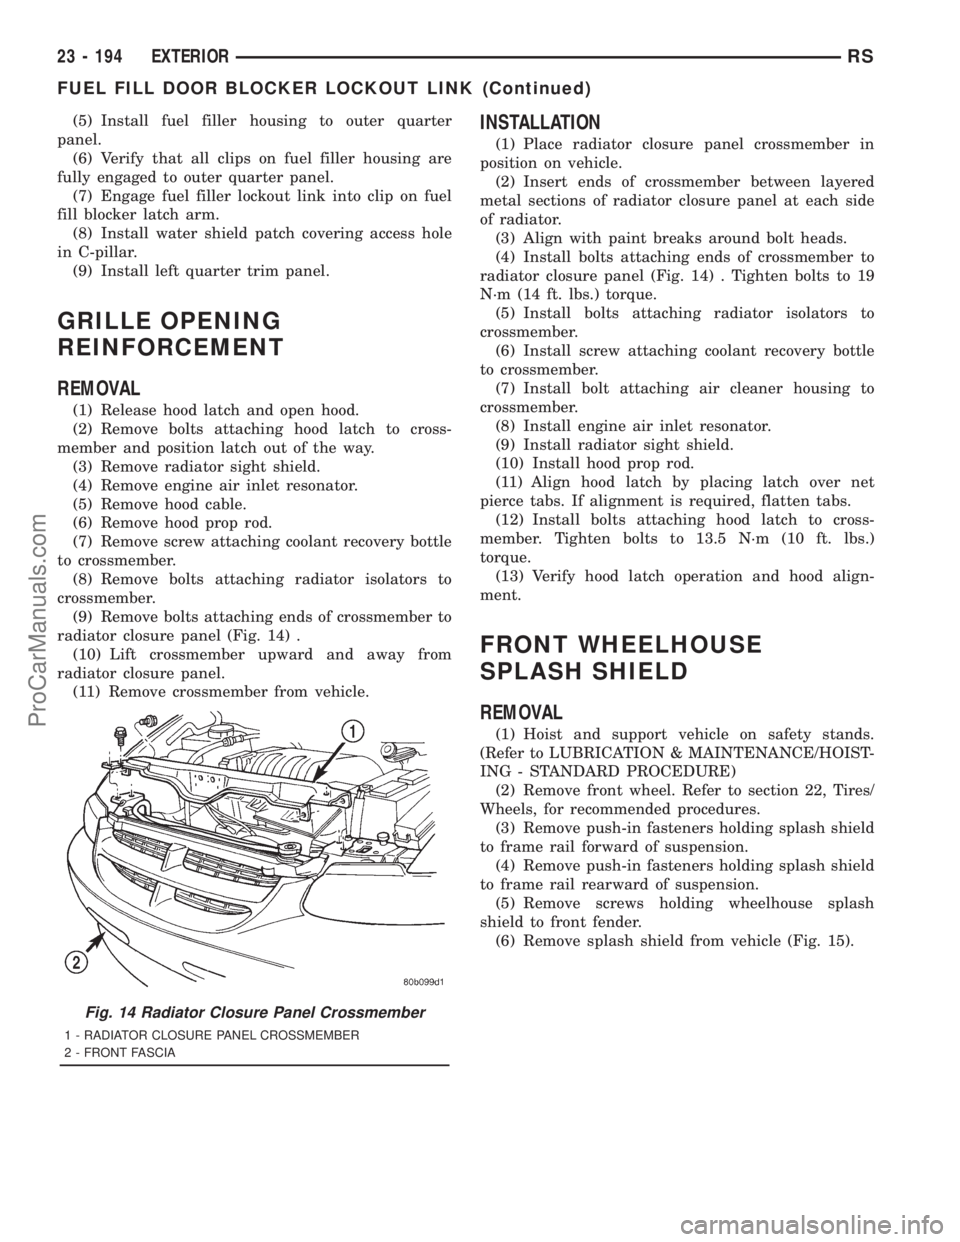
(9) Remove bolts attaching ends of crossmember to
radiator closure panel (Fig. 14) .
(10) Lift crossmember upward and away from
radiator closure panel.
(11) Remove crossmember from vehicle.
INSTALLATION
(1) Place radiator closure panel crossmember in
position on vehicle.
(2) Insert ends of crossmember between layered
metal sections of radiator closure panel at each side
of radiator.
(3) Align with paint breaks around bolt heads.
(4) Install bolts attaching ends of crossmember to
radiator closure panel (Fig. 14) . Tighten bolts to 19
N´m (14 ft. lbs.) torque.
(5) Install bolts attaching radiator isolators to
crossmember.
(6) Install screw attaching coolant recovery bottle
to crossmember.
(7) Install bolt attaching air cleaner housing to
crossmember.
(8) Install engine air inlet resonator.
(9) Install radiator sight shield.
(10) Install hood prop rod.
(11) Align hood latch by placing latch over net
pierce tabs. If alignment is required, flatten tabs.
(12) Install bolts attaching hood latch to cross-
member. Tighten bolts to 13.5 N´m (10 ft. lbs.)
torque.
(13) Verify hood latch operation and hood align-
ment.
FRONT WHEELHOUSE
SPLASH SHIELD
REMOVAL
(1) Hoist and support vehicle on safety stands.
(Refer to LUBRICATION & MAINTENANCE/HOIST-
ING - STANDARD PROCEDURE)
(2) Remove front wheel. Refer to section 22, Tires/
Wheels, for recommended procedures.
(3) Remove push-in fasteners holding splash shield
to frame rail forward of suspension.
(4) Remove push-in fasteners holding splash shield
to frame rail rearward of suspension.
(5) Remove screws holding wheelhouse splash
shield to front fender.
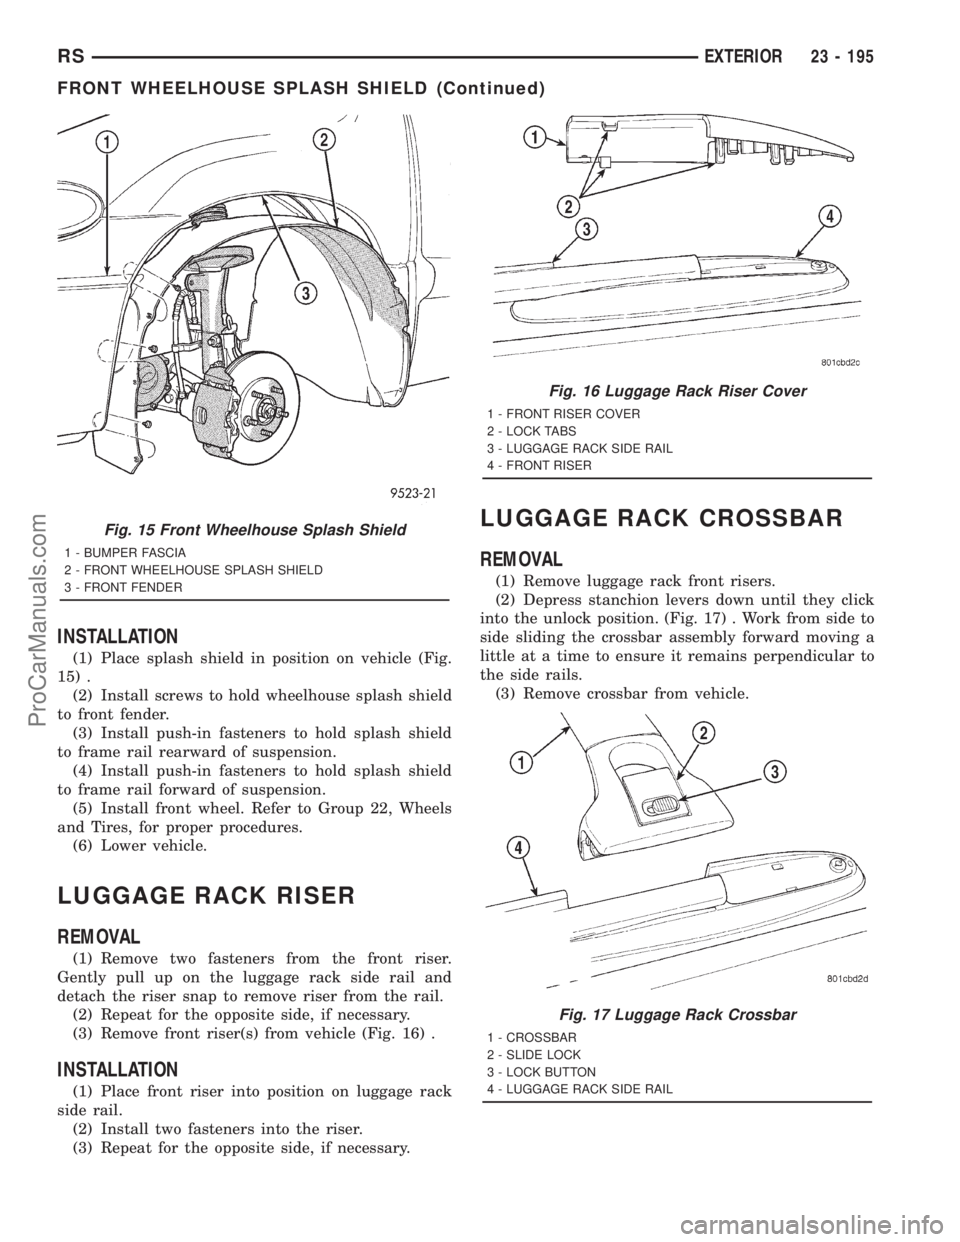
(6) Remove splash shield from vehicle (Fig. 15).
Fig. 14 Radiator Closure Panel Crossmember
1 - RADIATOR CLOSURE PANEL CROSSMEMBER
2 - FRONT FASCIA
23 - 194 EXTERIORRS
FUEL FILL DOOR BLOCKER LOCKOUT LINK (Continued)
ProCarManuals.com
Page 2108 of 2321

INSTALLATION
(1) Place splash shield in position on vehicle (Fig.
15) .
(2) Install screws to hold wheelhouse splash shield
to front fender.
(3) Install push-in fasteners to hold splash shield
to frame rail rearward of suspension.
(4) Install push-in fasteners to hold splash shield
to frame rail forward of suspension.
(5) Install front wheel. Refer to Group 22, Wheels
and Tires, for proper procedures.
(6) Lower vehicle.
LUGGAGE RACK RISER
REMOVAL
(1) Remove two fasteners from the front riser.
Gently pull up on the luggage rack side rail and
detach the riser snap to remove riser from the rail.
(2) Repeat for the opposite side, if necessary.
(3) Remove front riser(s) from vehicle (Fig. 16) .
INSTALLATION
(1) Place front riser into position on luggage rack
side rail.
(2) Install two fasteners into the riser.
(3) Repeat for the opposite side, if necessary.
LUGGAGE RACK CROSSBAR
REMOVAL
(1) Remove luggage rack front risers.
(2) Depress stanchion levers down until they click
into the unlock position. (Fig. 17) . Work from side to
side sliding the crossbar assembly forward moving a
little at a time to ensure it remains perpendicular to
the side rails.
(3) Remove crossbar from vehicle.
Fig. 15 Front Wheelhouse Splash Shield
1 - BUMPER FASCIA
2 - FRONT WHEELHOUSE SPLASH SHIELD
3 - FRONT FENDER
Fig. 16 Luggage Rack Riser Cover
1 - FRONT RISER COVER
2 - LOCK TABS
3 - LUGGAGE RACK SIDE RAIL
4 - FRONT RISER
Fig. 17 Luggage Rack Crossbar
1 - CROSSBAR
2 - SLIDE LOCK
3 - LOCK BUTTON
4 - LUGGAGE RACK SIDE RAIL
RSEXTERIOR23 - 195
FRONT WHEELHOUSE SPLASH SHIELD (Continued)
ProCarManuals.com