2001 BMW 525I SPORT WAGON tow
[x] Cancel search: towPage 110 of 238
110n
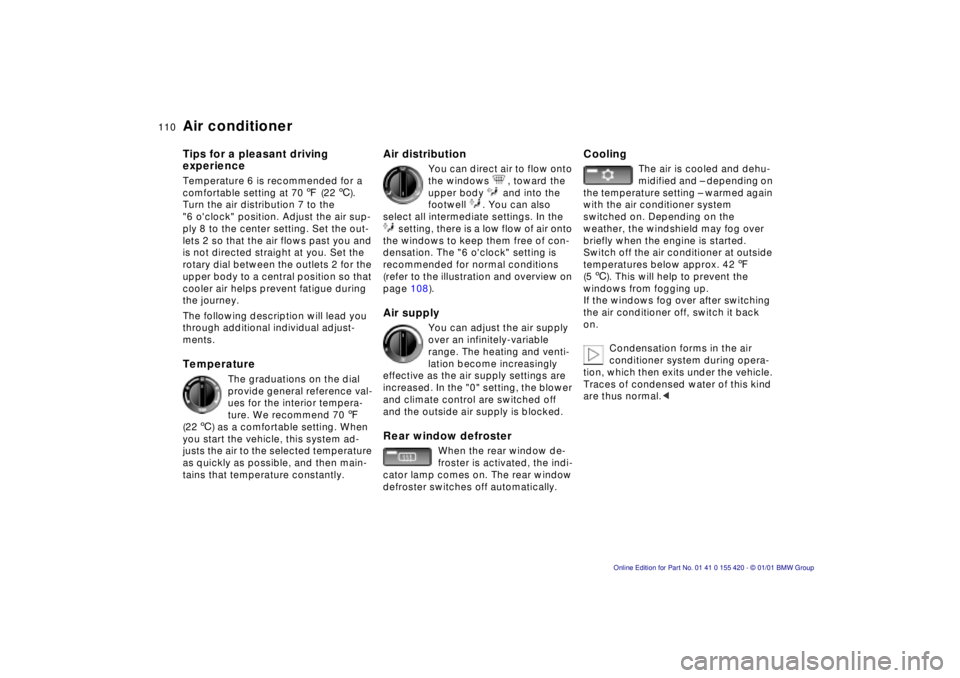
Air conditionerTips for a pleasant driving
experienceTemperature 6 is recommended for a
comfortable setting at 707 (226).
Turn the air distribution 7 to the
"6 o'clock" position. Adjust the air sup-
ply 8 to the center setting. Set the out-
lets 2 so that the air flows past you and
is not directed straight at you. Set the
rotary dial between the outlets 2 for the
upper body to a central position so that
cooler air helps prevent fatigue during
the journey.
The following description will lead you
through additional individual adjust-
ments.Temperature
The graduations on the dial
provide general reference val-
ues for the interior tempera-
ture. We recommend 707
(226) as a comfortable setting. When
you start the vehicle, this system ad-
justs the air to the selected temperature
as quickly as possible, and then main-
tains that temperature constantly.
Air distribution
You can direct air to flow onto
the windows , toward the
upper body and into the
footwell . You can also
select all intermediate settings. In the
setting, there is a low flow of air onto
the windows to keep them free of con-
densation. The "6 o'clock" setting is
recommended for normal conditions
(refer to the illustration and overview on
page 108).
Air supply
You can adjust the air supply
over an infinitely-variable
range. The heating and venti-
lation become increasingly
effective as the air supply settings are
increased. In the "0" setting, the blower
and climate control are switched off
and the outside air supply is blocked.
Rear window defroster
When the rear window de-
froster is activated, the indi-
cator lamp comes on. The rear window
defroster switches off automatically.
Cooling
The air is cooled and dehu-
midified and – depending on
the temperature setting – warmed again
with the air conditioner system
switched on. Depending on the
weather, the windshield may fog over
briefly when the engine is started.
Switch off the air conditioner at outside
temperatures below approx. 427
(56). This will help to prevent the
windows from fogging up.
If the windows fog over after switching
the air conditioner off, switch it back
on.
Condensation forms in the air
conditioner system during opera-
tion, which then exits under the vehicle.
Traces of condensed water of this kind
are thus normal.<
Page 111 of 238
IndexDataTechnologyRepairsCar careControlsOverview
111n
Air conditionerRecirculated air mode
If there are unpleasant
odors in the outside air, you
can temporarily block the flow of air.
The system then recirculates the air
currently within the vehicle
If you have a multifunction steering
wheel with the button for recirculated
air, you can also use this button to
switch to the recirculated air mode
(refer to page 25).
If the windows fog over in the re-
circulated air mode, switch the re-
circulated air off and increase the air
supply as required.<
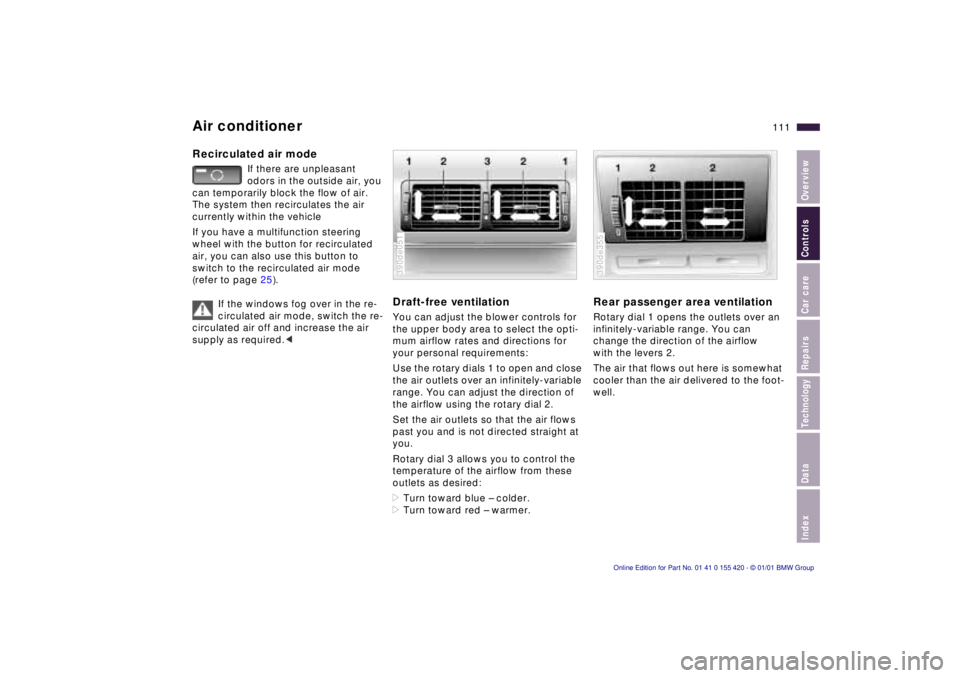
Draft-free ventilation You can adjust the blower controls for
the upper body area to select the opti-
mum airflow rates and directions for
your personal requirements:
Use the rotary dials 1 to open and close
the air outlets over an infinitely-variable
range. You can adjust the direction of
the airflow using the rotary dial 2.
Set the air outlets so that the air flows
past you and is not directed straight at
you.
Rotary dial 3 allows you to control the
temperature of the airflow from these
outlets as desired:
>Turn toward blue – colder.
>Turn toward red – warmer.390de051
Rear passenger area ventilationRotary dial 1 opens the outlets over an
infinitely-variable range. You can
change the direction of the airflow
with the levers 2.
The air that flows out here is somewhat
cooler than the air delivered to the foot-
well.390de355
Page 115 of 238
IndexDataTechnologyRepairsCar careControlsOverview
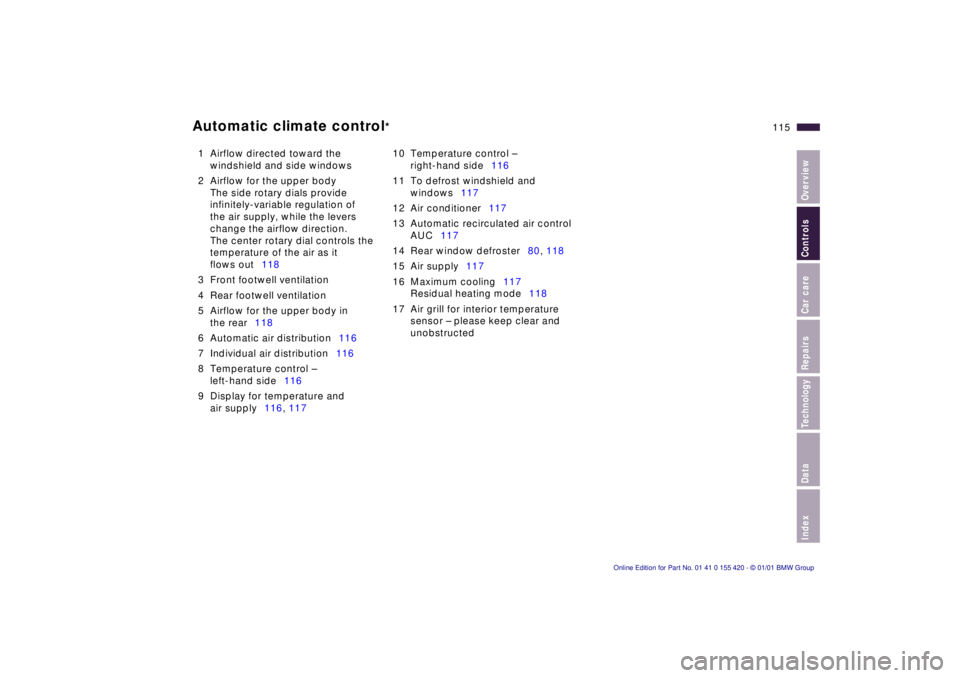
115n
Automatic climate control
*
1 Airflow directed toward the
windshield and side windows
2 Airflow for the upper body
The side rotary dials provide
infinitely-variable regulation of
the air supply, while the levers
change the airflow direction.
The center rotary dial controls the
temperature of the air as it
flows out118
3 Front footwell ventilation
4 Rear footwell ventilation
5 Airflow for the upper body in
the rear118
6 Automatic air distribution116
7 Individual air distribution116
8 Temperature control –
left-hand side116
9 Display for temperature and
air supply116, 11710 Temperature control –
right-hand side116
11 To defrost windshield and
windows117
12 Air conditioner117
13 Automatic recirculated air control
AUC117
14 Rear window defroster80, 118
15 Air supply117
16 Maximum cooling117
Residual heating mode118
17 Air grill for interior temperature
sensor – please keep clear and
unobstructed
Page 116 of 238
116n
Automatic climate control
*
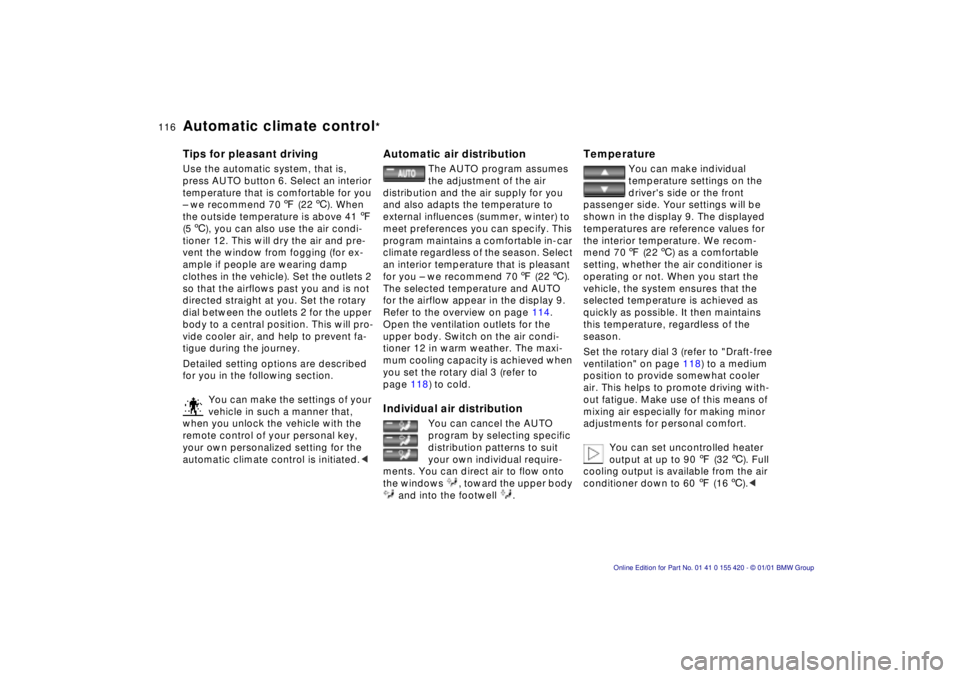
Tips for pleasant drivingUse the automatic system, that is,
press AUTO button 6. Select an interior
temperature that is comfortable for you
– we recommend 707 (226). When
the outside temperature is above 417
(56), you can also use the air condi-
tioner 12. This will dry the air and pre-
vent the window from fogging (for ex-
ample if people are wearing damp
clothes in the vehicle). Set the outlets 2
so that the airflows past you and is not
directed straight at you. Set the rotary
dial between the outlets 2 for the upper
body to a central position. This will pro-
vide cooler air, and help to prevent fa-
tigue during the journey.
Detailed setting options are described
for you in the following section.
You can make the settings of your
vehicle in such a manner that,
when you unlock the vehicle with the
remote control of your personal key,
your own personalized setting for the
automatic climate control is initiated.<
Automatic air distribution
The AUTO program assumes
the adjustment of the air
distribution and the air supply for you
and also adapts the temperature to
external influences (summer, winter) to
meet preferences you can specify. This
program maintains a comfortable in-car
climate regardless of the season. Select
an interior temperature that is pleasant
for you – we recommend 707 (226).
The selected temperature and AUTO
for the airflow appear in the display 9.
Refer to the overview on page 114.
Open the ventilation outlets for the
upper body. Switch on the air condi-
tioner 12 in warm weather. The maxi-
mum cooling capacity is achieved when
you set the rotary dial 3 (refer to
page 118) to cold.
Individual air distribution
You can cancel the AUTO
program by selecting specific
distribution patterns to suit
your own individual require-
ments. You can direct air to flow onto
the windows , toward the upper body
and into the footwell .
Temperature
You can make individual
temperature settings on the
driver's side or the front
passenger side. Your settings will be
shown in the display 9. The displayed
temperatures are reference values for
the interior temperature. We recom-
mend 707 (226) as a comfortable
setting, whether the air conditioner is
operating or not. When you start the
vehicle, the system ensures that the
selected temperature is achieved as
quickly as possible. It then maintains
this temperature, regardless of the
season.
Set the rotary dial 3 (refer to "Draft-free
ventilation" on page 118) to a medium
position to provide somewhat cooler
air. This helps to promote driving with-
out fatigue. Make use of this means of
mixing air especially for making minor
adjustments for personal comfort.
You can set uncontrolled heater
output at up to 907 (326). Full
cooling output is available from the air
conditioner down to 607 (166).<
Page 118 of 238
118n
Automatic climate control
*
>Left-hand indicator lamp on – AUC
mode: the system recognizes pollut-
ants in the outside air and blocks the
flow of air when necessary. The sys-
tem then recirculates the air currently
within the vehicle.
Depending on the air quality, the au-
tomatic system then switches back
and forth between outside air supply
and recirculation of the air within the
vehicle.
>Right-hand indicator lamp on: the
flow of external air into the vehicle is
permanently blocked. The system
then recirculates the air currently
within the vehicle.
If you have a multifunction steering
wheel with the recirculated-air button
(refer to page 25), you can also use it to
switch between "Off" and the recircu-
lated-air mode or AUC and the recircu-
lated-air mode.
If the windows should fog over in
the recirculated air mode, switch
the recirculated air mode off and in-
crease the air supply as required.<
Rear window defroster
When the rear window de-
froster is activated, the indica-
tor lamp comes on. The rear window
defroster switches off automatically.
Residual heating mode
The heat which is stored in
the engine is utilized for
heating the interior when the engine
has been switched off (while waiting at
a railroad crossing, for instance).
In ignition key position 1, you can alter
the settings of the automatic climate
control. In ignition key position 0, the
system automatically directs heated air
to the windshield, side windows and
footwells.
This function may be activated
when the outside temperature is
below approx. 597 (156), the engine
is at operating temperature, and the
battery is adequately charged. The LED
on the button will light up when all con-
ditions have been met.<
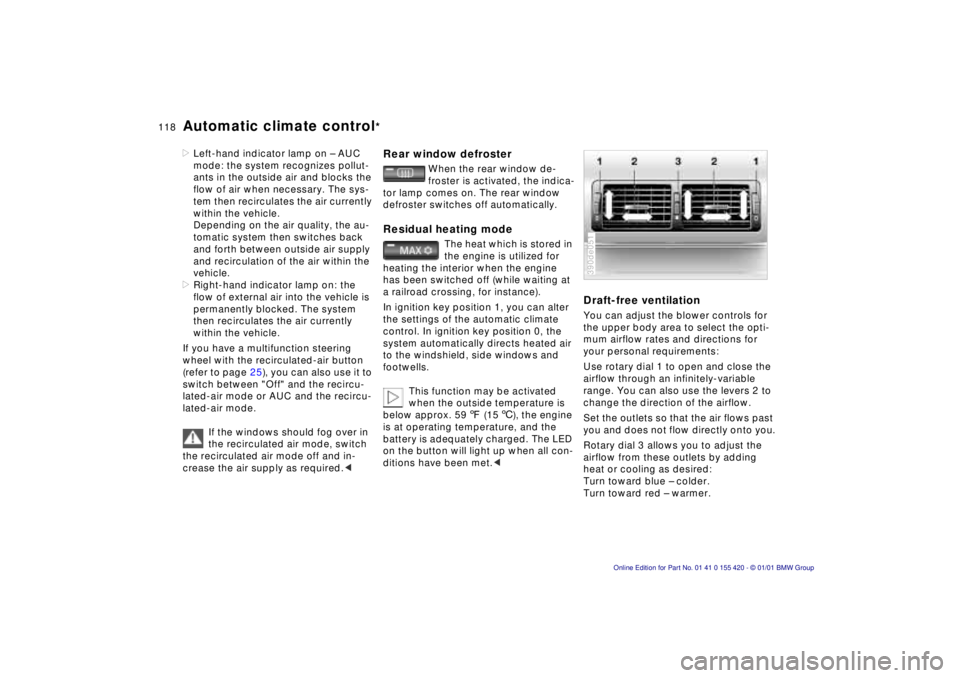
Draft-free ventilationYou can adjust the blower controls for
the upper body area to select the opti-
mum airflow rates and directions for
your personal requirements:
Use rotary dial 1 to open and close the
airflow through an infinitely-variable
range. You can also use the levers 2 to
change the direction of the airflow.
Set the outlets so that the air flows past
you and does not flow directly onto you.
Rotary dial 3 allows you to adjust the
airflow from these outlets by adding
heat or cooling as desired:
Turn toward blue – colder.
Turn toward red – warmer.390de051
Page 136 of 238
136nCargo loading
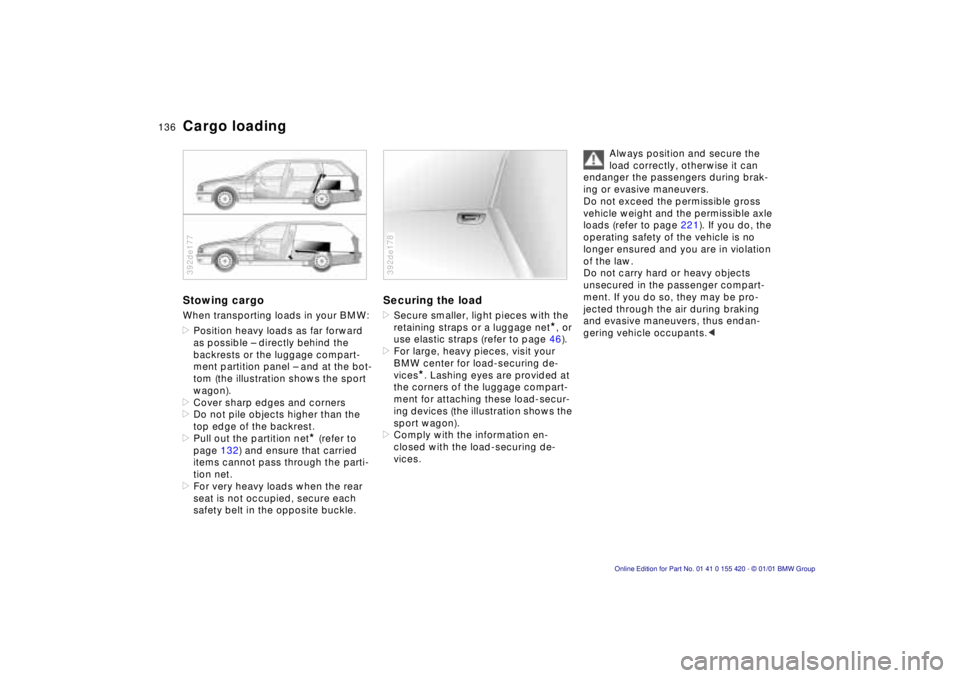
Stowing cargo
When transporting loads in your BMW:
>Position heavy loads as far forward
as possible – directly behind the
backrests or the luggage compart-
ment partition panel – and at the bot-
tom (the illustration shows the sport
wagon).
> Cover sharp edges and corners
> Do not pile objects higher than the
top edge of the backrest.
> Pull out the partition net
* (refer to
page 132) and ensure that carried
items cannot pass through the parti-
tion net.
> For very heavy loads when the rear
seat is not occupied, secure each
safety belt in the opposite buckle.
392de177
Securing the load
>Secure smaller, light pieces with the
retaining straps or a luggage net
*, or
use elastic straps (refer to page 46).
> For large, heavy pieces, visit your
BMW center for load-securing de-
vices
*. Lashing eyes are provided at
the corners of the luggage compart-
ment for attaching these load-secur-
ing devices (the illustration shows the
sport wagon).
> Comply with the information en-
closed with the load-securing de-
vices.
392de178
Always position and secure the
load correctly, otherwise it can
endanger the passengers during brak-
ing or evasive maneuvers.
Do not exceed the permissible gross
vehicle weight and the permissible axle
loads (refer to page 221). If you do, the
operating safety of the vehicle is no
longer ensured and you are in violation
of the law.
Do not carry hard or heavy objects
unsecured in the passenger compart-
ment. If you do so, they may be pro-
jected through the air during braking
and evasive maneuvers, thus endan-
gering vehicle occupants. <
Page 140 of 238
140nBreak-in procedure
To ensure that your vehicle provides
maximum economy throughout a long
service life, we request that you ob-
serve the following.
Engine and differential
Up to 1,200 miles (2,000 km):
Drive at varying engine speeds and
road speeds, but do not exceed
4,500 rpm and the following road
speeds during this initial period:
BMW 525i, 530i: 100 mph (160 km/h)
BMW 540i: 106 mph (170 km/h)
Obey your local and state maximum
speed limits.
Refrain from using full throttle and avoid
pressing the accelerator beyond the
kickdown point.
Once you have driven 1,200 miles
(2,000 km), engine and vehicle speeds
can gradually be increased.
You should also comply with these
break-in procedures if the engine or dif-
ferential is replaced later in the course
of the vehicle service life.
Tires
Due to technical factors associated
with their manufacture, tires do not
achieve their full traction potential until
an initial break-in period has elapsed
for this reason, drive with extra care
during the initial 200 miles (300 km).
Obey your local and state maximum
speed limits.
When the vehicle is operated on
wet or slushy roads, a wedge of
water may form between the tire and
the road surface. This phenomenon is
referred to as aquaplaning, or hydro-
planing, and can lead to partial or com-
plete loss of traction, vehicle control
and braking effectiveness. Reduce your
speed on wet roads. <
Brake system
Approximately 300 miles (500 km) must
elapse before the brake pads and ro-
tors achieve the optimal pad-surface
and wear patterns required for trouble-
free operation and long service life later
on.
To break in the separate parking brake
drums, apply the parking brake lightly
when coasting to a standstill (at a traffic
signal, for instance), provided that traf-
fic conditions allow you to do so. To
avoid corrosion, repeat this procedure
from time to time.
The brake lamps do not come on
when the parking brake is applied.
Vacuum for the brake system servo unit
on your BMW is available only when the
engine is running. When you move the
car with the engine shut off – when
towing, for instance – substantially
higher levels of pedal force will be
required to brake the vehicle. <
Clutch
The clutch will also begin to function
optimally after about 300 miles
(500 km). Engage the gears carefully
during the break-in period.
Page 142 of 238

142nCatalytic converter
The catalytic converter reduces harmful
exhaust emissions, and is designed for
use with unleaded fuel only.
Even minute quantities of lead would be
enough to permanently damage both
the catalytic converter and the system
oxygen sensor.
To ensure efficient, trouble-free engine
operation and avoid potential damage:
>Be sure to comply with the scheduled
maintenance requirements.
> Fill the fuel tank well before it is
empty.
> Tow-start the vehicle only when the
engine is cold, since unburned fuel
may otherwise reach the catalytic
converter. It is better to start the vehi-
cle with an outside starting aid. >
Avoid other situations in which the
fuel is not burned, or burns incom-
pletely, such as engaging the starter
frequently or for extended periods, or
repeated start attempts in which the
engine does not start (stopping and
restarting an engine which is running
properly does not present a problem).
Never let the engine run with any of
the spark plug cables disconnected. Be sure to comply with the in-
structions above to prevent un-
burned fuel from reaching the catalytic
converter. Otherwise there is danger of
overheating and damage to the cata-
lytic converter.
Extreme temperatures occur at the cat-
alytic converter on this and every cata-
lyst-equipped vehicle. Heat shields are
installed adjacent to some sections of
the exhaust system. Never remove
these shields; do not apply undercoat-
ing to their surfaces. When driving,
standing at idle, and parking the vehi-
cle, take care to avoid contact between
the exhaust system and flammable ma-
terials (grass, hay, leaves, etc.). Such
contact could lead to a fire, resulting in
personal injury and property damage. <