Page 150 of 238

150n
Information for your safety
The factory-approved radial tires are
matched to the car and have been
selected to provide optimum safety and
driving comfort on your vehicle.
It is not merely the tire's service life, but
also driving comfort and – above all else
– driving safety which depend on the
condition of the tires and the mainte-
nance of the specified tire pressure.
Incorrect inflation pressure is a frequent
cause of tire damage. It also signifi-
cantly influences the roadholding ability
of your BMW.
Check tire inflation pressures –
including the spare tire – regularly
(refer to page 29), at least every two
weeks and before beginning a longer
trip. If this is not done, incorrect tire
pressures can cause driving instability
and tire damage, ultimately resulting in
accidents. <
Tire tread – tire damage
Inspect your tires frequently for tread
wear, signs of damage and for foreign
objects lodged in the tread. Check the
tread depth.
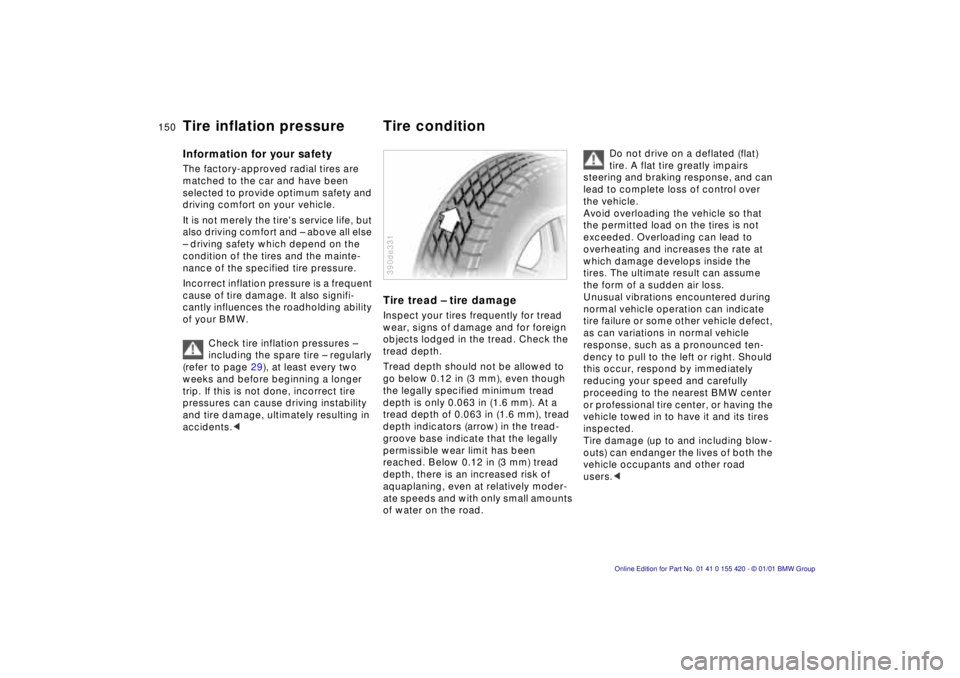
Tread depth should not be allowed to
go below 0.12 in (3 mm), even though
the legally specified minimum tread
depth is only 0.063 in (1.6 mm). At a
tread depth of 0.063 in (1.6 mm), tread
depth indicators (arrow) in the tread-
groove base indicate that the legally
permissible wear limit has been
reached. Below 0.12 in (3 mm) tread
depth, there is an increased risk of
aquaplaning, even at relatively moder-
ate speeds and with only small amounts
of water on the road.
390de331
Do not drive on a deflated (flat)
tire. A flat tire greatly impairs
steering and braking response, and can
lead to complete loss of control over
the vehicle.
Avoid overloading the vehicle so that
the permitted load on the tires is not
exceeded. Overloading can lead to
overheating and increases the rate at
which damage develops inside the
tires. The ultimate result can assume
the form of a sudden air loss.
Unusual vibrations encountered during
normal vehicle operation can indicate
tire failure or some other vehicle defect,
as can variations in normal vehicle
response, such as a pronounced ten-
dency to pull to the left or right. Should
this occur, respond by immediately
reducing your speed and carefully
proceeding to the nearest BMW center
or professional tire center, or having the
vehicle towed in to have it and its tires
inspected.
Tire damage (up to and including blow-
outs) can endanger the lives of both the
vehicle occupants and other road
users. <
Tire inflation pressure Tire condition
Page 165 of 238

Index
Data
Technology
Repairs
Car care
Controls
Overview
165nEngine oil
Checking oil level
1 Park the vehicle on a level surface.
2 Shut the engine off after it has
reached normal operating
temperature.
3 After approx. 5 minutes, pull the dipstick out and wipe it off with a
clean lint-free cloth, paper towel, or
similar material.
4 Carefully push the dipstick all the way into the guide tube and pull it out
again.
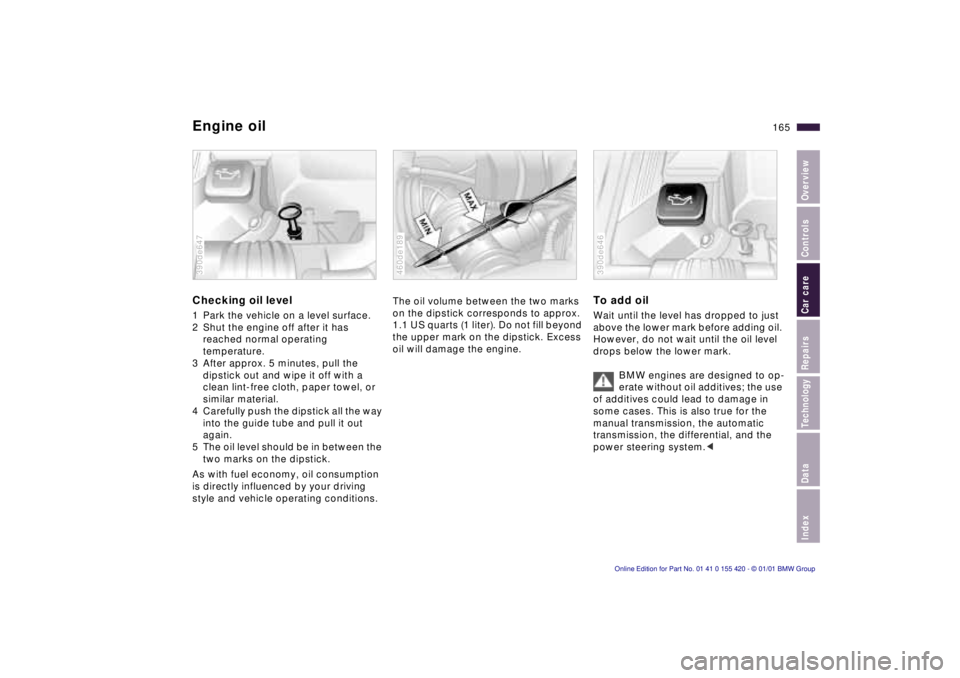
5 The oil level should be in between the
two marks on the dipstick.
As with fuel economy, oil consumption
is directly influenced by your driving
style and vehicle operating conditions.
390de647
The oil volume between the two marks
on the dipstick corresponds to approx.
1.1 US quarts (1 liter). Do not fill beyond
the upper mark on the dipstick. Excess
oil will damage the engine.
460de189
To add oil
Wait until the level has dropped to just
above the lower mark before adding oil.
However, do not wait until the oil level
drops below the lower mark.
BMW engines are designed to op-
erate without oil additives; the use
of additives could lead to damage in
some cases. This is also true for the
manual transmission, the automatic
transmission, the differential, and the
power steering system. <
390de646
Page 181 of 238
Index
Data
Technology
Repairs
Car care
Controls
Overview
Overview
Controls and features Operation, care
and maintenance
Owner service procedures
Technical dataIndex
Advanced technology
181
n
Replacement procedures:
Onboard tool kit 182
Wiper blades 182
Lamps and bulbs 183
Changing a wheel 190
Battery 193
Fuses 196
In case of electrical
malfunction:
Fuel filler door 198
Sliding/Tilt sunroof 198
Tailgate 199
Assistance, giving and
receiving:
Jump-starting 200
Towing the vehicle 201
Page 182 of 238
182n
Attached to the underside of the
luggage compartment lid/tailgate.
Unscrew the wingnut for access.
394de080
Front
1 Pull the wiper arm up slightly and hold it firmly.
2 Press back the release (arrow) and pull the wiper blade back toward the
base of the wiper arm.
3 Install the new blade and slide the release back into position.
390de097
Rear*
1 Hold the wiper blade on the window and remove/unclip the wiper arm at
the articulated joint (arrow).
2 Insert a new wiper blade and press it on/clip it into the wiper arm.
Use only wiper blades approved
by BMW. <
392de173
Onboard tool kit Wiper blades
Page 185 of 238
Index
Data
Technology
Repairs
Car care
Controls
Overview
185nLamps and bulbs
Side turn signal indicators
5 watt bulb
1 Use finger pressure against the rear
end of the lens (arrow) to press it for-
ward for removal.
2 Press gently on the bulb and turn it to the left to remove it.
390de106
Front fog lamps
H8 bulb, 35 watt
The bulb is pressurized. There-
fore, wear safety glasses and pro-
tective gloves. Failure to comply with
this precaution could lead to injury if the
bulb is accidentally damaged during re-
placement. <
1 Using a screwdriver, remove the mounting clip for the air grill (arrow)
and remove the grill by bringing it
toward the front.
390de671
2 Loosen both screws (arrows).
3 Take off the cover panel next to the headlamp.
4 Turn the headlamp 90 3 to the left and
remove it by bringing it toward the
front.
5 Disconnect the plug.
6 Turn the lamp to the left and remove it.
390de672
Page 199 of 238
Index
Data
Technology
Repairs
Car care
Controls
Overview
199nTailgate
Manual release – sport wagon
In the event of an electrical malfunction,
you can release the tailgate manually:
1 From inside the luggage compart-
ment, open the two side covers
(arrow). Remove the covers.
392de166
2 Release the two quick-release fasteners of the cover for the onboard
tool kit in the tailgate. Raise the
cover.
3 Remove the plastic plugs (arrow) and pull toward the interior. The tailgate
will be released.
4 Open the tailgate. Press the plugs back into place and close the cover
with the quick-release fasteners.
5 Position the two side covers and close them.
392de301
Page 201 of 238

Index
Data
Technology
Repairs
Car care
Controls
Overview
201nJump-starting Towing the vehicle
6 Start the engine of the support
vehicle and let it run.
7 Start the engine on the vehicle needing the jump-start, and allow it
to run as usual. If the first start at-
tempt is not successful, wait a few
minutes before another attempt in
order to allow the discharged battery
to recharge.
8 Before disconnecting the jumper cables from your BMW, turn on the
headlamps, the rear window
defroster and the highest blower
speed and allow the engine to run
at least 10 seconds to prevent a volt-
age surge at the voltage regulator.
9 Then disconnect the jumper cables in the opposite order.
Have the battery recharged if neces-
sary.
Tow fitting
The screw-in tow fitting is stored in the
onboard tool kit; be sure that it remains
in the vehicle at all times. This fitting
is designed for installation in the tow
sockets located at the front and rear of
the vehicle, and is intended for towing
on proper road surfaces only.
It should not be used to pull a vehicle
out of deep snow, mud, sand, etc. Al-
ways observe all applicable towing laws
and regulations.
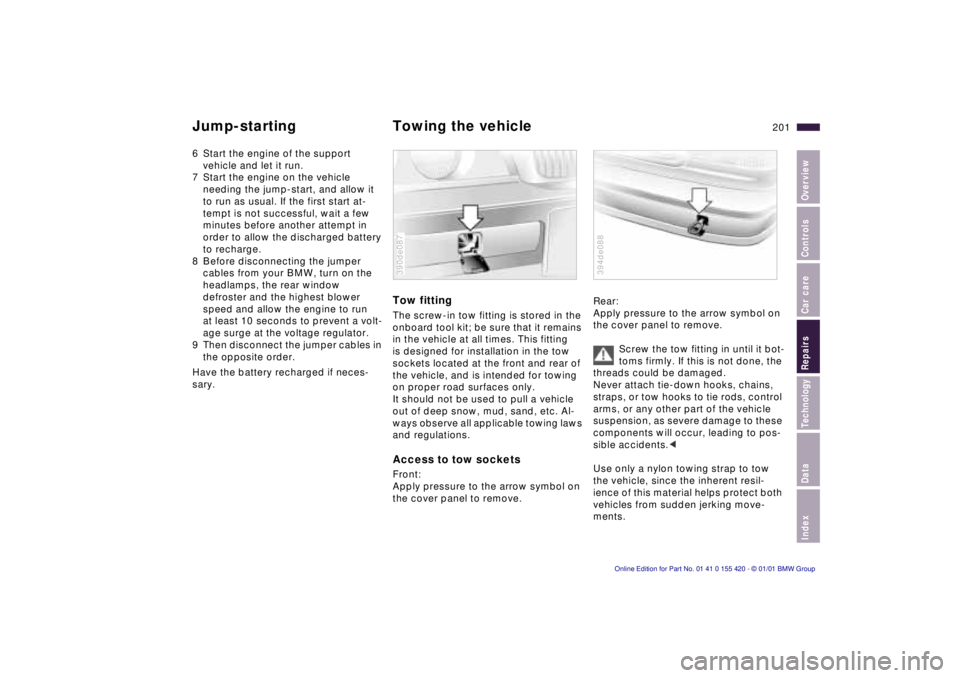
Access to tow sockets
Front:
Apply pressure to the arrow symbol on
the cover panel to remove.
390de087
Rear:
Apply pressure to the arrow symbol on
the cover panel to remove.
Screw the tow fitting in until it bot-
toms firmly. If this is not done, the
threads could be damaged.
Never attach tie-down hooks, chains,
straps, or tow hooks to tie rods, control
arms, or any other part of the vehicle
suspension, as severe damage to these
components will occur, leading to pos-
sible accidents. <
Use only a nylon towing strap to tow
the vehicle, since the inherent resil-
ience of this material helps protect both
vehicles from sudden jerking move-
ments.
394de088
Page 202 of 238

202nTowing the vehicle
The towed vehicle should always
be the lighter of the two vehicles.
If this is not the case, it is no longer
possible to control vehicle response. <
Tow-starting
It is not possible to start the engine of
vehicles equipped with an automatic
transmission by towing or pushing.
For instructions on jump starting, refer
to page 200.
Never attempt to use your vehicle to
push another vehicle, since damage to
the energy-absorbing bumpers could
result.
Towing a vehicle with automatic
transmission
1 Place the selector lever in position N.
2 Towing speed: Max. 45 mph (70 km/h).
3 Towing distance: Max. 95 miles (150 km).
4 Leave the ignition key in position 1 to ensure that the brake lamps, turn sig-
nals, horn and windshield wipers re-
main operative, and to prevent the
steering lock detent from engaging.
5 Switch on the hazard warning flash- ers (observe country-specific regula-
tions).
Find some means of identifying the ve-
hicle in tow, for instance, place a sign
or warning triangle in the rear window.
Make sure that the ignition key
remains in position 1 even when
the electrical system has failed to pre-
vent the steering lock from engaging.
The steering and brakes are without
power assist when the engine is off.
This means that increased effort is
required for steering and braking. <
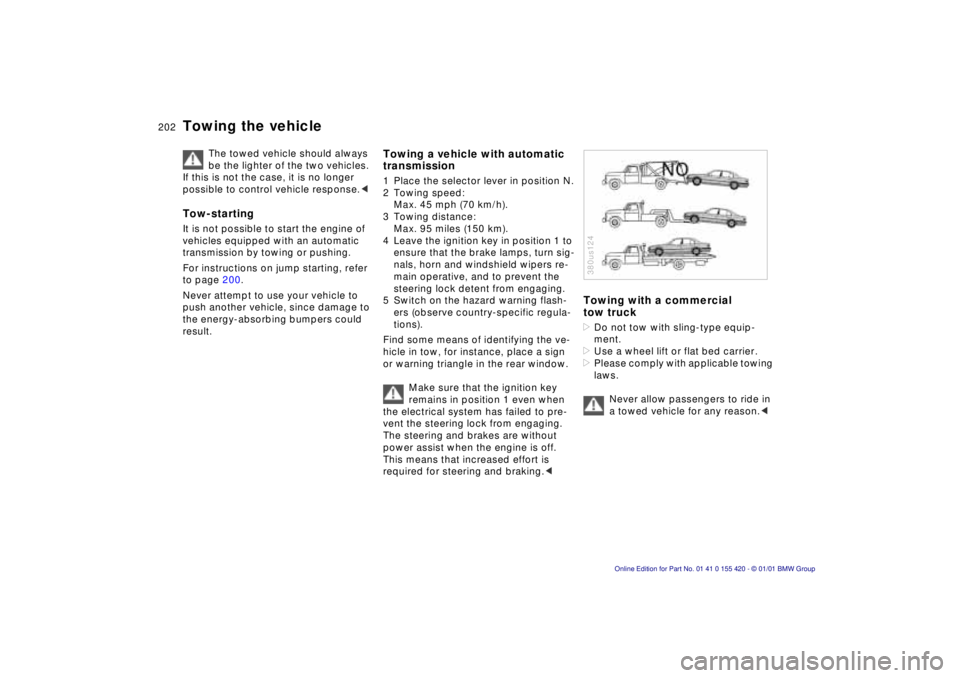
Towing with a commercial
tow truck
> Do not tow with sling-type equip-
ment.
> Use a wheel lift or flat bed carrier.
> Please comply with applicable towing
laws.
Never allow passengers to ride in
a towed vehicle for any reason. <
380us124